Experience Cloud allows you to create customised sites within Salesforce for external users. This can be used to create partner portals or support forums, among other uses. To allow seamless integration between Experience Cloud and StoreConnect, you can configure Single Sign-on which allows users to log in to a StoreConnect store using their Experience Cloud credentials.
Account and contact creation
When using Experience Cloud Single Sign-On, Account and Contact records need to be created before the user attempts to log in to the store, and time given to allow the records to synchronize with the store. These can be Account and Contact records created by StoreConnect’s checkout process or records created in Salesforce, provided they are compatible with records created by StoreConnect. For example, you could send an email to customers who have completed a purchase inviting them to set a username/password for Experience Cloud login. This is not part of the StoreConnect package and will need to be tailored to your organisation and use case.
Note that Experience Cloud self-registration is not supported as it relates all new Contact records to a single Account which is not compatible with how StoreConnect uses the Account-Contact relationship.
Configuration
Assuming you have an Experience Cloud site set up, here are the steps to configure Single Sign-On in StoreConnect:
Enable identity provider
- From Salesforce Setup, search for Certificate and Key Management
- Click ‘Create a Self-Signed Certificate’
- Give it a name
- Click ‘Save’
- From Salesforce Setup, search for Identity Provider
- Click ‘Enable Identity Provider’
- Select your Certificate
- Click ‘Save’


Generate a fingerprint from the certificate
To complete this step you will need OpenSSL installed on your computer.
- From Identity Provider, click ‘Download Certificate’ to download the certificate to your hard drive
- Open a terminal window on your computer
- Run the following command in your terminal to generate your fingerprint (Keep this for the next step)
openssl x509 -fingerprint -in {path/to/certificate.crt} -sha1

Create a connected app
- From Salesforce Setup, search for App Manager
- Click ‘New Connected App’
- Populate the fields as follows
Basic information
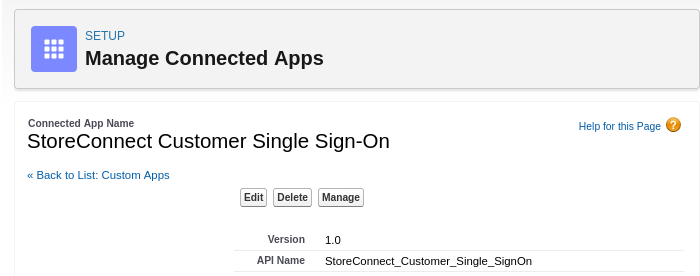
Connected App Name - StoreConnect Customer Single Sign-On
API Name - StoreConnect_Customer_Single_SignOn
Contact Email - Enter the contact email for Salesforce to use in case they want to contact you or your support team
Logo Image URL - [https://res.cloudinary.com/hzkr6fi81/image/upload/v1652399370/media/StoreConnect-S-100x100.png](https://res.cloudinary.com/hzkr6fi81/image/upload/v1652399370/media/StoreConnect-S-100x100.png)
Icon URL - [https://res.cloudinary.com/hzkr6fi81/image/upload/v1652399370/media/StoreConnect-S-100x100.png](https://res.cloudinary.com/hzkr6fi81/image/upload/v1652399370/media/StoreConnect-S-100x100.png)
Info URL - <a href="/article/login-from-salesforce" data-article-url-name="login-from-salesforce" data-smart-link="true">https://support.getstoreconnect.com/s/article/login-from-salesforce</a>
Description - Allows users to log in to Store accounts with an Experience Cloud account
Web app settings
Start URL - https://{your-stores-domain.com}/
Enable SAML - True
Entity Id - https://{your-stores-domain.com}/logins/auth/experience_cloud/metadata
ACS USR - https://{your-stores-domain.com}/logins/auth/experience_cloud/auth
Name ID Format - urn:oasis:names:tc:SAML:1.1:nameid-format:emailAddress
Issuer - https://{your-stores-domain.com}/logins/auth/experience_cloud/metadata
IdP Certificate - Select the certificate you created earlier
- Leave all other fields as is
- Click ‘Save’
Assign permission to users
To be able to log into your store all users will need to have access to this connected app by adding it to relevant profiles, permission sets or both.
Manage the Connected App to add permissions to already existing profiles or permission sets or add the connected app directly from each profile or permission set.
Create authentication provider
We now need to create an Authentication Provider for the store you want to allow Experience Cloud users to login to, this can be created from the store’s Authentication Providers related list.
| StoreConnect Field | Local Provider Value |
|---|---|
| Provider | Experience Cloud |
| Authorised Domains | Optional |
| Client Id | |
| Client Secret | Certificate Fingerprint |
| Provider URL | Experience Site URL |
| Reset Password URL | Optional |
Authorised domains
If you have a custom domain for your Experience Cloud site you can enter it here to allow user redirection to work correctly. The Provider URL is automatically authorised, so you only need to add additional domains here. This field supports multiple domains separated by a semi-colon (;).
Provider URL
The Provider URL is the path of your Experience Cloud site. To ensure this is correct you can check Salesforce Setup > Identity Provider, under SAML Metadata Discovery Endpoints:
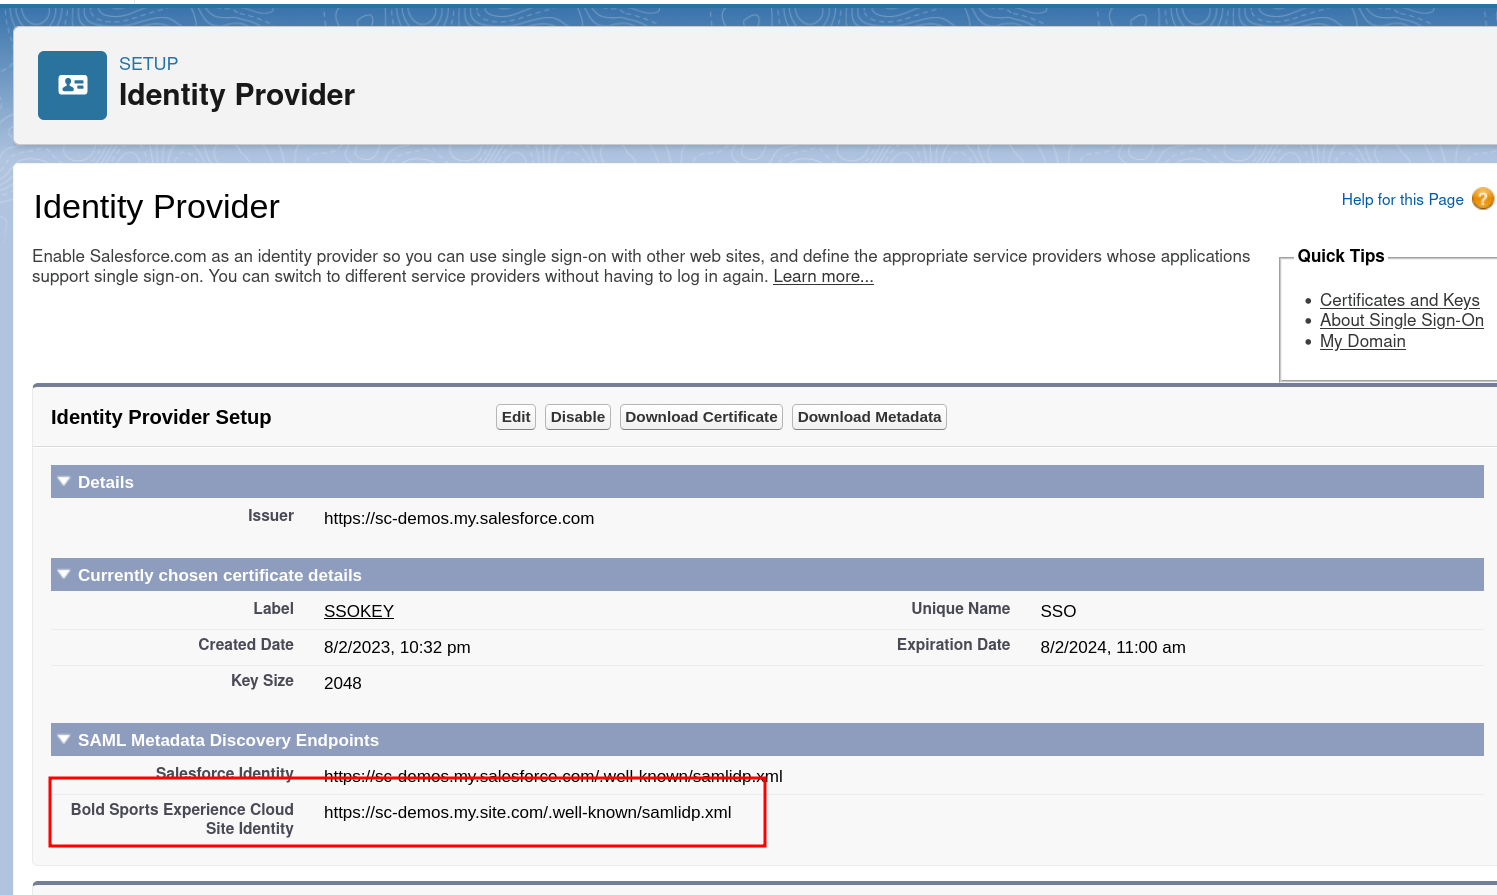
The Provider URL will be everything to the left of .well-known. I.e. for the example image above the Provider URL would be [https://sc-demos.my.site.com](https://sc-demos.my.site.com).
Reset password URL
Due to security limitations, StoreConnect is not able to initiate a password reset for an Experience Cloud account. To support password reset, the ‘reset password’ flow on the store will redirect the user to the Reset Password URL if it is present. If left blank, the store will not show a ‘reset password’ link.
Customers without an Experience Cloud licence
If you wish to allow some users to login using Experience Cloud but others to login using a different method (either username/password or another provider) you will need to create additional Authentication Providers. See the Authentication Provider documentation documentation.