Here's what the parts of a product page look like in the default structure.
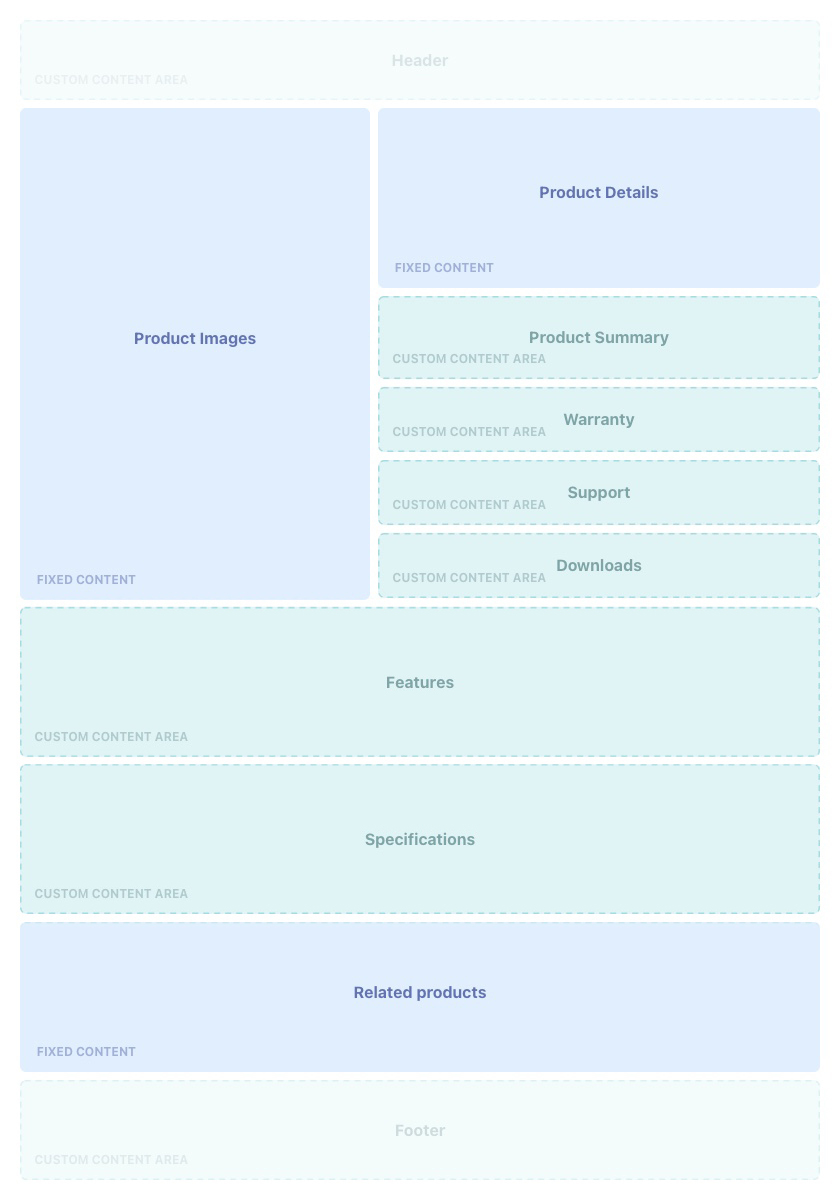
At the top you can see the area for products images and product details (in blue). The Product details section includes the product display name, product code, price, and purchase options (add to cart or buy it now). If the product is a bundle or booking or has variants, the relevant product component are also shown.
Custom content can be added in the content block areas shown in green.
Custom content blocks
You can use the following pre-existing content blocks to enhance products, with content accepted in Text, Markdown, and HTML. You can also customize content using Liquid, but you will need Liquid experience.
Custom content fields available in the product object.
- Product Summary
- Warranty
- Support
- Downloads
- Specifications
- Features
With the exception of Product Summary, all of the above fields:
- automatically have Liquid code added to them to render any content blocks related to the product.
- display a section title on the product page that you click on to expand the section, revealing the content (when there is content to render).
Add content blocks to a product page
- Open the product record and go to Content Block Products in the Additional Relationships list.
- Click New.
- Search and select the content block you want to add to the page.
- Set the Position. This determines the positioning in relation to other content blocks in the same section.
- Set the Usage Type:
- Warranty content
- Support content
- Downloads content
- Specifications content
- Features content
You will notice there is also a Usage Type called
Featured Productwhich is used to create a Featured Product Content Block, which is different toFeatures Content.
- The Specifications field may show a line of Liquid that tells it to render the products Traits. This is only the case where the Trait Type’s Display on Product Page checkbox is set to
TRUE. You don't need to change anything here. - Click Save.
To configure Related Products, add them to the Related Products Children list.