StoreConnect themes support multiple languages through a locale system. You define a set of translated strings for each language your theme needs to support, and StoreConnect automatically serves the right language based on each store's locale setting.
This is useful when you have stores serving different regions, or when you want a single theme that can be reused across markets without hardcoding language into your templates.
How it works
The locale system has three parts that work together:
- Theme locales — each represents a language your theme supports (e.g. English, French). One theme locale is set as the default.
- Locale translations — key/value pairs on each theme locale. The key is a shared identifier (e.g.
store.home.greeting); the value is the translated string for that language. - The
tLiquid filter — used in your templates to output the translated value for the current locale:{{ "store.home.greeting" | t }}
When a visitor views a store, StoreConnect matches the store's Locale field to the corresponding theme locale and returns translations from it. If no match is found, the default theme locale is used.
Step 1: Configure the locale picklist
Theme locales and stores share a global Salesforce picklist for the locale field. Before creating theme locales, make sure the locales you need are present in this picklist.
"In Salesforce Setup, go to Picklist Value Sets and open the Locales value set. Add any locale codes your theme needs to support (e.g. en, fr, de)."
Stores use the same global picklist for their Locale field, so adding a value here makes it available in both places.
Step 2: Create theme locales
From the Related tab on your theme record, add a new Theme Locale for each language.
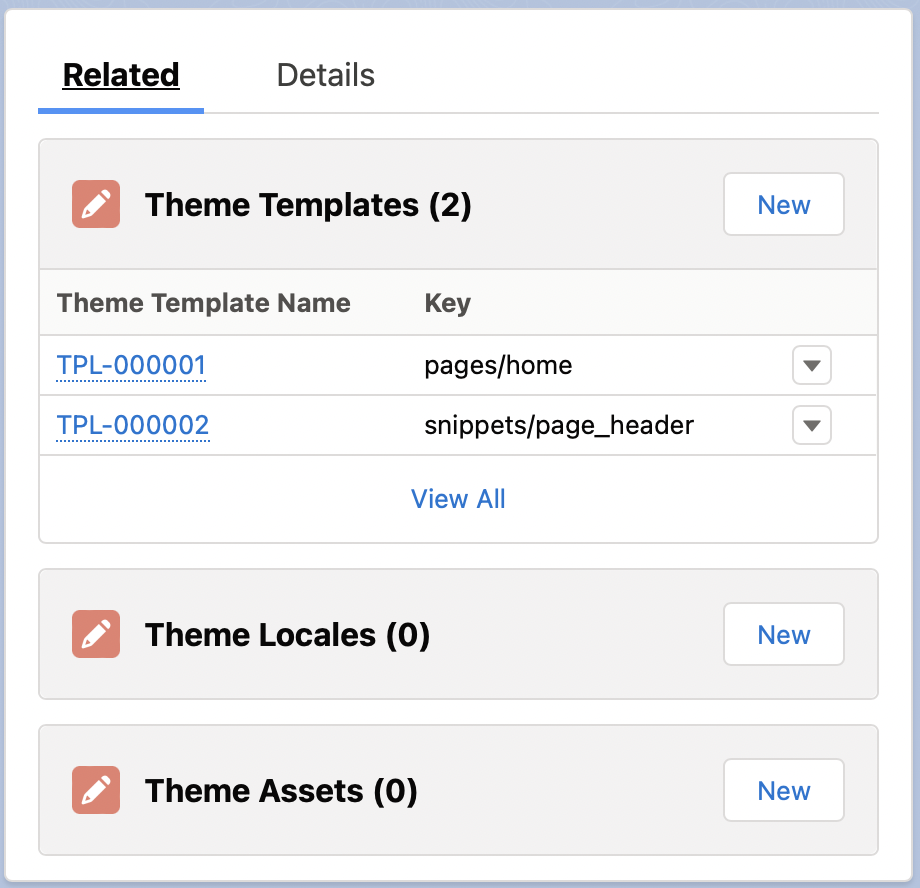
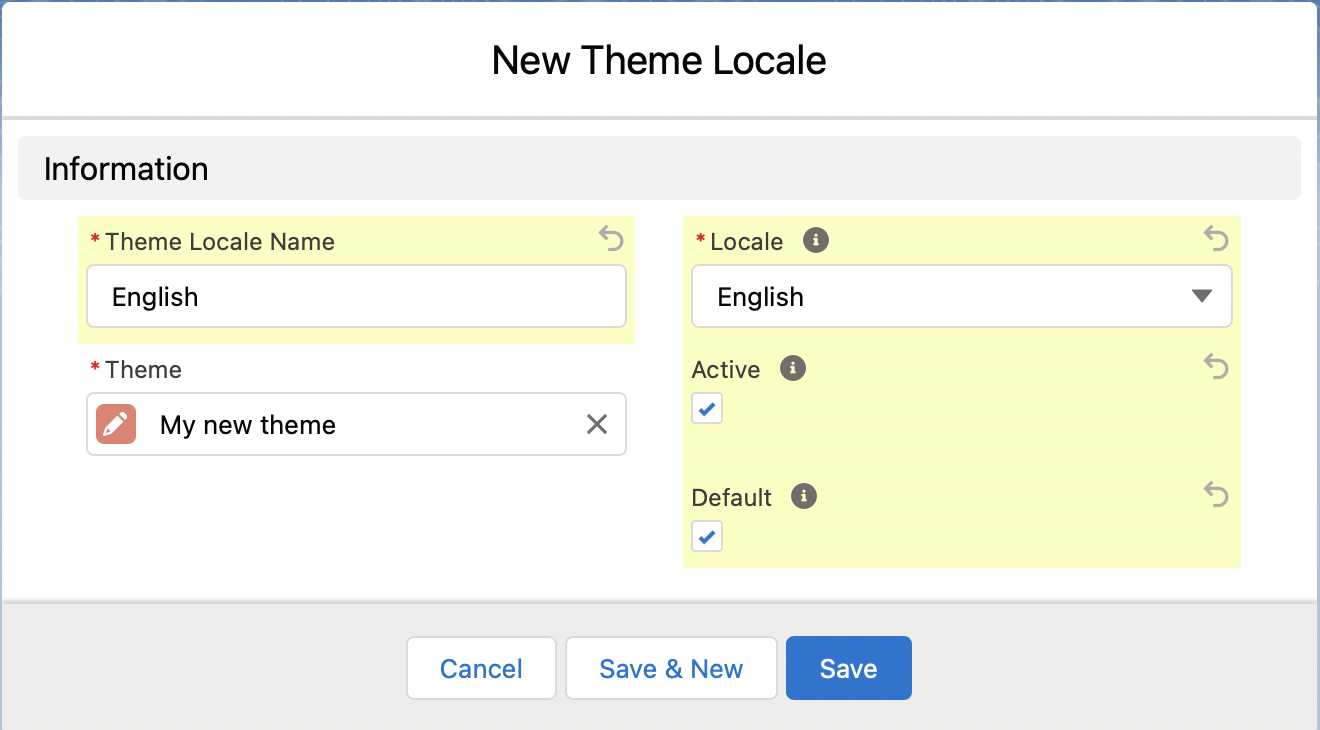
For each theme locale:
| Field | What to set |
|---|---|
| Name | A label for your reference only — e.g. "English" or "French" |
| Locale | The locale code — must match the store's Locale field value |
| Default | Check for the fallback language when no match is found |
| Active | Leave unchecked until the locale's translations are complete |
Only one theme locale should be set as the default. If a store's locale does not match any active theme locale, the default is used.
Step 3: Add locale translations
From the Related tab on your theme locale, add locale translations — one for each string you want to make translatable.
![]()
![]()
Each translation has two fields:
- Key — a unique identifier for this string within the theme locale. Use dot notation to group related strings (e.g.
store.home.greeting,products.cta.add_to_cart). Keys must match across all theme locales — if English has the keystore.home.greeting, French must use the same key. - Value — the translated text for this locale (e.g. "Welcome" for English, "Bienvenue" for French).
Use consistent naming conventions across all your locales. Dot notation like section.page.element makes it easy to manage translations as your theme grows.
Step 4: Use translations in your templates
In any Liquid template, use the t filter to output the translation for the current locale:
{{ "store.home.greeting" | t }}
StoreConnect looks up the key in the active theme locale for the current store and returns the value. If the key is missing, it outputs a missing translation message to help you identify gaps.
See t-filter-reference for the full filter reference.
Step 5: Assign a locale to your store
Once your theme locales and translations are set up, go to the store record and set the Locale field to the locale you want that store to use.
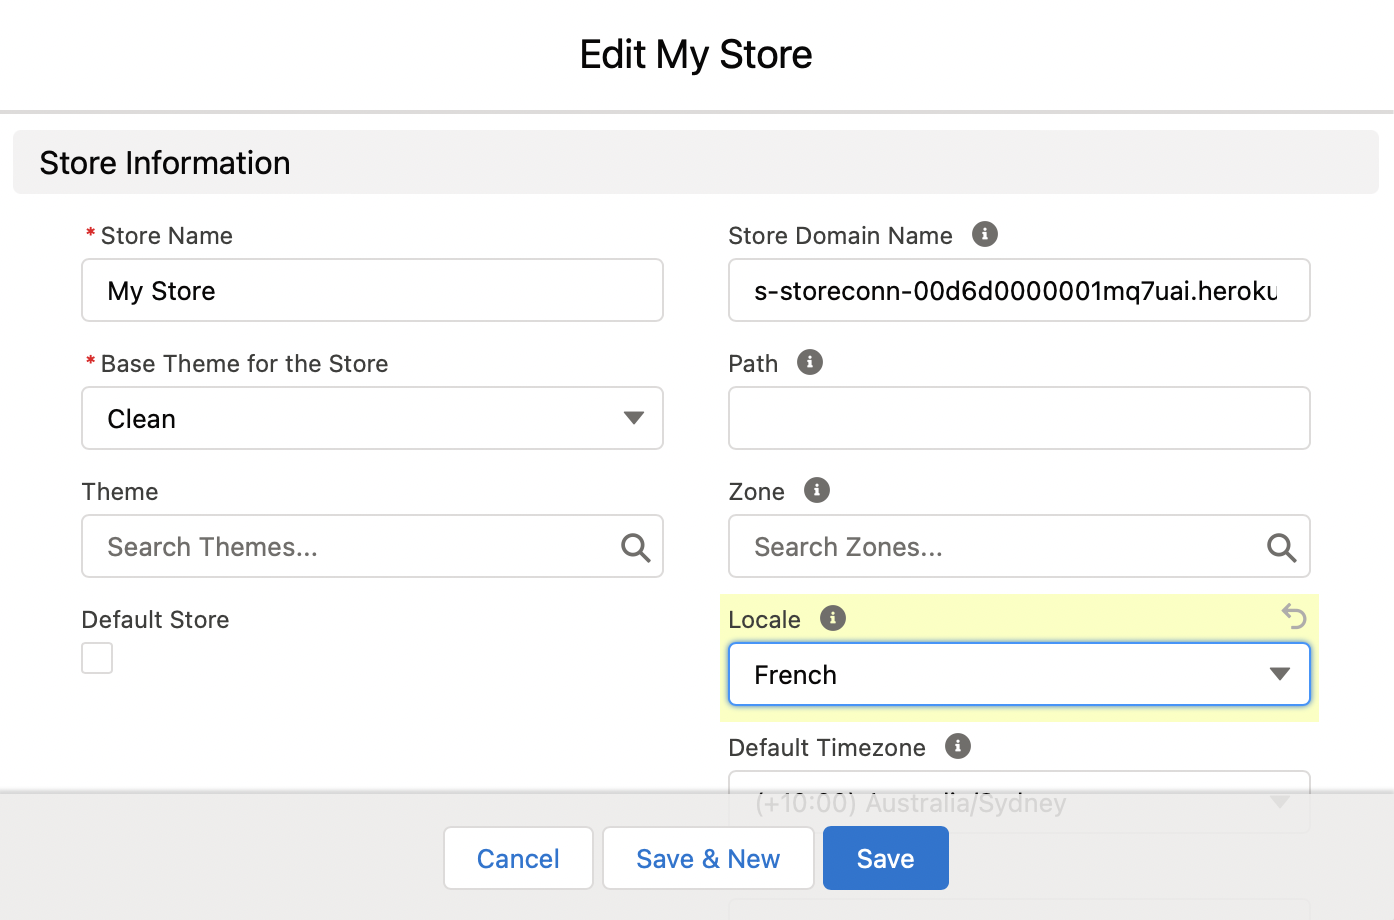
The store will now use the matching theme locale. If the field is blank or no match exists, the default theme locale is used.
Dynamic translations
Translations can include dynamic values — for example, including the store's name in a greeting. Use %{variable_name} as a placeholder in the translation value:
| Field | Value |
|---|---|
| Key | store.home.greeting |
| Value | Welcome to %{store_name} |
Then pass the value in from your template using a named parameter:
{{ "store.home.greeting" | t: store_name: current_store.name }}
Output: Welcome to My Store
You can use any Liquid variable as a parameter value — store fields, product names, customer details, and so on.
Walkthrough example
To make a home page greeting translatable for English and French:
- Create a theme locale for English — set as Default and Active.
- Add a locale translation: key
store.home.greeting, valueWelcome. - Create a theme locale for French — set Active, not default.
- Add a locale translation to the French locale: key
store.home.greeting, valueBienvenue. - In the home page template, replace the hardcoded text with:
{{ "store.home.greeting" | t }}
- Set the store's Locale field to
fr.
Preview the store — it now displays "Bienvenue". Switch the locale back to en and it displays "Welcome".
![]()
![]()