This guide shows you two different ways to set a global custom footer for your site:
Create a footer using a content block
Go to the store settings
Under the CMS tab click on ‘footer content block’
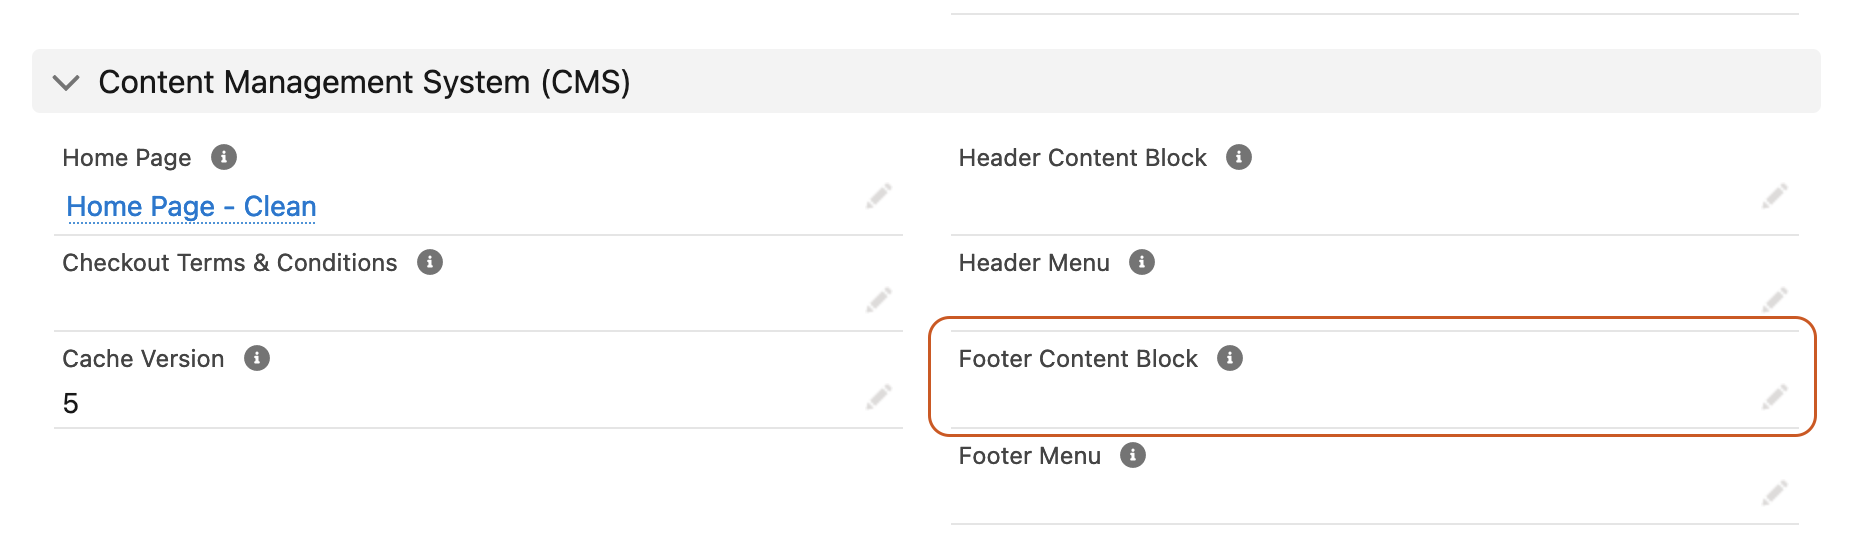
On the dropdown being displayed click on new content block
Select the ‘No added styling’ option in the content template field
Give your content block a name
Place your HTML or liquid code in the content field
Click on Save
Now save the Store record
Create a footer in your theme
While using a custom theme you can insert your own footer following these steps:
- Go to the theme you are currently working on
- Create a new theme template
- Use the
snippets/footerkey and paste the your template in the content field - Click on Save
Footer markup
Here’s a liquid and HTML boilerplate you can use for both methods above, feel free to modify it.
{%- cache "footer", items: [current_store, current_customer, current_privacy] -%}
  {%- if current_store.footer != blank %}
    {{ current_store.footer.render }}
  {%- else %}

      {%- if current_store.footer_menu != blank %}
        {{ current_store.footer_menu.render }}
      {%- endif %}

        © {{ current_store.name | default: "StoreConnect" }} {{ current_store.timezone | now | date: "%Y" }}
        {%- if current_privacy.accepted? %}

            {{ "privacy.manage_settings" | t }}

        {%- endif %}


  {%- endif %}
{%- endcache %}