You can adjust which product categories are shown in what order on your store site. This is described in this topic.
Other options for changing the menu design include:
- Use the menu builder to customize the navigation completely, while using the standard search and account login links. See the menu-builder help article.
- Completely replace the Header Menu HTML and optionally use the Menu Builder to control the navigation menu from within your Salesforce environment. See the custom-header help article.
Change the order of product categories in the navigation
Let's change the product order in our sample store. We're currently showing product categories as follows: Homewares, Events, Clothing, Mens, Beauty, Womens, Hats, Bottoms.
Note that the Account menu item appears to the right of these, by default.

Let's view them in StoreConnect.
In the App Launcher in StoreConnect, type Product Categories.
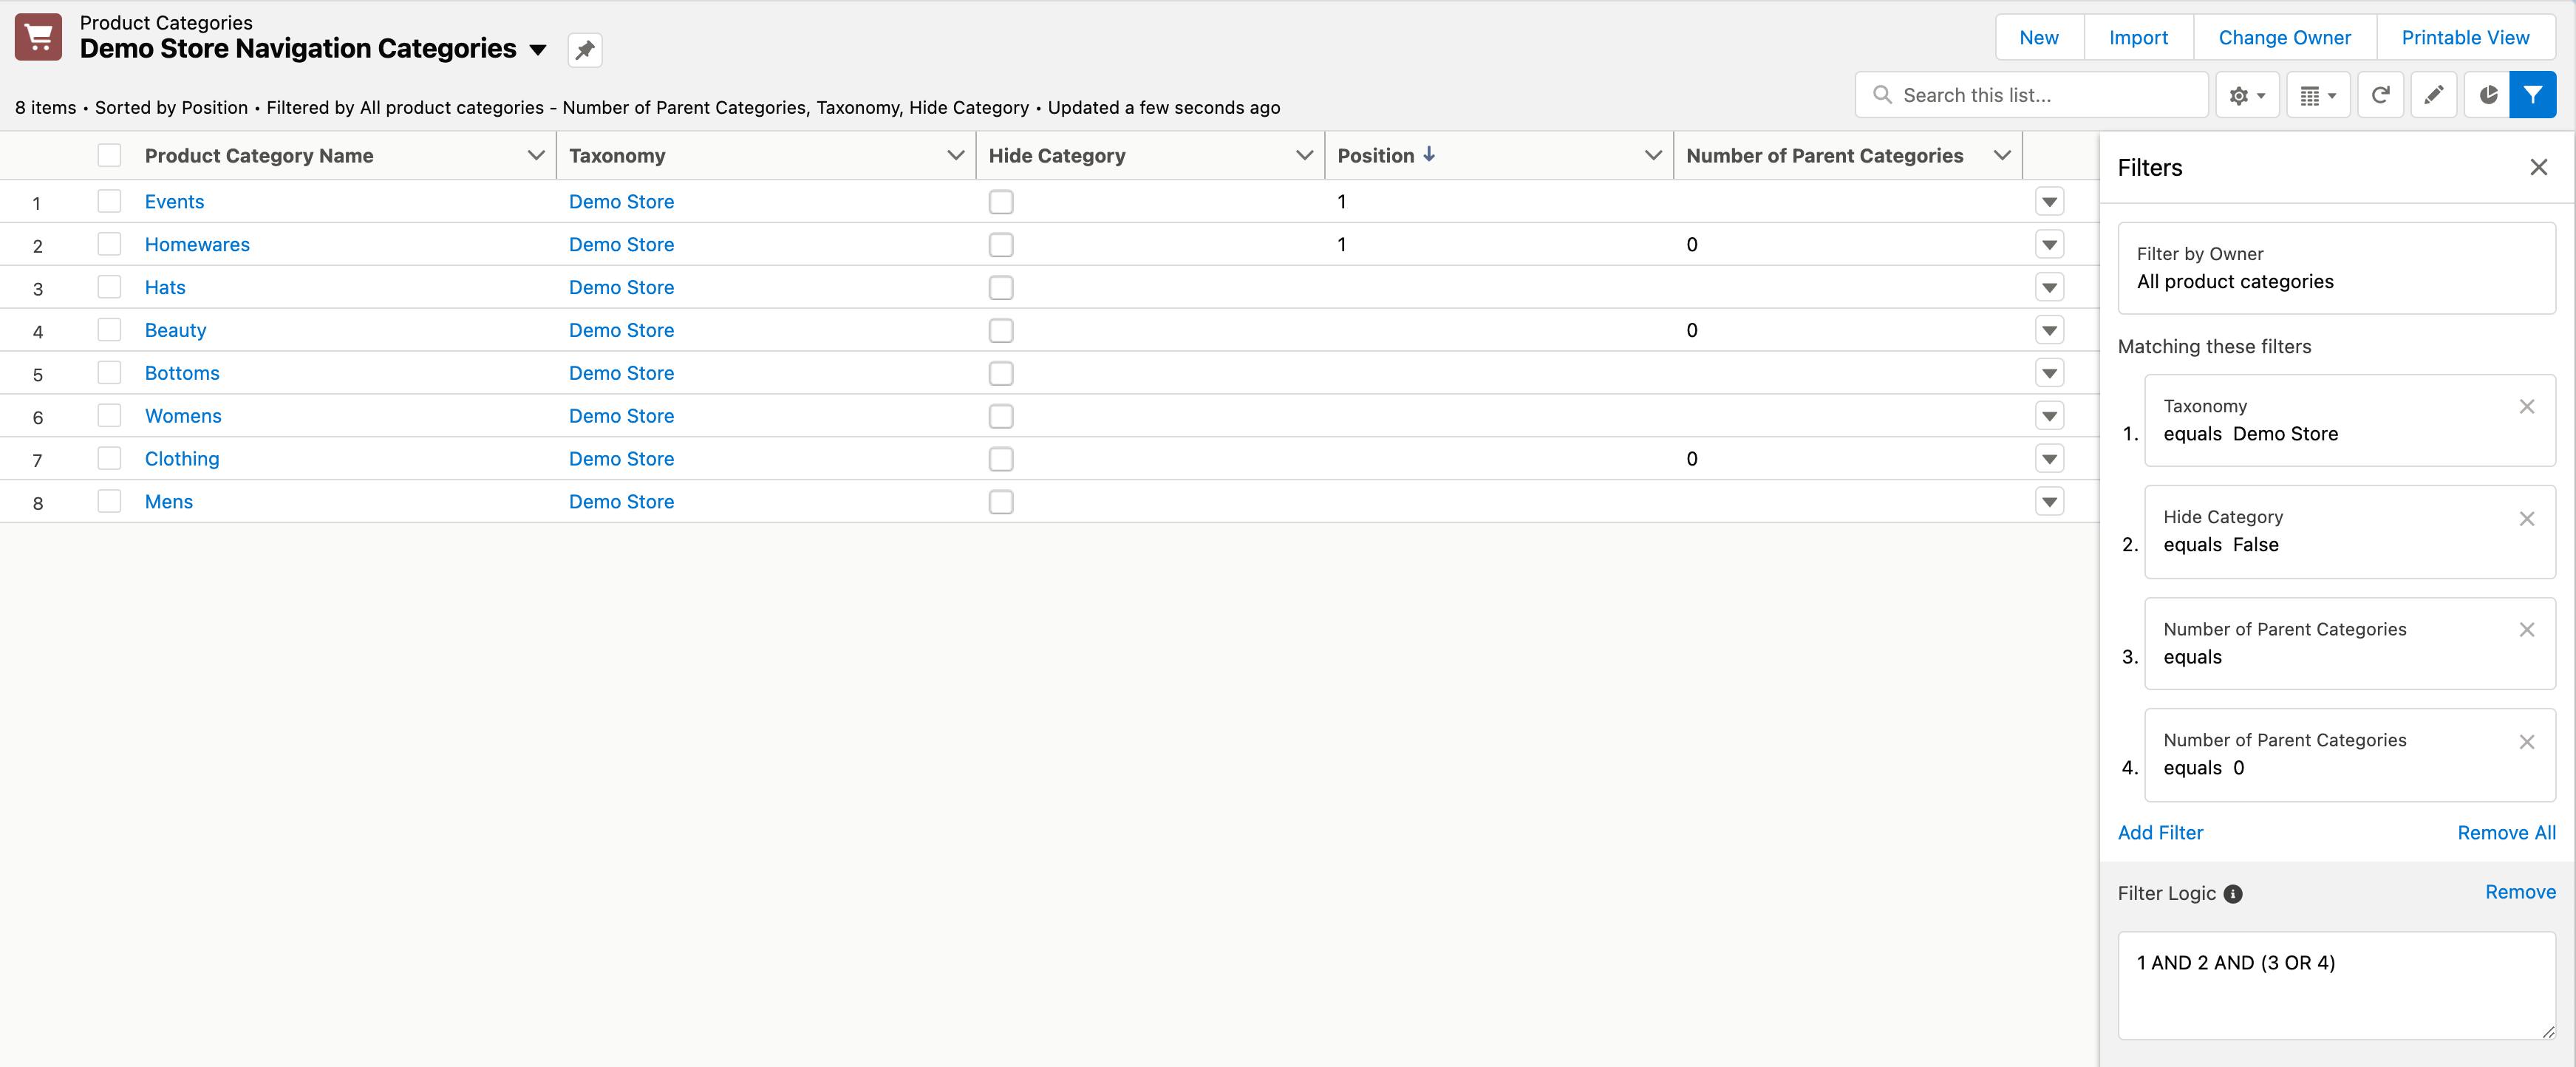
Then to make it easy to see, create a new list, call it “Your Store Name Navigation Categories” and select the following fields to display:
- Product Category Name
- Taxonomy
- Hide Category
- Position
- Number of Parent Categories
Then edit the list filters and make sure the first filter shows All Product Categories then add:
- Taxonomy equals “Your store Taxonomy Name”
- Hide Category equals FALSE
- Number of Parent Categories equals (do not enter anything into the value box)
- Number of Parent Categories equals 0
Then click Add Filter Logic and within the logic, replace “1 AND 2 AND 3 AND 4” with “1 AND 2 AND (3 OR 4)”
Then click on Save.
Your filter should look like this:
If you click the “Position” header menu twice you will get the list sorted by position from low to high with the numbers at the top. In the example above, you can see that by doing this, Events is listed first and then Homewares is second, but our website is showing Homewares first and Events second. This is an important point, that if you want to ensure the order of your product categories to set the position, so lets do that. We can just double click the field we want to change (position) and go ahead and edit these, while we are doing this, we’ll also hide the “Bottoms” category as we don’t want it on the top menu any more, after editing our list it looks like this:
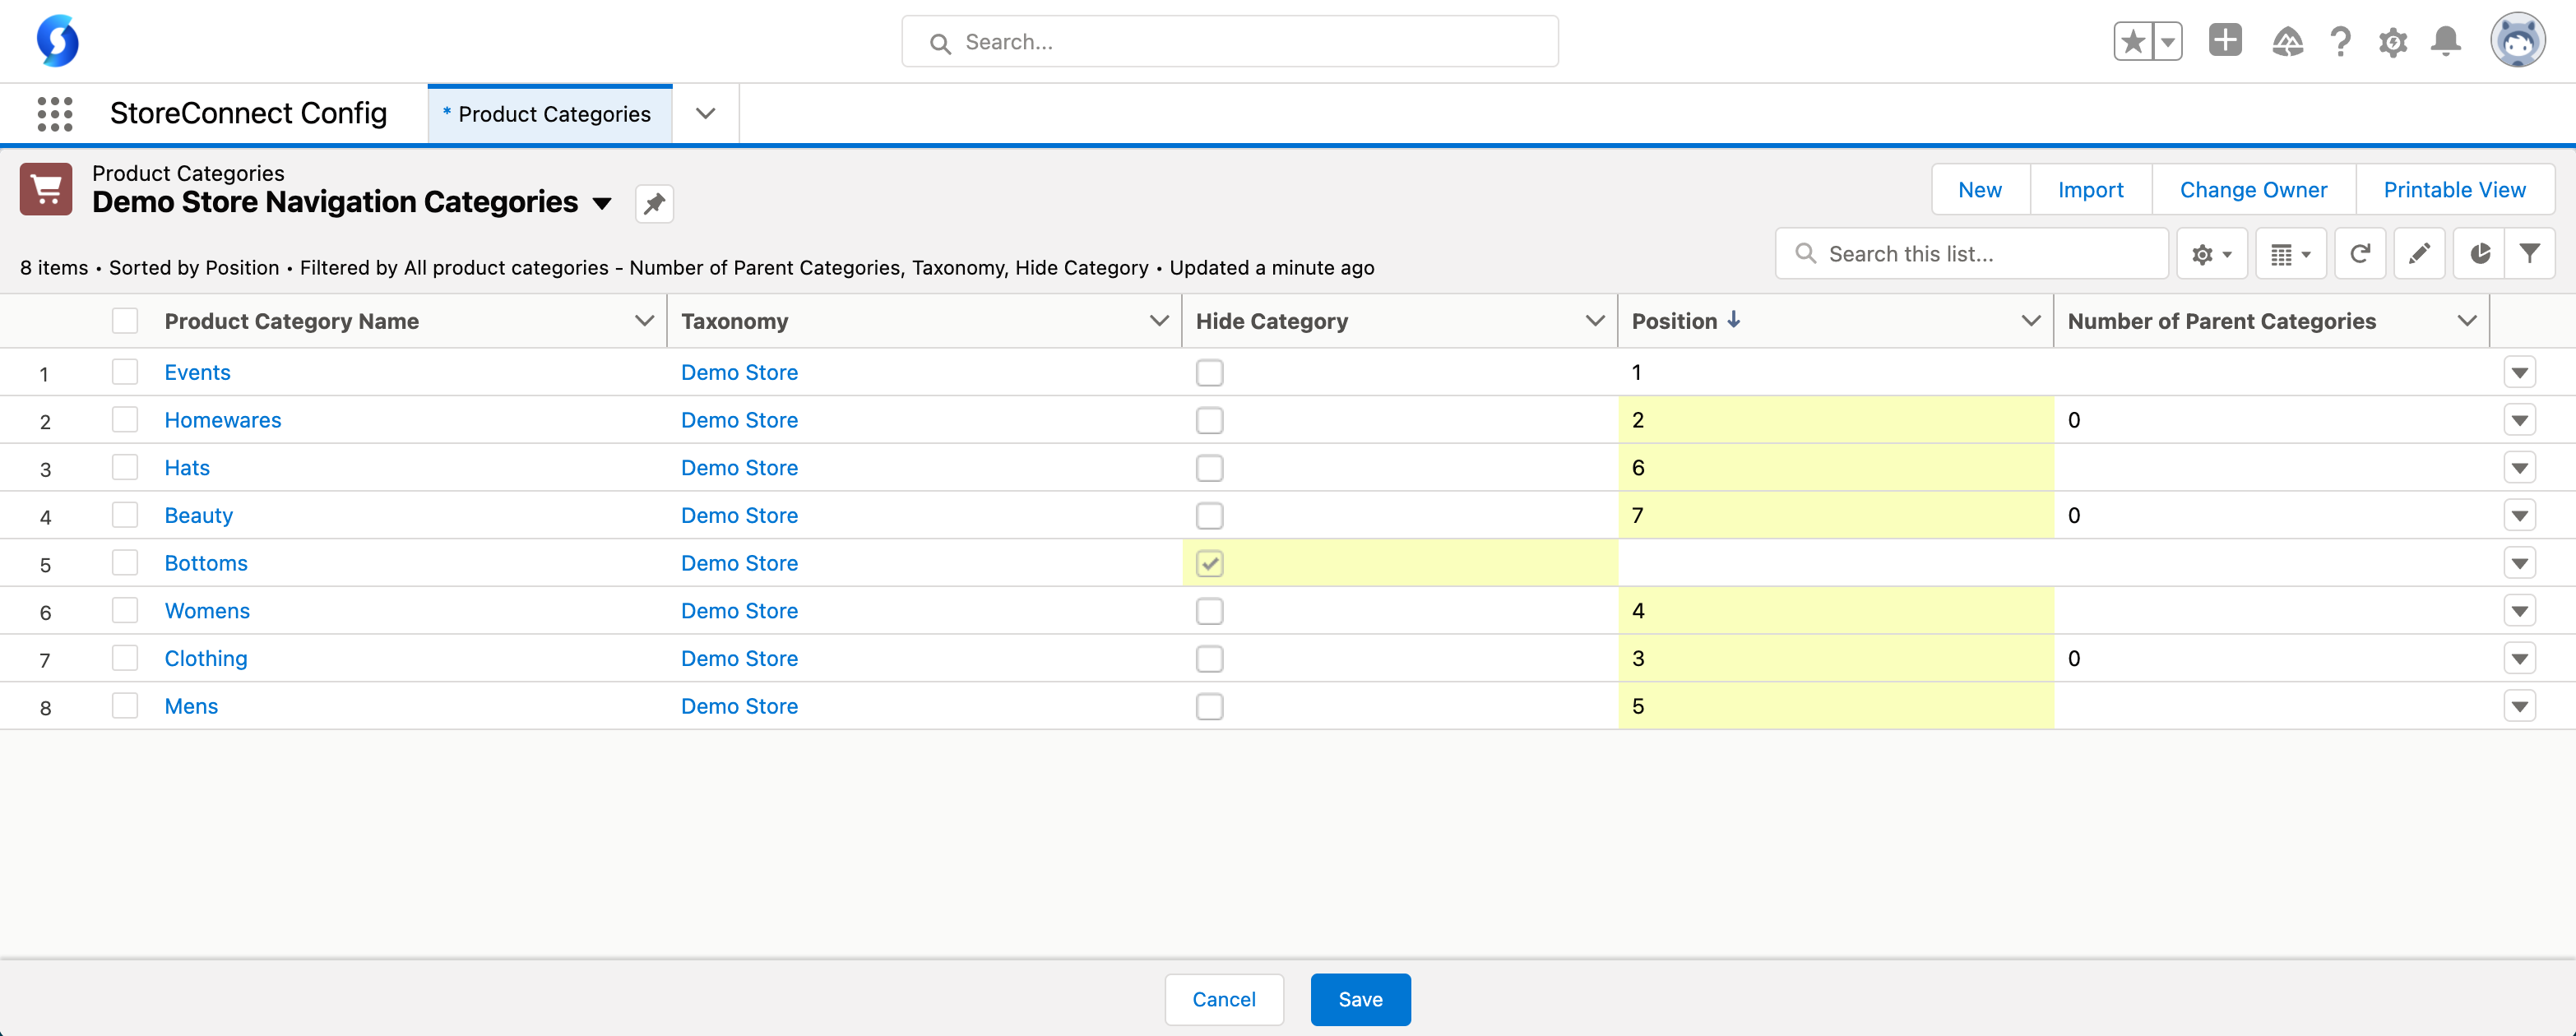
Now we will go ahead and click the Save button at the bottom of the list filter.
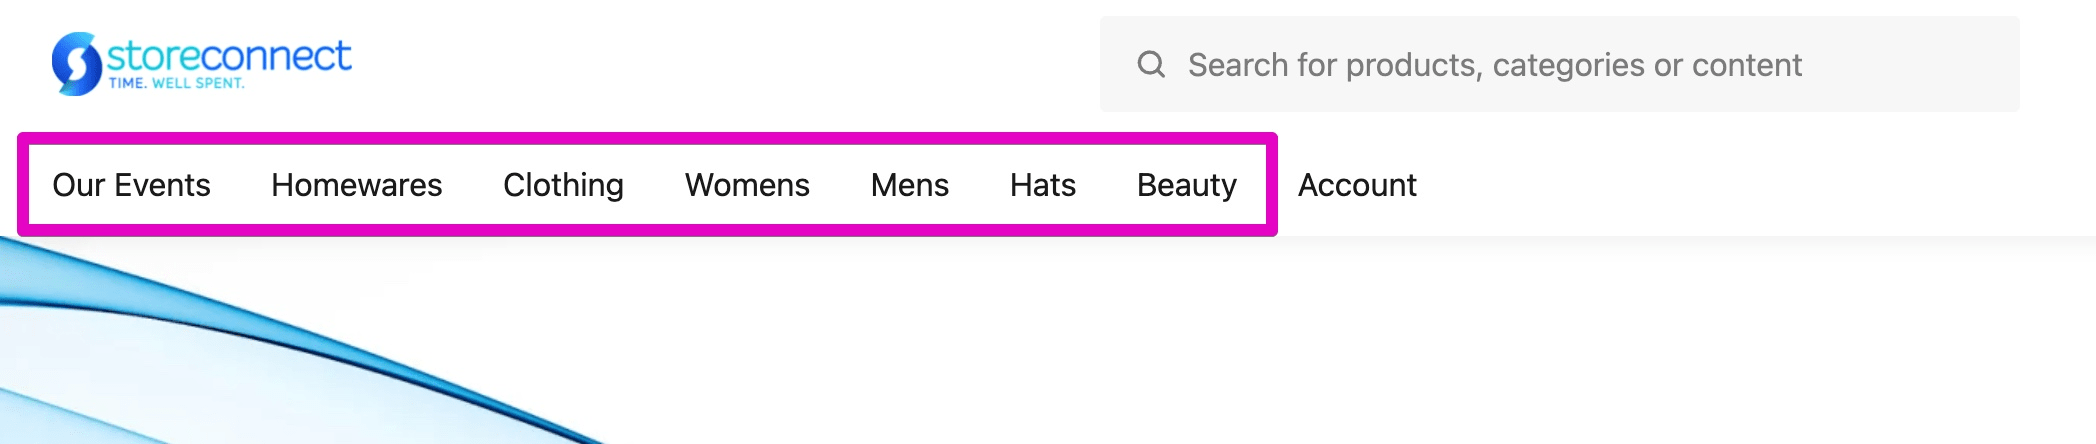
Then going back to our store (after a few seconds to allow it to update) we can refresh our store and see the changes have been made to our requirements:
Adding child product category menu display
This basic menu also includes the Child Product Categories that display automatically under their parent. These are the Child Product Categories of the main menu. To show or hide these or change their order, you can do the same as you did for the parent menus, just checking or unchecking the Hide checkbox and changing the position to be what you need.
Removing the account option
To remove the Account Option, you can replace the menu with your own custom menu using the menu-builder or, for more advanced requirements, build your own custom-header.