You can add multiple outlets for each store, and add multiple registers and outlet users for each outlet.
Add a store outlet
- On your store home page, go to POS > POS Outlets.
- Click New.
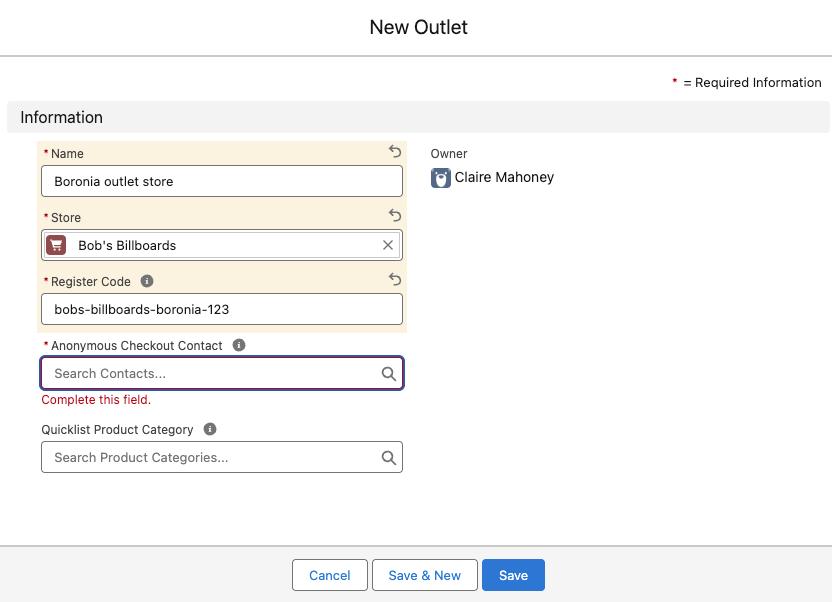
- Enter a Name for the outlet.
- Select the relevant Store.
- Enter a Register Code. This must be at least 20 characters. We suggest using an easy to remember pattern, combined with a random set of numbers, like mybusiness-country-location-672, e.g. bobsbillboards-aus-metro-672. This code is used when connecting a new register and needs to be memorable and secure.
- In the Anonymous Checkout Contact field, select + New Contact. The New Contact window opens. This contact will be used like a guest user at checkout for POS transactions. You can still look up your Salesforce contacts at POS, but this one will be the anonymous default for easy checkout.
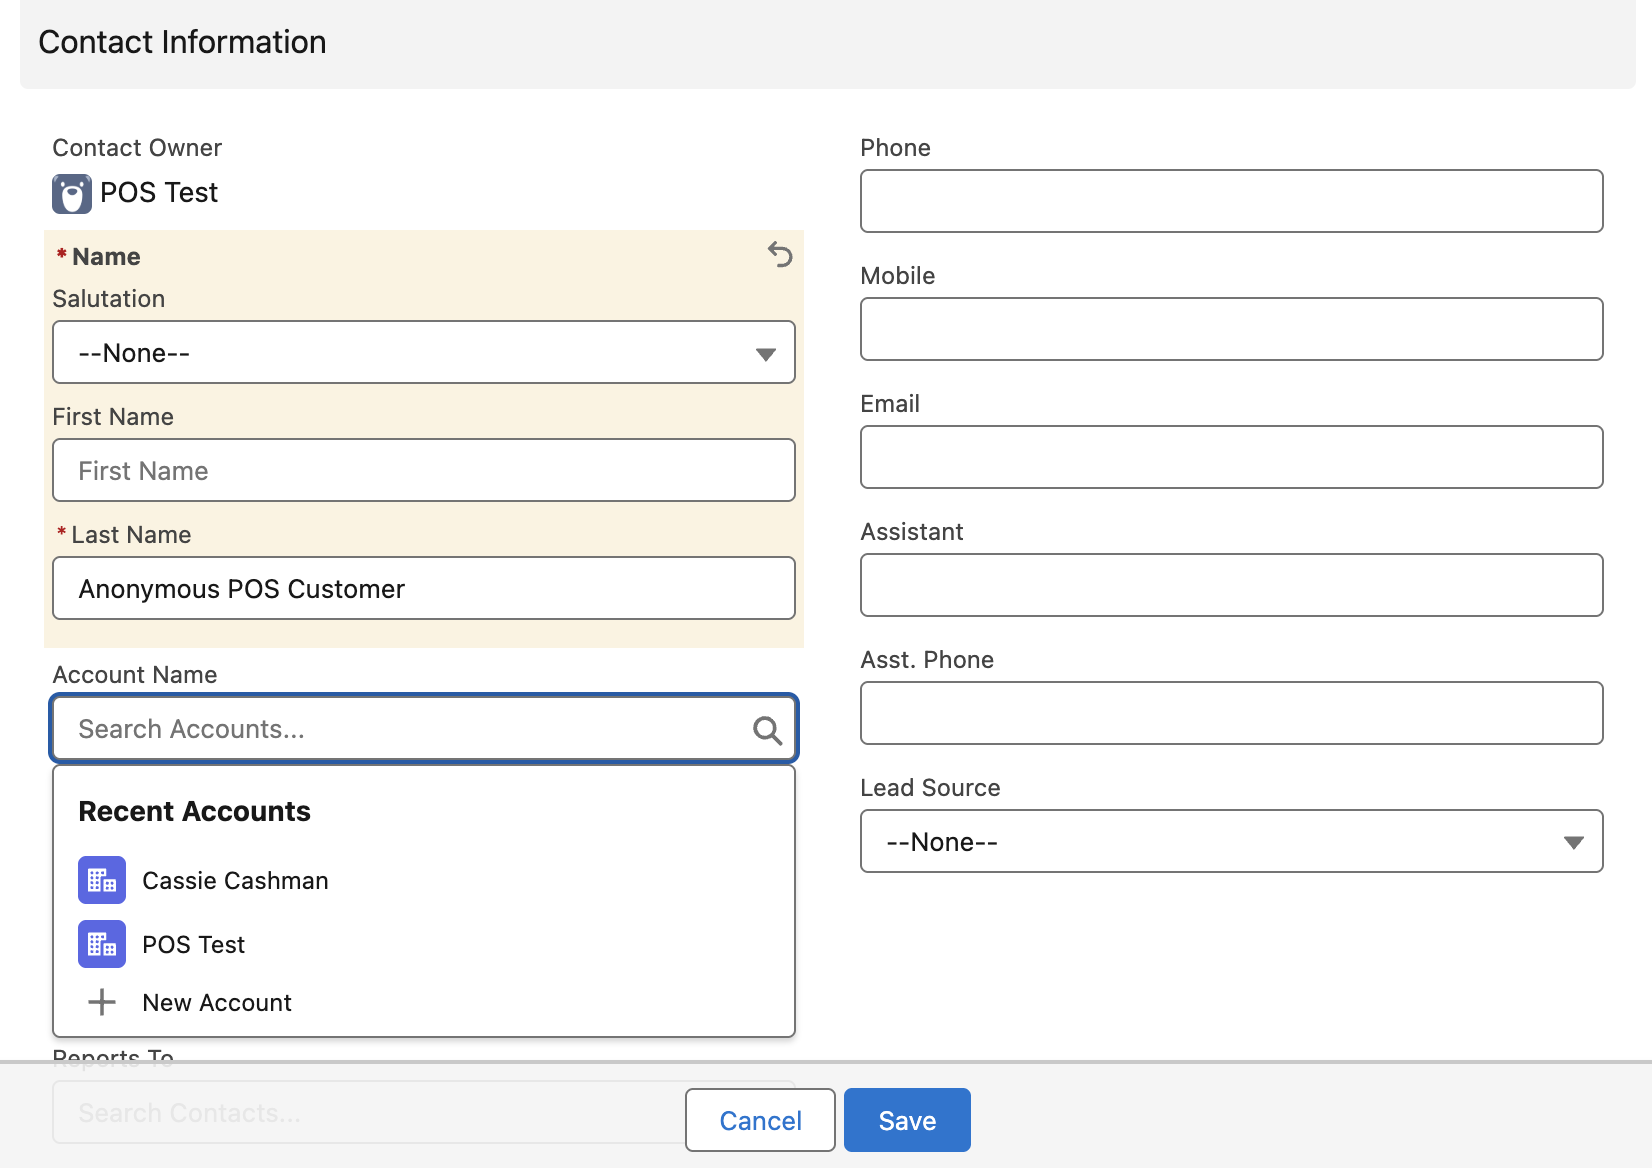
- Enter a Last Name for your anonymous contact, something like Anonymous POS Customer**.**
- In the Account Name field, select + New Account. The New Account window opens.
- Enter Anonymous POS Customer in the Account Name field.
- Select Save. This saves the new account.
- Select Save. This saves the new contact.
- Select Save. This saves the new outlet.
You can now select the anonymous account to process purchases at POS, and all transactions will appear against this account.