Create a bookable event
On this page
If you want to sell tickets to an event, you can set this up as a bookable product in StoreConnect. The product can be configured so buyers can reserve and pay for an event scheduled on a specific date.
This guide takes you through an example of setting up an event, which can be followed step by step if you have a trial of StoreConnect installed, and access to the the StoreConnect Corporate Store that comes pre-setup.
Event details used in this guide
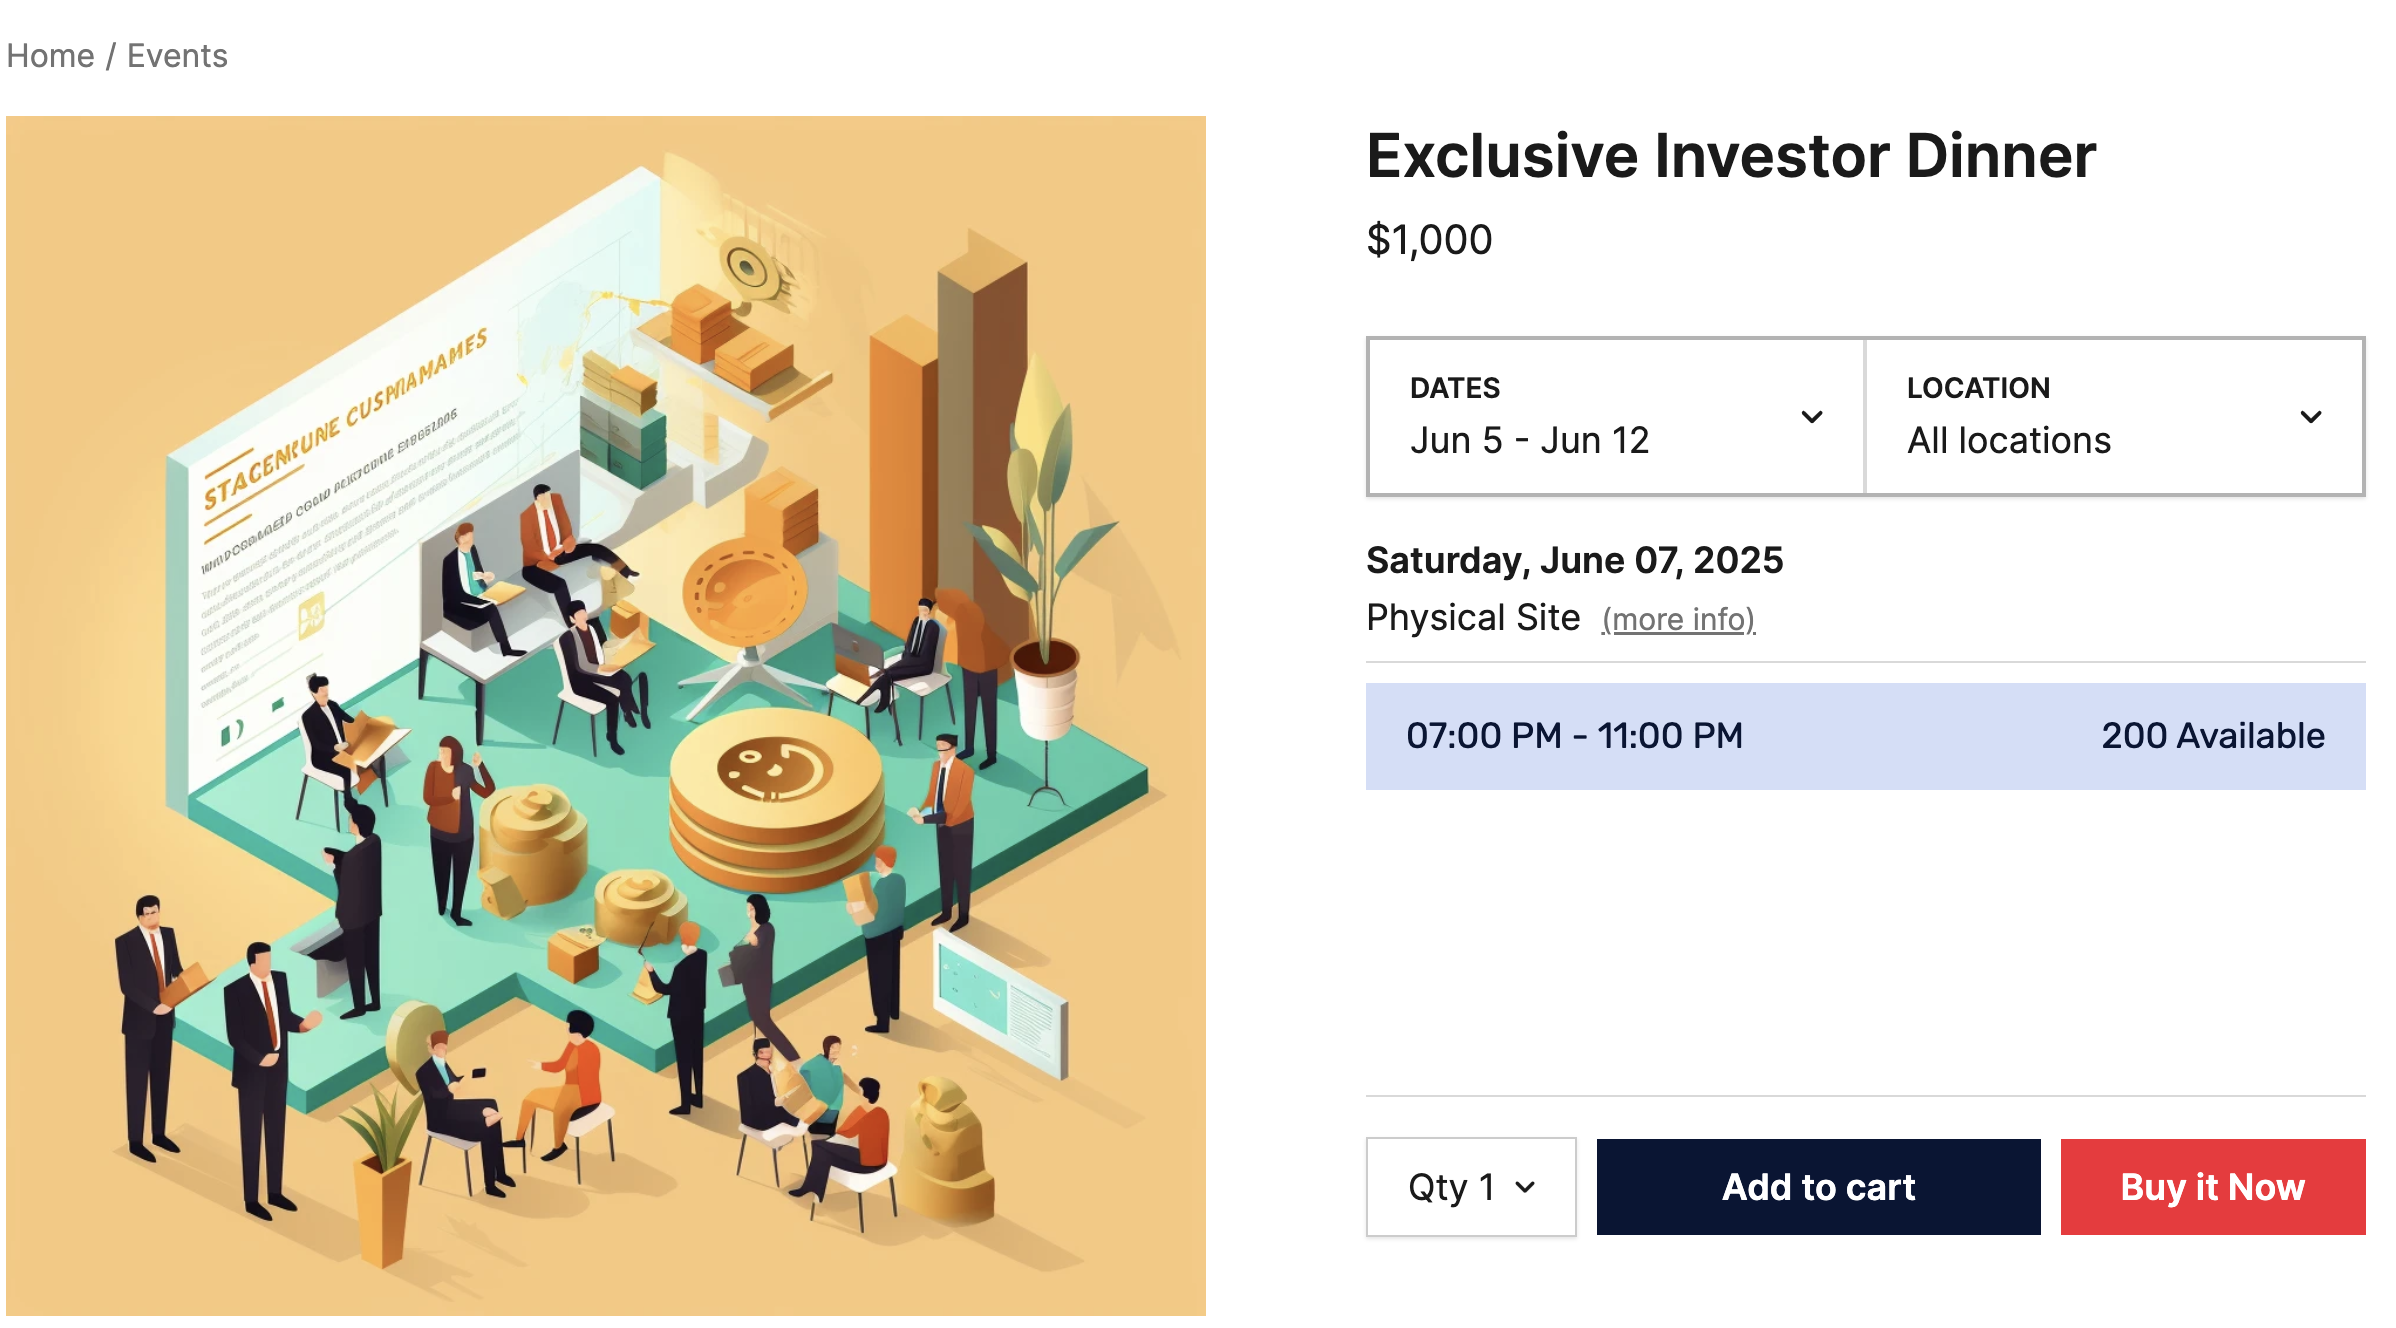
- Event name: Exclusive Investor Dinner
- Price: $1,000
- Location: Physical Site
- Date: 6 July 2025 (or adjust to future date)
- Time 7 to 11pm
- Maximum available tickets: 200
- Minimum required to run the event: 50
- Reservations are for 2 guests - the person purchasing the event and another attendee
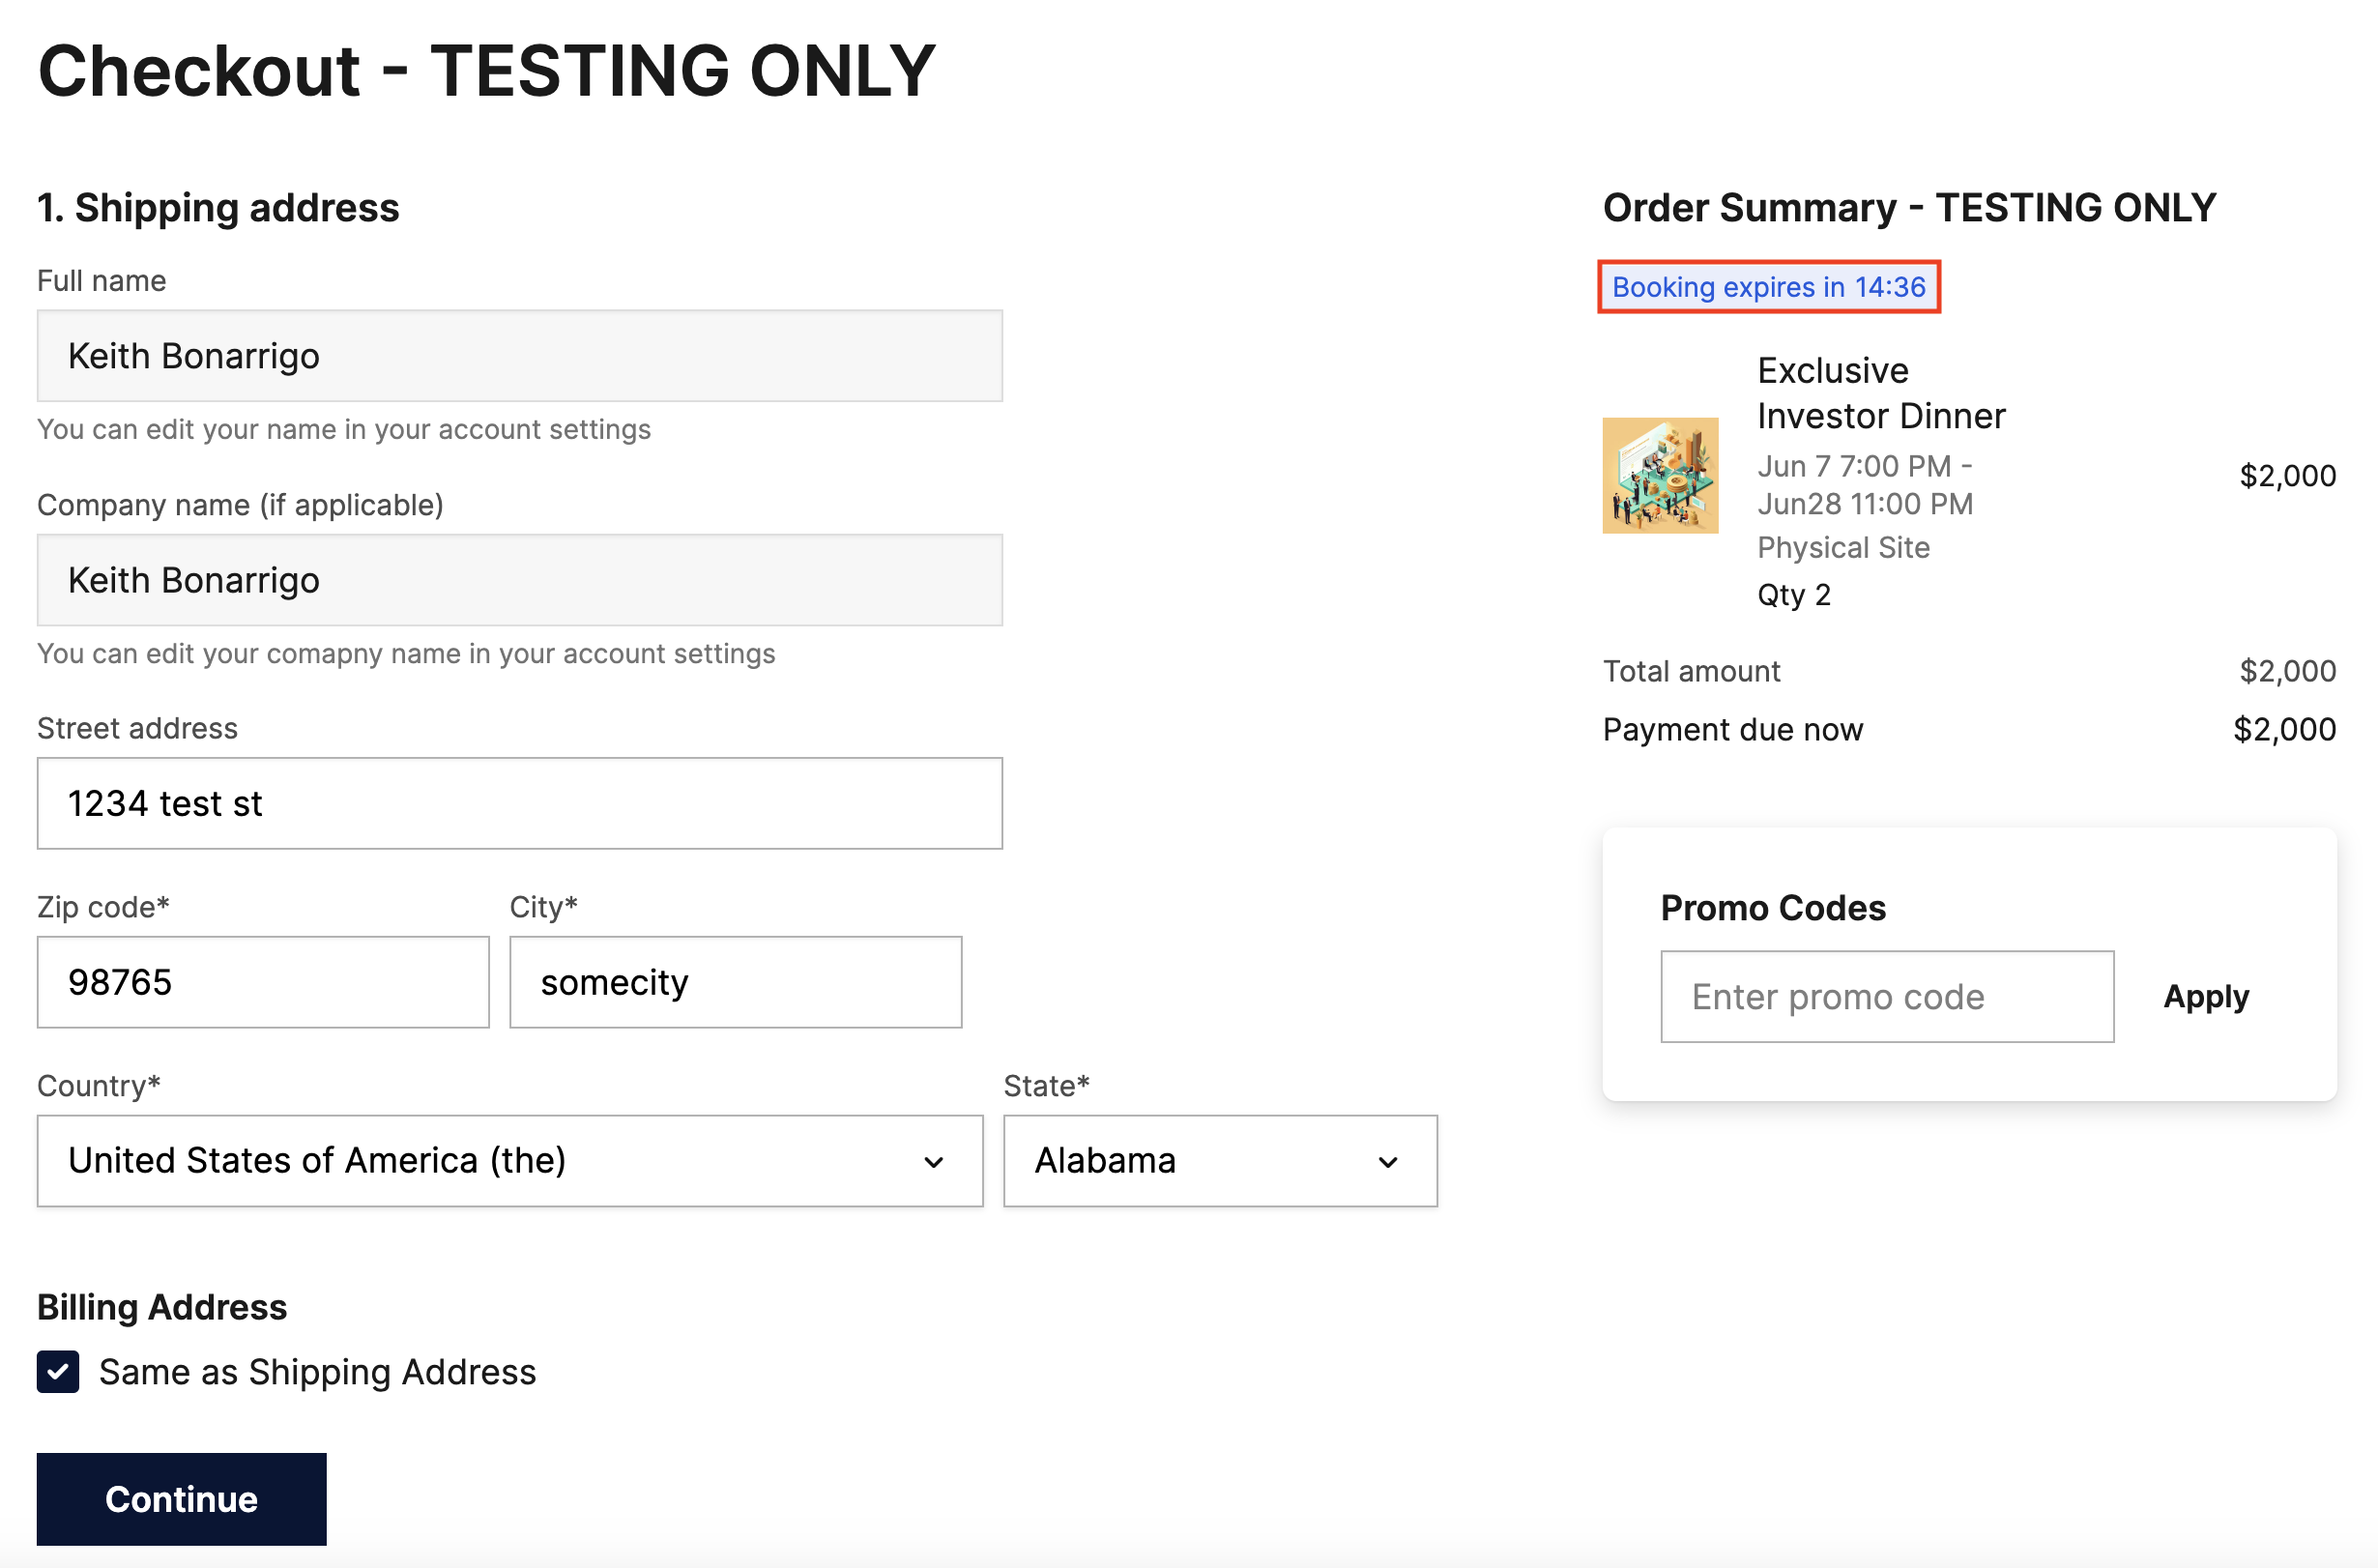
- Time to checkout: 15 minutes after added to cart
What the end product should look like
Before you begin: install StoreConnect trial
Follow the instructions here for to set up a Salesforce trial org or here for a sandbox or production org.
Step 1: configure the booking timer for the store
- Go to Stores and select the StoreConnect Store.

2. Select the Products tab and scroll to the Booking section.
3. Edit the Booking Hold Duration (mins) field and type 15, then Save.

Step 2: add booking information for the product
- Go to the Products list and open the Corporate - Exclusive Investor Dinner product.
- In the Booking section, edit the following fields.
- Booking duration (mins) - 180
- Booking Start Buffer (mins) field. Enter 1440 to stop bookings 24 hours before the event.
- Booking End Buffer (mins) - leave blank
- Select the Booking Require Attendee Details option
- Enter 2 in the Max Attendees Per Booking field.
- Select Save.
Step 3: define a bookable location for the event
- In the App launcher, search for Bookable Locations.
- Select New to add the new location.
- Call the location
Physical Site. - Ensure that this location is associated to the StoreConnect Store.
- Select the Active checkbox is enabled.
- Select Save.

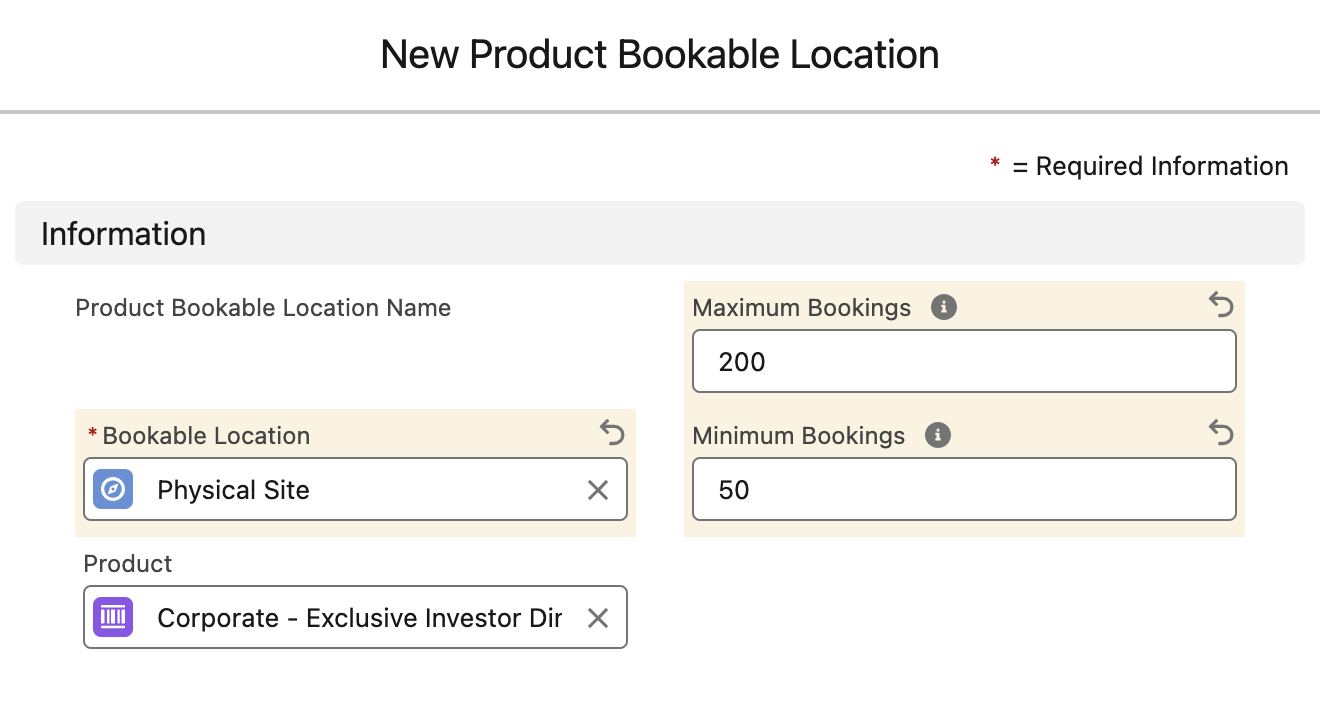
Step 4: define the product for the bookable location
- With the bookable location record open, select New in the Product Bookable Location section on the right.
- In the Product field, search and select the ticket product.
- Enter the Maximum Bookings (200) and Minimum Bookings (50) allowed.
- Select Save.
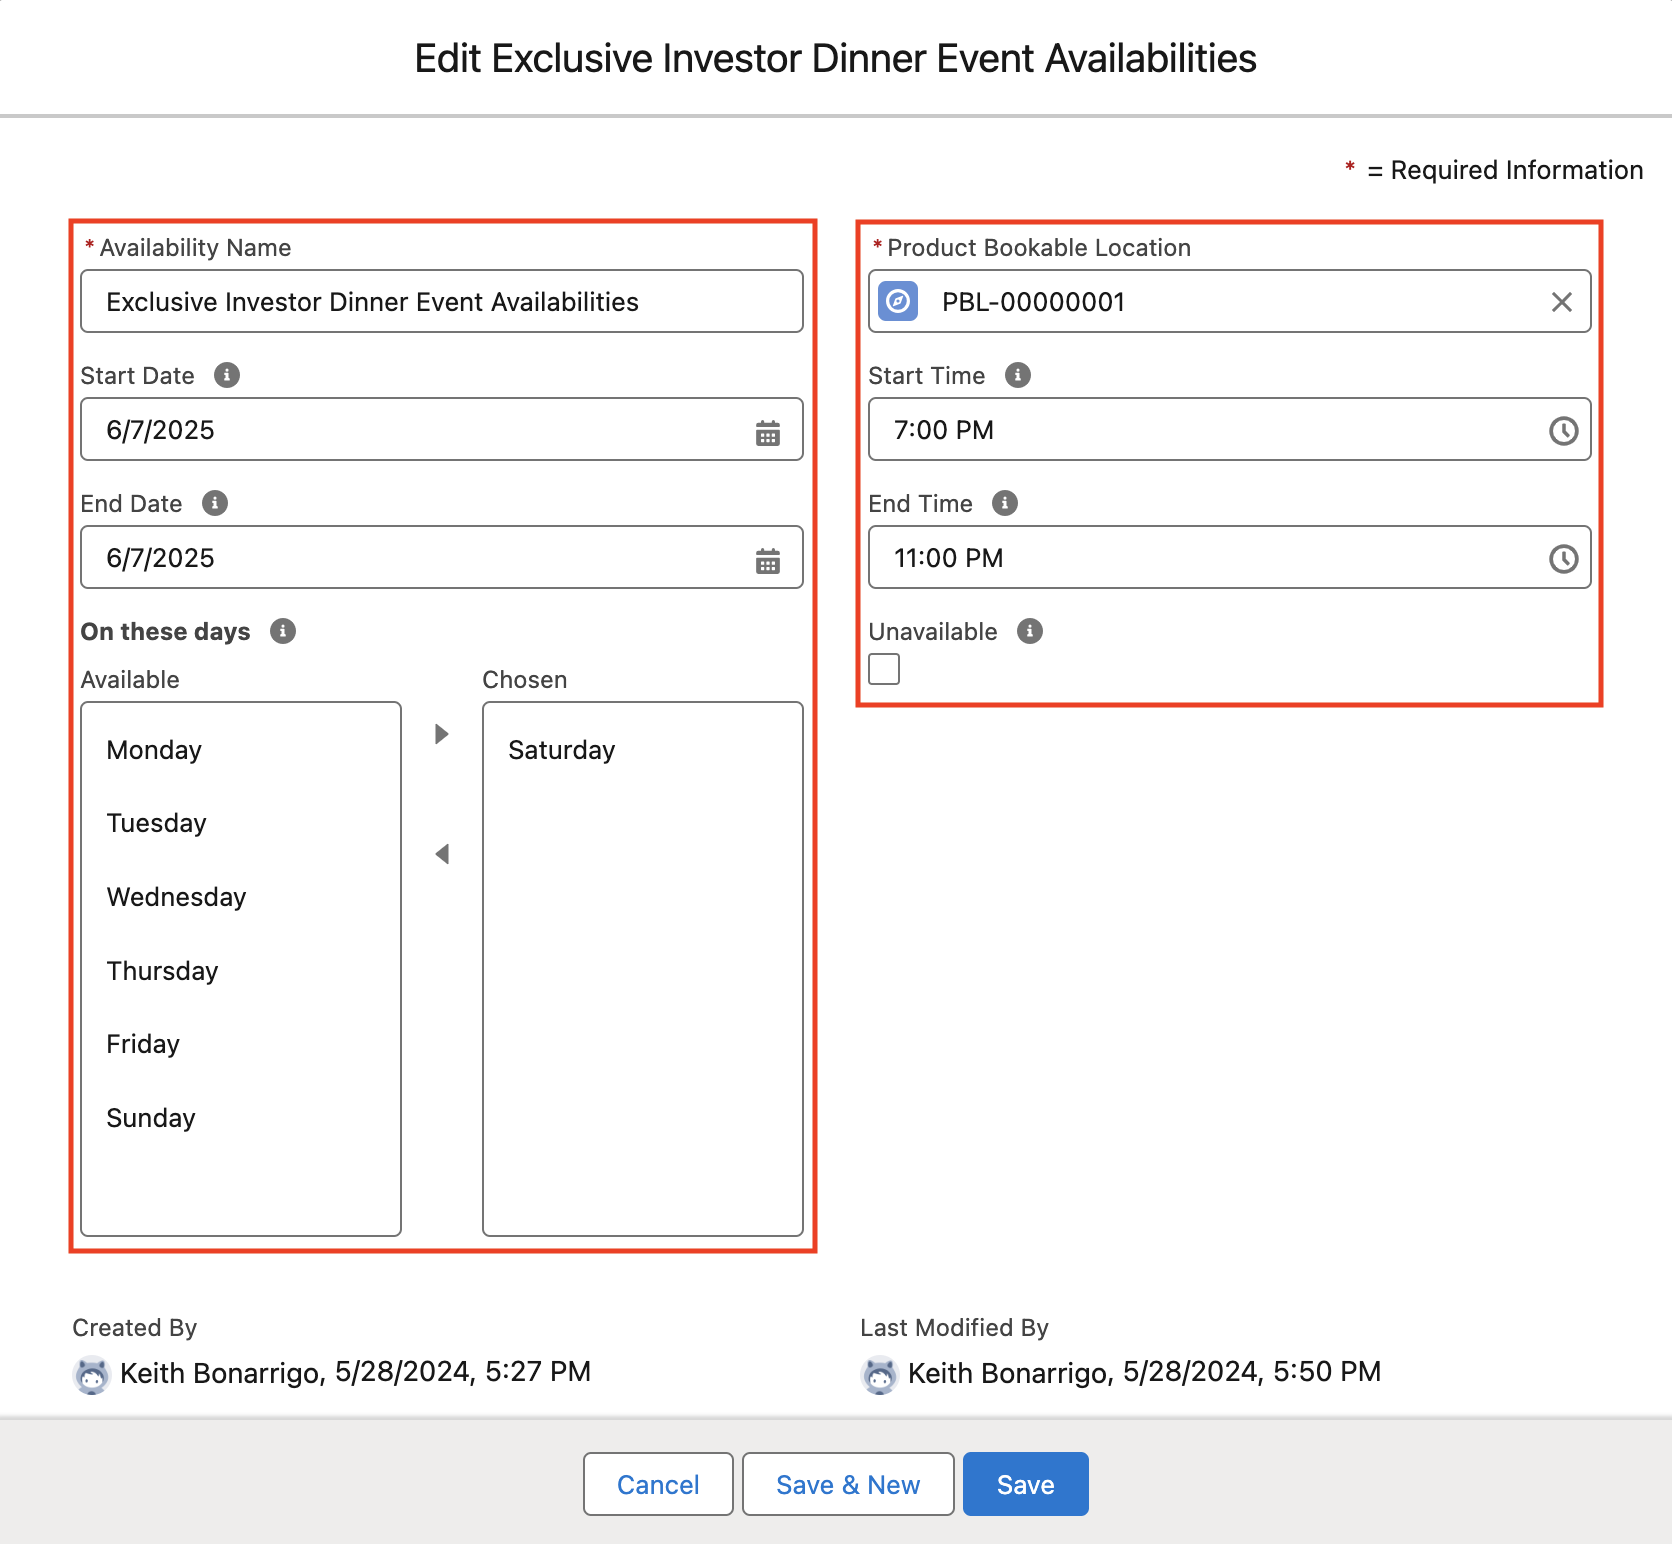
Step 5: define availabilities for the bookable event
- In the Product Bookable Location record you just created, select New in the Availabilities section.
- Enter the following details:
- Name - Exclusive Investor Dinner Event Availabilities
- Start date - 6 July 2025 (or future date)
- End date - same as above
- Start time - 7.00pm
- End time - 11.00pm
- Day of the week - Saturday
- Check that the amount of minutes entered for start and end time matches the booking duration time you entered in the product booking information.
- Select Save.
Step 6: test the bookable product
Navigate to the store website and locate the product you added. The entry should look a lot like this (details may vary).
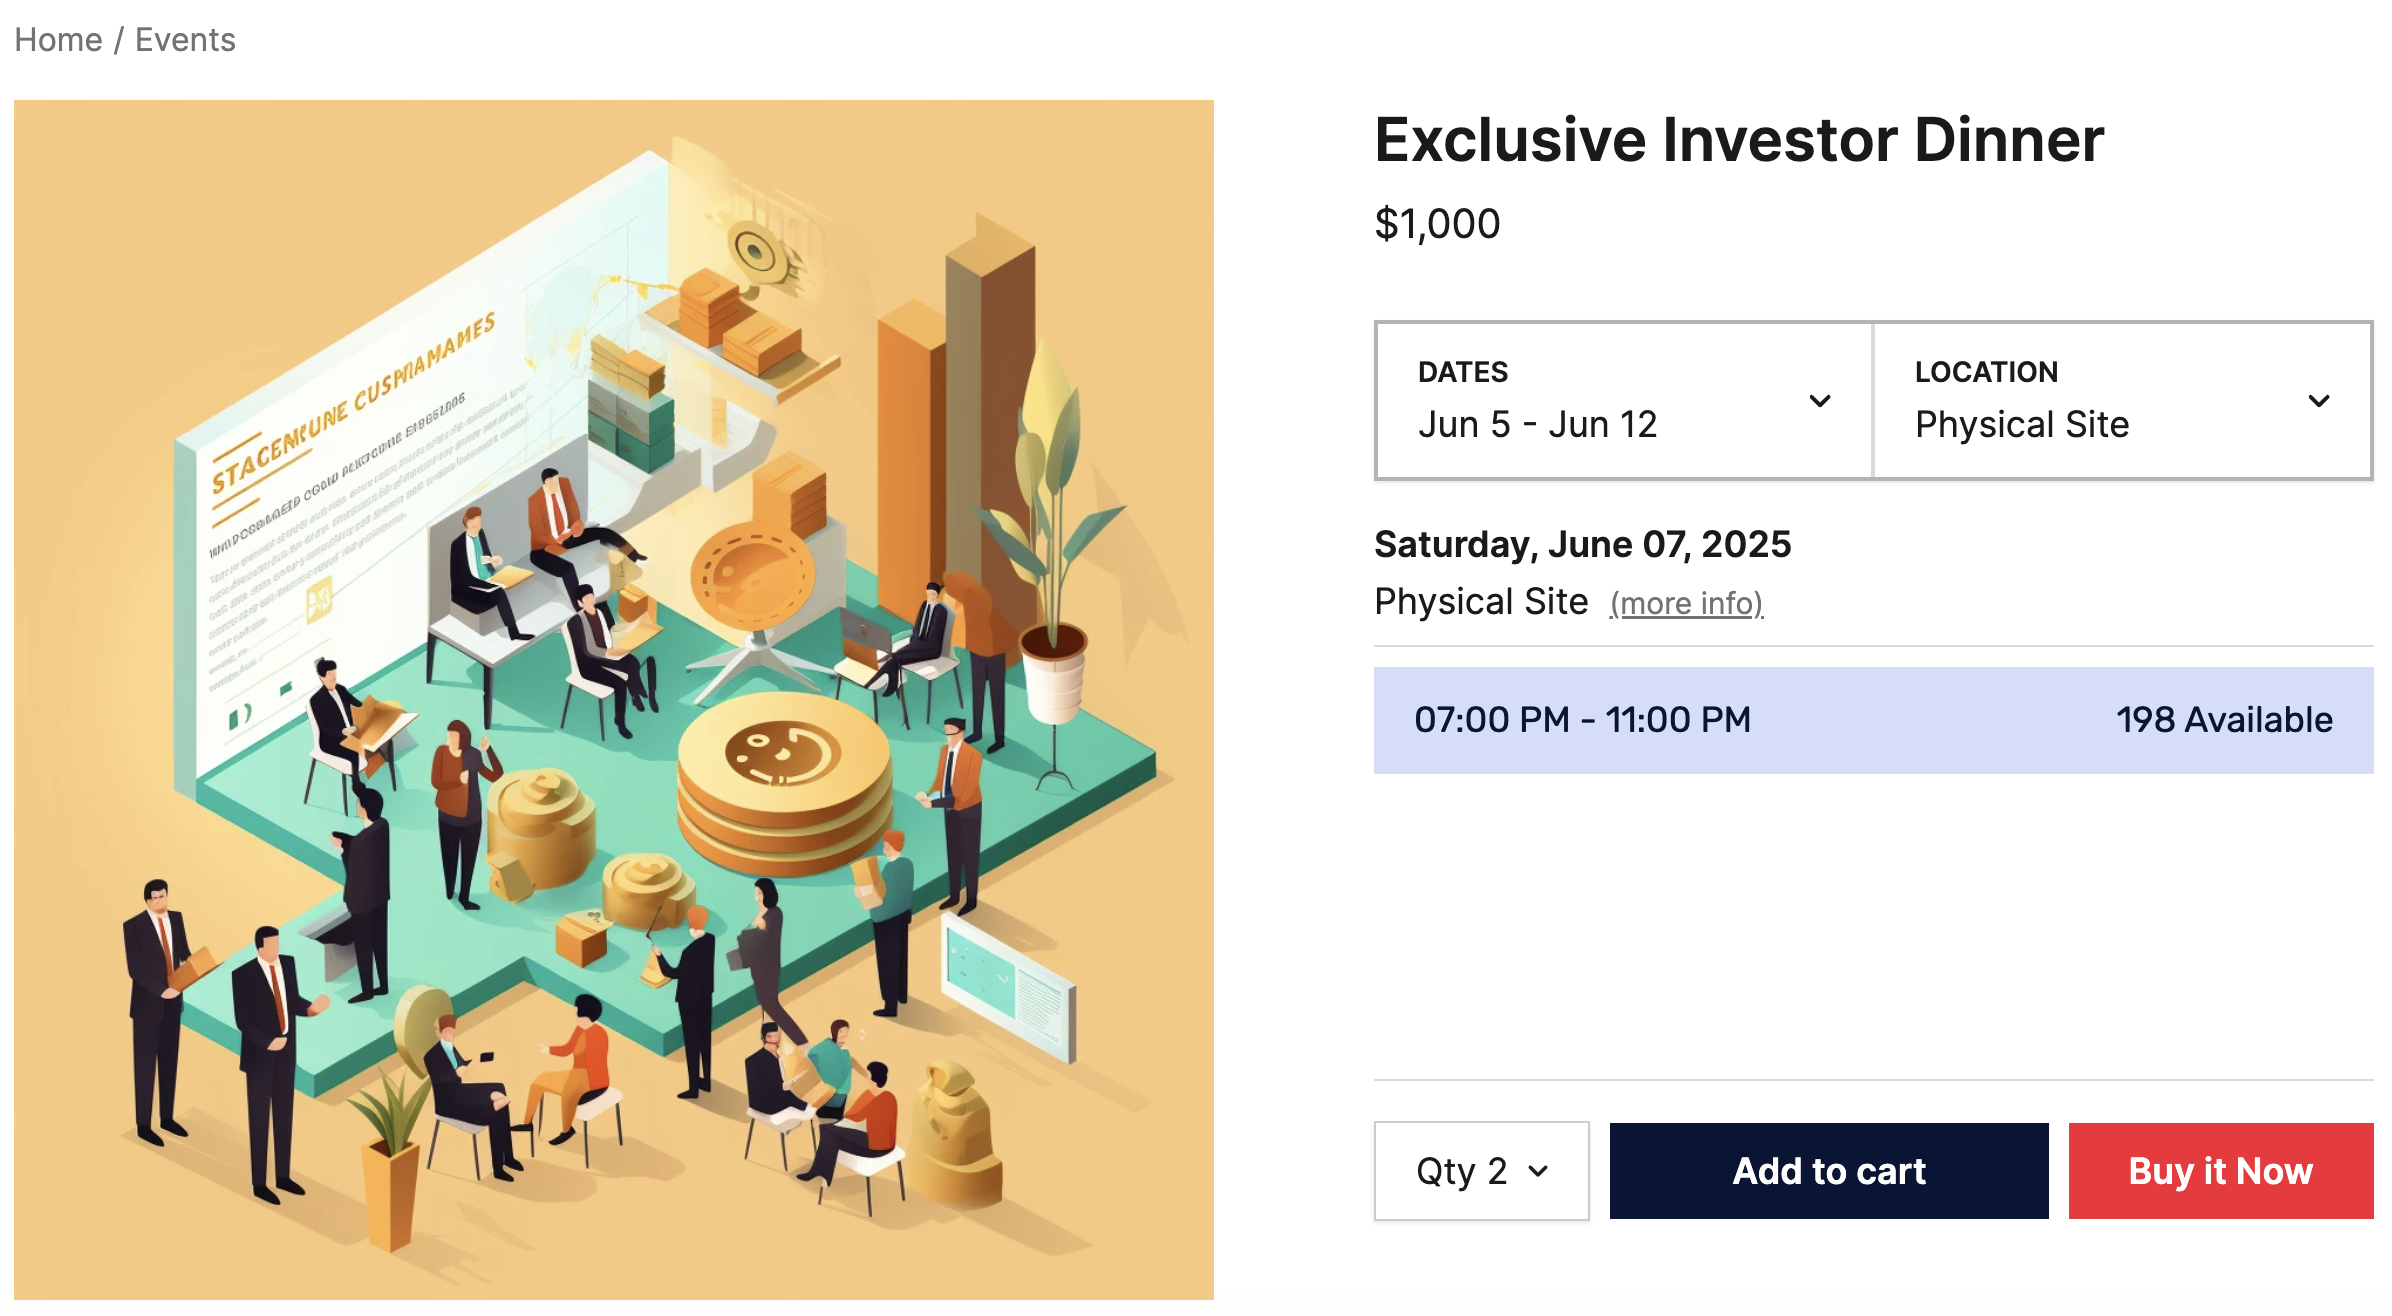
Step 7: buy a ticket
- Select Buy it Now and go to the checkout.
- Fill in your shipping/billing information and accept the terms and conditions on the next page. Note that the timer is running on the cart, as configured above.
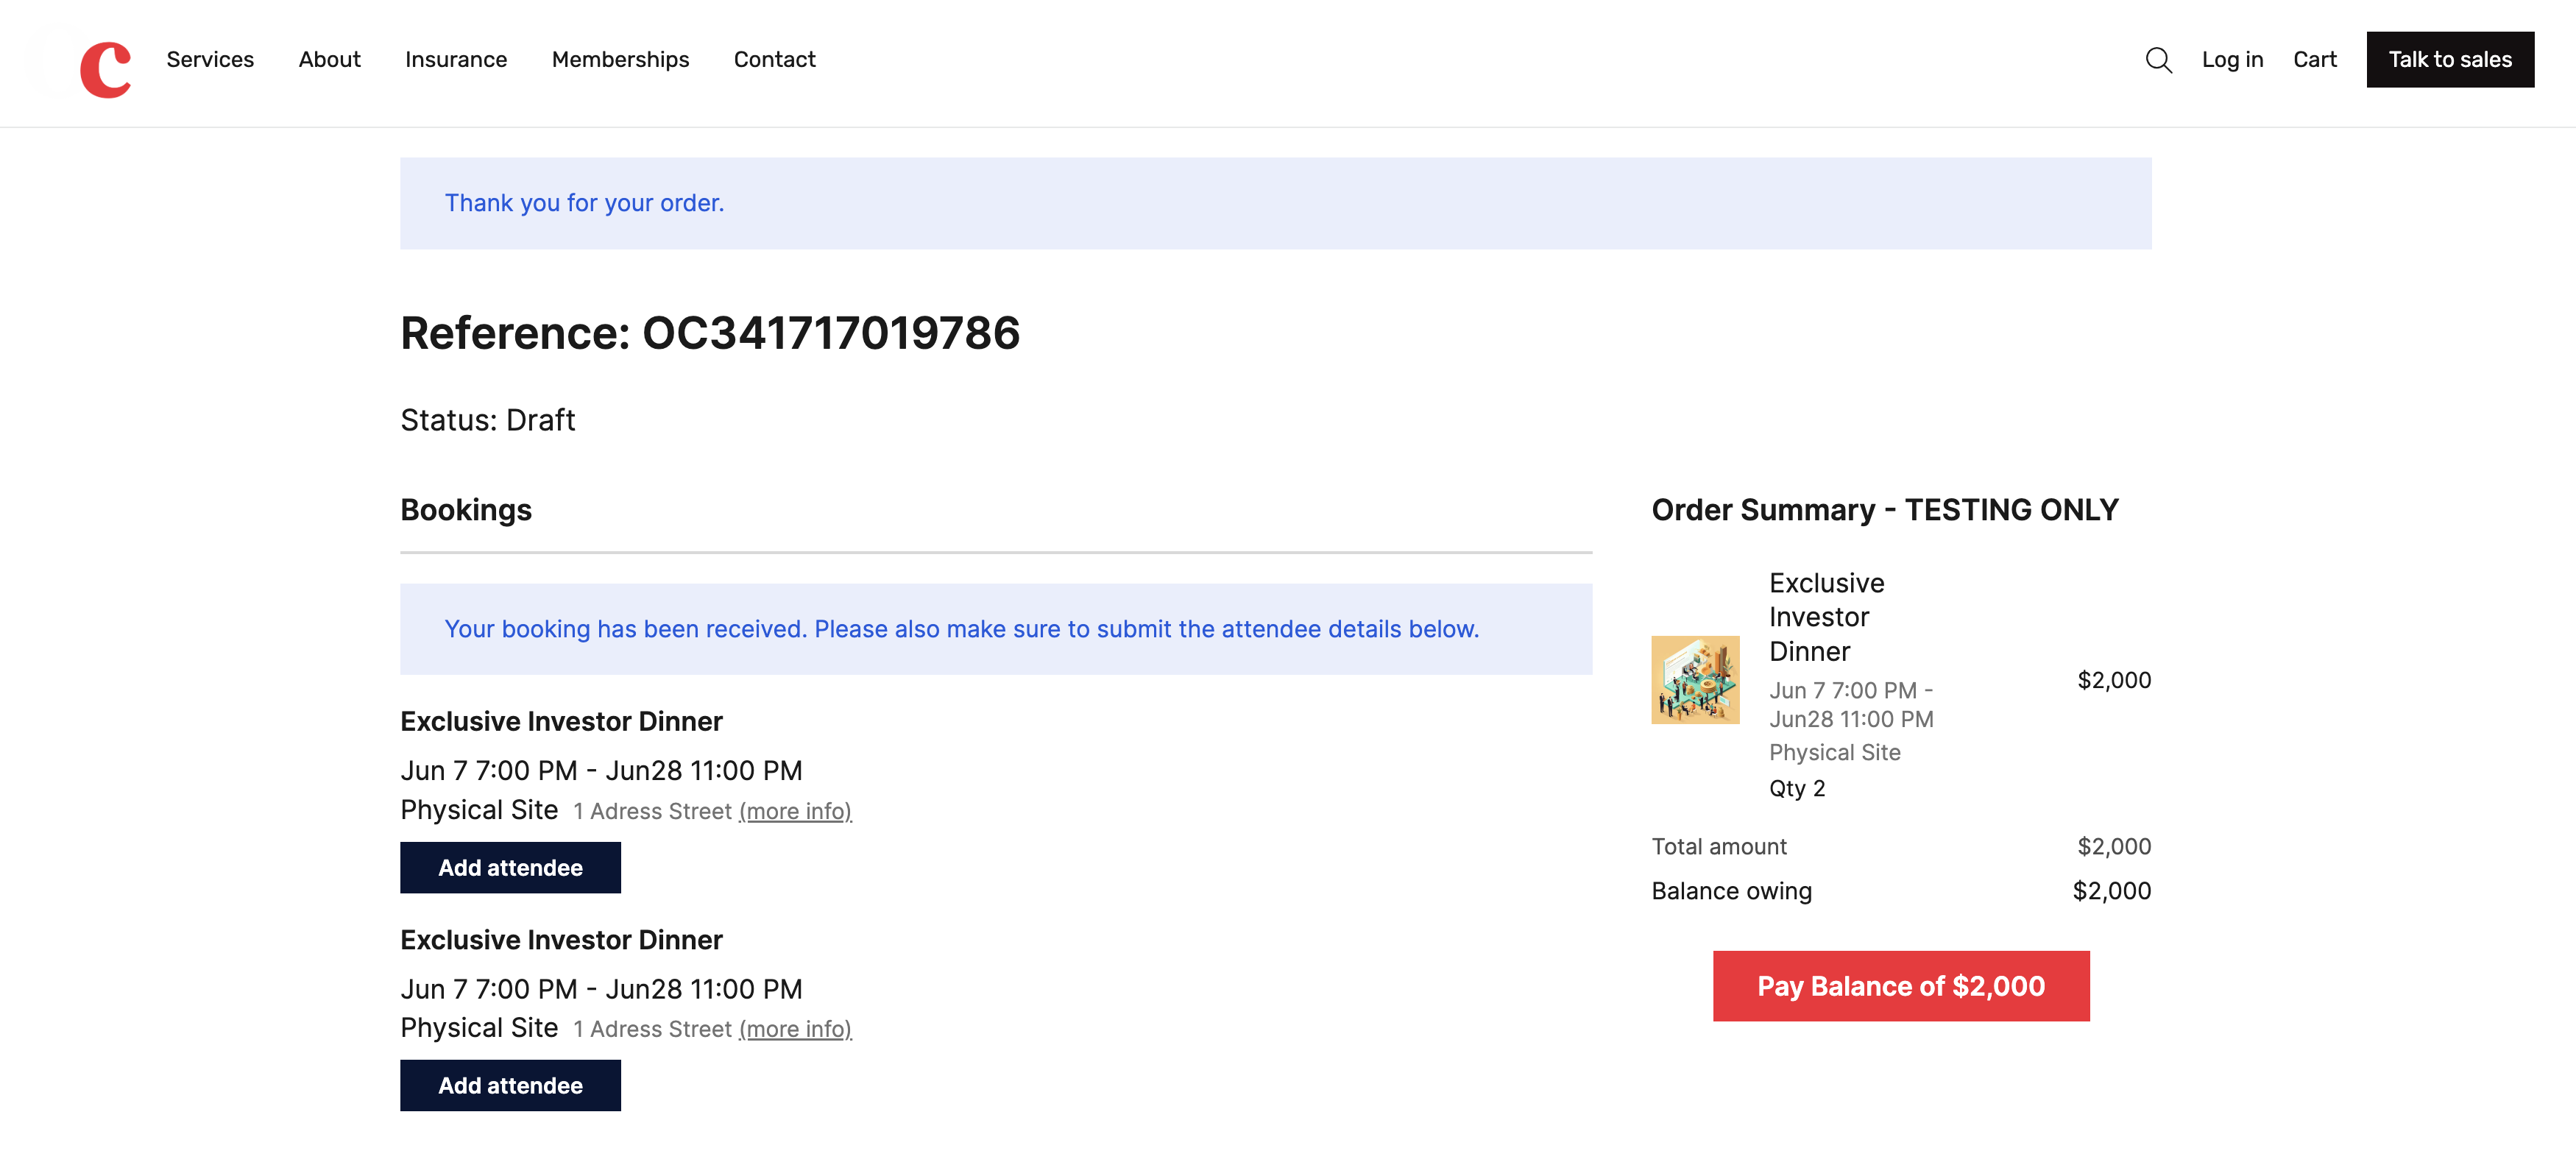
- Select the Send me an invoice option for payment.
- Complete the Attendee information for both guests.
- Click Add Attendee and ensure that the I am attending option is selected.
- Click Add Attendee and enter some fake details.
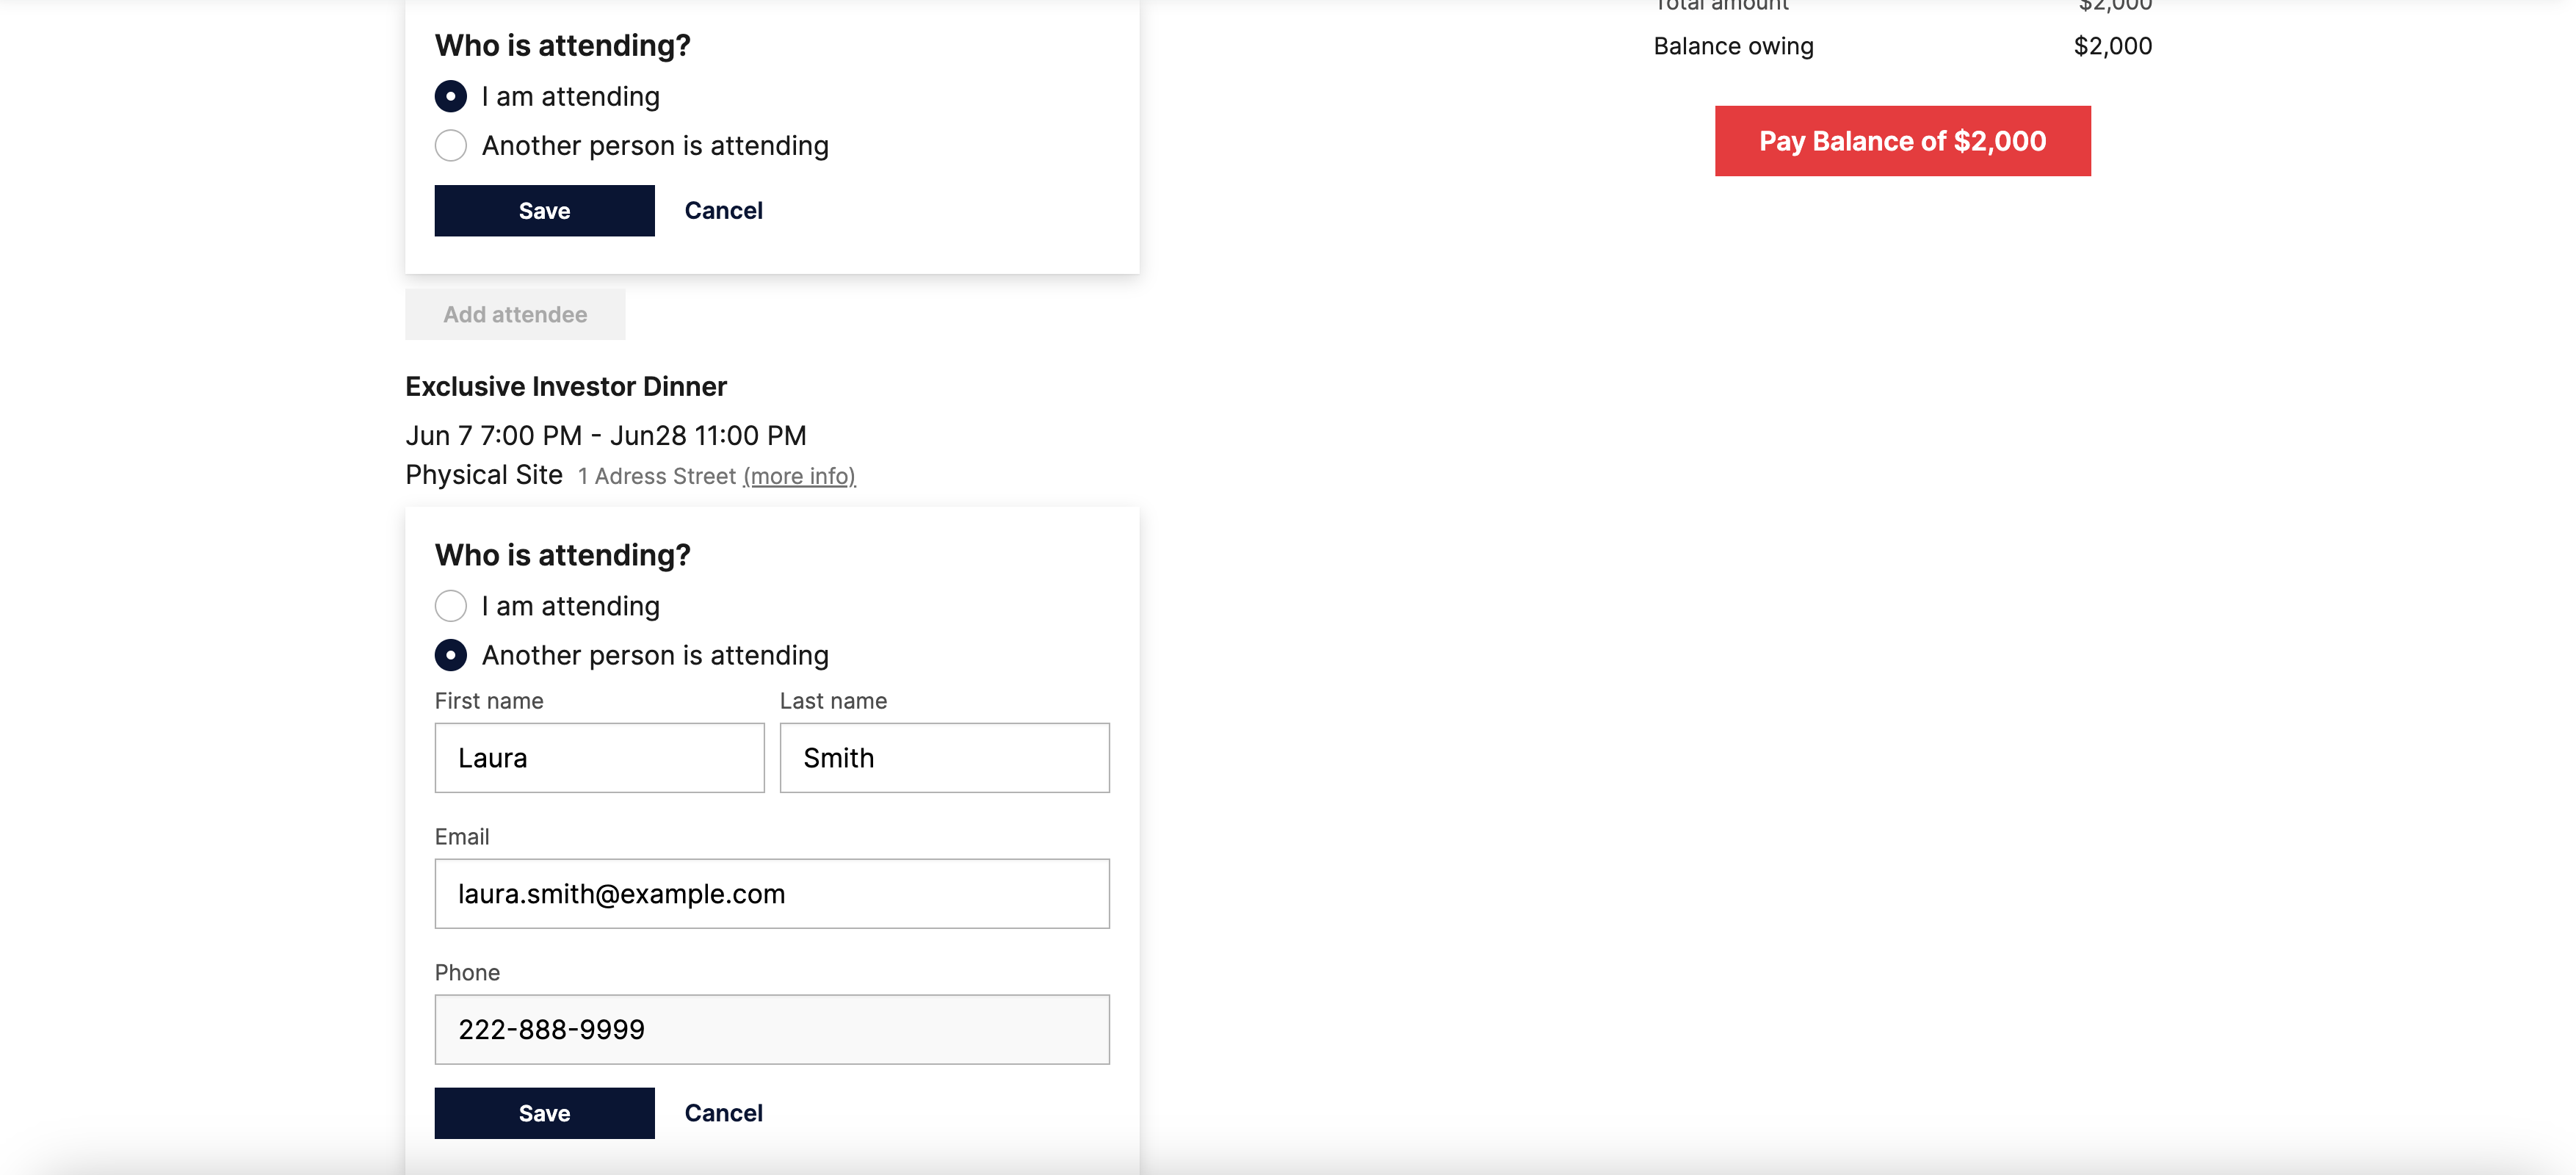
- Save each of the attendee entries.
- Complete the transaction and copy the order #.
Step 8: check the order in the back-end of Salesforce
- Search for the order in StoreConnect.

- In the Order Products related section, select Corporate - Exclusive Investor Dinner.
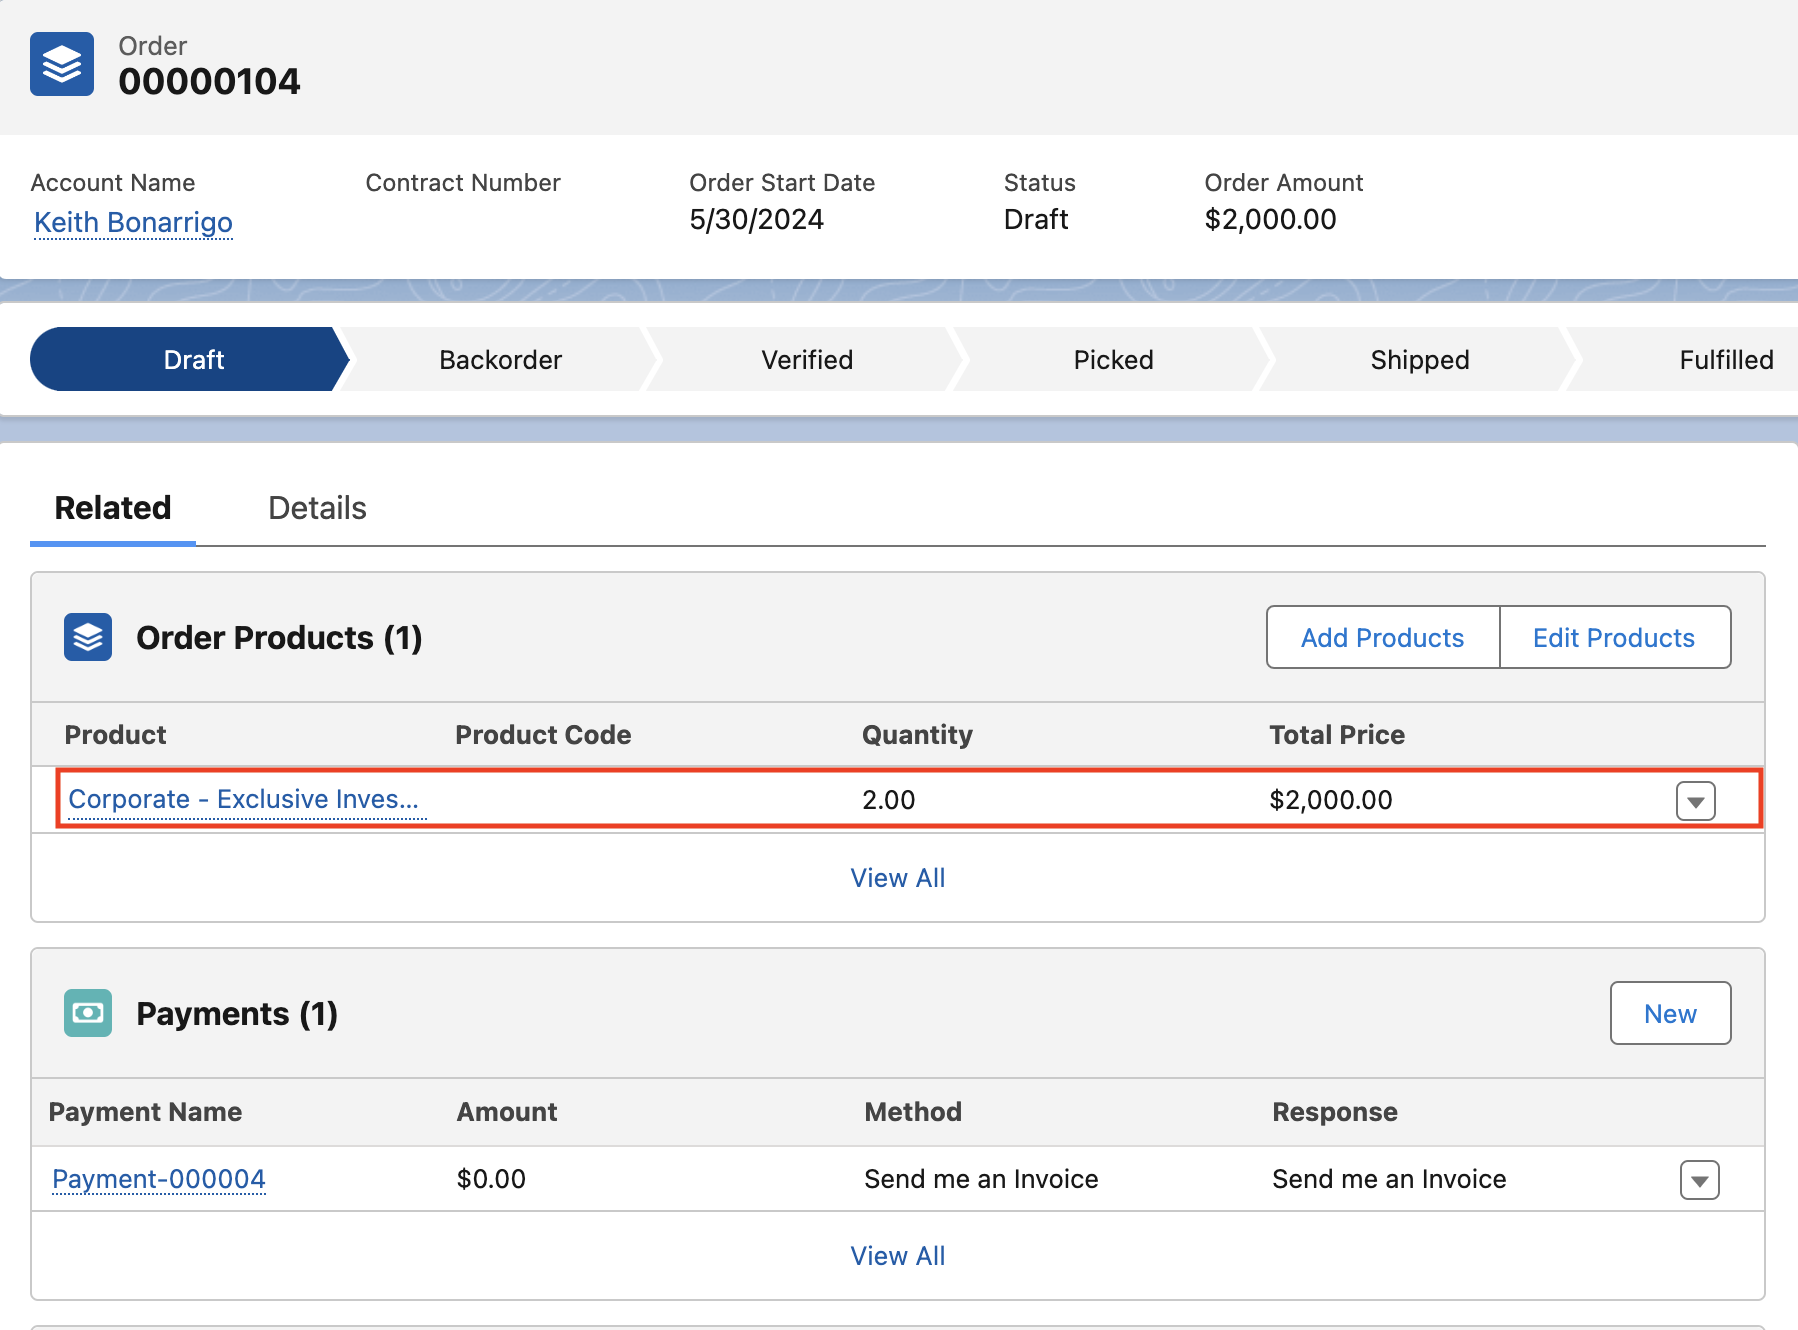
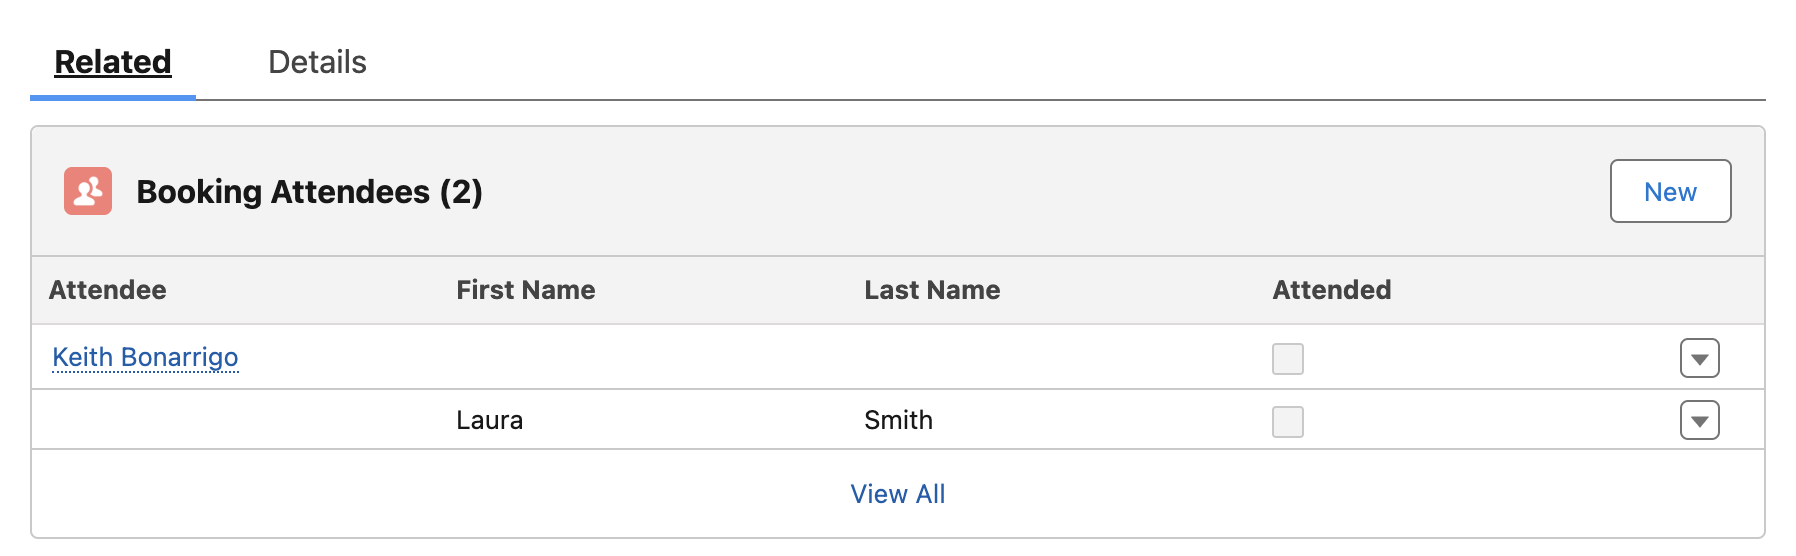
- In the product record, select the Bookings related list.
- Ensure that both of the attendees are listed in the Booking record.
Congratulations! You’ve successfully set up a bookable event and registered. Enjoy your upcoming dinner!