Managing StoreConnect upgrades
On this page
StoreConnect upgrades are a two-step process: the Salesforce package is upgraded first, then the web application is deployed.
The Salesforce package is upgraded at StoreConnect’s discretion. You may not receive advance notice before a package upgrade. For major version upgrades, you will be notified before the web application is deployed, giving you time to prepare and test before the cutover.
Upgrade procedure
1. Receive notification
StoreConnect notifies you that the Salesforce package is now on the latest version. At this point the web application has not yet been upgraded.
2. Test in a sandbox (optional)
If you have access to a Salesforce sandbox, this is a good opportunity to test the upgrade before it reaches production. Refresh a full or partial sandbox, then run the Setup Wizard from the StoreConnect Web Console to provision the web application on the new version. This gives you a safe environment to work through changes before they affect your live store.
3. Review the upgrade guide
Read the upgrade guide for the version you are moving to — for example, Upgrade guide — v19 to v20. Work through each section that is relevant to your implementation. Understand which changes will affect you and what action, if any, is required.
4. Prepare your theme
If the upgrade requires template changes, make those changes in a cloned version of your theme rather than your active theme. This keeps your live store stable while you prepare the updated version.
Name your themes clearly so you can switch between them quickly — for example, Default Theme v19 for the current active theme and Default Theme v20 for the updated version.
:::warning Cloning a theme is not a simple one-click operation. A theme record has many related template records, and Salesforce has no built-in way to clone a record and all its related records in one step. You will need to clone each template manually, or use a third-party tool capable of deep-cloning related records. Plan time for this before the upgrade window opens. :::
5. Switch themes at the right time
Once the web application is upgraded, StoreConnect will notify you. At that point you can switch your store to the updated theme.
Timing matters here. There are two scenarios:
- Theme changes that are backward-compatible. You can switch to the new theme before or after the web application is upgraded without affecting your live store.
- Theme changes that are required for the upgraded site to function correctly. If you switch the new theme before the upgrade, your live store may break. If you switch after the upgrade but take too long, your live store will be broken in the interim.
For the second scenario, coordinate with StoreConnect on timing so you can switch the theme as soon as the upgrade is complete. Make sure you are available to receive the upgrade completion notification and can act on it immediately.
Post-upgrade tasks
After the web application is upgraded, review the following:
- Check your store site. Look carefully for any design issues that may be linked to Liquid or theme component changes.
- Review page layouts. For any new objects introduced in the upgrade, ensure you are using the correct page layout. For existing objects, check the upgrade guide for new fields or related objects and add them to your page layouts and related lists as appropriate.
- Update interdependent integrations. Check that any Lightning packages or other integrations are up to date.
- Review error logs. Check error logs for automations, scheduled jobs, and API workflows.
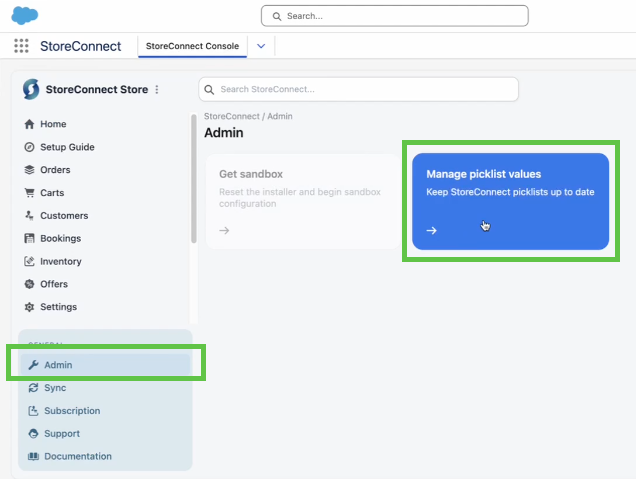
Update picklist values
After a package upgrade, you may need to update picklist values. The StoreConnect Web Console includes a tool for this.
Go to Web Console > Administration > Picklist values and follow the on-screen prompts.