Create a store outlet
On this page
You can add multiple outlets for each store, and add multiple registers and outlet users for each outlet.
Add a store outlet
- On your store home page, go to POS > POS Outlets.
- Click New.
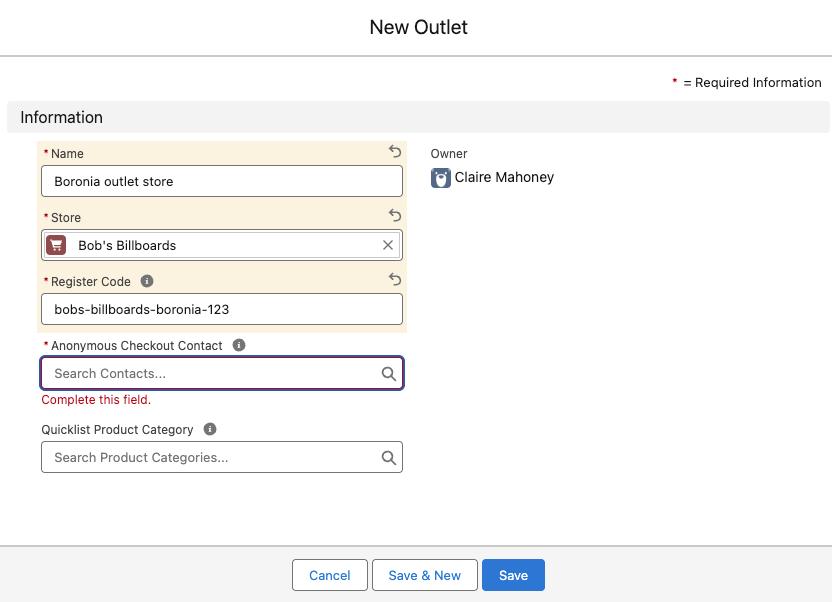
- Enter a Name for the outlet.
- Select the relevant Store.
-
Enter a Register Code. This must be at least 20 characters. We suggest using an easy to remember pattern, combined with a random set of numbers, like mybusiness-country-location-672, e.g. bobsbillboards-aus-metro-672. This code is used when connecting a new register and needs to be memorable and secure.
:::tip Choose a code that is easy to remember and hard to guess — for example,
mybusiness-location-672. The only enforced rule is a minimum of 20 characters. ::: - (Optional) In the Pricebook field, select a Salesforce pricebook to assign to this outlet. When set, POS transactions at this outlet use prices from the selected pricebook instead of the store’s default pricebook. This is useful when different physical locations have different pricing.
- In the Anonymous Checkout Contact field, select + New Contact. The New Contact window opens. This contact will be used like a guest user at checkout for POS transactions. You can still look up your Salesforce contacts at POS, but this one will be the anonymous default for easy checkout.
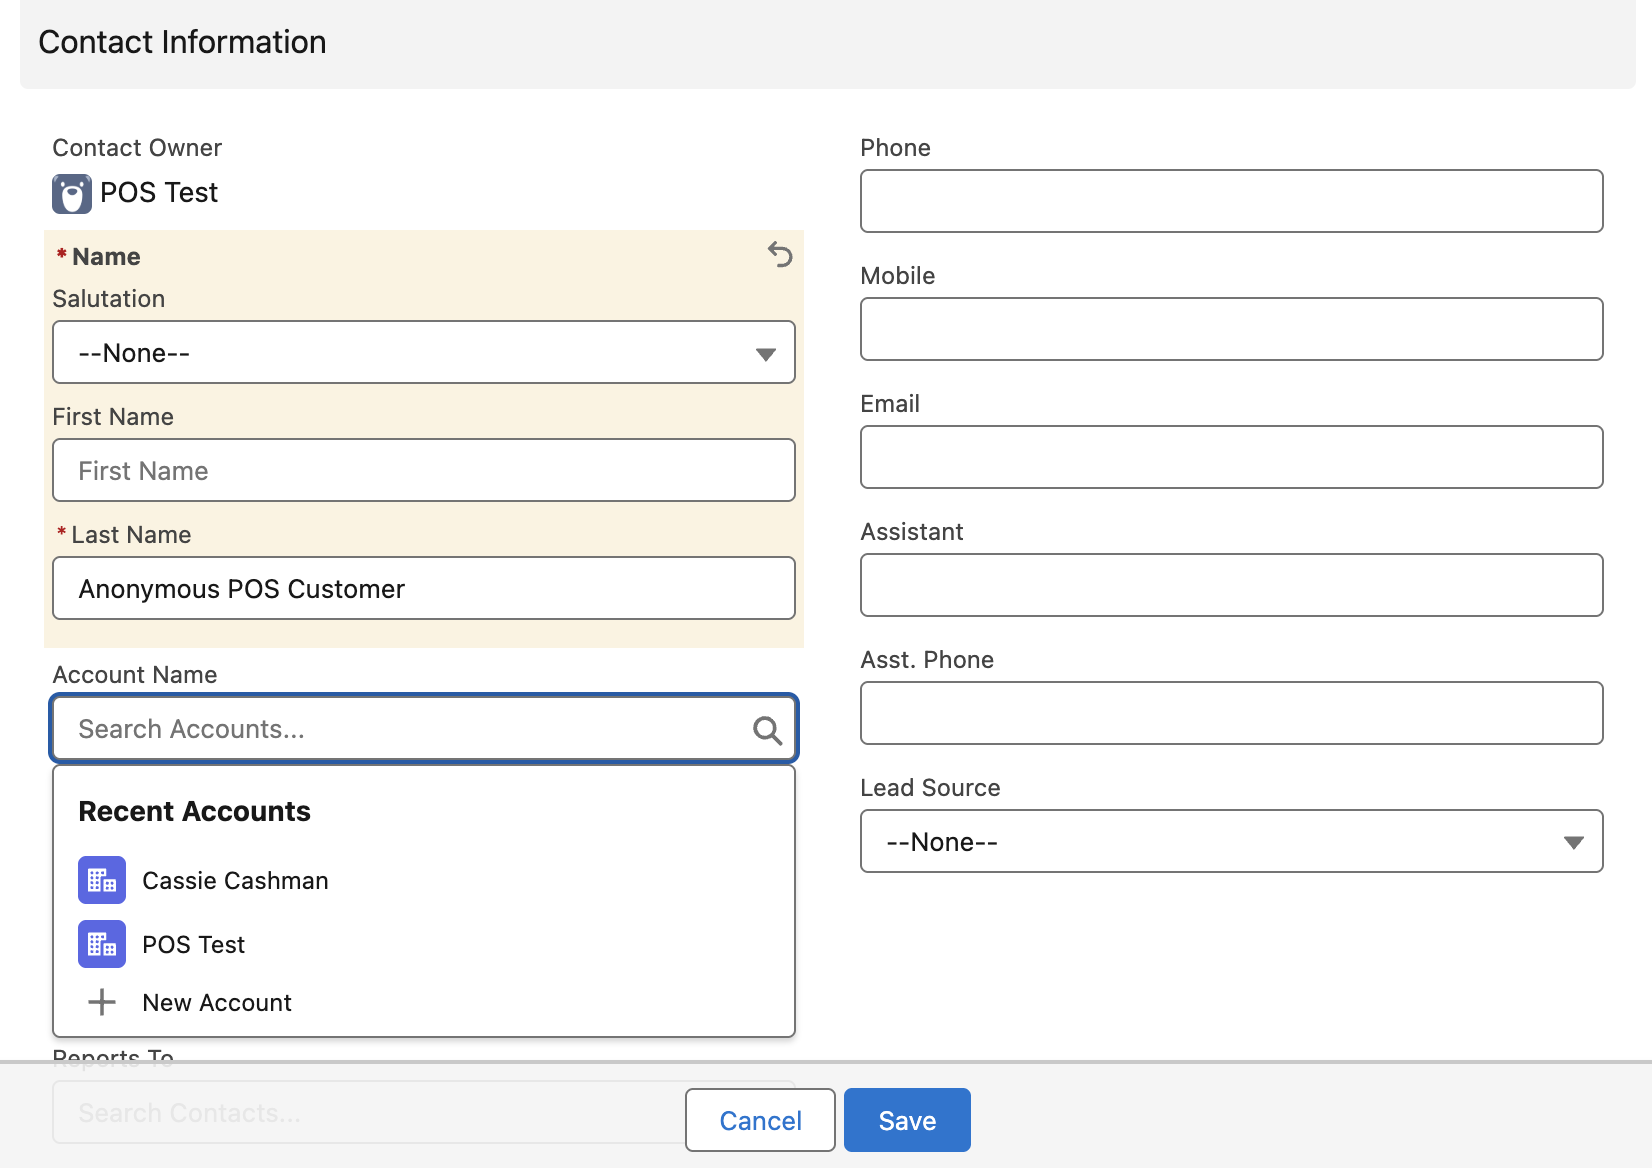
- Enter a Last Name for your anonymous contact, something like Anonymous POS Customer.
- In the Account Name field, select + New Account. The New Account window opens.
- Enter Anonymous POS Customer in the Account Name field.
- Select Save. This saves the new account.
- Select Save. This saves the new contact.
- Select Save. This saves the new outlet.
You can now select the anonymous account to process purchases at POS, and all transactions will appear against this account.
Optional outlet fields
In addition to the fields above, the Outlet record includes several optional fields that you can populate in Salesforce:
| Field | Description |
|---|---|
| Address Line 1 | Physical street address of the outlet |
| Address Line 2 | Additional address detail |
| City | Outlet city |
| State/Province | Outlet state or province |
| Zip/Postal Code | Outlet postcode |
| Country | Links to a Country record |
| Phone | Phone number for this outlet |
| Tax Number | Tax identifier for the outlet (e.g. ABN, GST number) |
| Quicklist Product Category | The product category displayed on the POS main screen for registers at this outlet |
For a complete field reference including API names, see Outlet Object Reference.