Create multiple storefronts with StoreConnect
On this page
Multiple storefronts are a great way to pinpoint a specific product line, group, or customer base in a specific geographic location. StoreConnect comes with the ability to create multiple storefronts to achieve just that in a few simple steps. The amount of included stores included with the StoreConnect license depends on the license tier, which is listed in the ‘Site Performance & Usage Limits’ section of our pricing guide listed here.
In this guide, we will move through the steps to clone a second store from the ‘StoreConnect’ store, which is installed with a StoreConnect trial.
Outcome of following this guide
After completing the steps in this guide we will have the following:
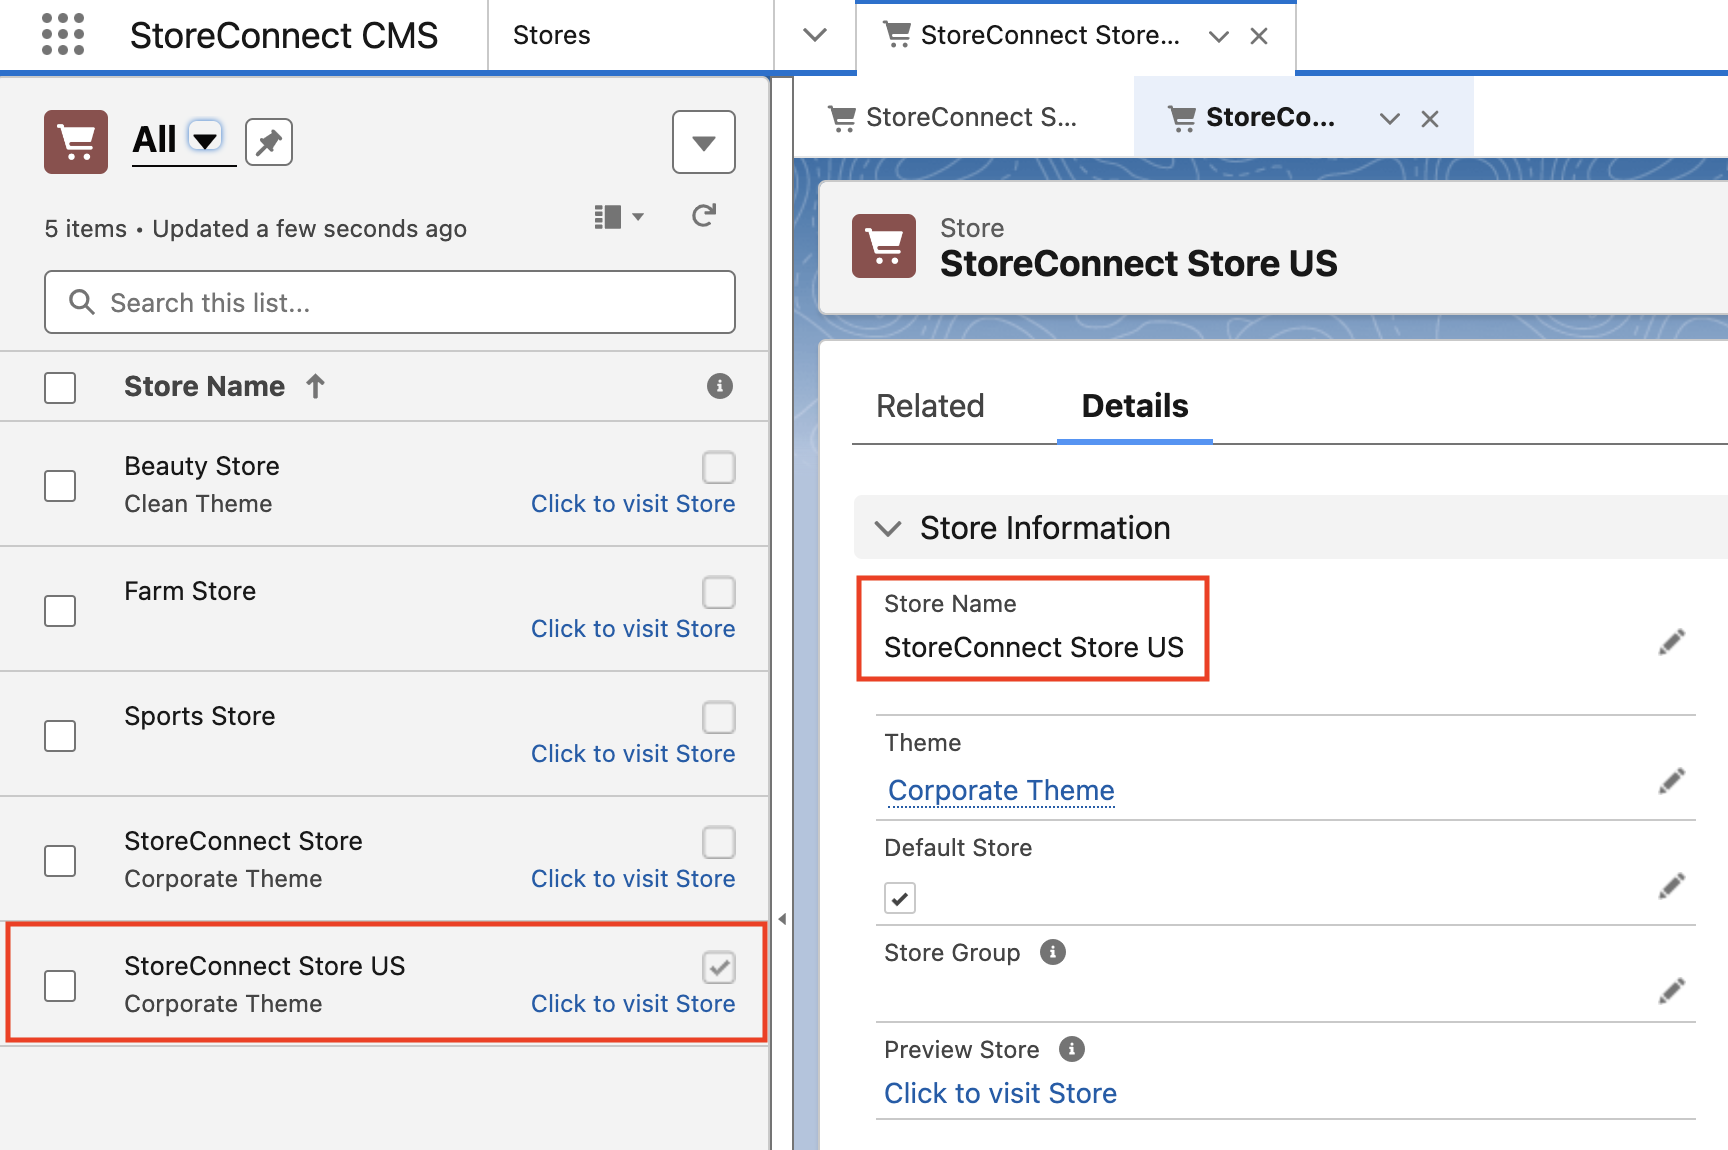
1. A new store based on the existing ‘StoreConnect Store’ named ‘StoreConnect Store US’
2. This separate store that has its own path which will be ‘us’
3. The new store will have its own taxonomy named ‘SC - US Store Taxonomy’
4. The new store will have a separate product category named ‘Insurance’ with a select series of insurance-based products entered for this category
5. We will have separate price book for these products with a 10% price increase for the selected products
6. The new store will operate in a separate currency (USD)
7. The new store will have a ‘Pay Later’ payment option for checkout
What is a taxonomy?: In an e-commerce store, a ‘taxonomy’ refers to the structured classification and organization of products into categories and subcategories. This system helps customers navigate the store, find products easily, and understand the relationships between different items offered in specific storefront.
1. Create/clone a new store record
- Open Salesforce and navigate to the StoreConnect CMS app. Select ‘Stores’ from the dropdown and click a store. For the purposes of this guide, we will use the ‘StoreConnect Store’, which installs with a StoreConnect trial.
- From the StoreConnect CMS app, select ‘stores’
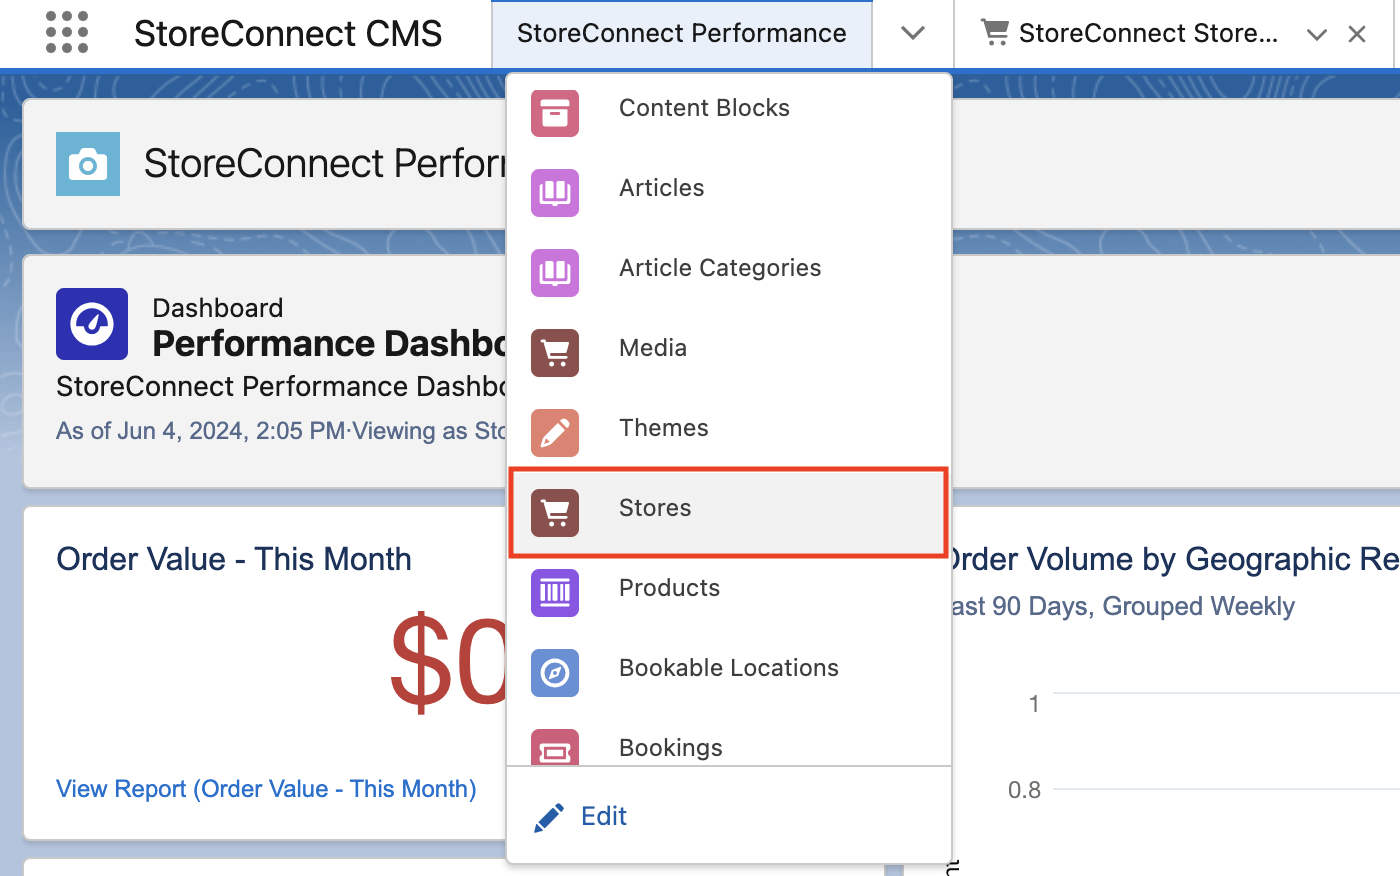
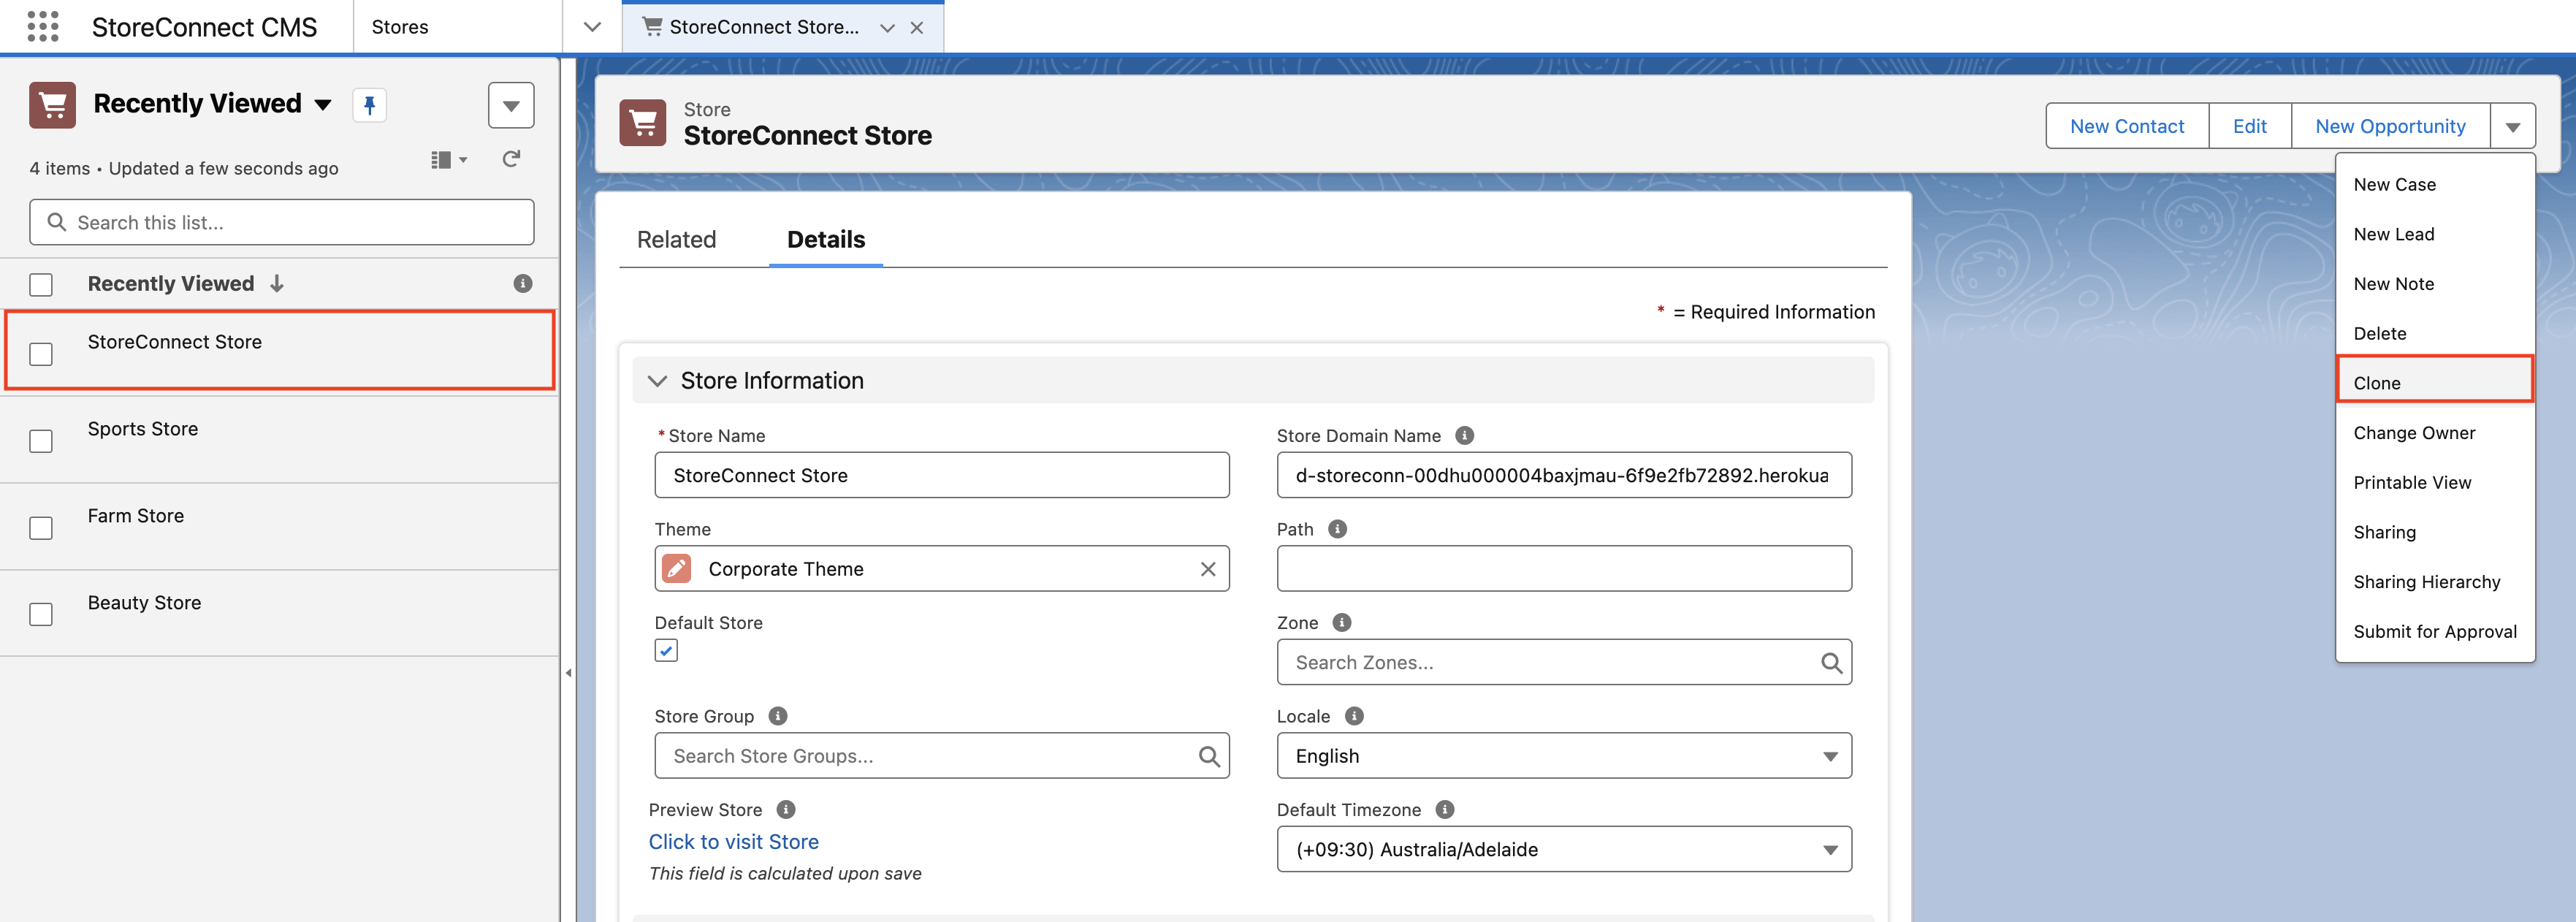
- Select the ‘StoreConnect Store’. For simplicity, we will clone and adapt this store record for our new store.
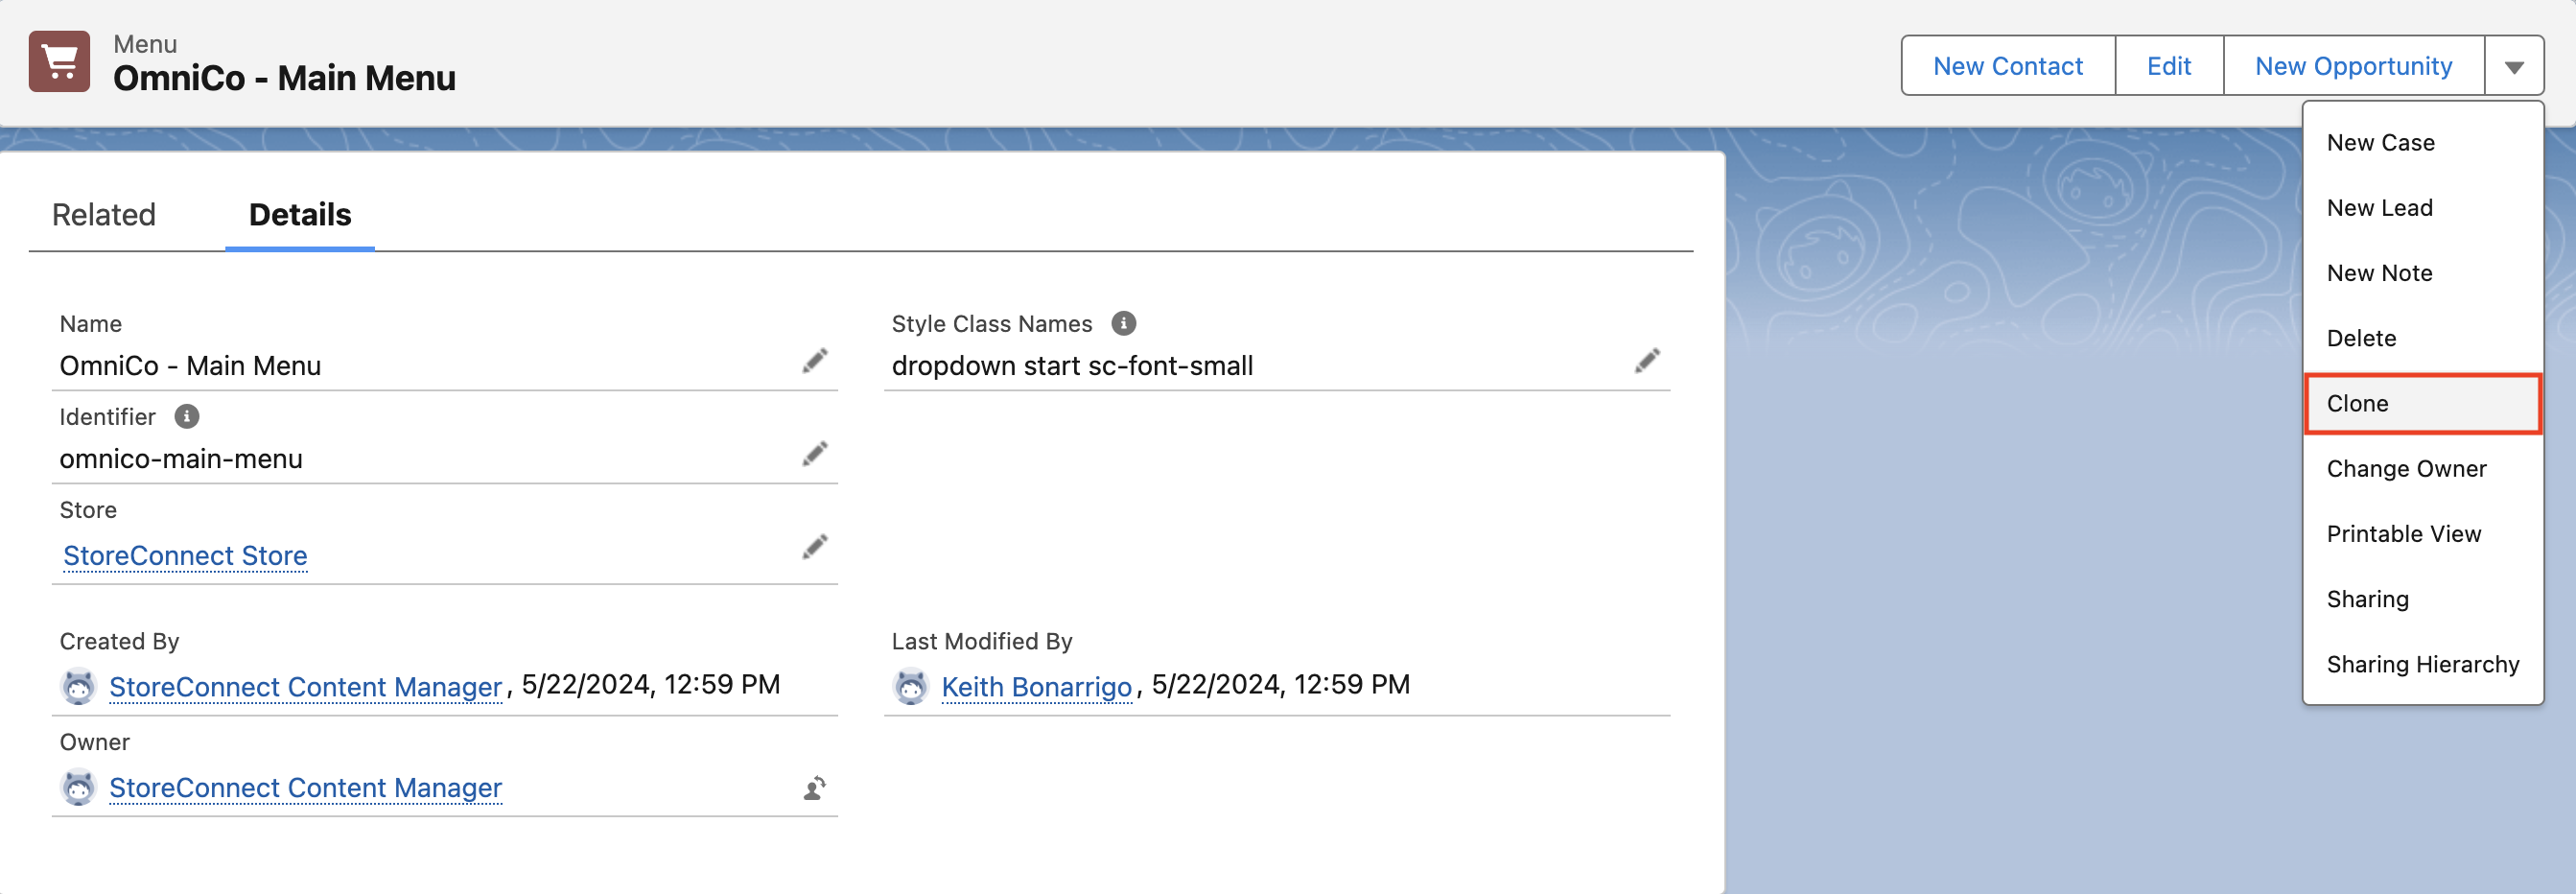
- From the ‘StoreConnect Store’ record page, click ‘Clone’ on the right.
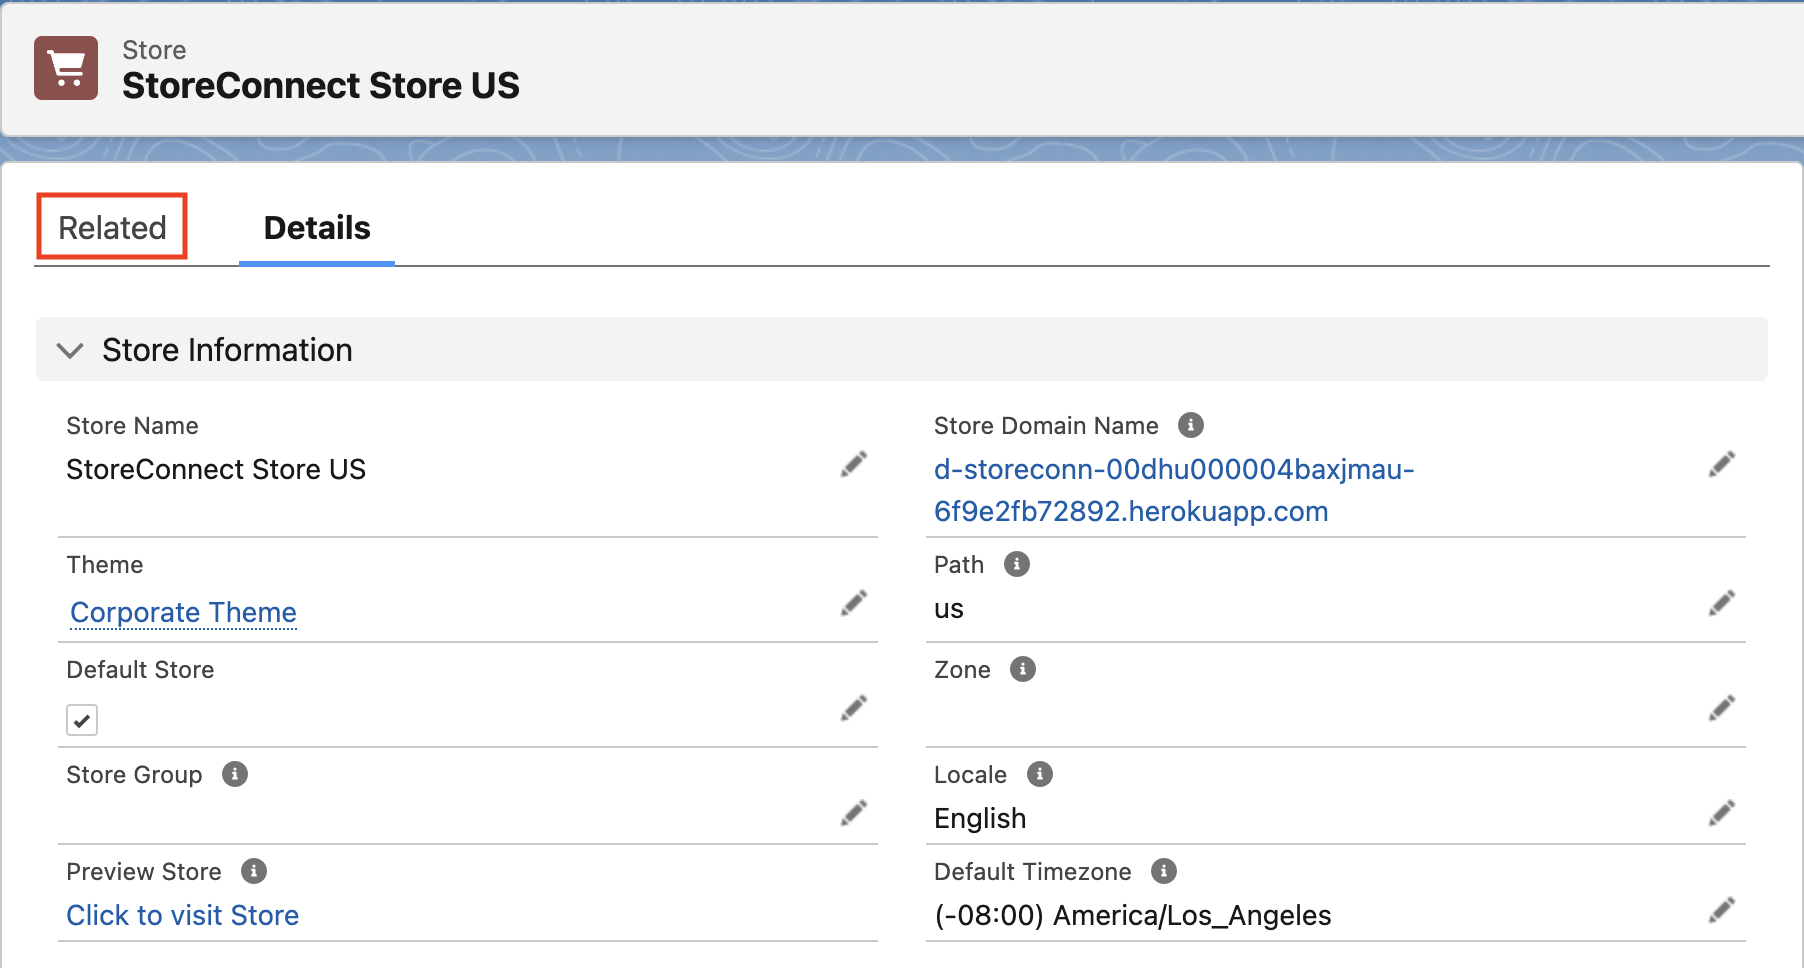
- Add the name of the new store. We will add ‘StoreConnect Store US’ to the
Store Namefield - Change the store path. We will use ‘us’ in the
Pathfield - Change the timezone. We will use ‘GMT-8 America/Los Angeles’ in the
Default Timezonefield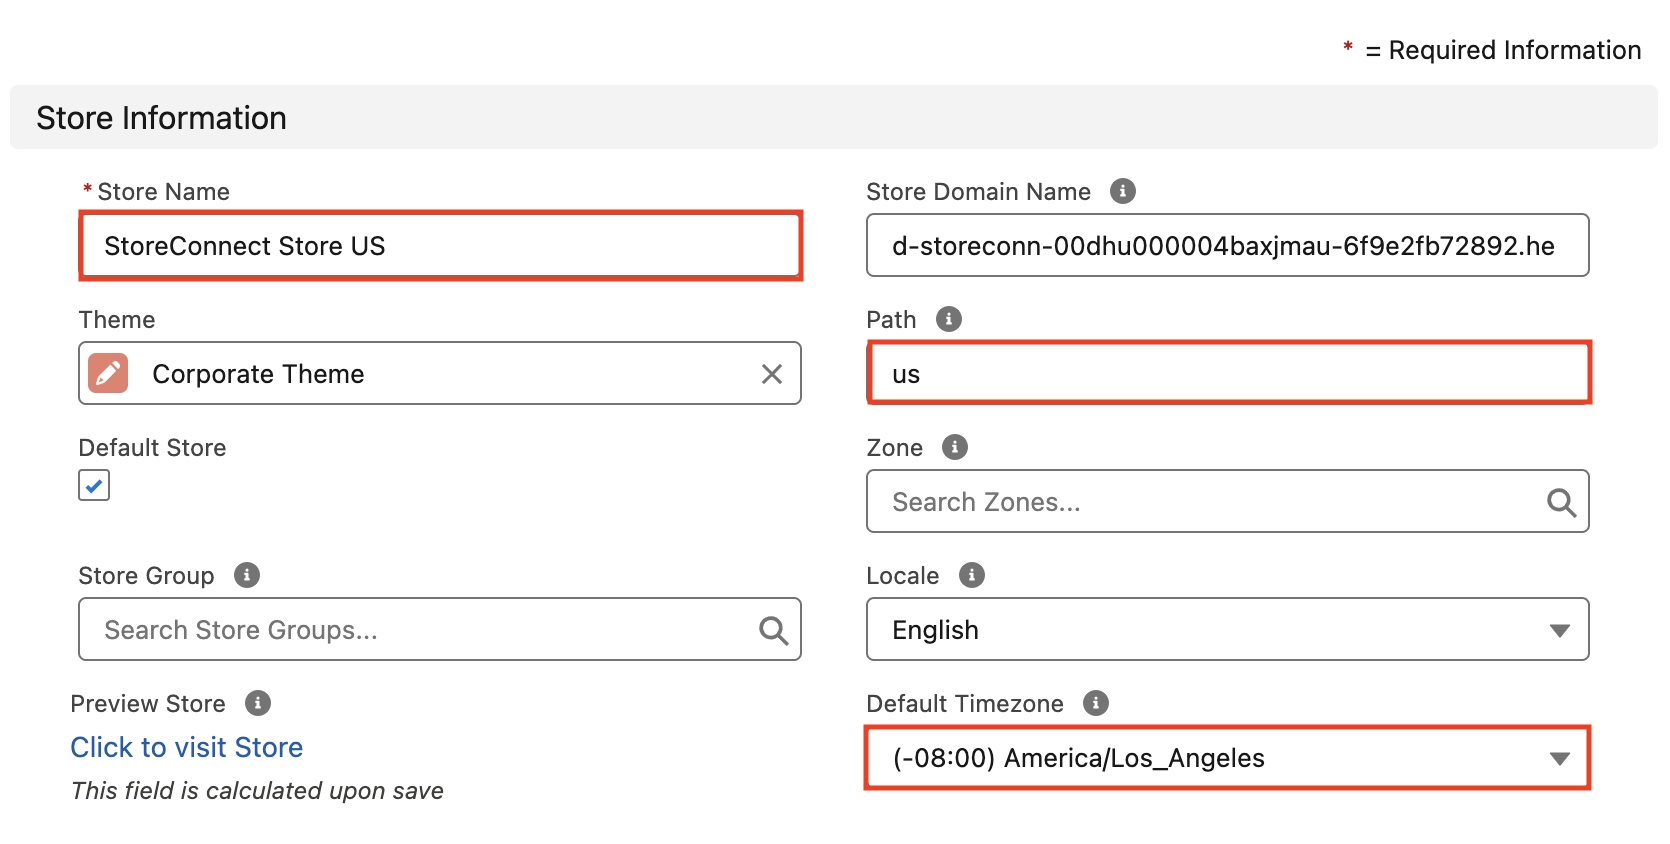
- Change the currency for the new store. Select ‘USD’ in the
Currencyfield in the ‘Currency section below these initial values.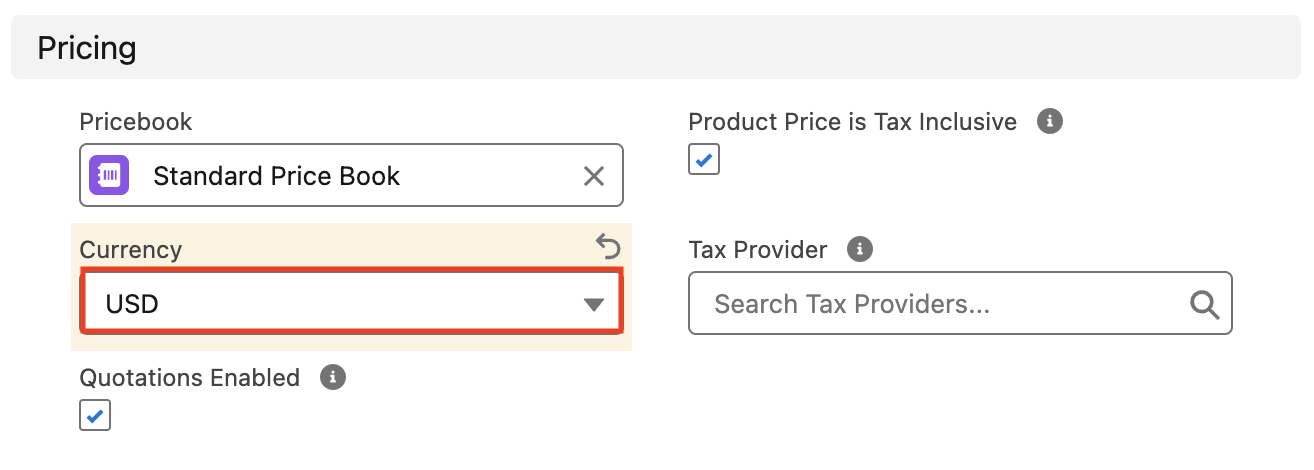
- Once completed, the new store record will show with the other stores.
This store will have many of the same preset features like home page, terms and conditions page, and menu. These can be altered later.
2. Create a payment option for the new store
- Select the ‘StoreConnect Store’, select the related list tab.
- Navigate to ‘Payment Providers’ and select ‘New’.
- Select ‘Pay Later Option’.
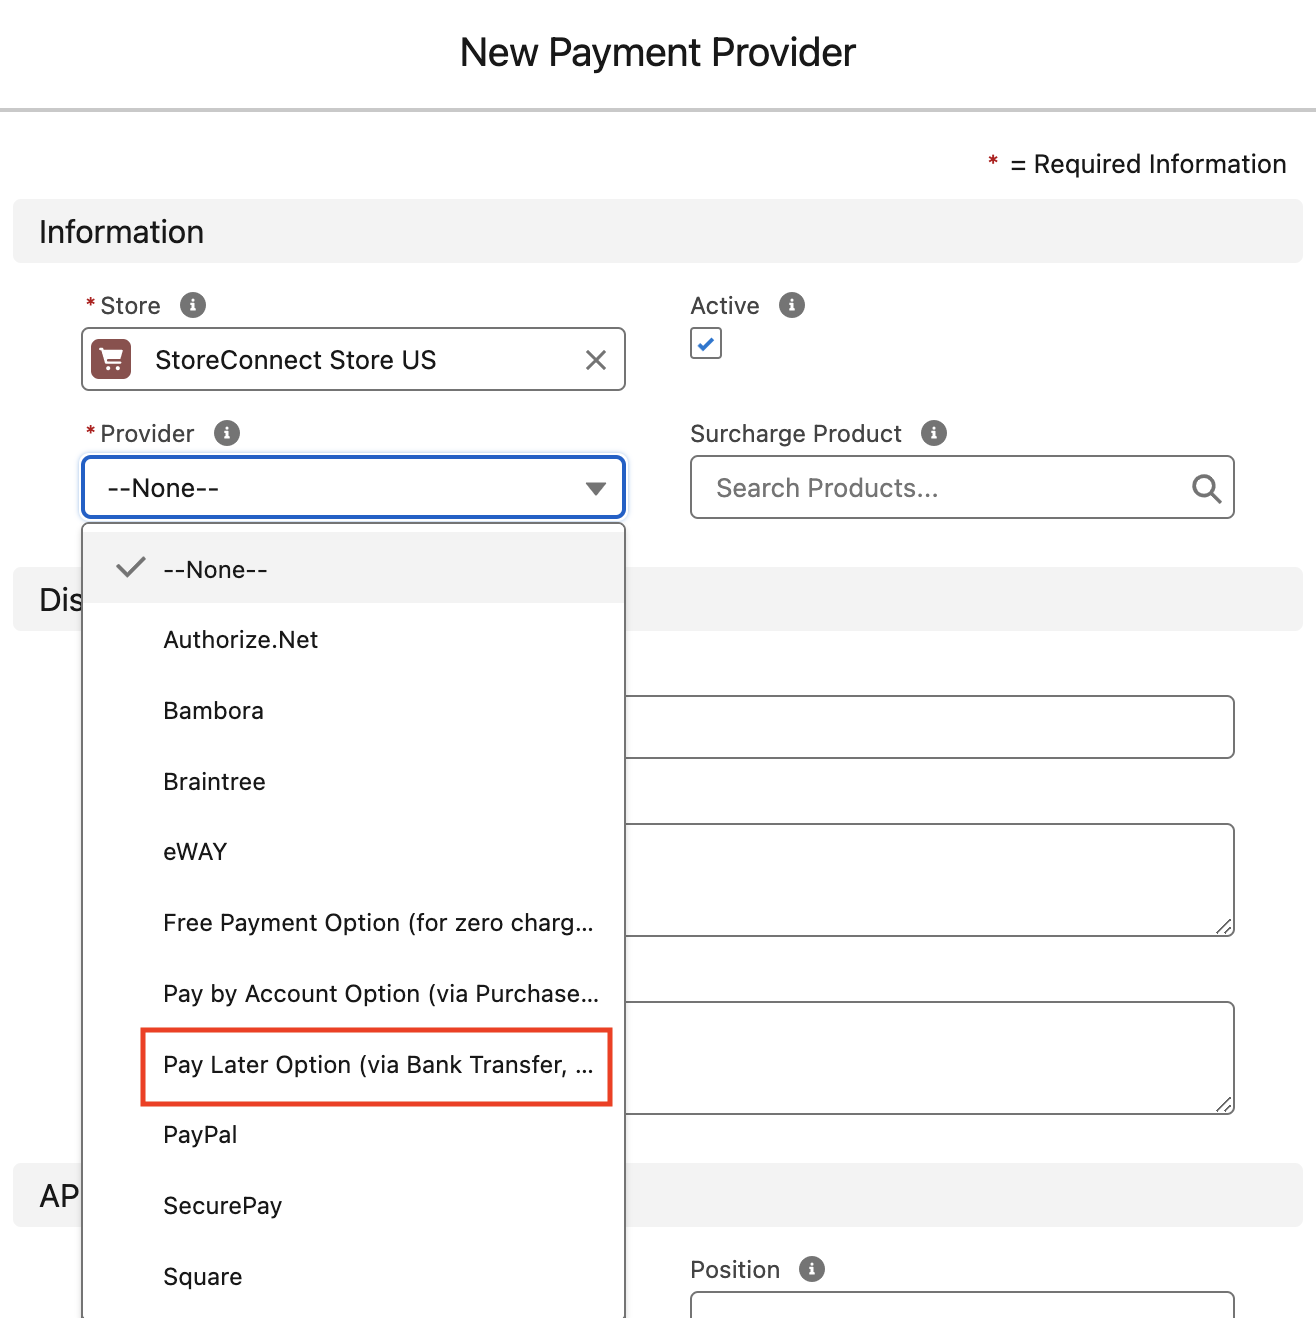
- Ensure that the
Activecheckbox is enabled.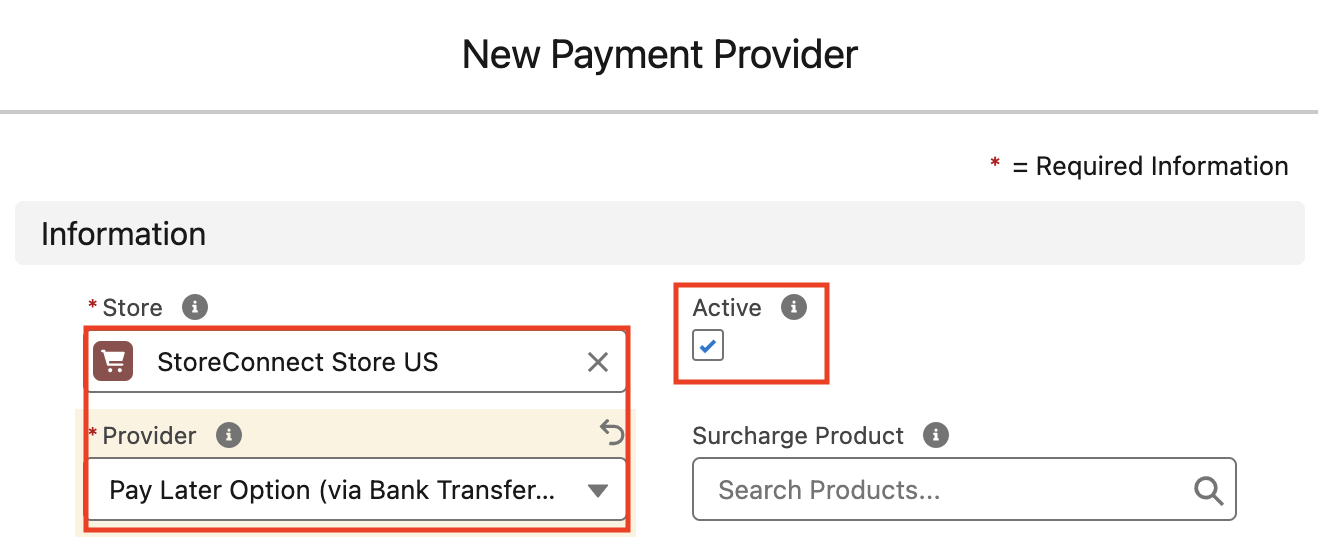
- Add ‘x’ for the
API Modefield and ‘x’ for theAPI Secretfield.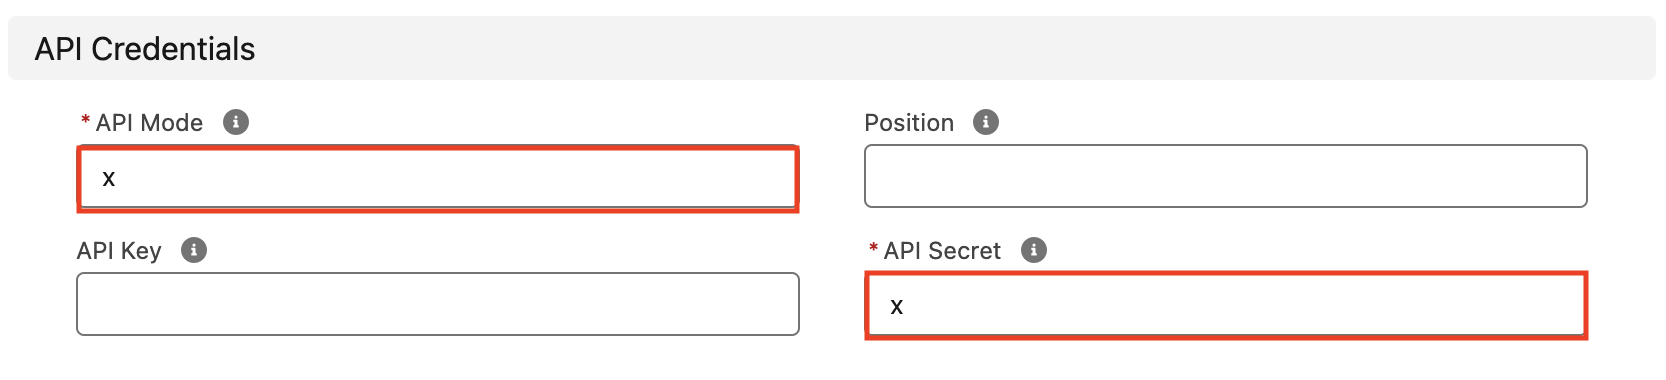
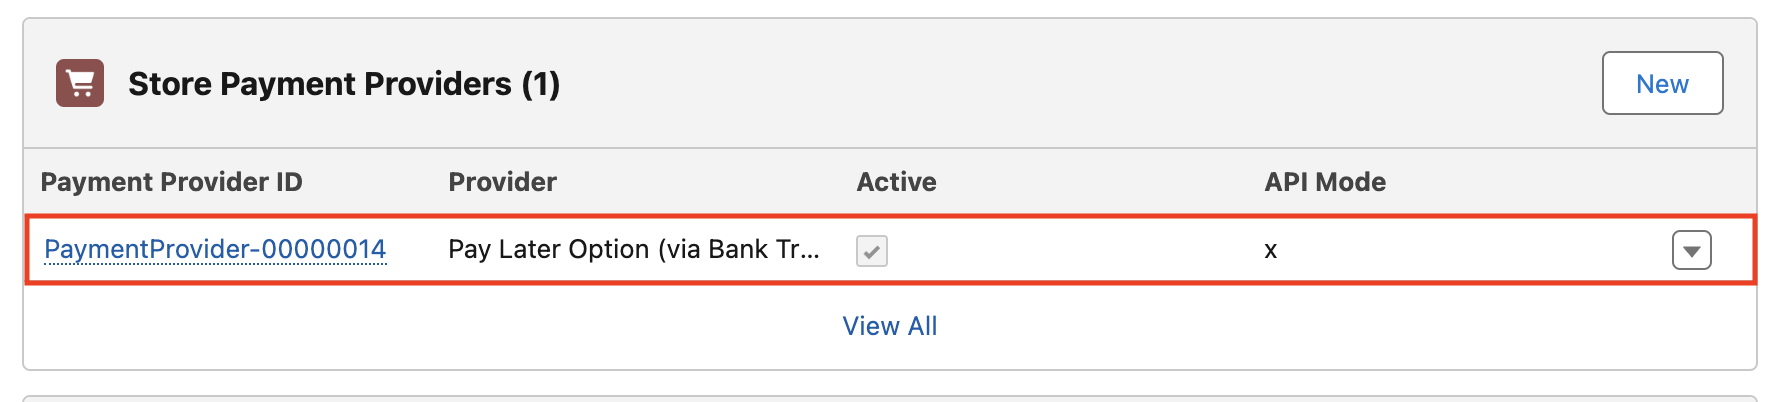
- Click ‘Save’. The new payment provider will appear in the Store record related list and will be available as a checkout option.
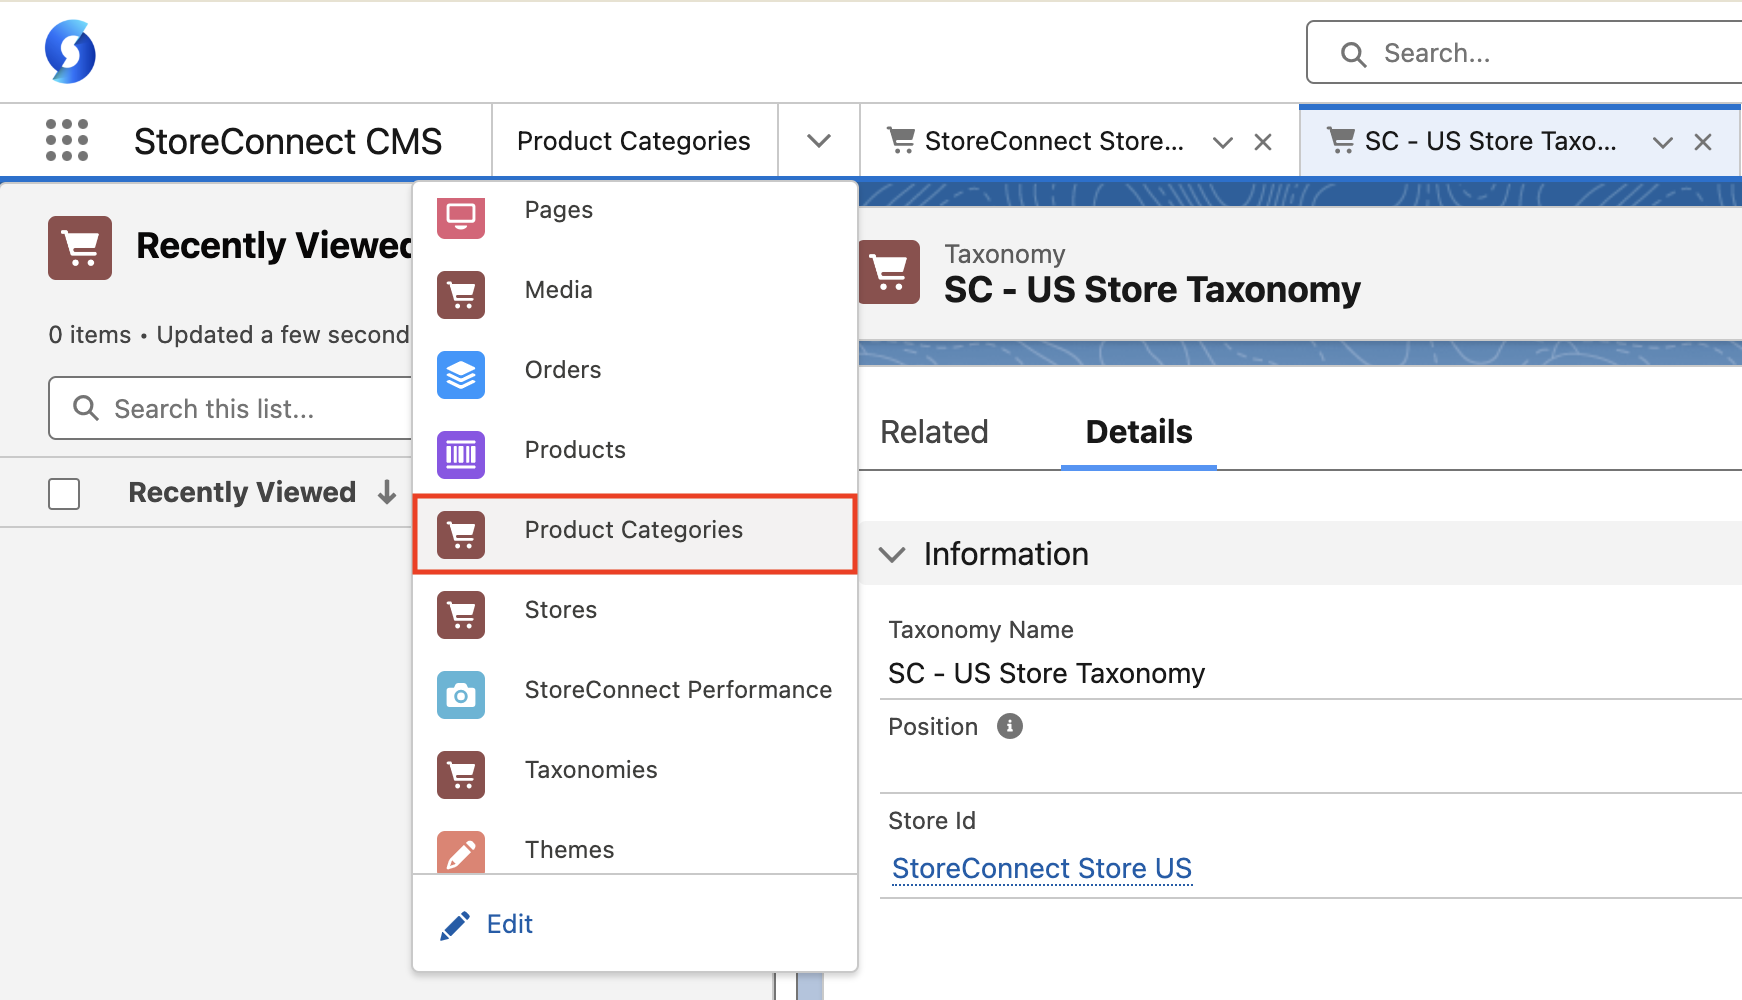
3. Add new taxonomy taxonomy for the store
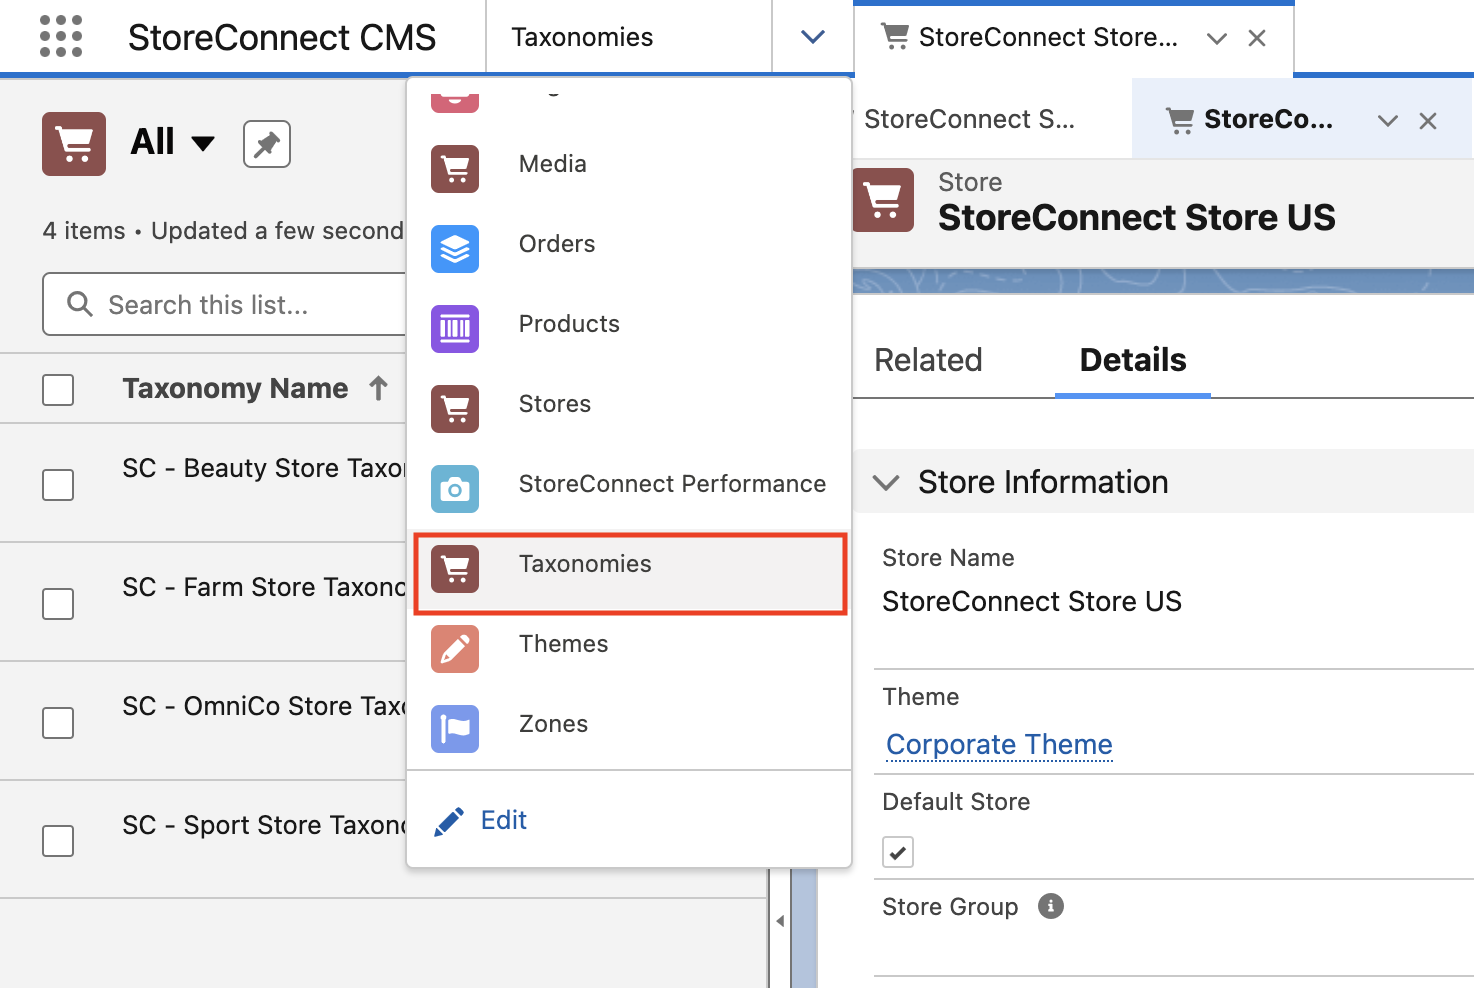
1. Select ‘taxonomies from the dropdown in the StoreConnect CMS app
2. Select ‘New’ from the button on the right

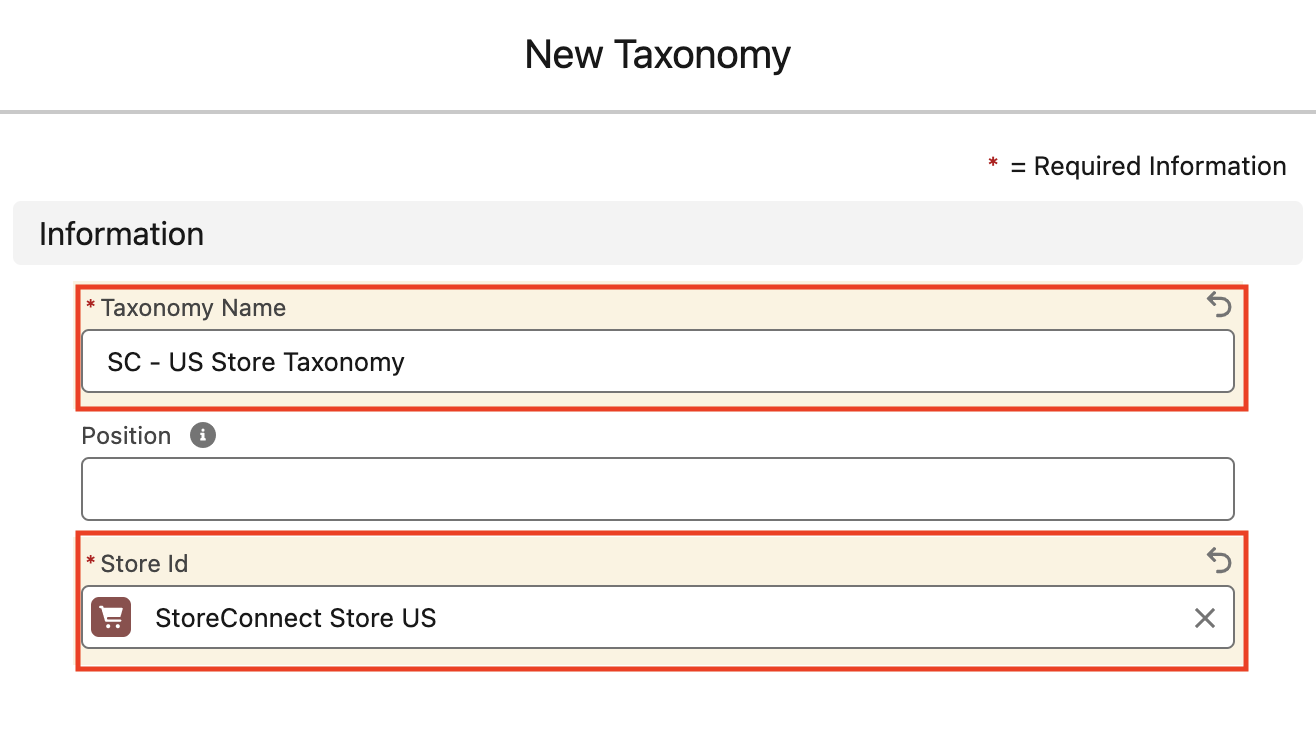
3. We will enter ‘SC - US Store Taxonomy’ for the name of our new taxonomy in the Taxonomy Name field
4. Ensure that the correct store is selected - the new store we just cloned is named ‘StoreConnect Store US’ so we will select that value in theStore Id field to associate this taxonomy to this new store.
5. Click ‘Save’
4. Create a new price book for the new store
1. Select ‘Price Books’ from the dropdown in the ‘StoreConnect CMS’ app.
2. Click on the ‘Standard PriceBook’ in the record listings
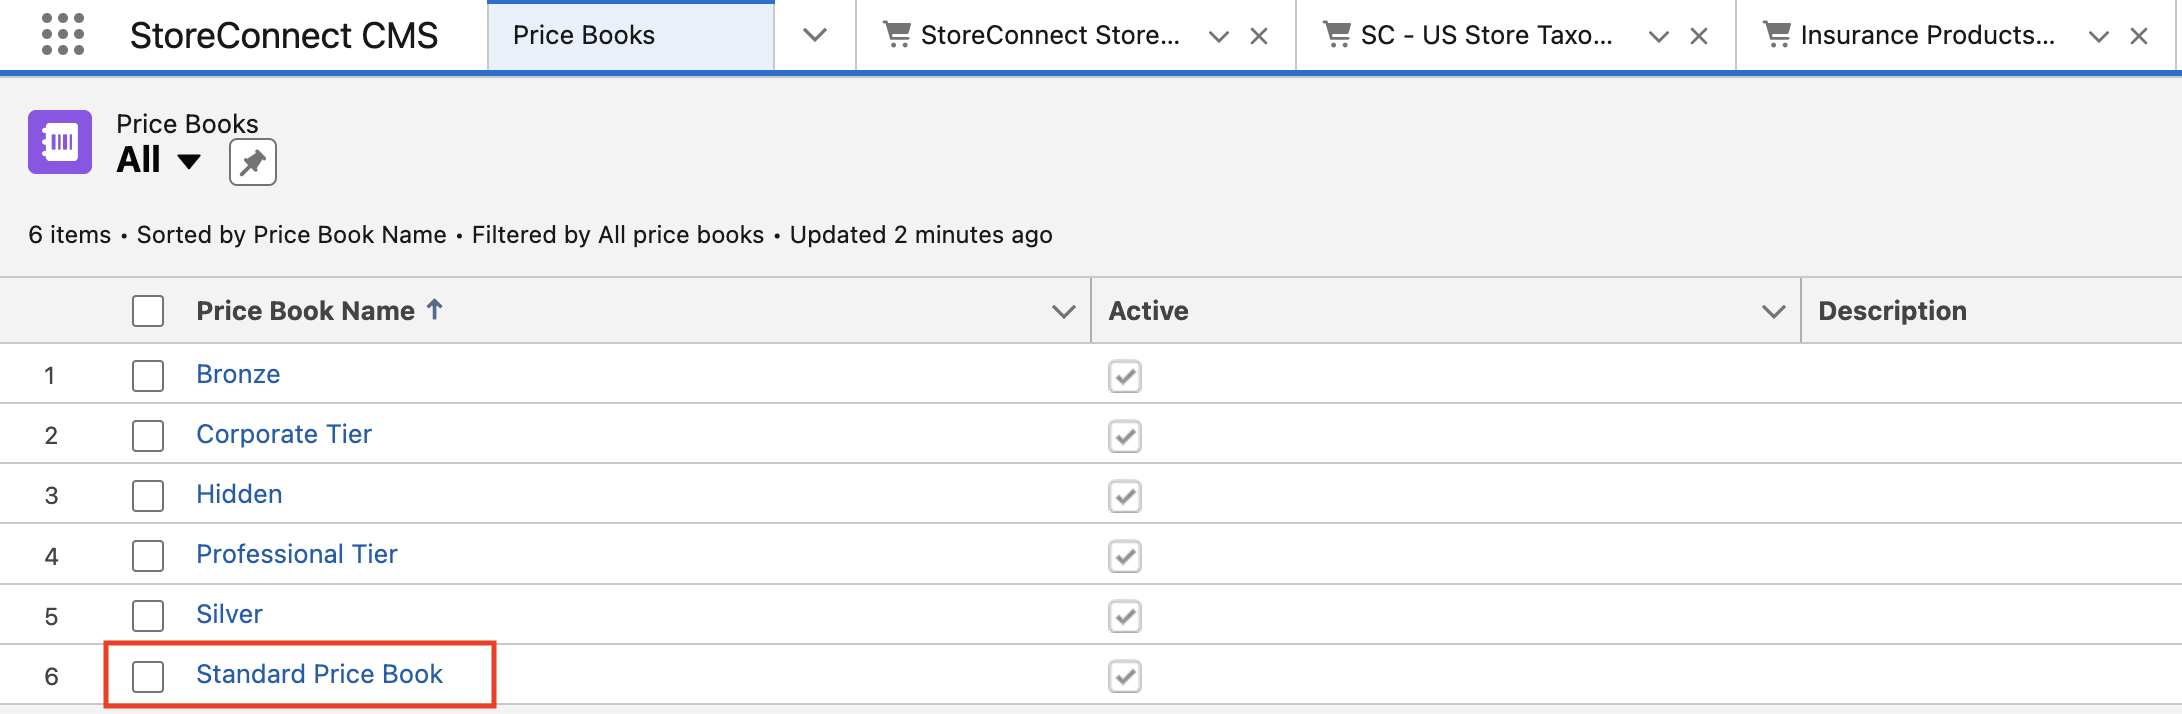
3. From the ‘Standard Price Book’ record page click ‘Clone’ in the upper right
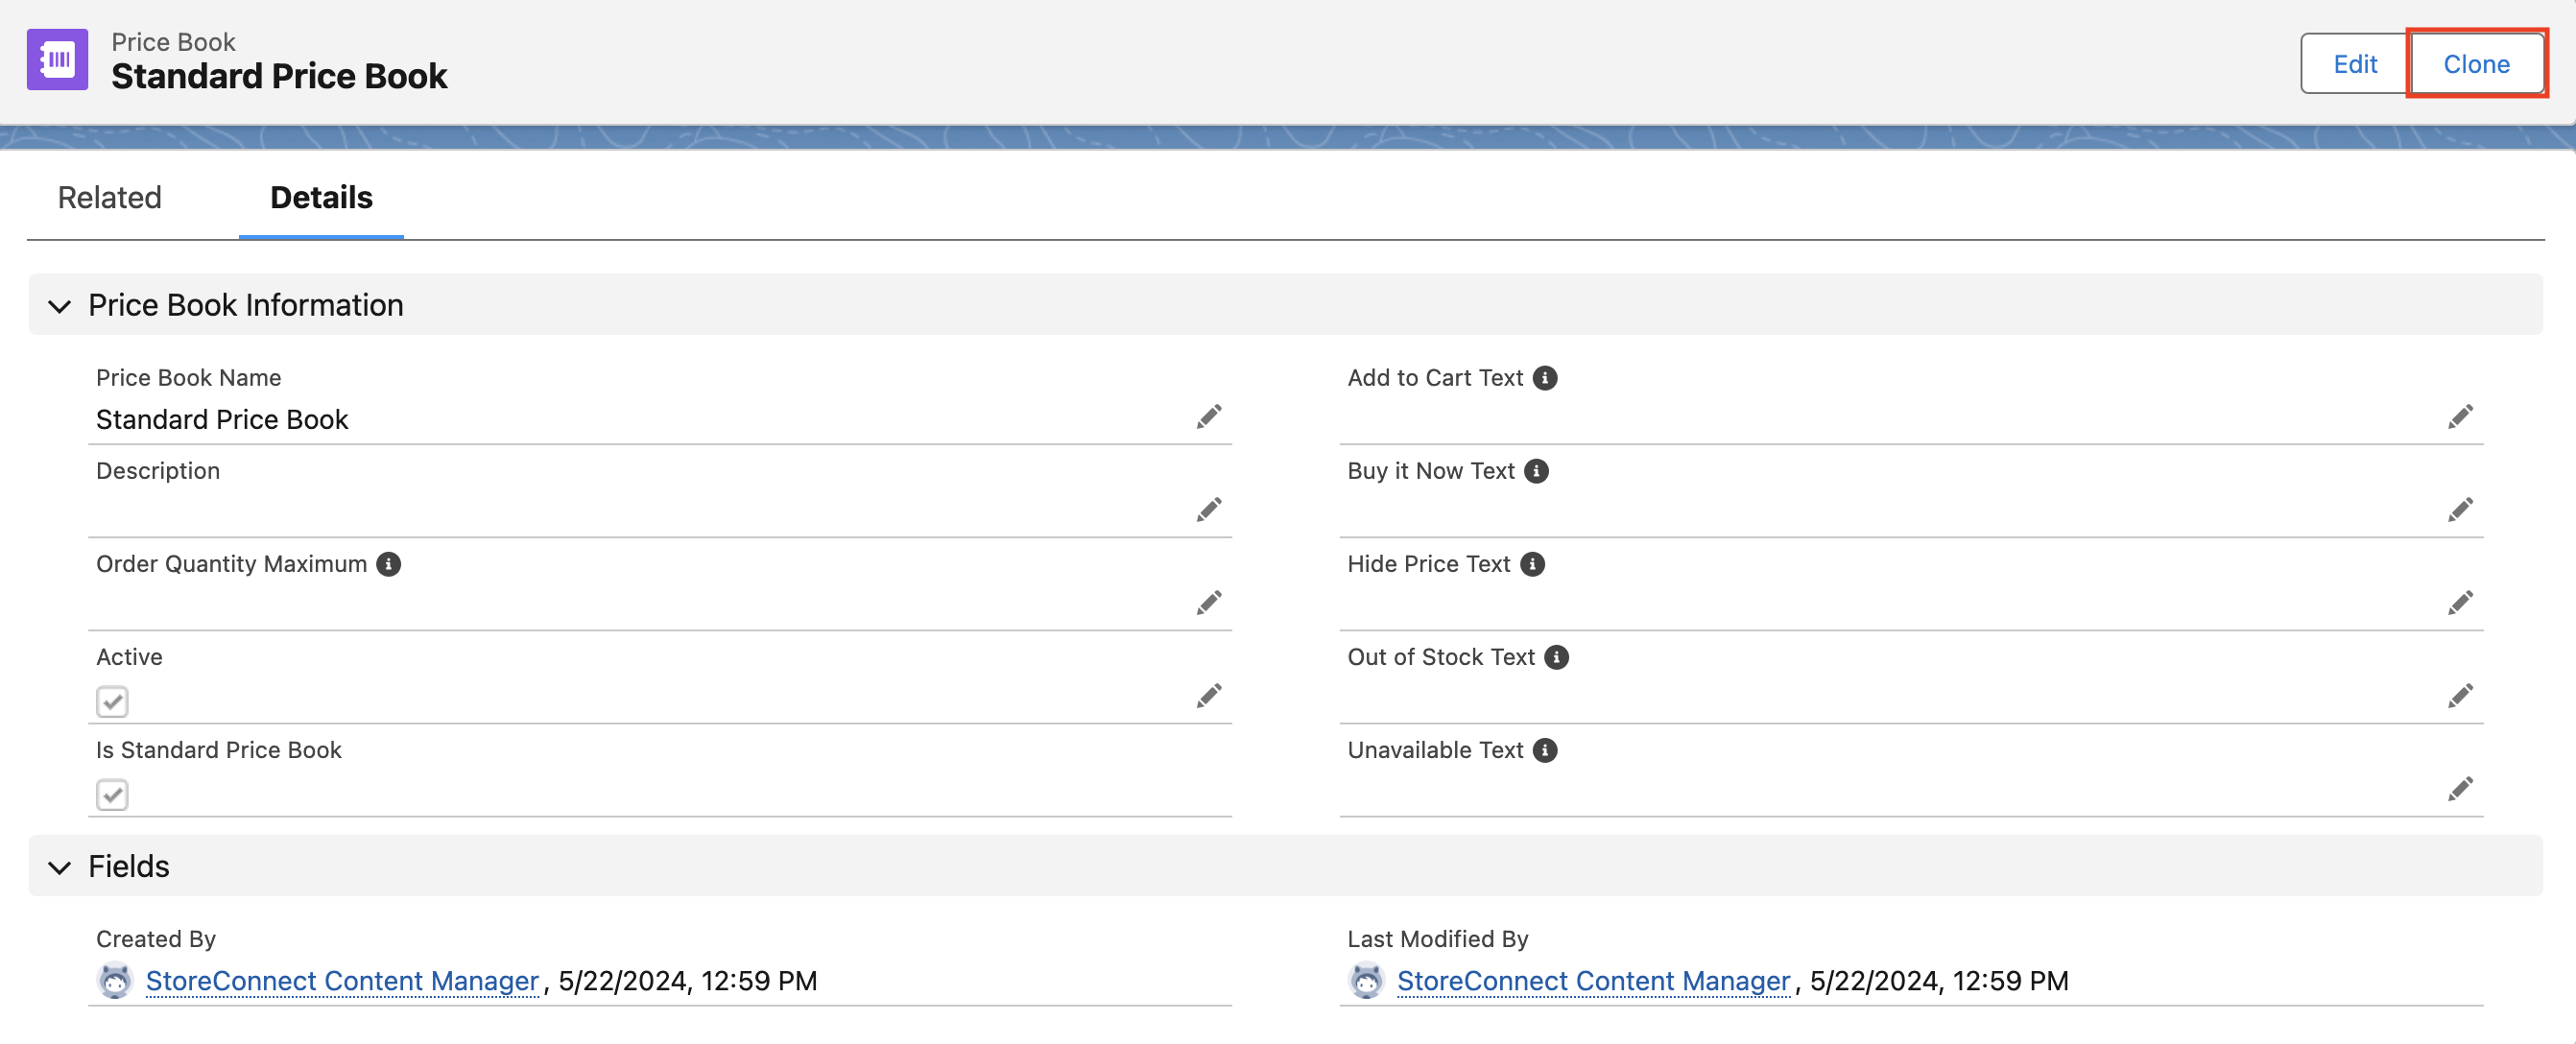
4. Add a new name for this price book. We will enter ‘US Standard Price Book’ in the Price Book Name field
5. Ensure that the Active checkbox is enabled

5. Add the new price book to the new store
1. Click the ‘Stores’ record from the dropdown in the ‘StoreConnect CMS’ app and select ‘StoreConnect Store US’
2. Navigate to the ‘Pricing’ section of the store record
3. Select ‘US Standard Price Book’ in the Pricebook field and click ‘Edit’ in the right dropdown
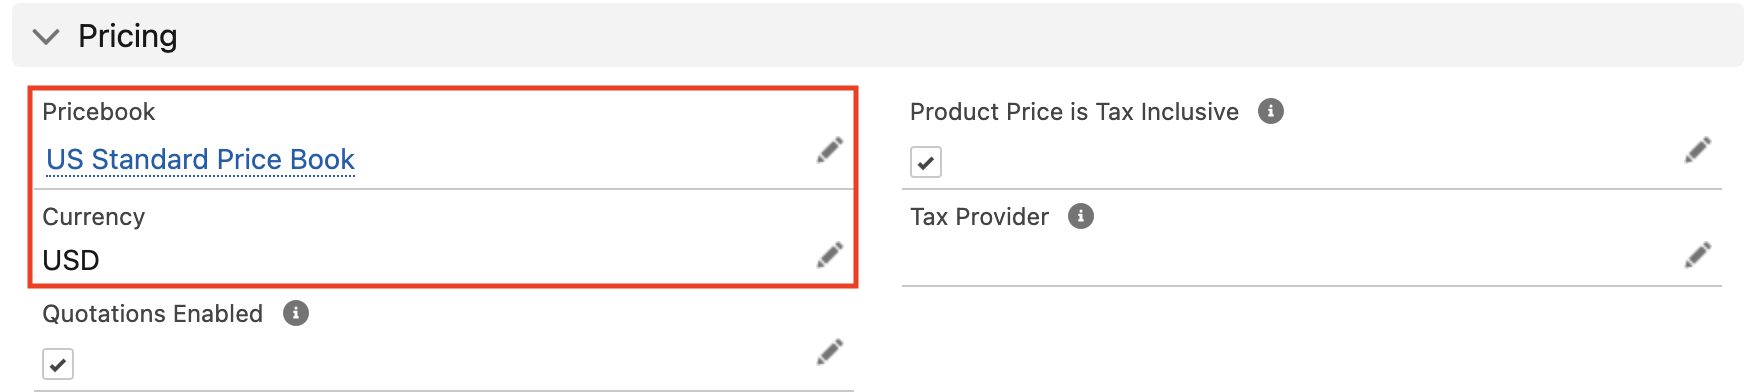
4. Click ‘Save’ to associate the new price book to the new store
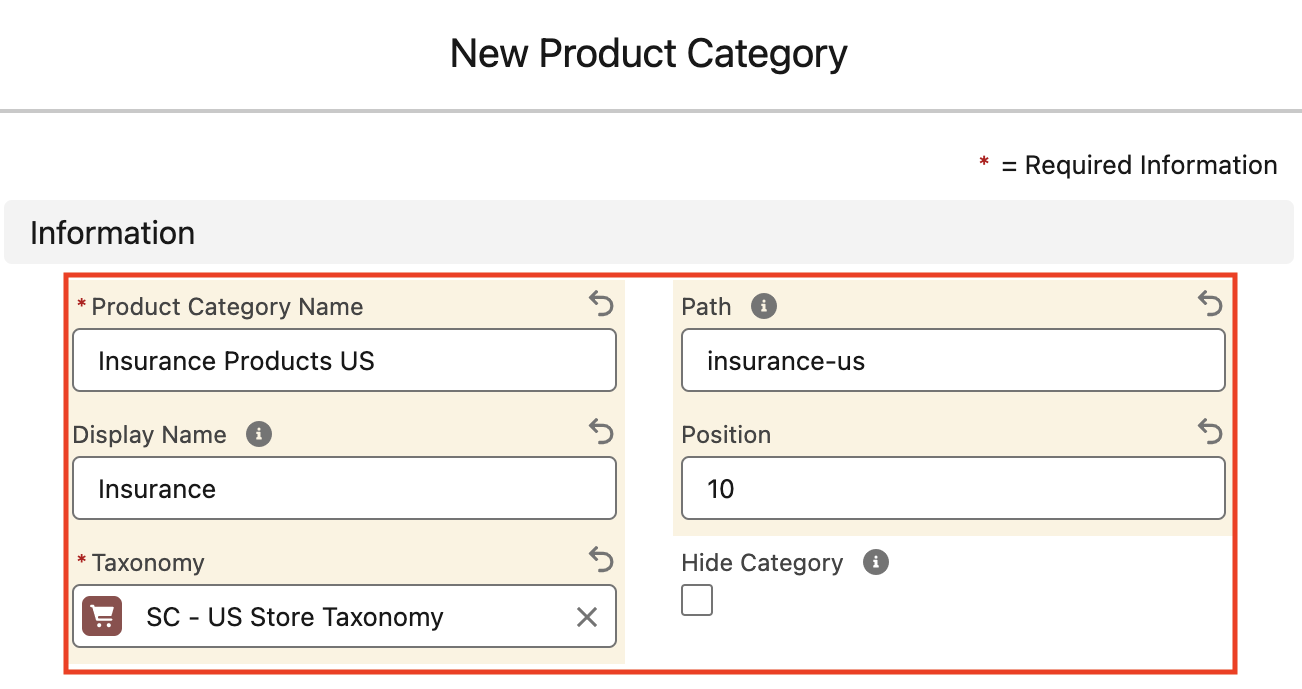
6. Add new product categories for our new store
We will use the pre-installed insurance products as the showcase in our new store so we will create a new product category for them
1. Select ‘Product Categories’ from dropdown in the StoreConnect CMS app.
2. Click ‘New’ on the upper right

3. We will add ‘Insurance Products US’ in the Product Category Name field. This is what we will see in the back-end of Salesforce
4. We will add ‘Insurance’ in the Display Name field. This is what will show on the StoreConnect storefront
5. Ensure that the ‘SC - US Store Taxonomy’ is selected for the Taxonomy field, as this is the taxonomy that applies to our new store
6. We will add ‘insurance-us’ in the Path field
7. Will add ‘10’ in the Position field. This number will determine how this category orders in its display relative to other products categories that may be added
8. We want this category to appear in our new store, so we will ensure that Hide Category is not enabled
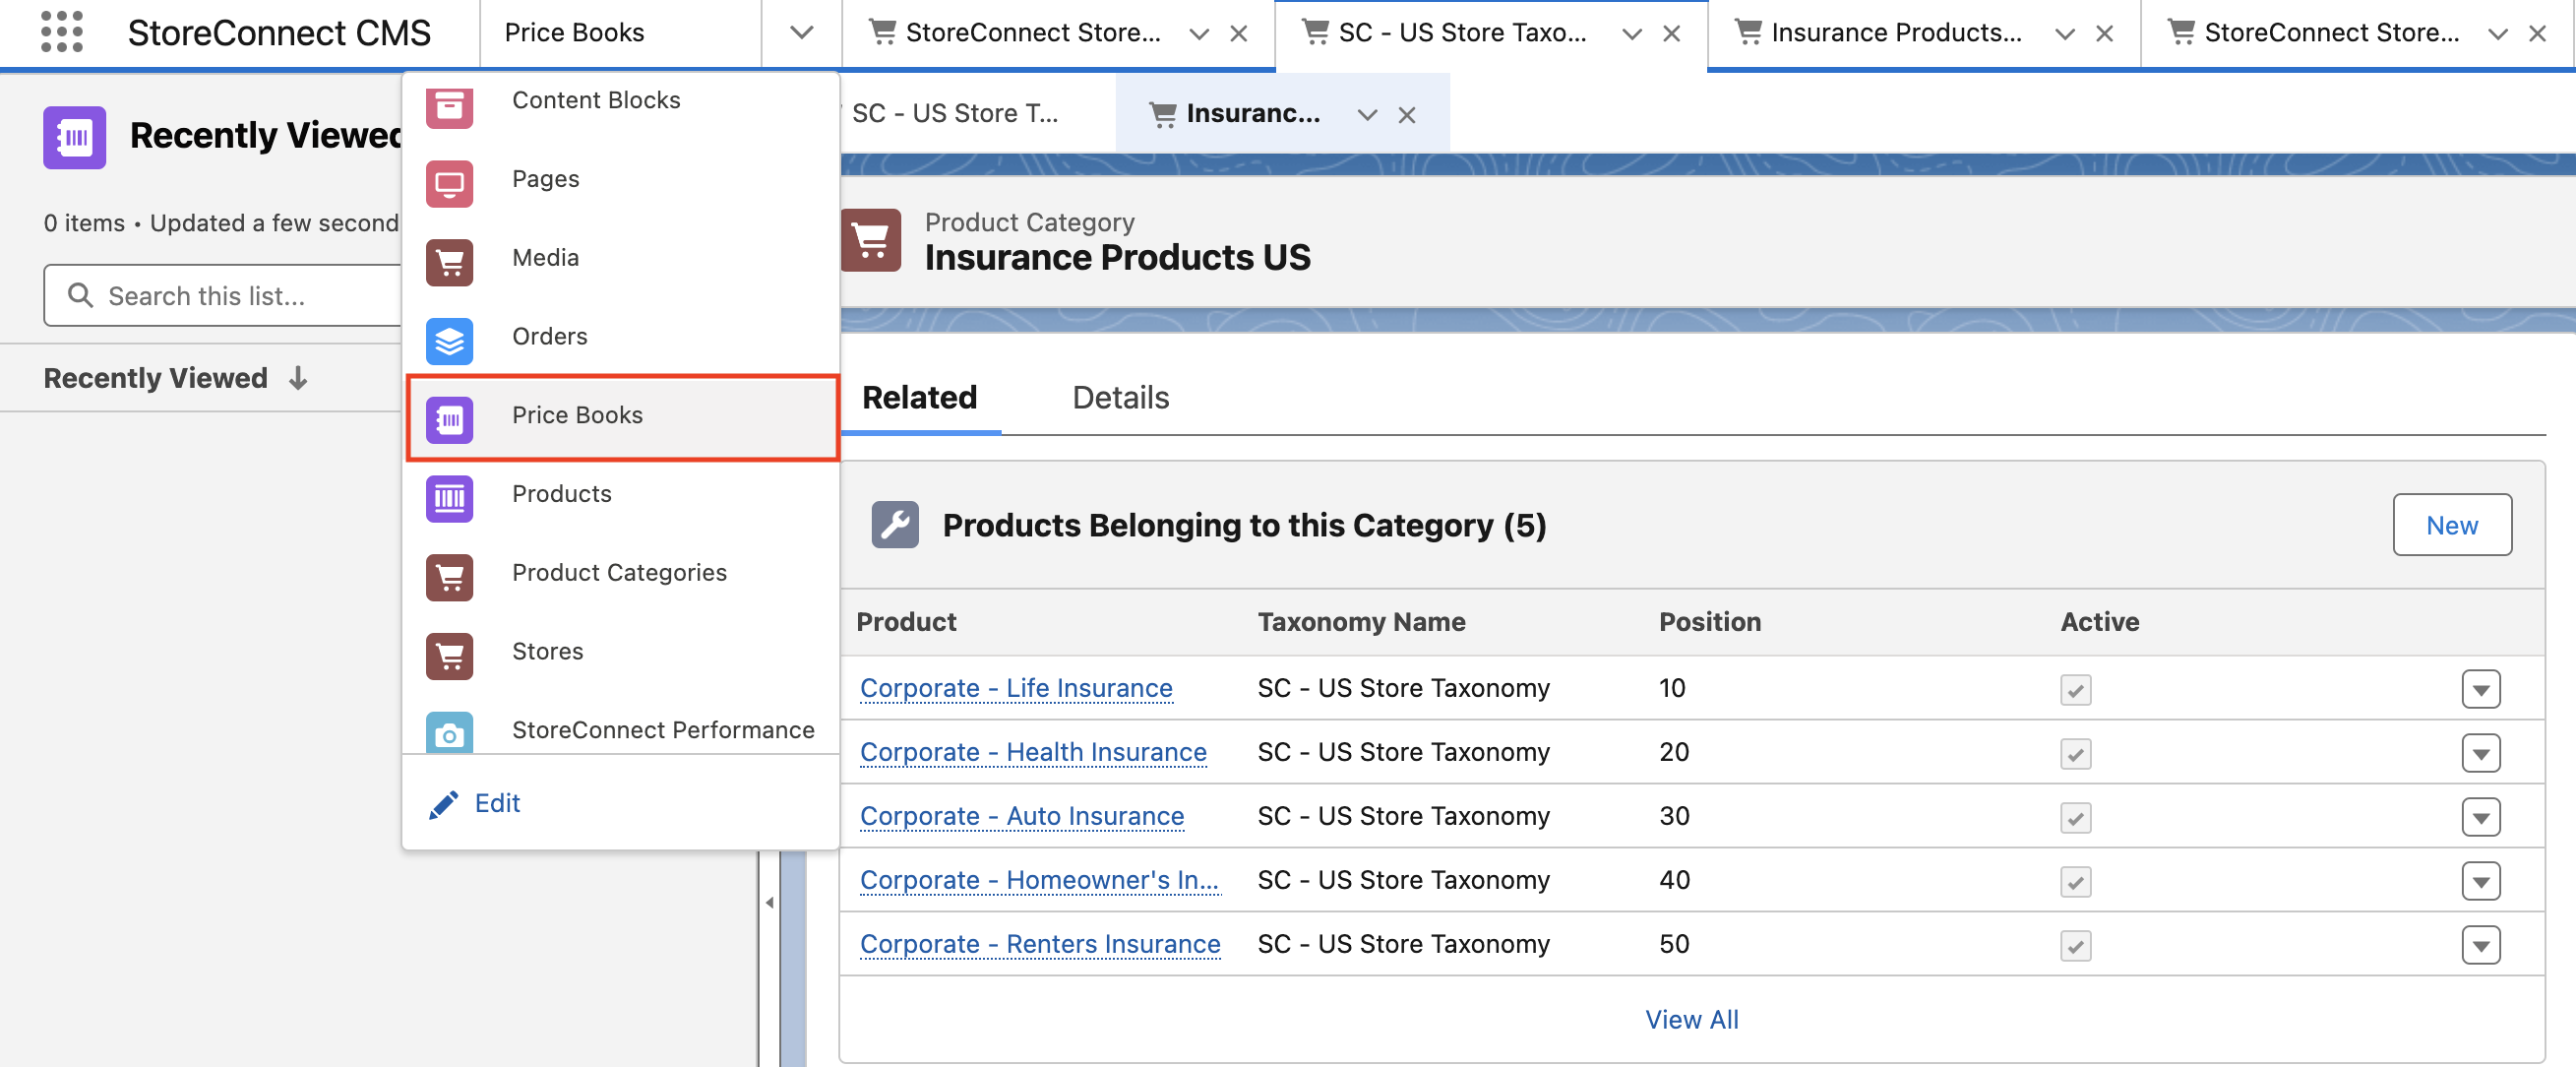
7. Add products to the new product category
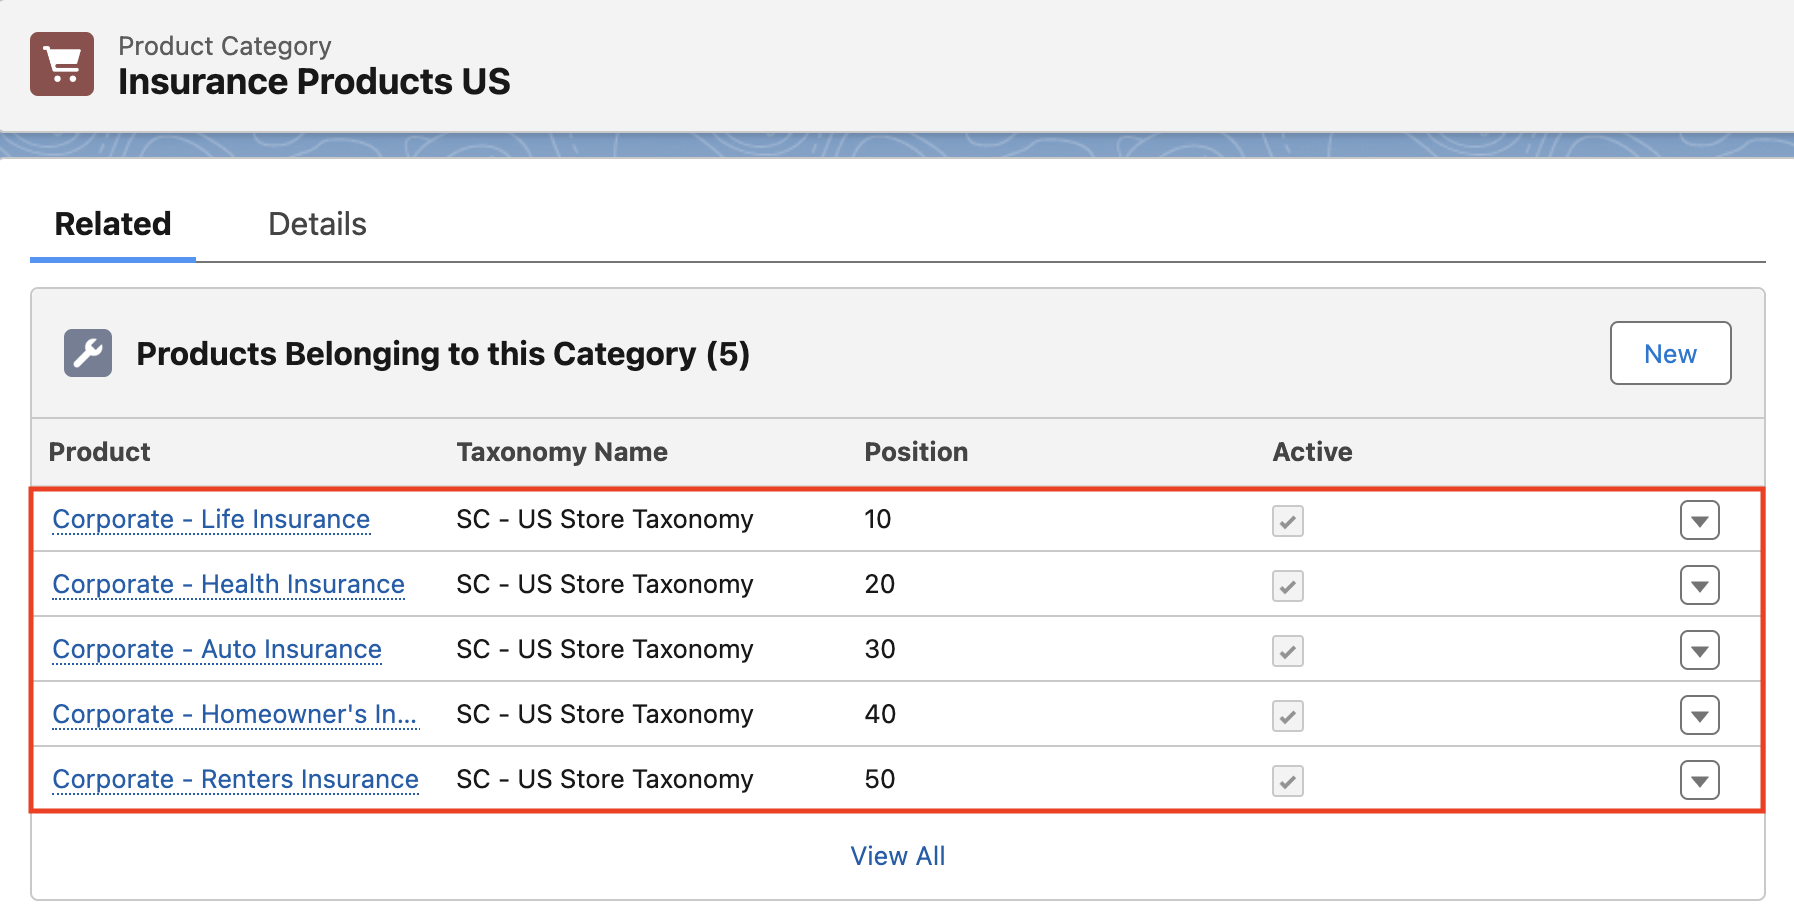
1. From the newly created product category ‘Insurance Products US’, select the related list tab and click ‘New’ under ‘Products Belonging to this Category’
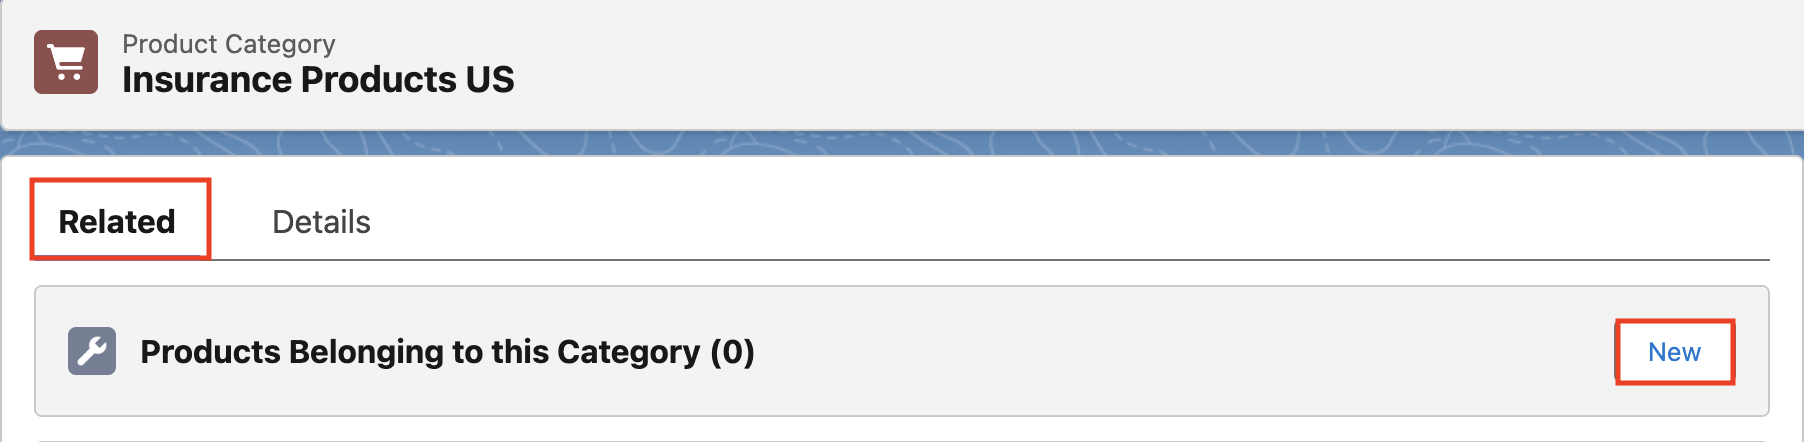
2. Place ‘insurance’ in the search field and select the first Product - ‘Corporate - Life Insurance’.
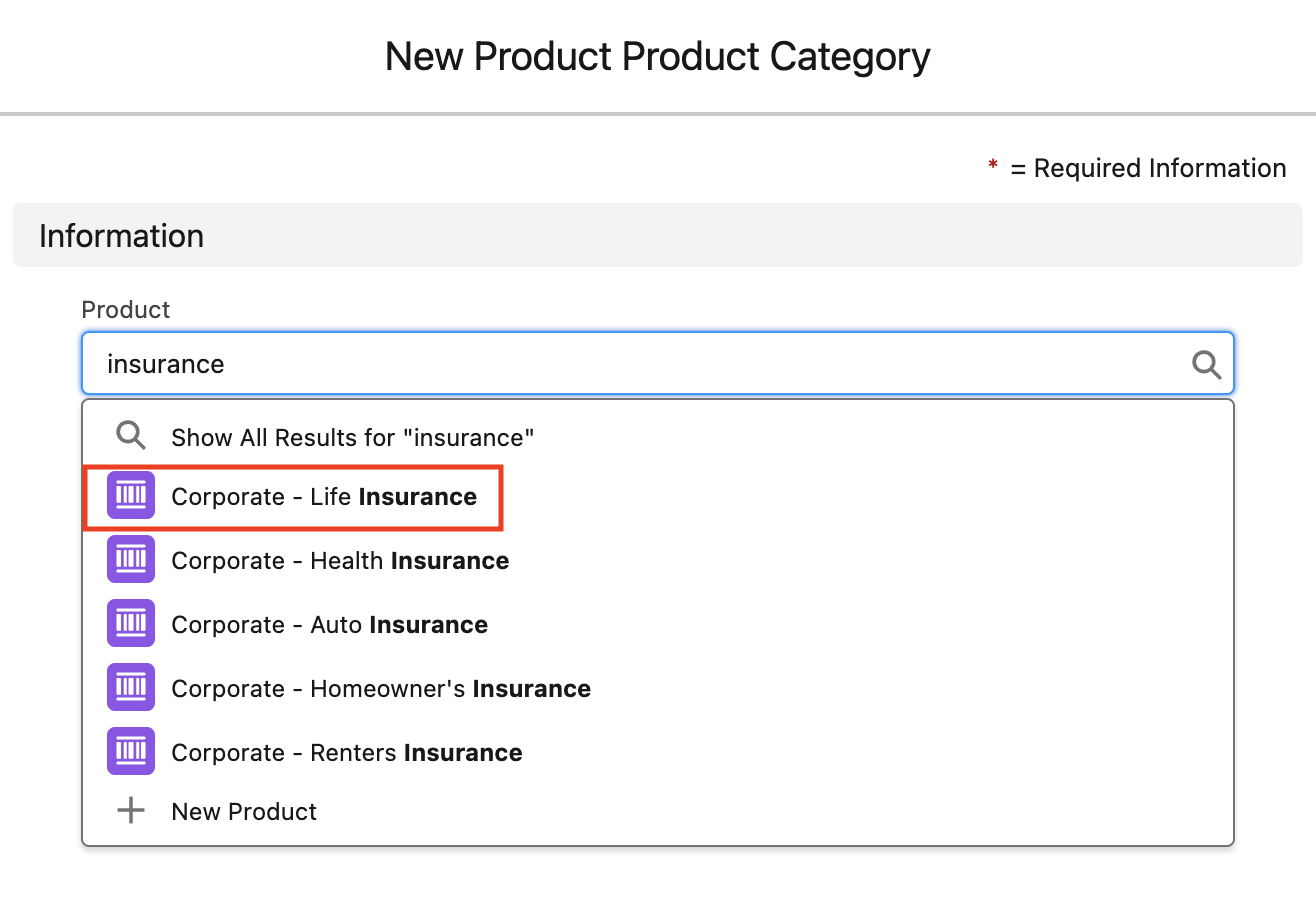
3. Ensure ‘Insurance Products US’ is the category selected
4. Add a value of ‘10’ in the Position field. This will be used to order this product relative to others in the same category
5. Ensure that the Active and Primary checkboxes are enabled
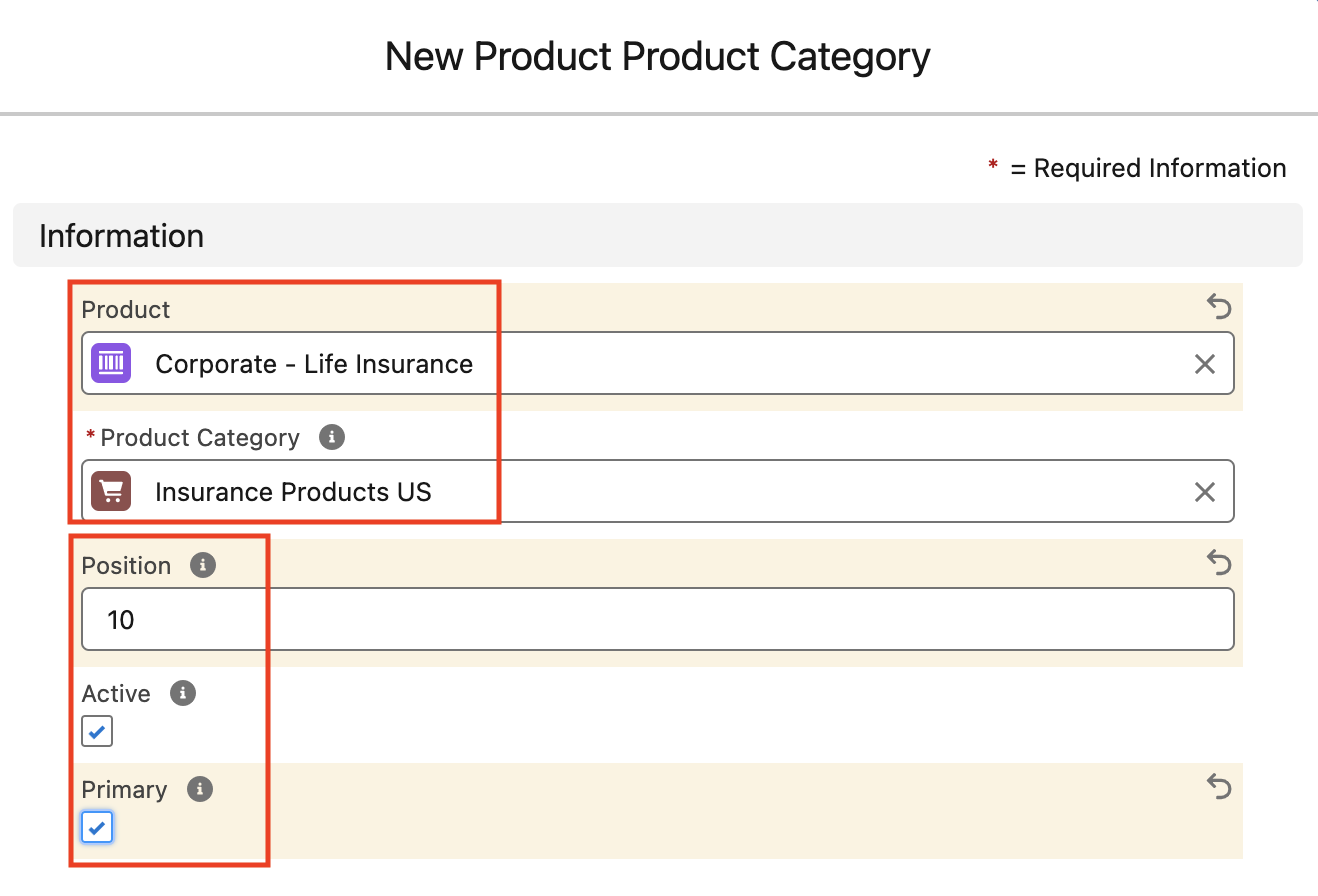
6. We will repeat this process until all insurance products are added to the ‘Insurance Products US’ related list, incrementing the position field value by 10 for each one to order them.
8. Alter the new price book entries for the new store
In this example we will increase the cost of each of the insurance products by 10%.
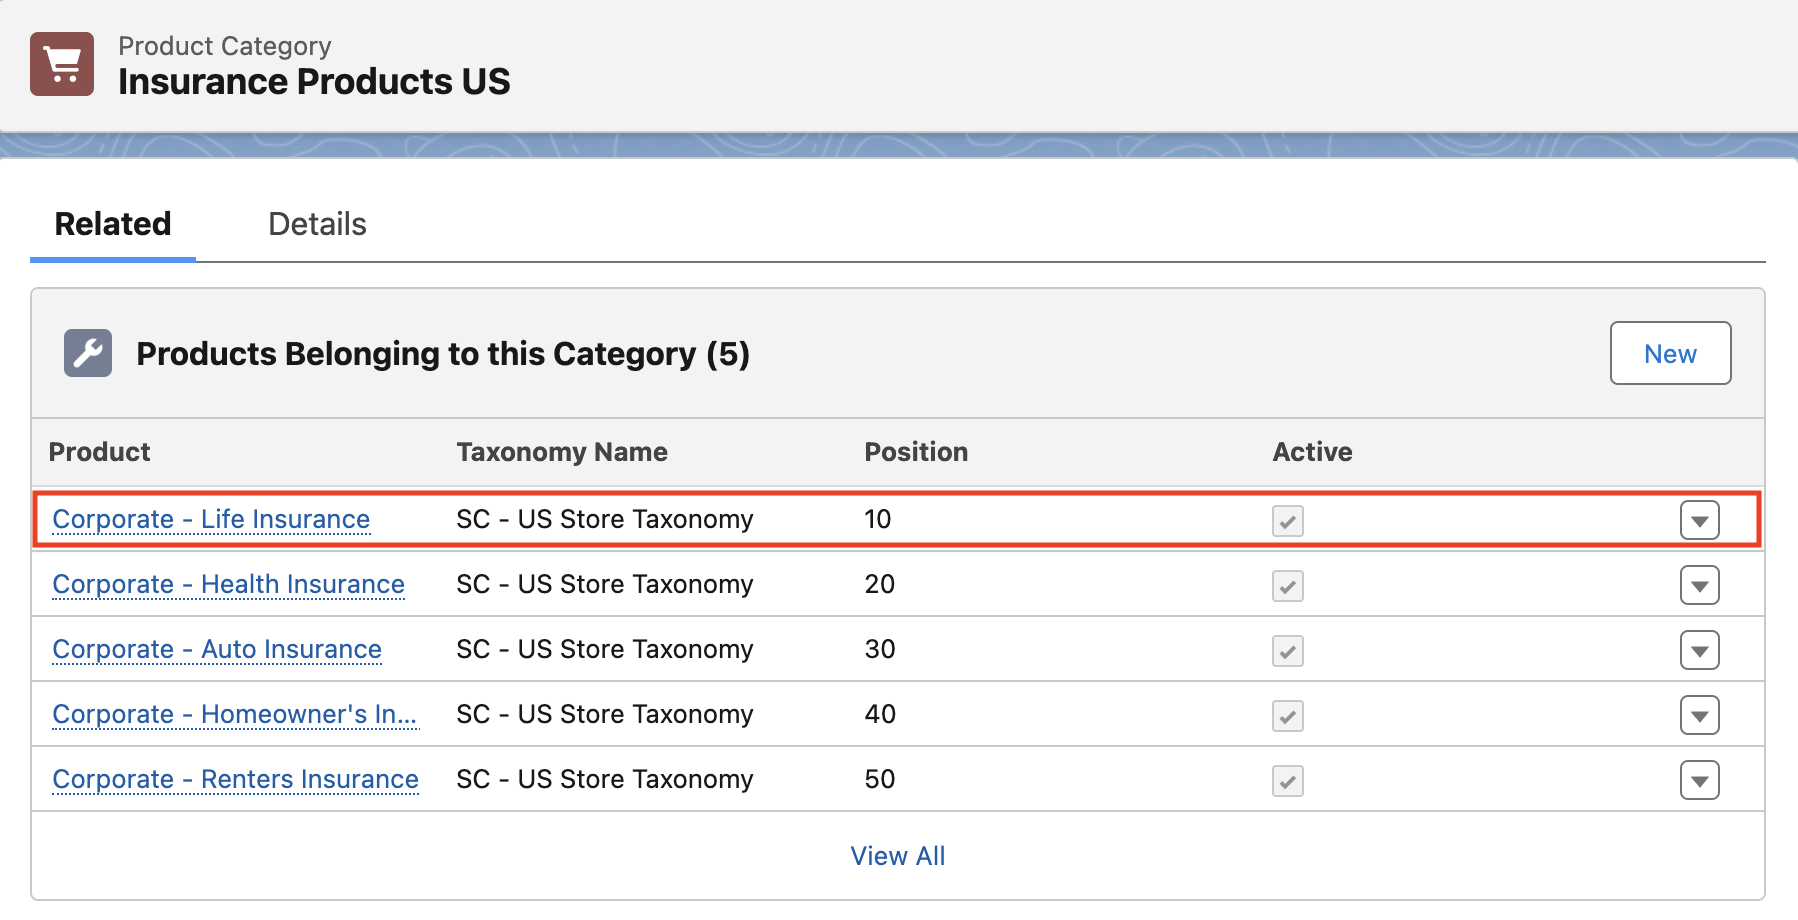
1. From the ‘Insurance Products US’ related list, click the name of the first product - ‘Corporate - Auto Insurance’
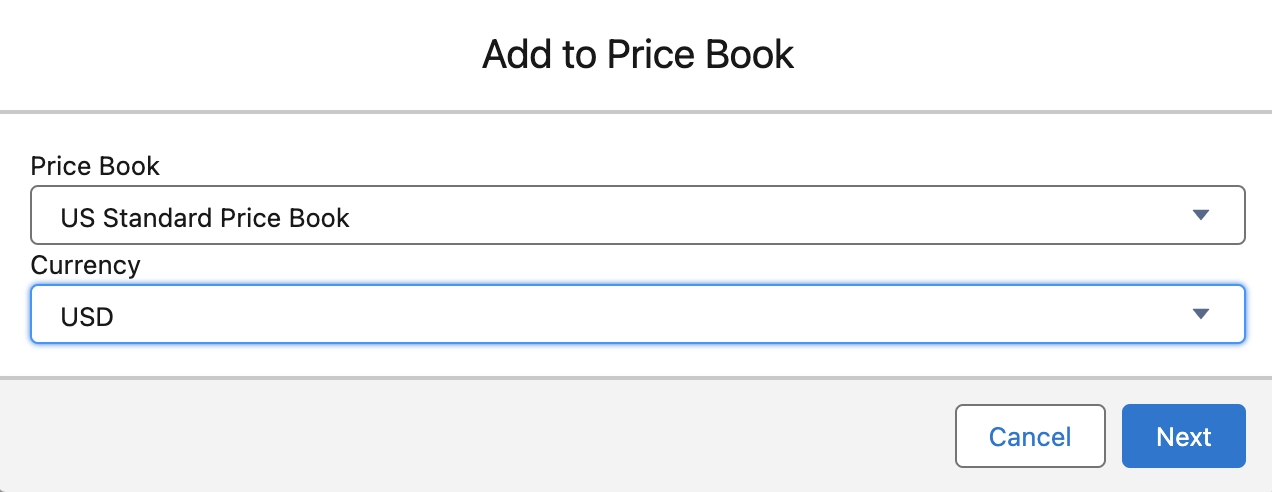
2. Go to the ‘Price Books’ section on the right and select ‘Add to Pricebook’.
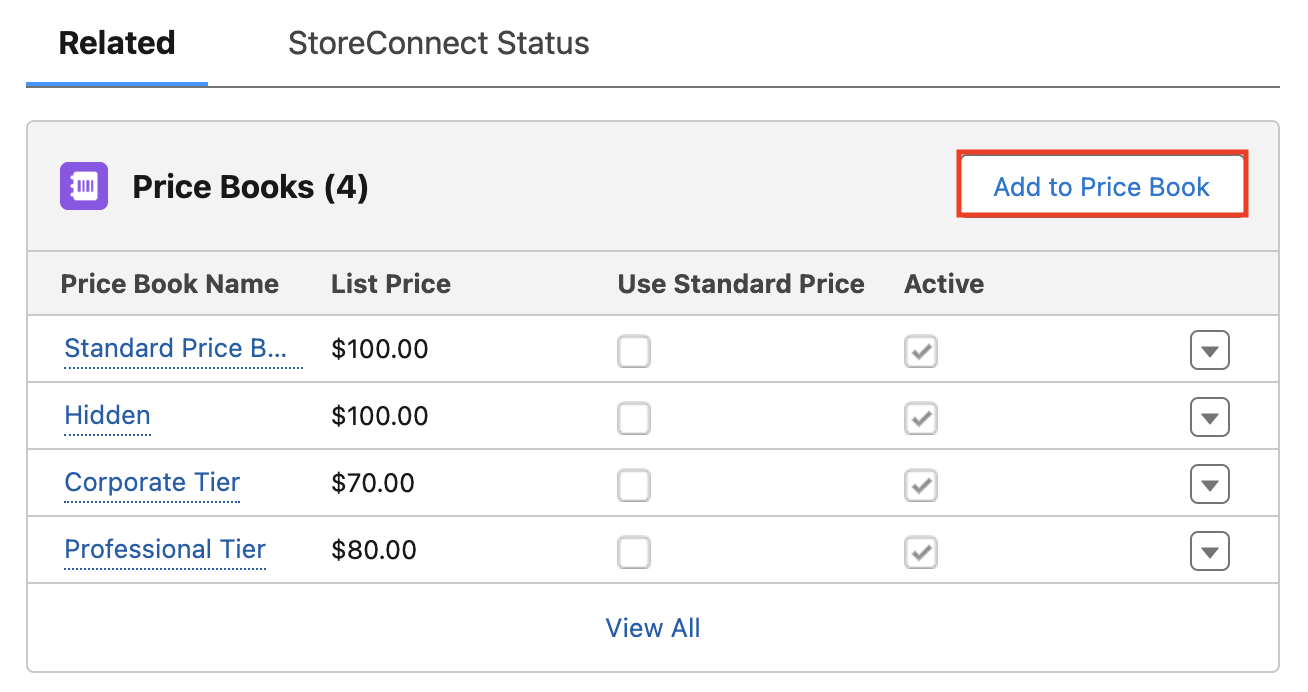
3. Ensure that the ‘US Standard Price Book’ is selected and the currency is ‘USD’.
4. Add a price book entry - we will place a value of ‘110.00’ in the List Price field, which is 10% more than the listing in the ‘Standard Price Book’.
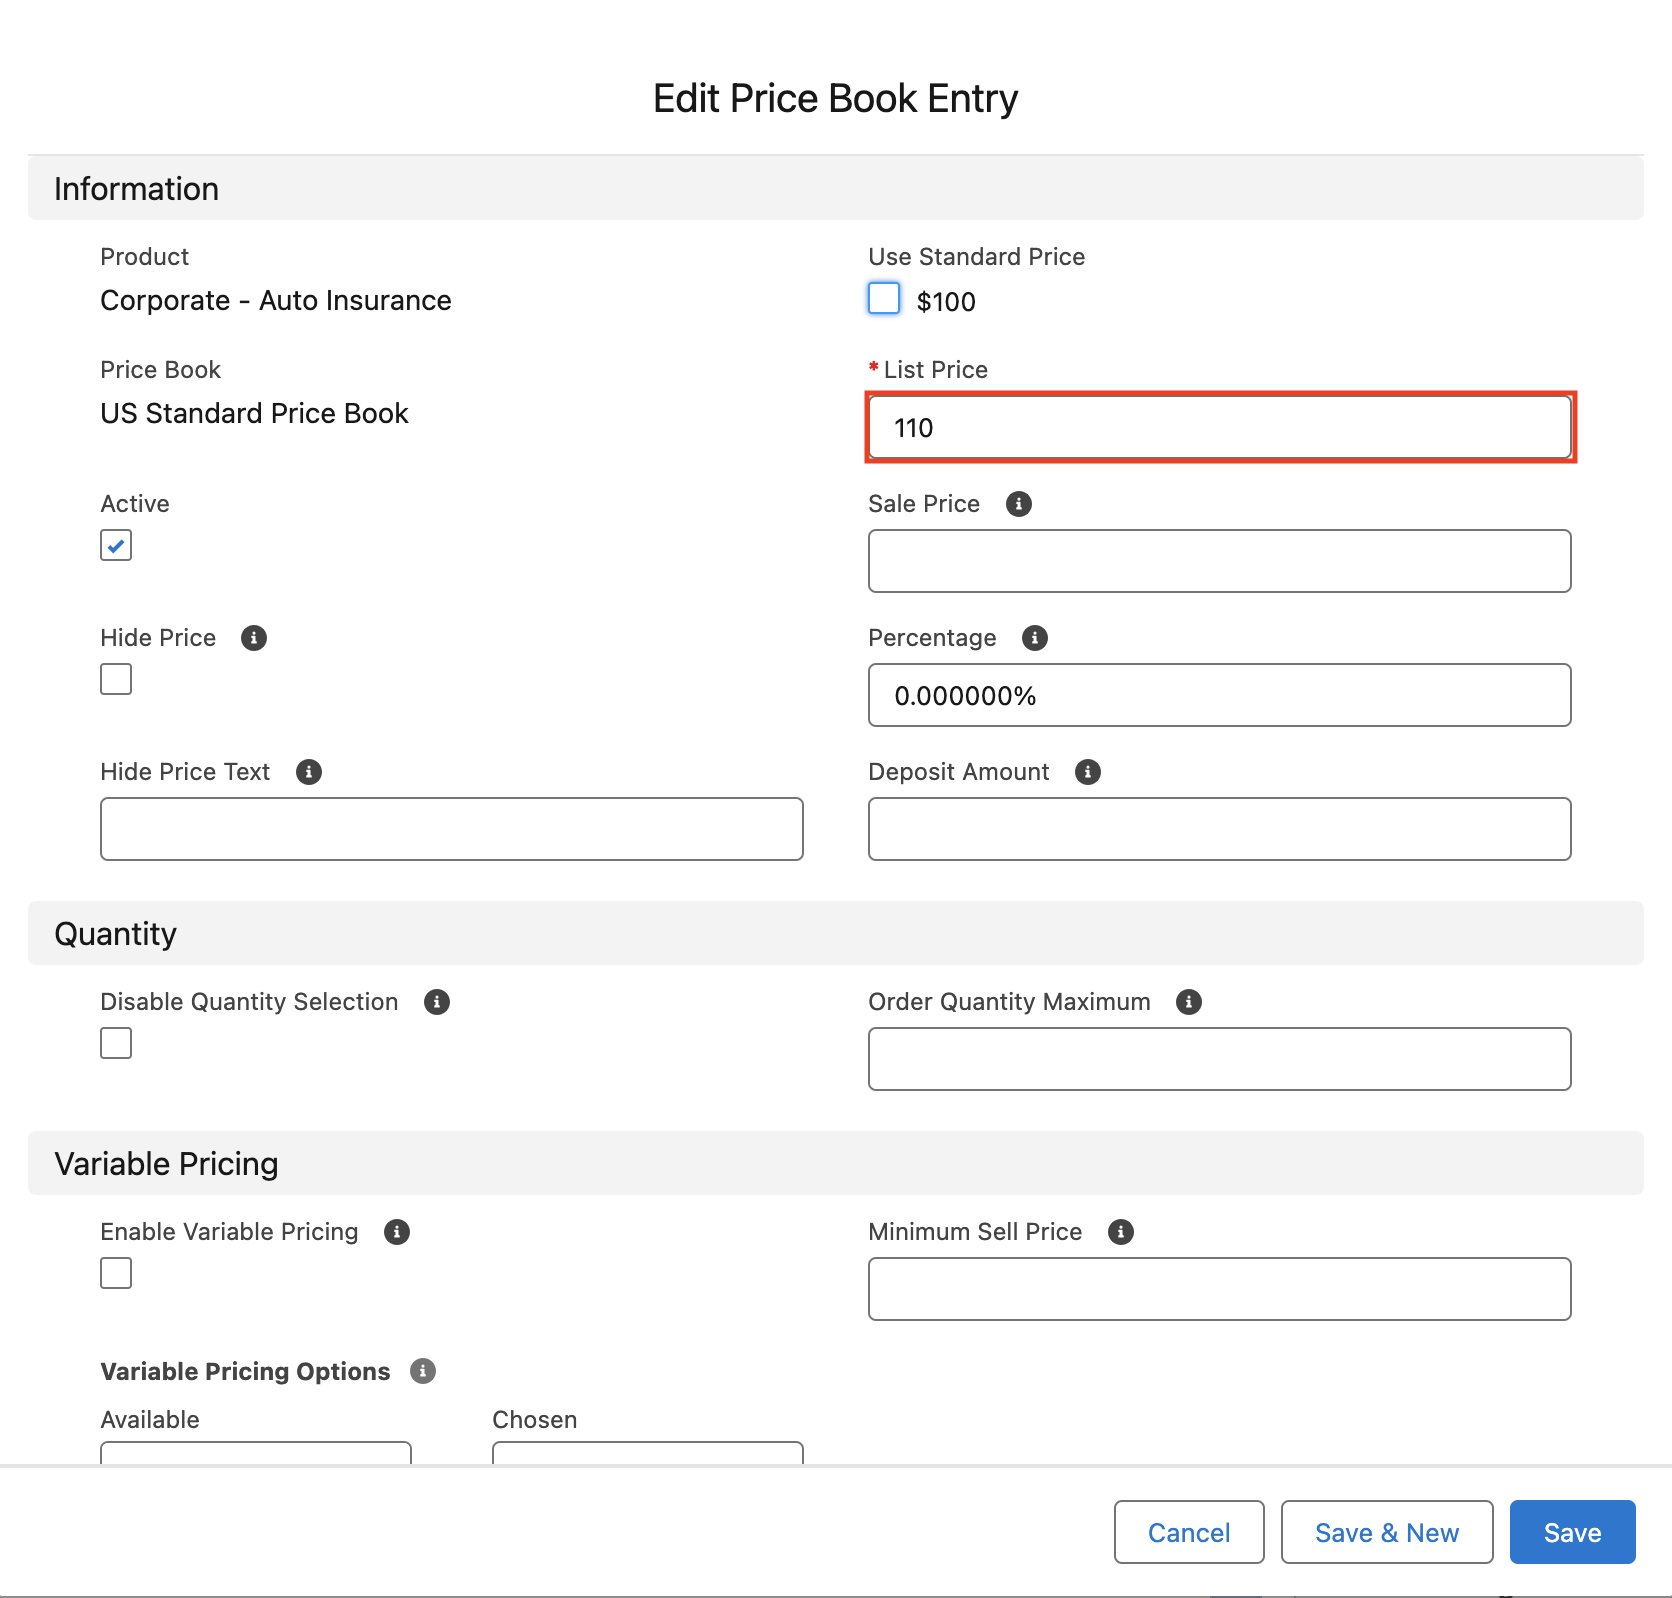
5. Save the price book addition
6. Repeat this for all of the insurance products in the ‘Insurance Products US’ related list. Note that these changes can be done in bulk by using a tool like Dataloader.io.
9. Create a new menu for the new store
We will clone a pre-existing menu named ‘OmniCo - Main Menu’ for use in the new store.
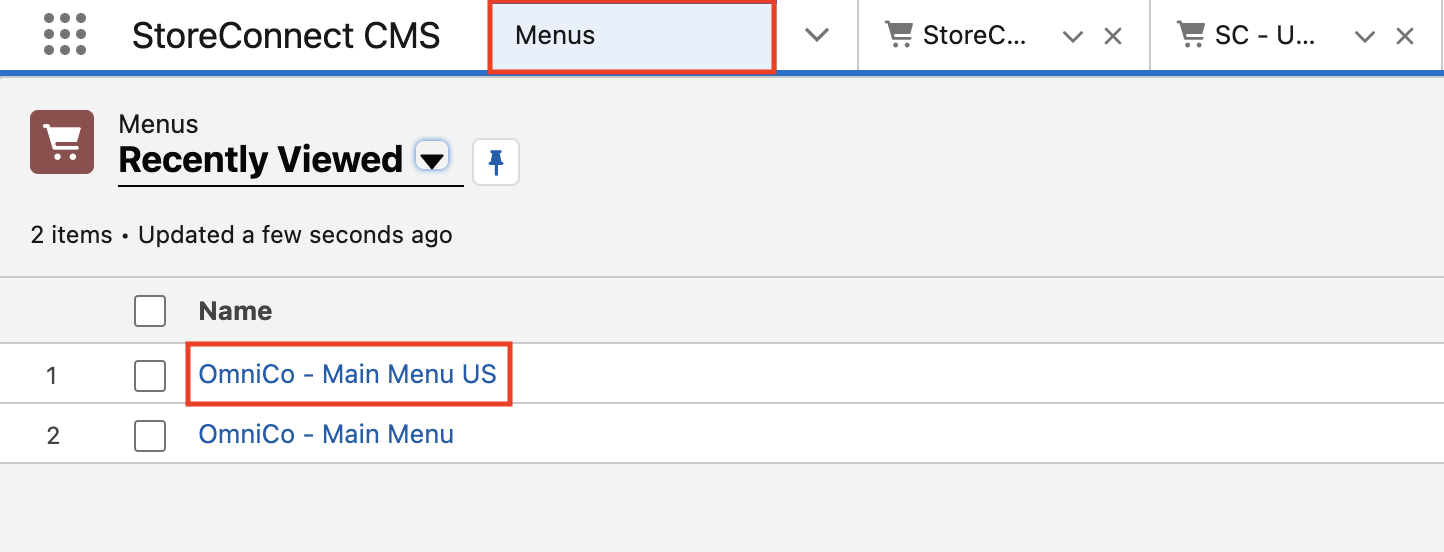
1. Select ‘Menus’ from the dropdown in the ‘StoreConnect CMS’ app
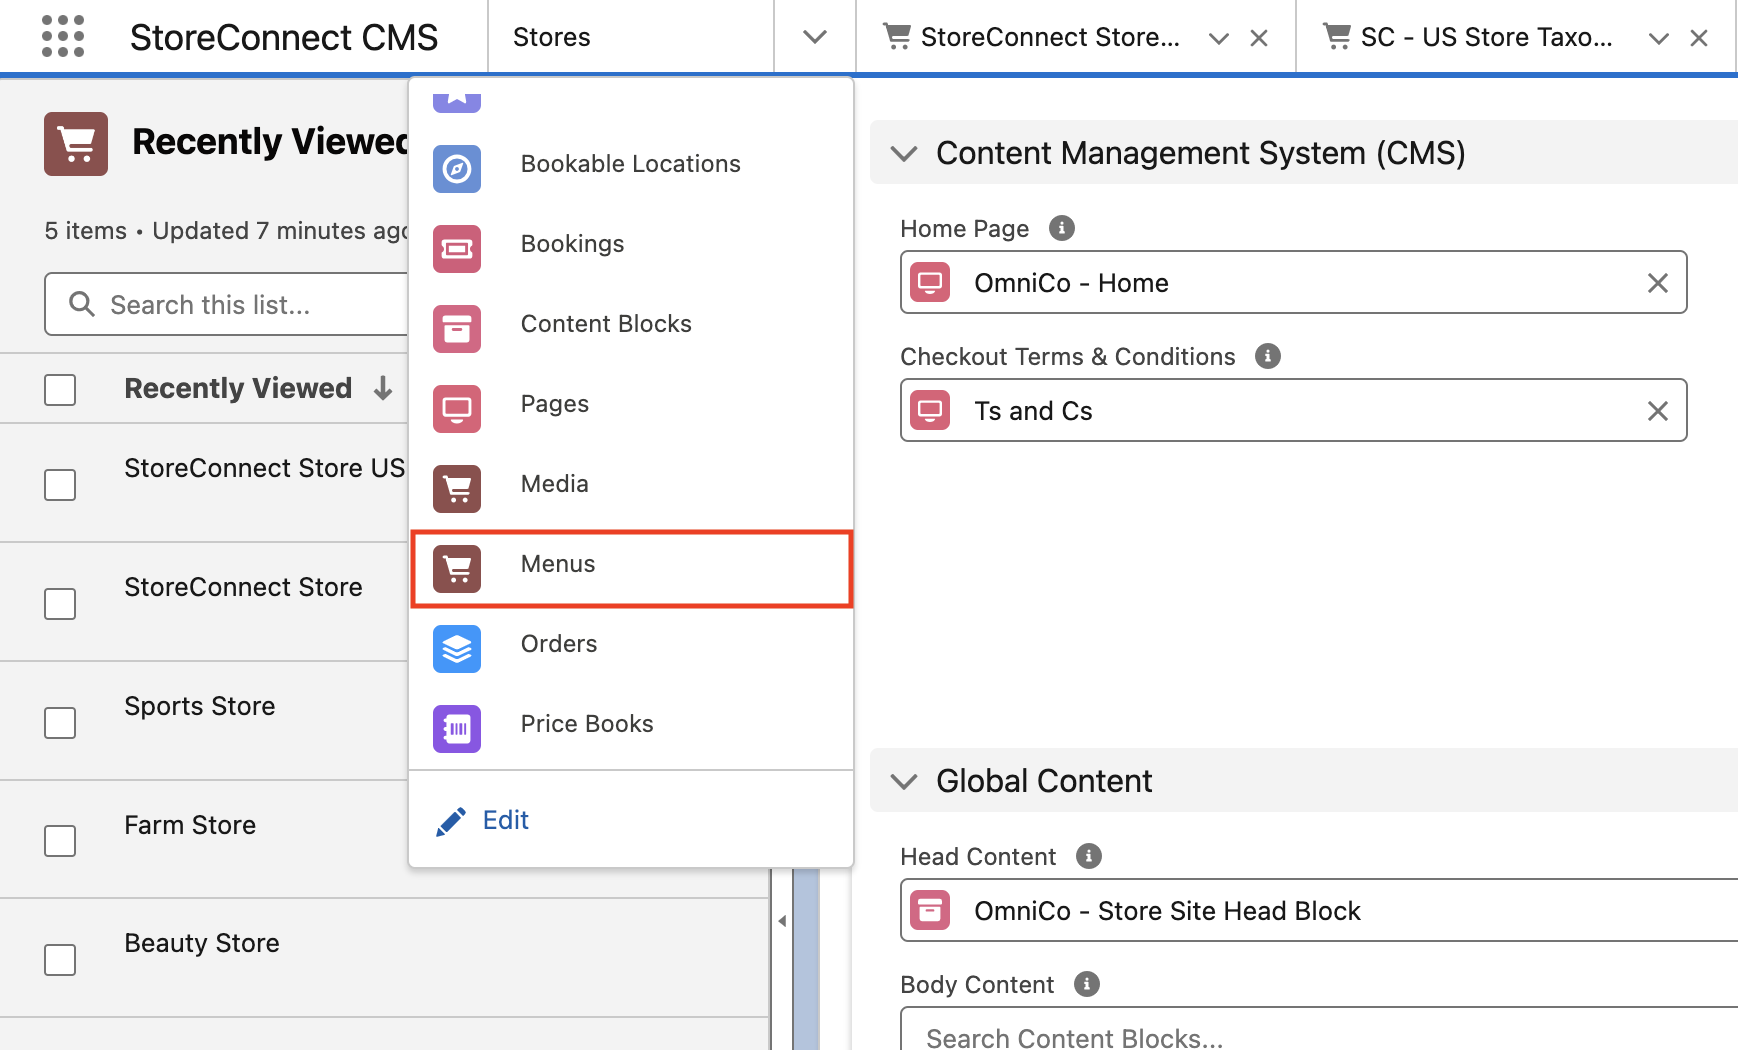
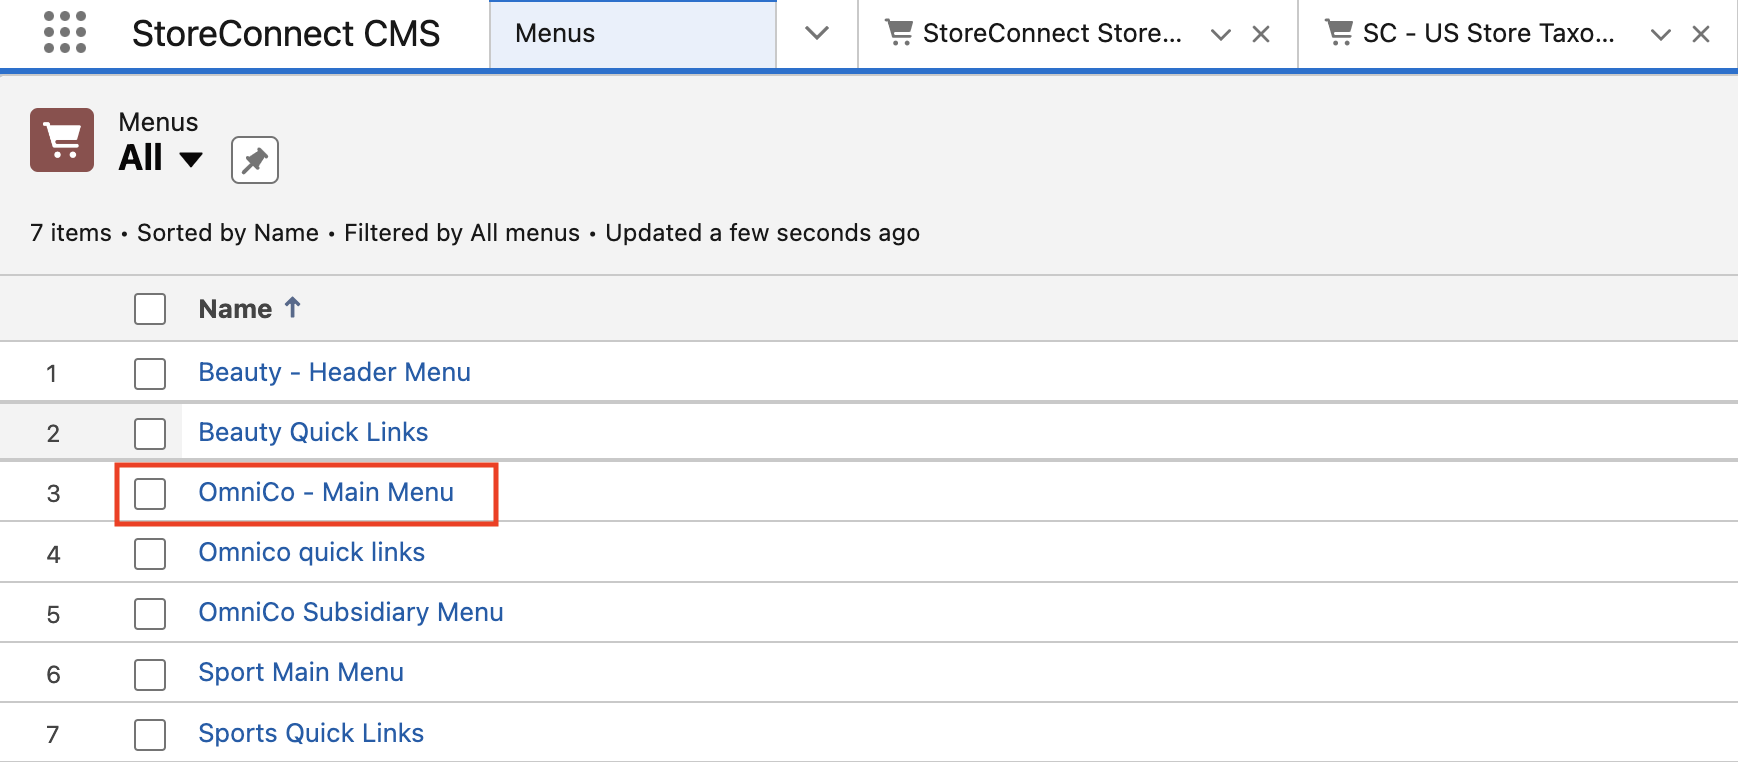
2. Select the ‘OmniCo - Main Menu’
3. Click ‘Clone’ on the upper right
4. Name the cloned menu ‘OmniCo - Main Menu US’ in the Name field
5. Alter the identifier field value to ‘omnico-main-menu-us’
6. Ensure that ‘StoreConnect Store US’ is selected in the Store field

7. Click ‘Save’
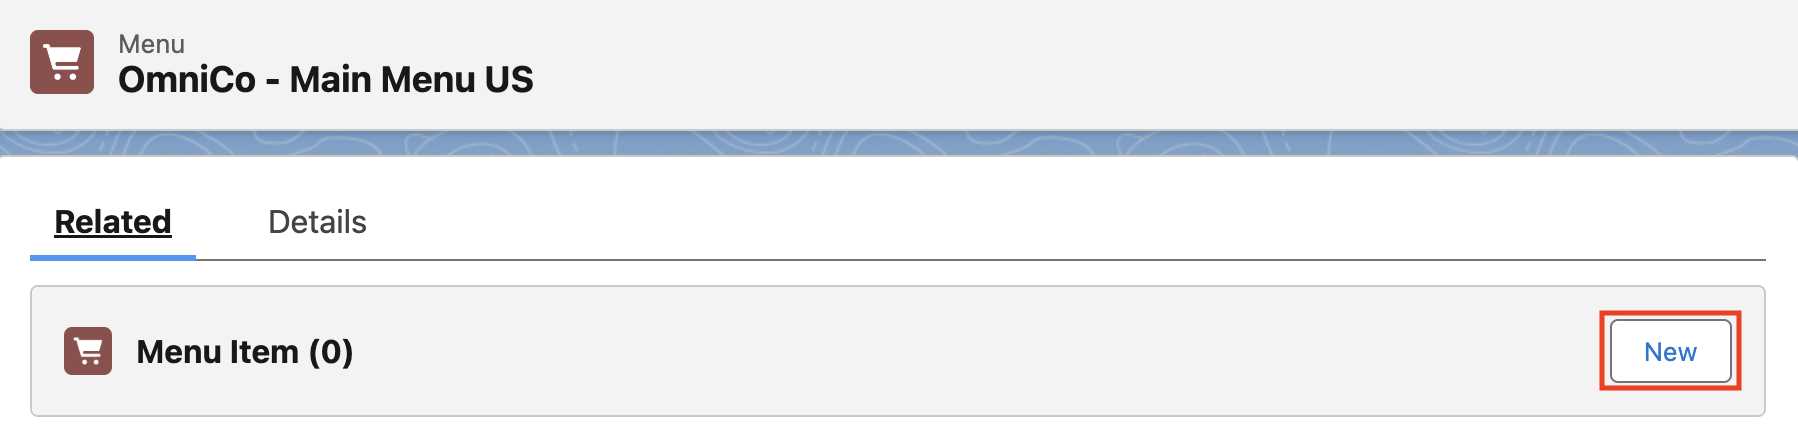
10. Add menu items to the new menu
1. Select ‘Menus’ from the dropdown in the ‘StoreConnect CMS’
2. Select the ‘OmniCo - Main Menu US’ menu
3. Click on the related list

4. Select ‘New’ next to the ‘Menu Items’ related list
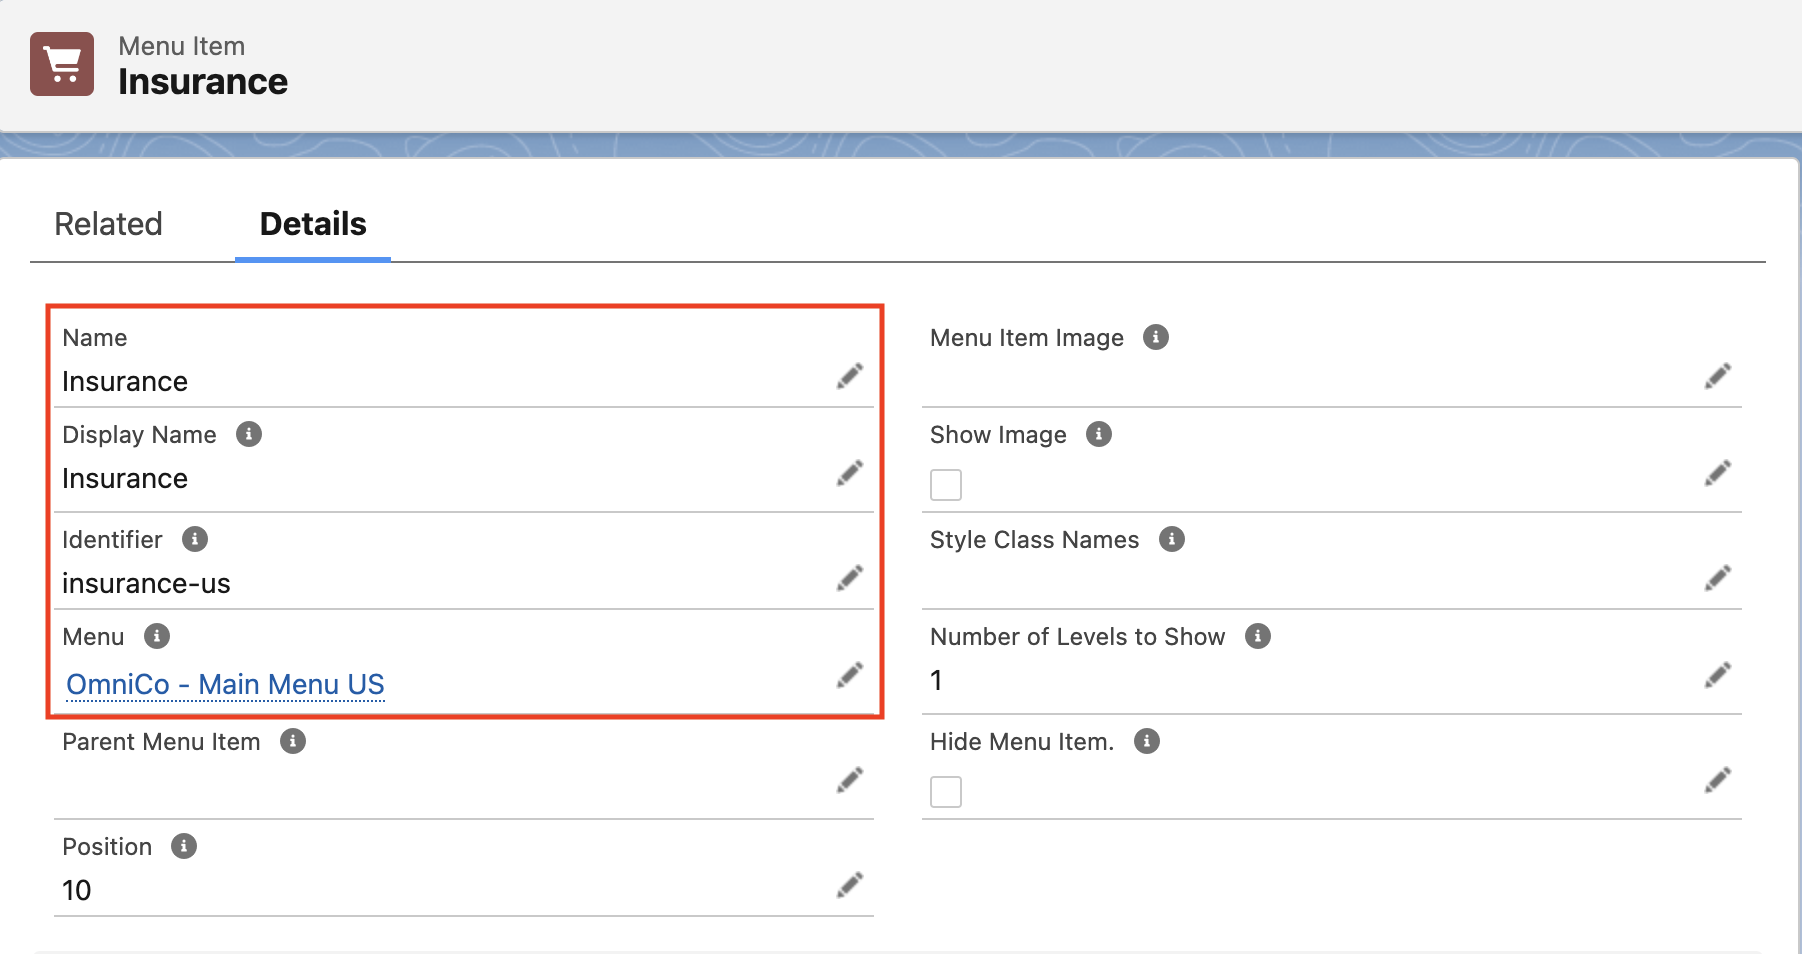
5. Add ‘Insurance’ in the name field
6. Add ‘Insurance’ in the Display Name field
7. Add ‘insurance-us’ in the Identifier field
8. Ensure that ‘OmniCo - Main Menu US’ is listed in the Menu field
9. Add ‘10’ for the Position field. This will order it relative to any other menu items placed in the new menu
11. Check your new store
1. Select ‘Stores’ from the ‘StoreConnect CMS’ app dropdown
2. Click on the URL in the Store Domain Name field. This will open your main store
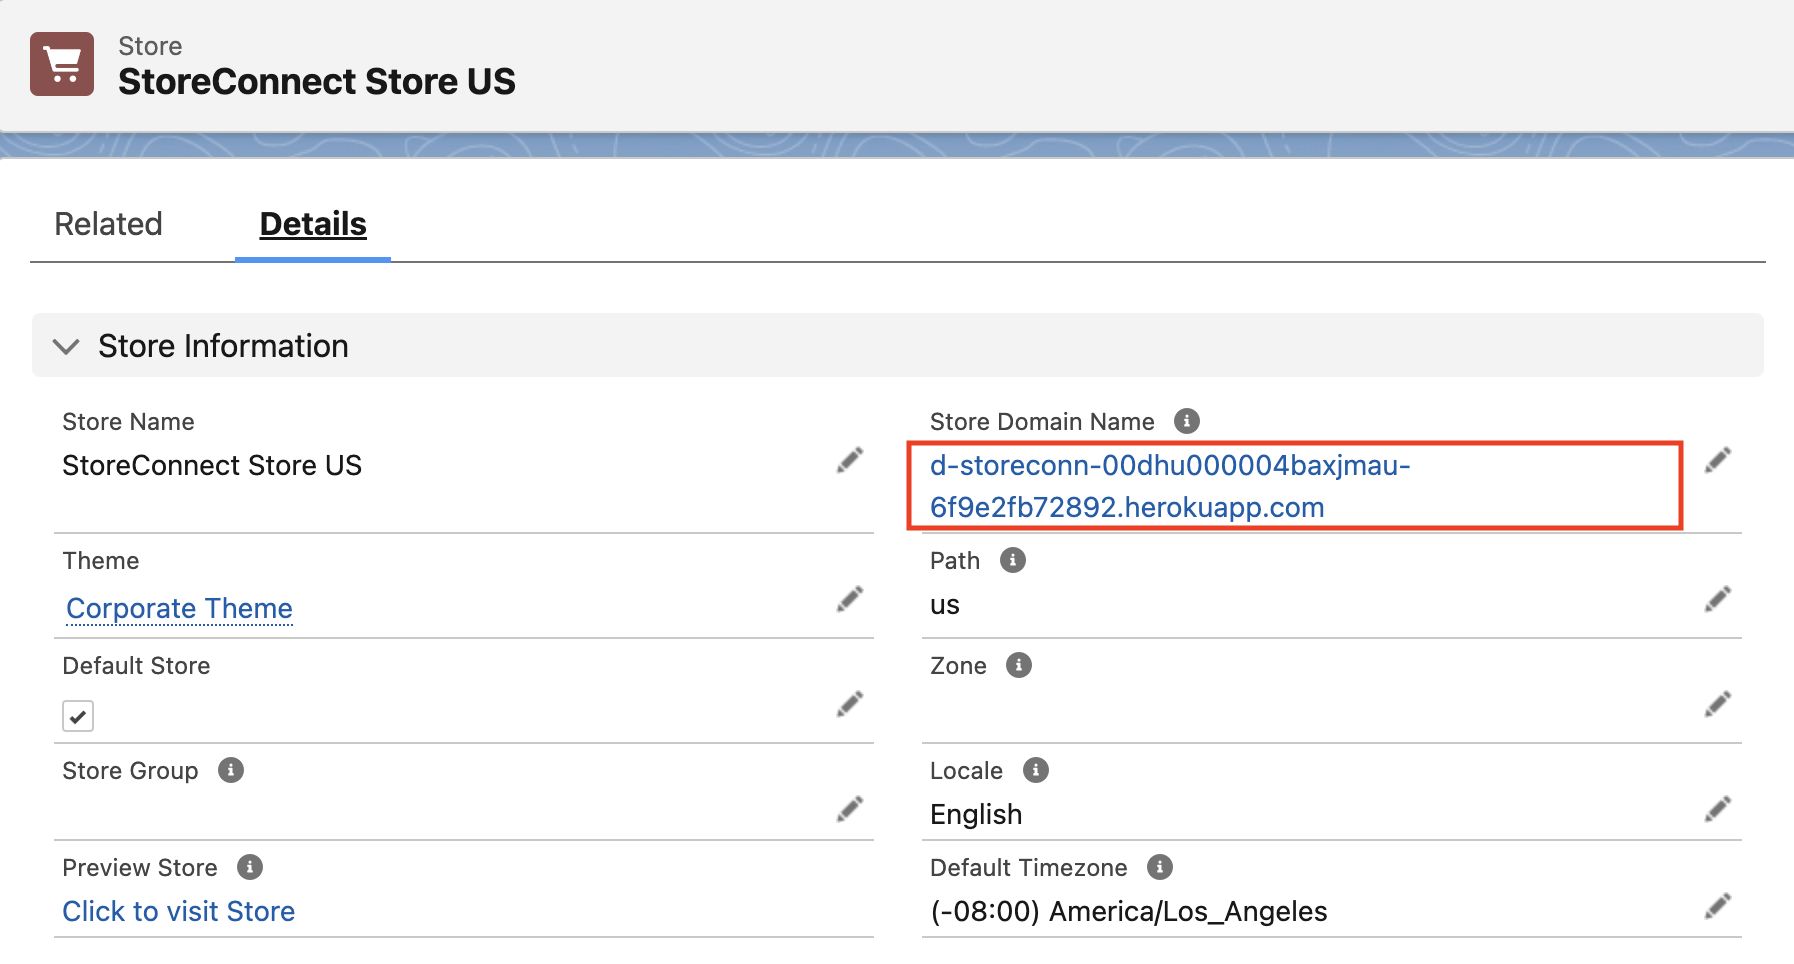
3. Add the ‘Path` value to the end of the URL. In our example, this is ‘us’.
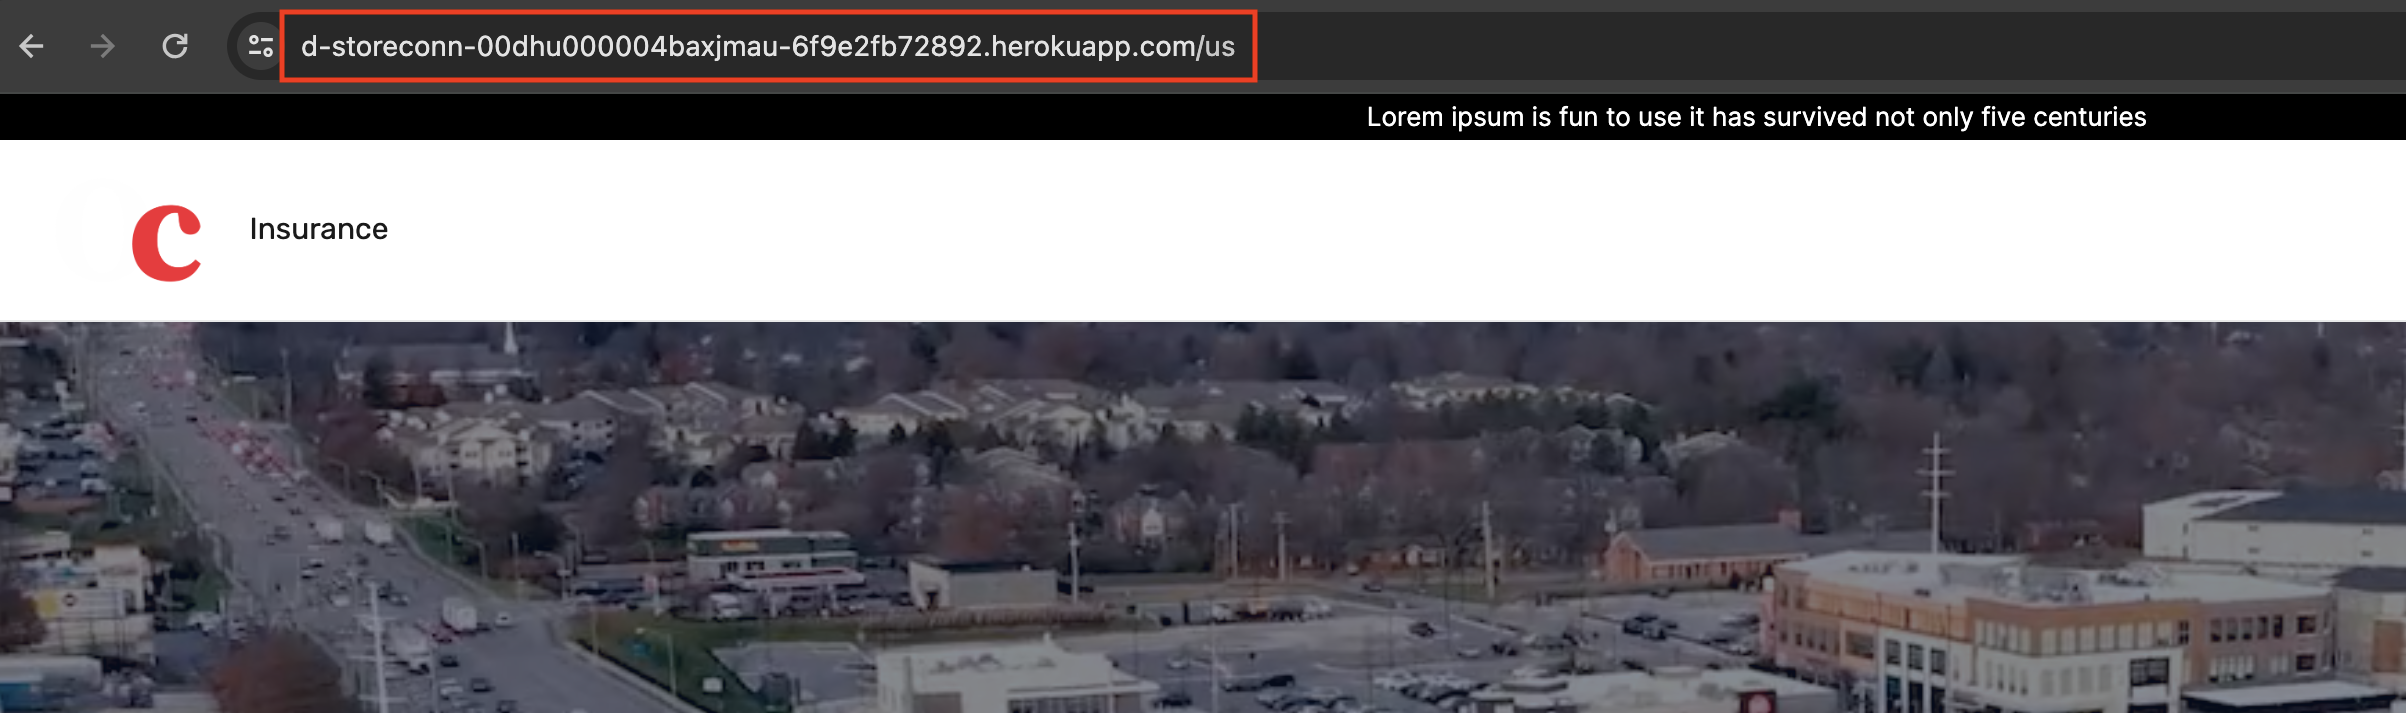
*Note that this separate domain/subdomain can be pointed to this new store. For demonstration purposes we will use the default URL as it installs with it path
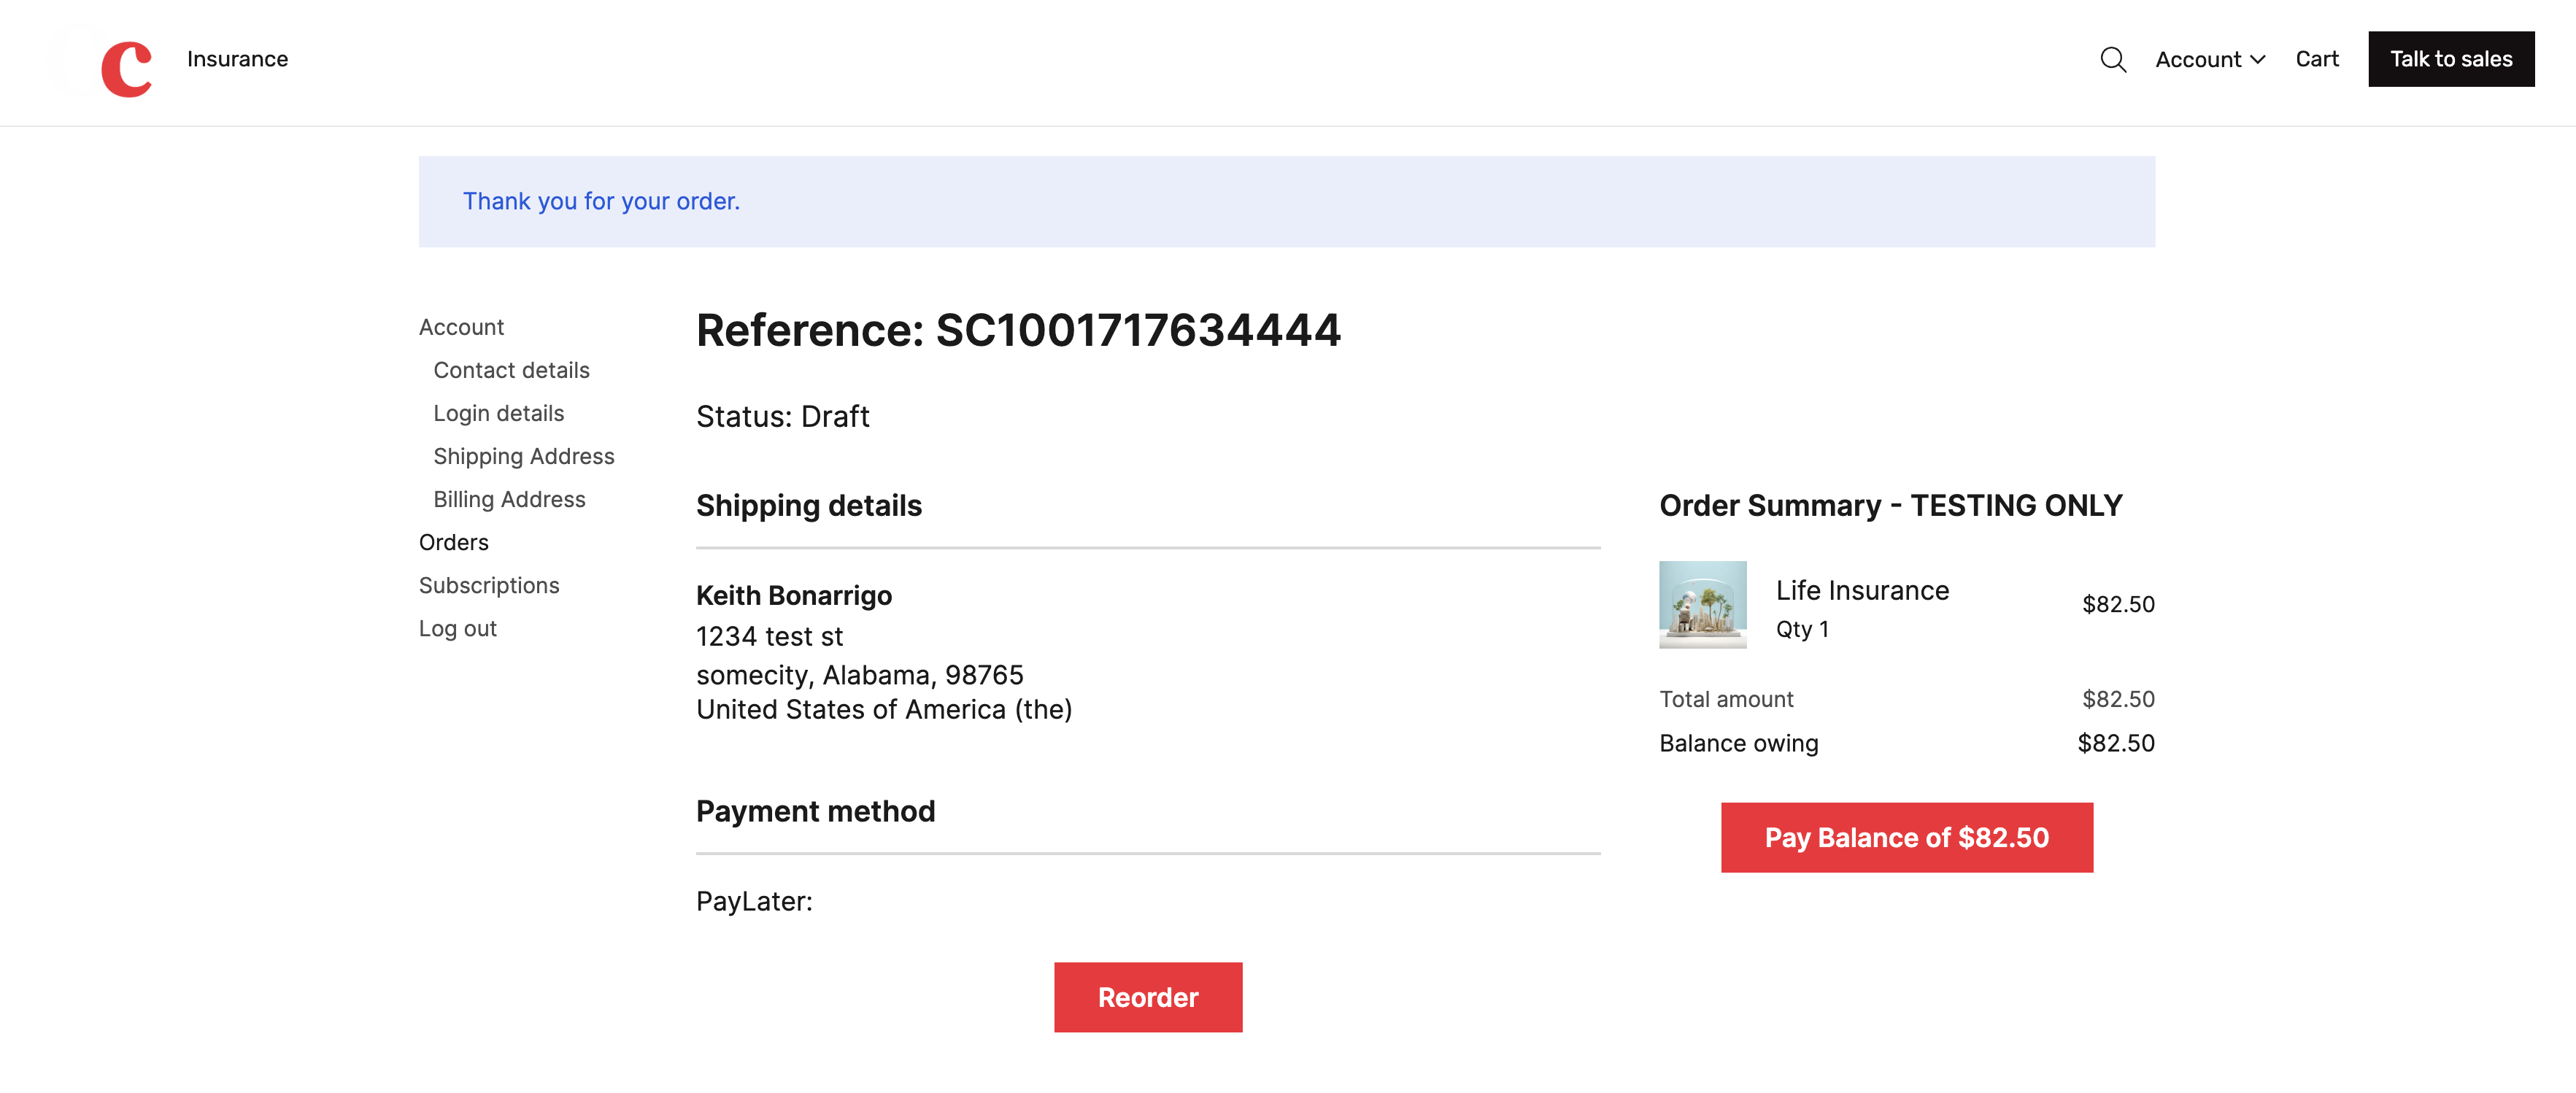
12. Perform a checkout with the new store
1. Click on the ‘Insurance’ link in the header menu. You should see your insurance products with their new pricing
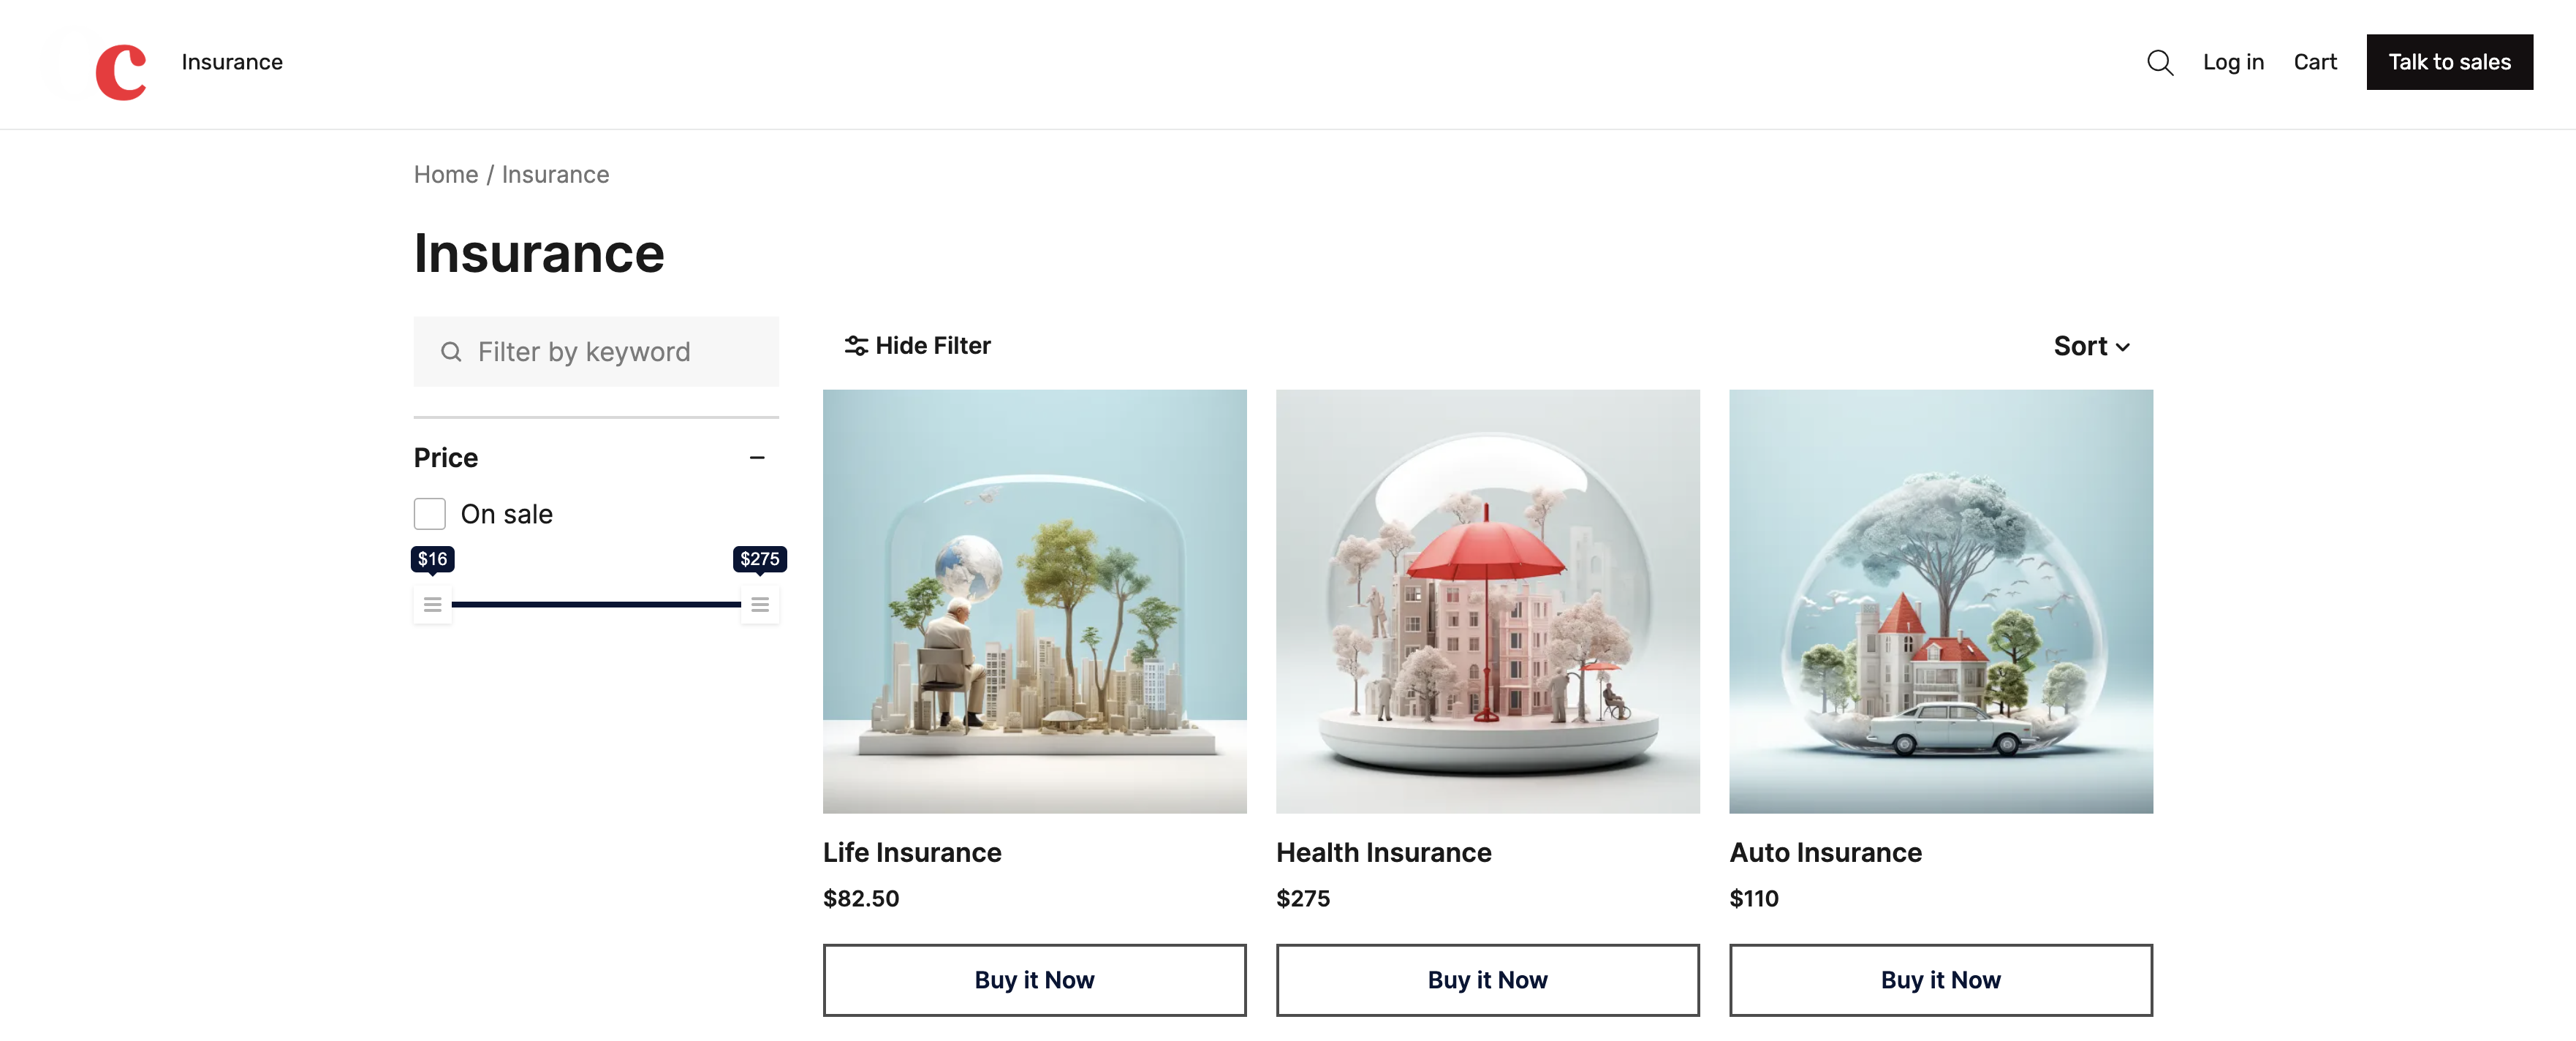
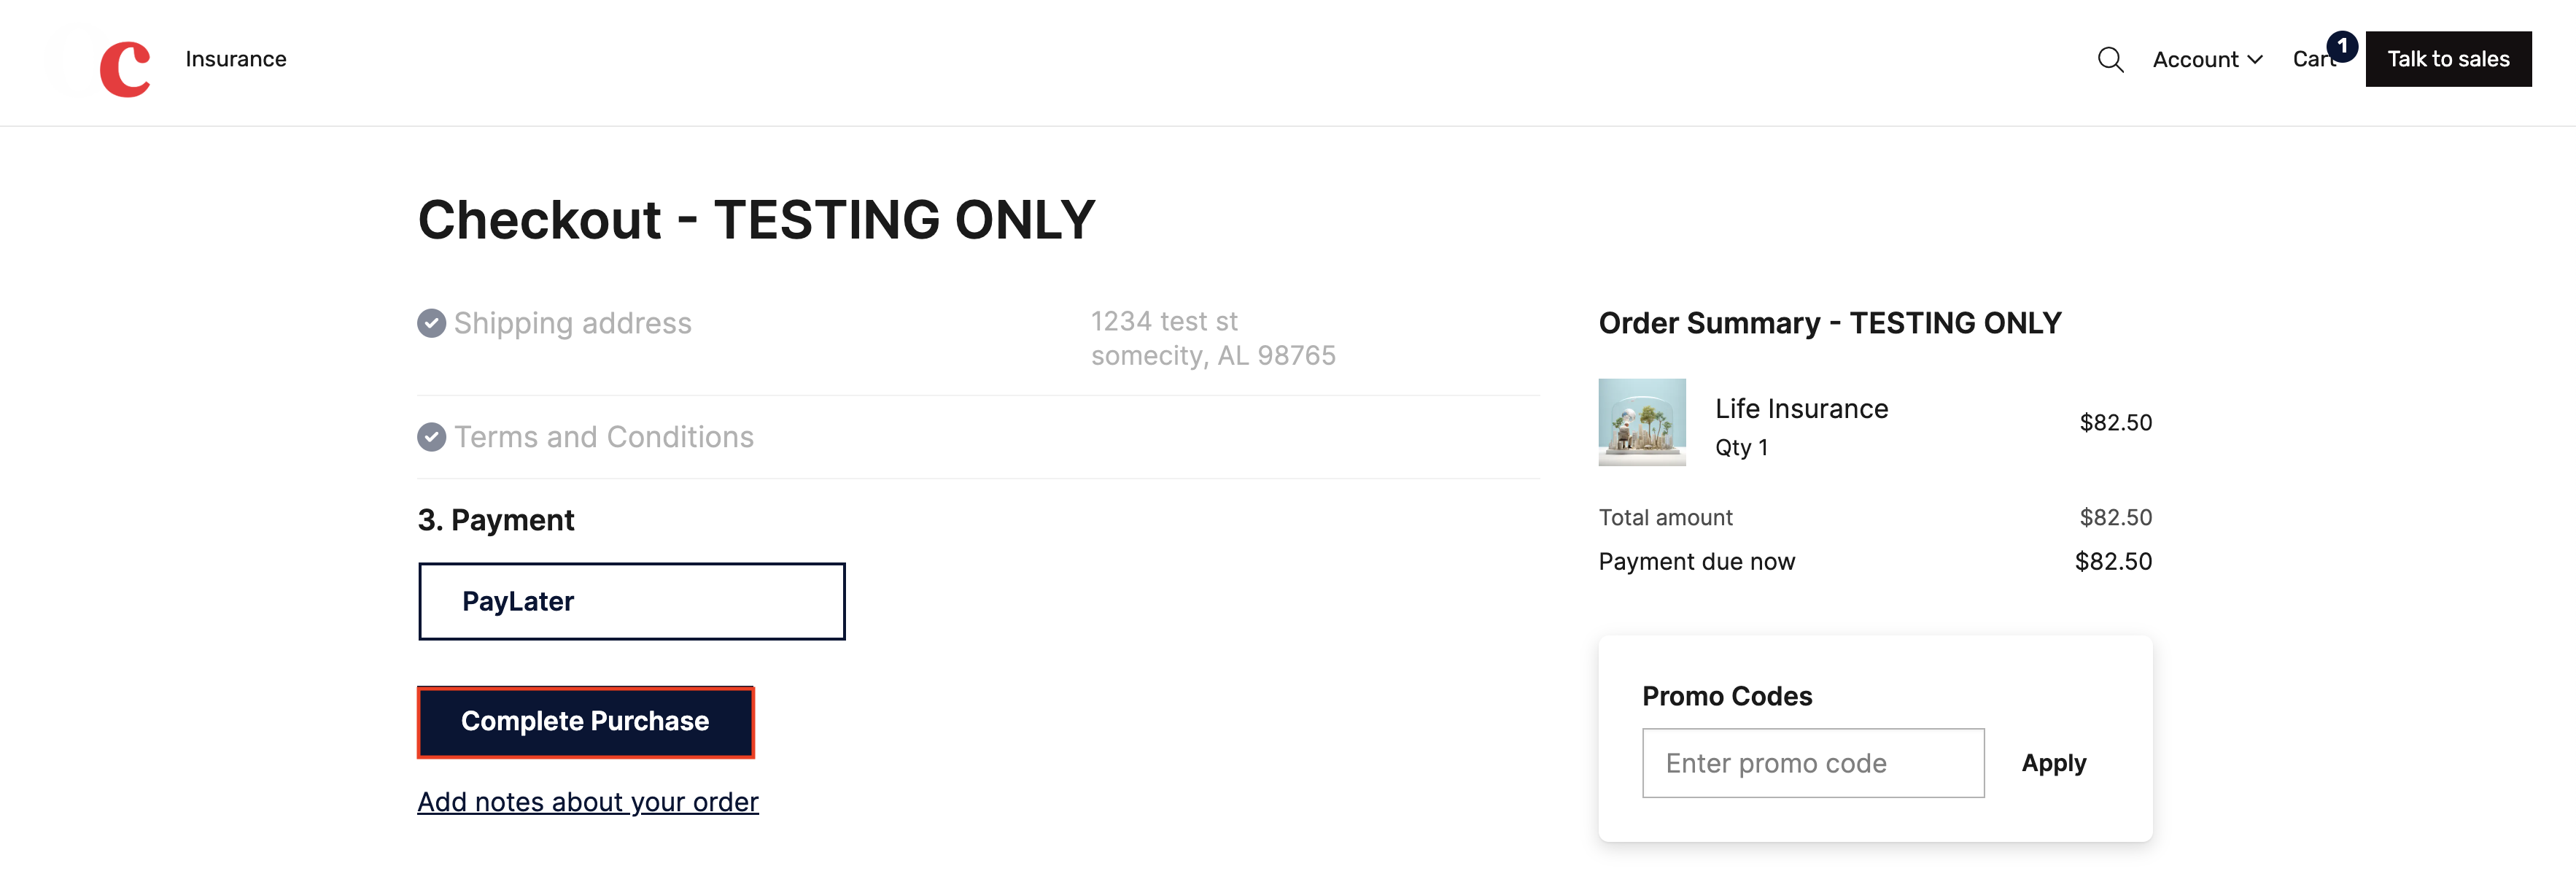
2. Select an insurance product and proceed through checkout
Congratulations!
You’ve created a new US store which charges in USD and focuses on insurance services!
Was this article helpful?
Thanks for your feedback! It helps us improve our docs.