

Create an article in StoreConnect
On this page
Use this process to create an article and publish it on your storefront. The example values below build one article end to end, so you can follow along with your own content in place of them.
Before you start
- StoreConnect is installed in your Salesforce org. See Prerequisites to getting started.
- You have at least one Store record.
- You have the article content ready to paste in.
For the full list of fields on the Article record, see Articles and article categories.
Create the article record
- Open the StoreConnect CMS app from the Salesforce App Launcher.
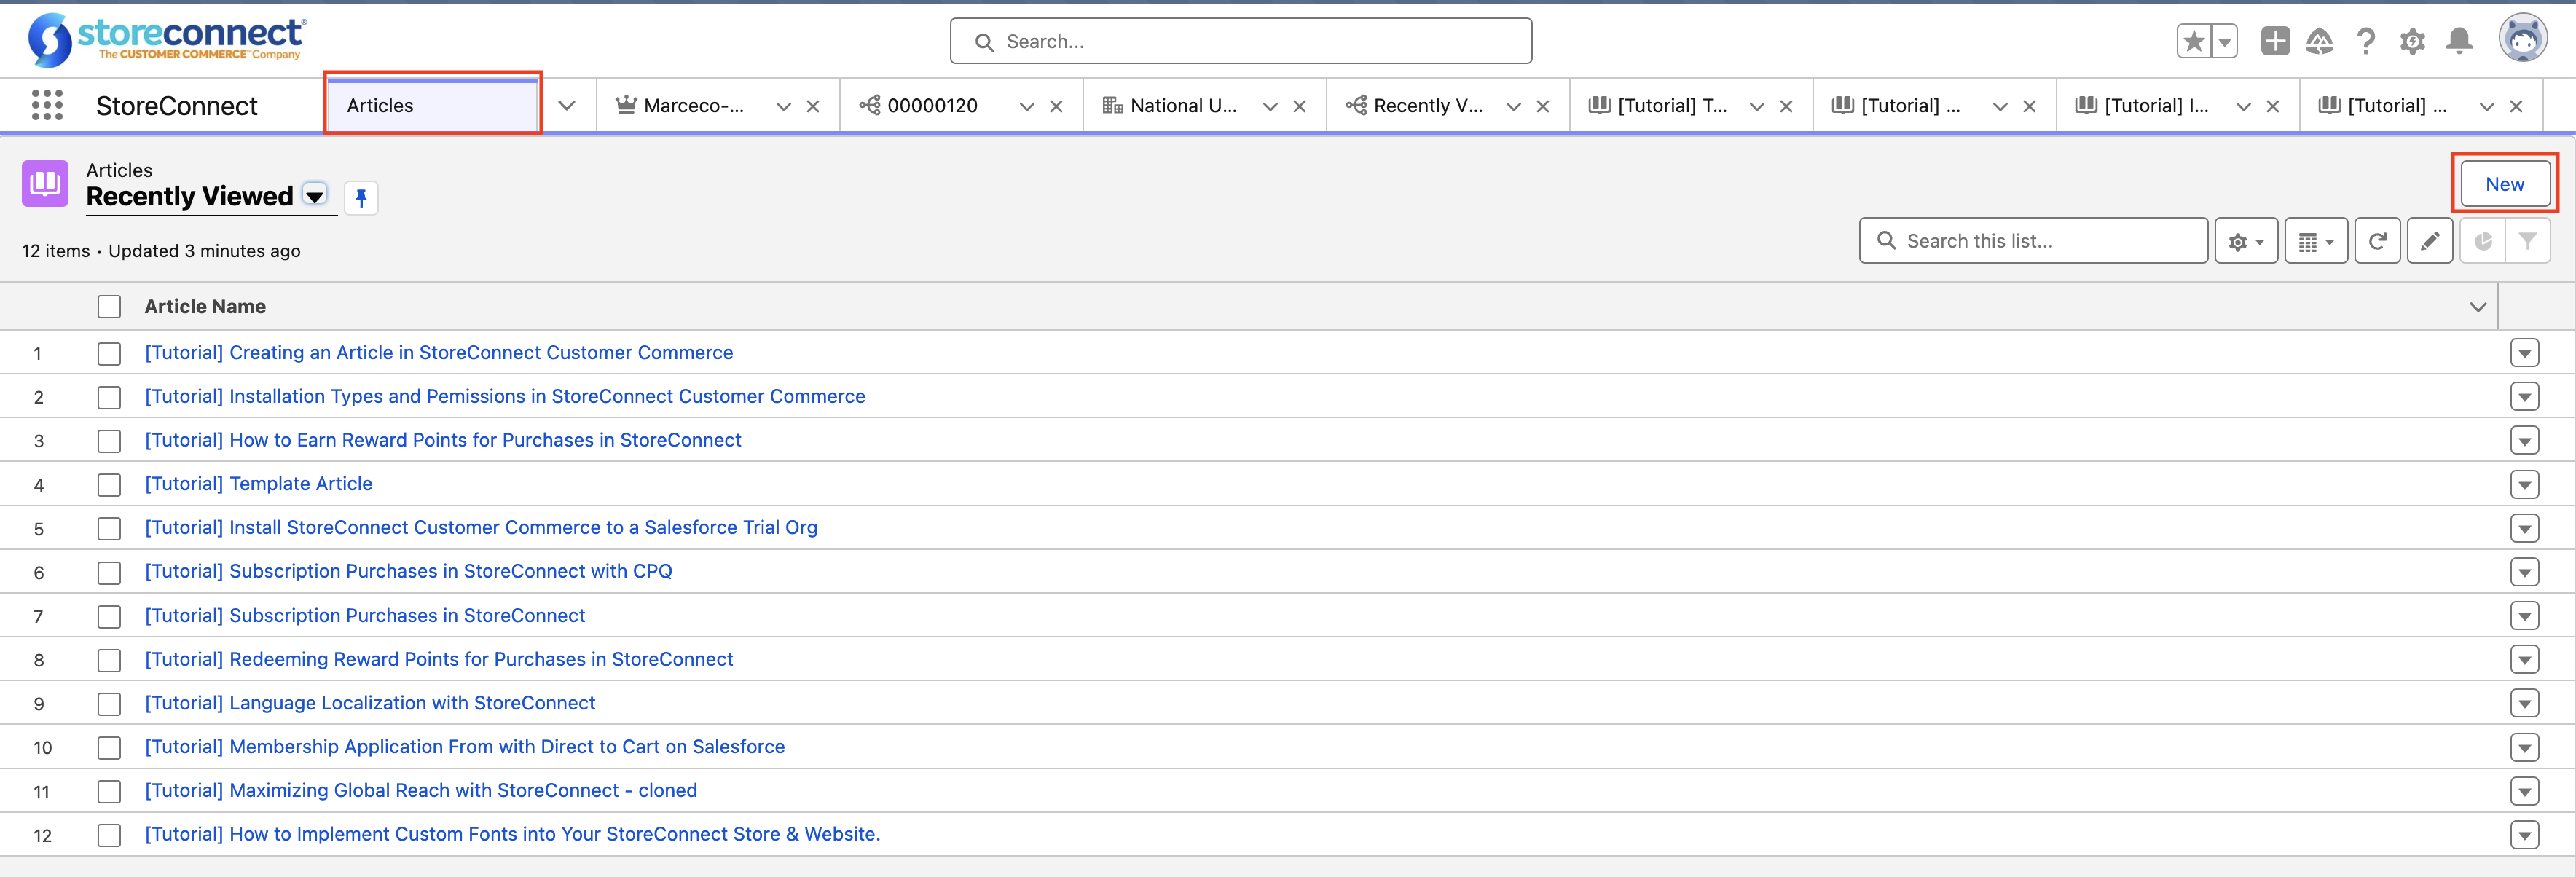
- Select Articles.
-
Select New.
Populate the Information section
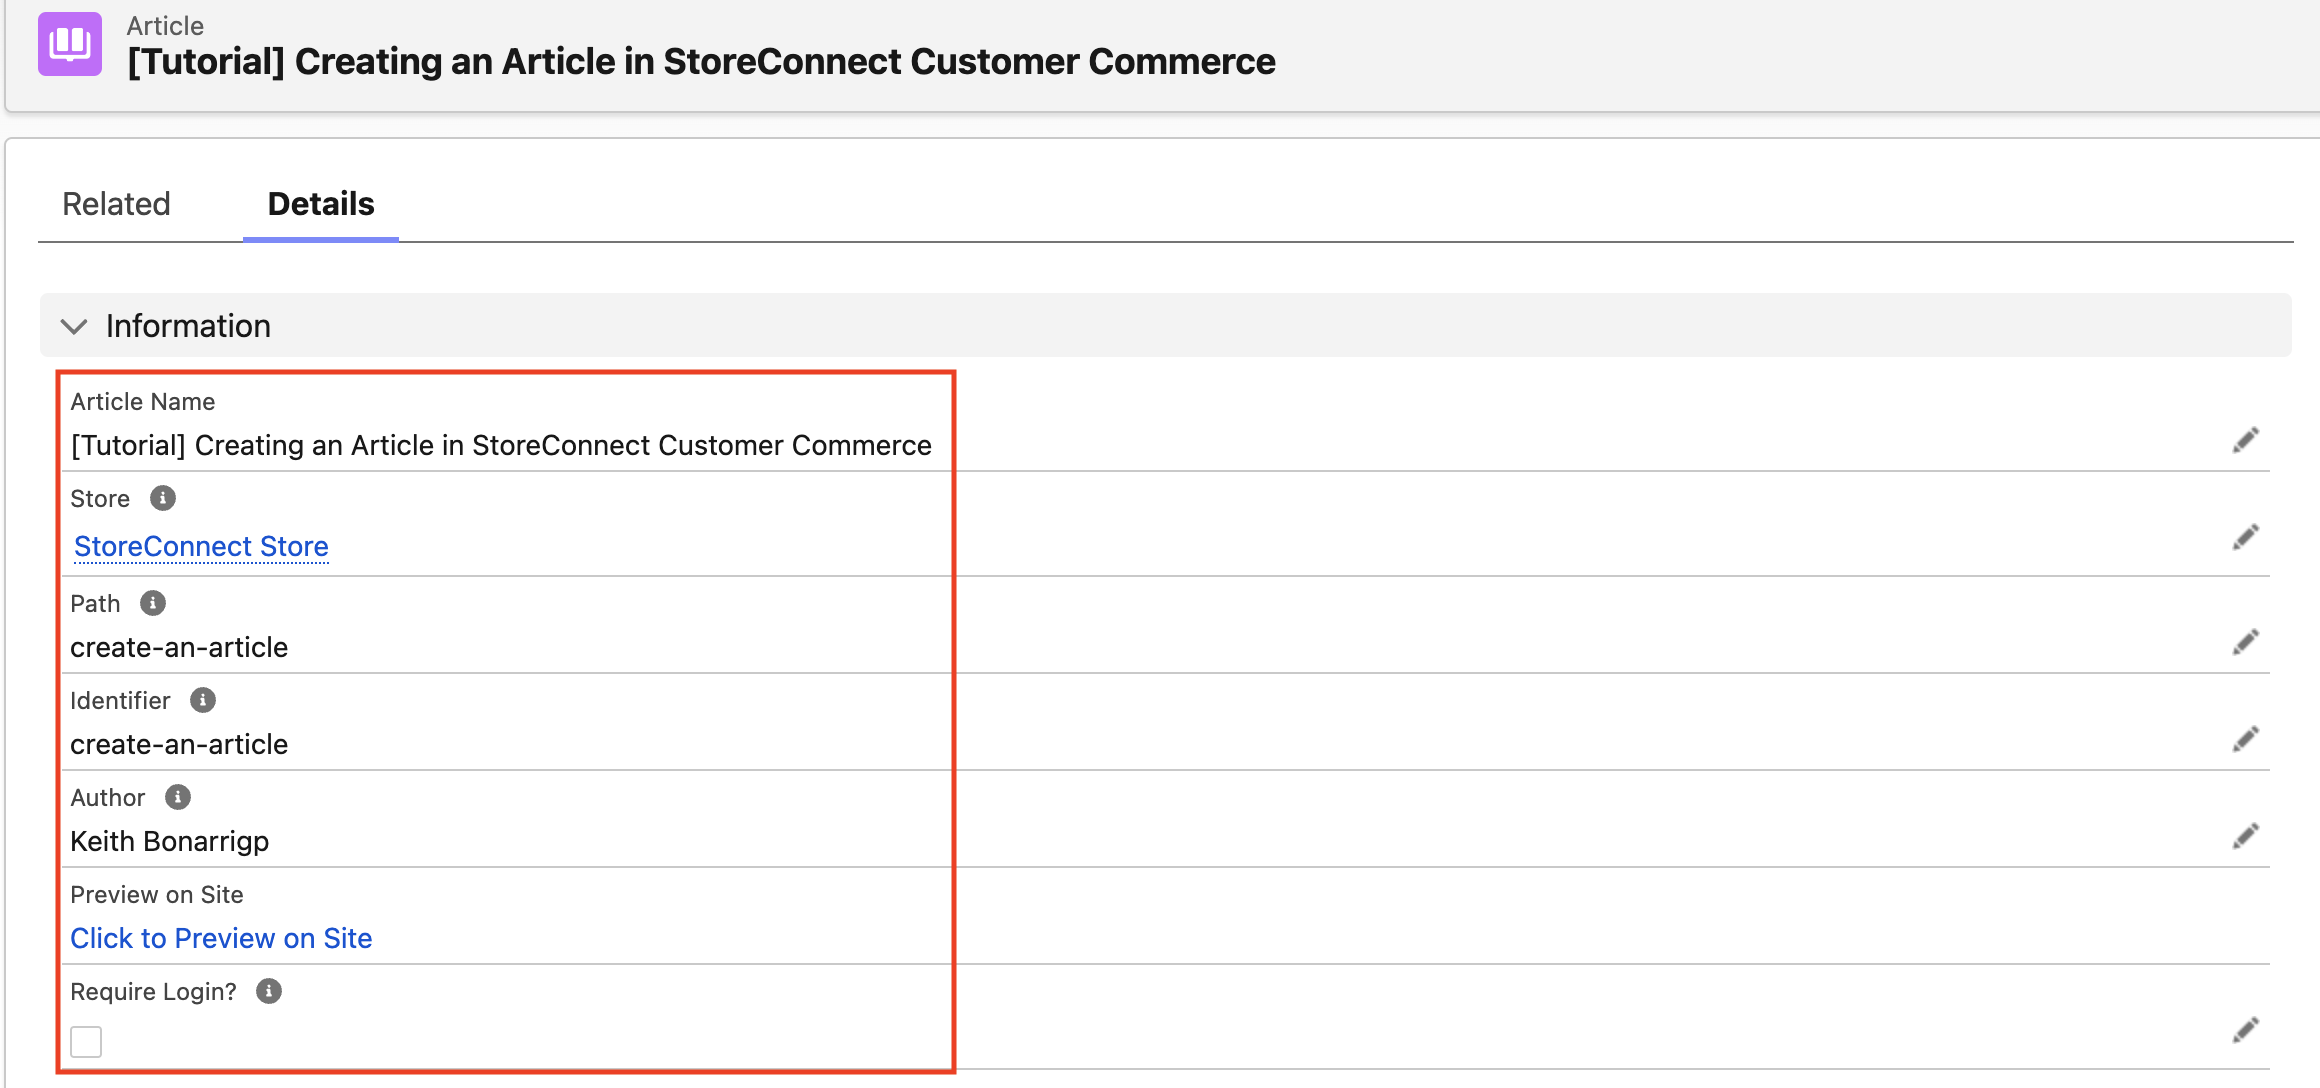
- Enter the Article Name. This identifies the article inside Salesforce and is not shown to customers. The example uses
[Tutorial] Creating an article in StoreConnect. - Select the Store. Start typing the store name and pick it from the results.
- Enter the Path and Identifier. Use lowercase letters, digits, and hyphens, with no spaces or special characters. The example uses
create-an-articlefor both. - Enter the Author, for example
Comms team. -
Check Require Login? only if a customer must be signed in to read the article. Leave it clear for a public article.
Populate the Post Content section
- Set Article Hero Image to an existing media record, or upload a new one. This is the image shown in the article header.
- Enter the Title. This is the H1 heading at the top of the article. The example uses
Creating an article in StoreConnect. - Enter the Subtitle, shown beneath the title. The example uses
Get your message out today. - Enter the Summary. The example uses
Create an article to get your message out in StoreConnect. - Enter the Introductory Text. This accepts plain text, HTML, or Markdown.
-
Enter the Content Body. This is the main body of the article, and also accepts plain text, HTML, or Markdown.
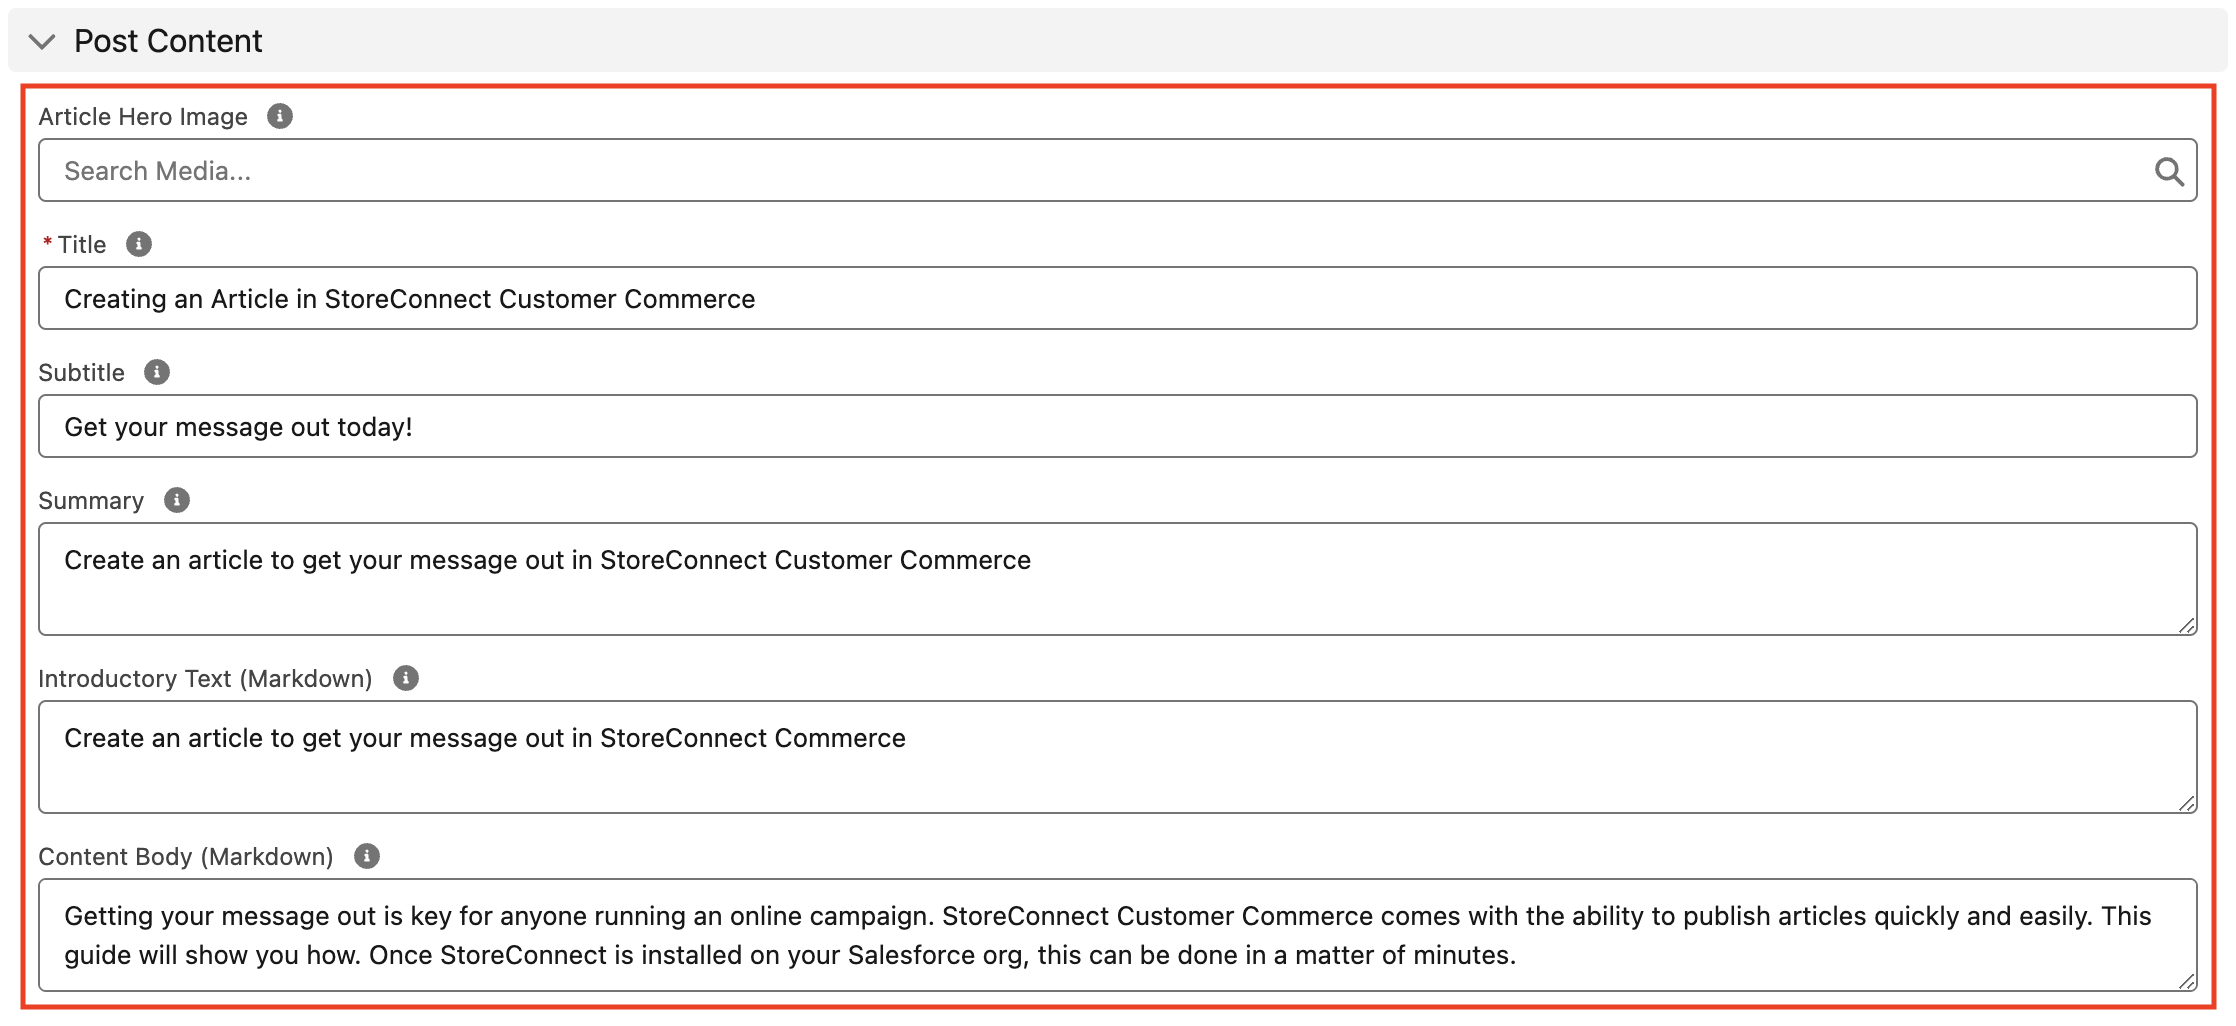
:::note Not every theme renders every field. The default article template does not display Summary or Introductory Text in the article body, so check your own theme before relying on them. :::
Populate the Publishing Details section
- Check Published. Leave this clear until the article is finished, because it is what makes the article publicly viewable.
-
Set the Published On Date with the date picker. A date in the past publishes the article immediately; a date in the future holds it until then. The example uses
01/03/2024.
Populate the SEO Details section
- Enter the Meta Title, the headline search engines show for the article. The example uses
Create an article in StoreConnect. - Enter the Meta Description, the sentence shown beneath that headline in search results. The example uses
A step-by-step guide to creating an article in StoreConnect. -
Select Save.
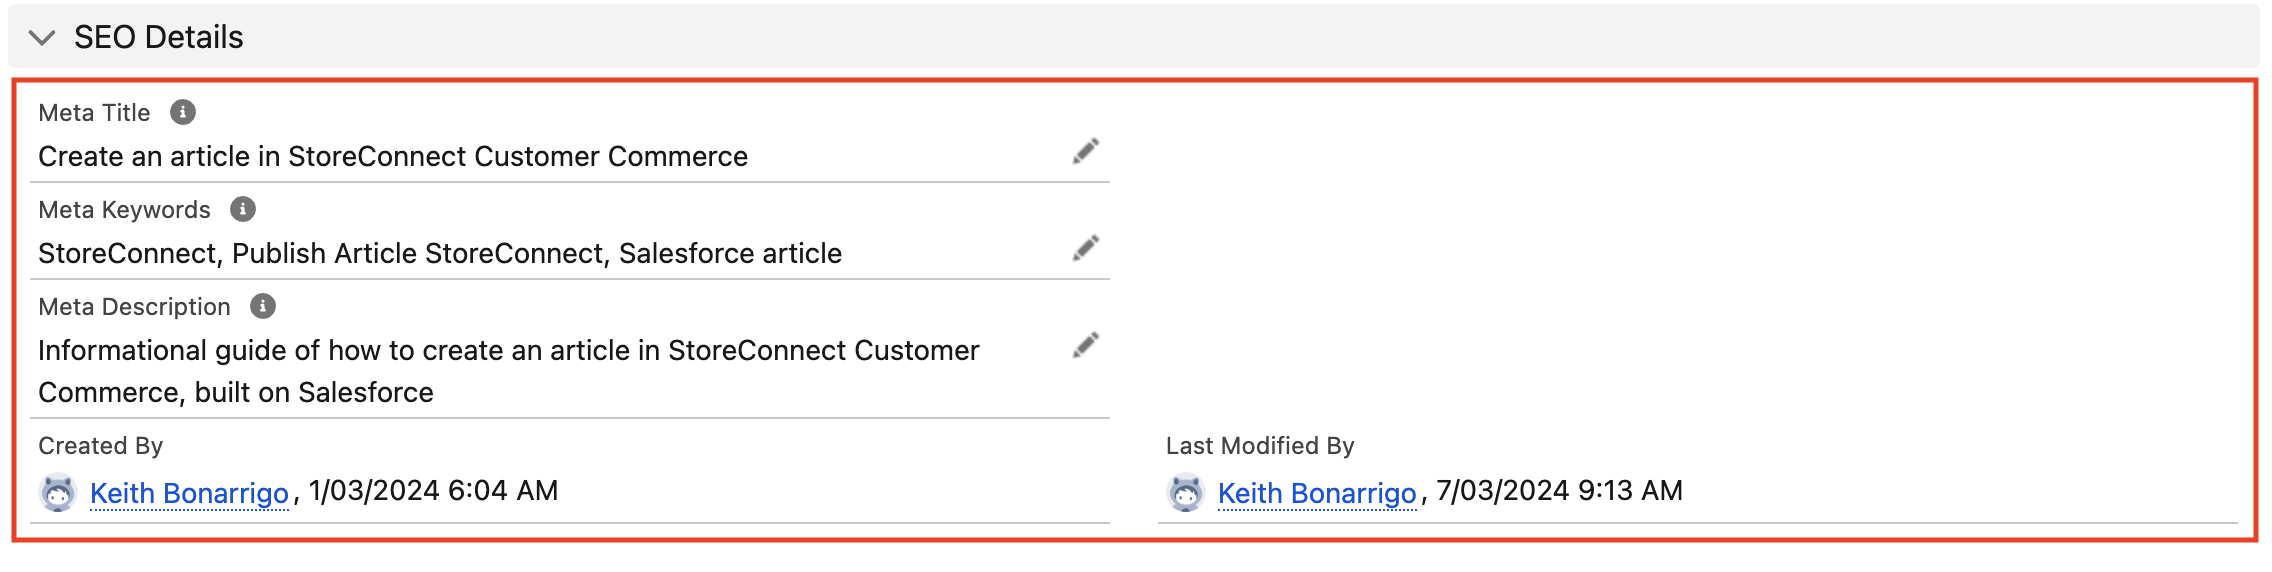
:::note The Meta Keywords field on this section no longer affects search ranking, and populating it will not improve your search position. See SEO and site data. :::
The article is now live at /articles/create-an-article on your storefront, and appears in the archive at /articles. To group it with other articles, see Articles and article categories.
Was this article helpful?
Thanks for your feedback! It helps us improve our docs.