

Create multiple storefronts with StoreConnect
On this page
Use this worked example to build a second storefront by cloning the store that ships with a StoreConnect trial. It walks through every record you need to create, in order, and ends with a checkout on the new store.
For the full checklist without the worked example, see create multiple stores.
How many storefronts your license includes depends on your tier, listed in the ‘Site Performance & Usage Limits’ section of the StoreConnect pricing guide.
Before you begin
- You need a store to clone. This example clones the StoreConnect Store record that installs with a StoreConnect trial.
- You need access to the StoreConnect CMS app in Salesforce.
- Complete the steps in order. Each one depends on records created earlier: the taxonomy has to exist before its categories, and the price book before its entries.
:::note A taxonomy is the structured classification of products into categories and subcategories. It is what lets customers navigate a store and see how products relate to each other. Each storefront has its own taxonomy, which is why you create a new one here rather than reusing the original. :::
What you will have built
By the end of this example:
- A new store named
StoreConnect Store US, cloned from StoreConnect Store, served on the pathus - Its own taxonomy,
SC - US Store Taxonomy - Its own product category, Insurance, holding a series of insurance products
- Its own price book, with those products priced 10% higher
- A different currency,
USD - A Pay Later option at checkout
Step 1: Clone the store record
-
In the StoreConnect CMS app, go to the Stores list.
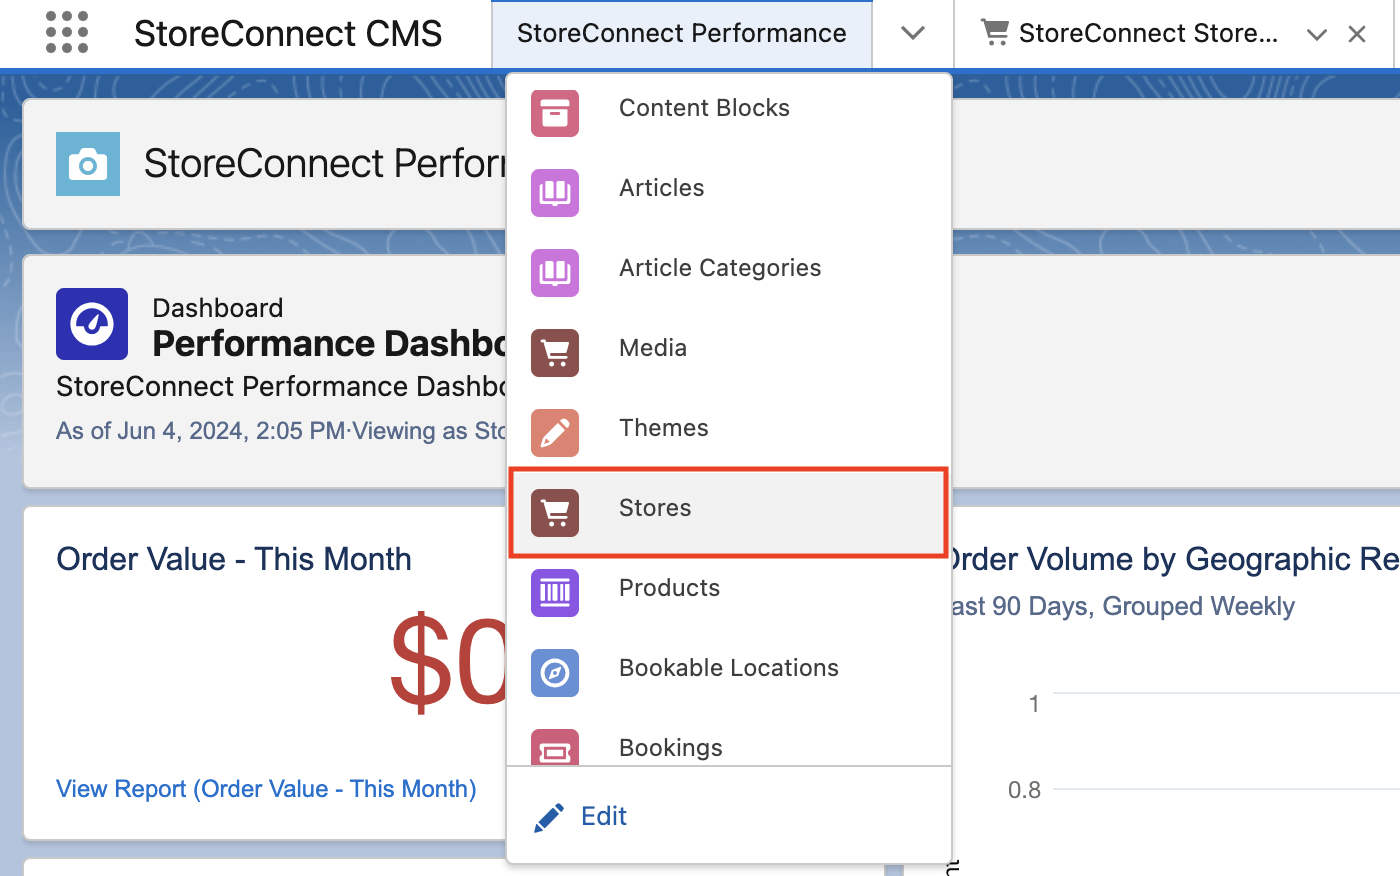
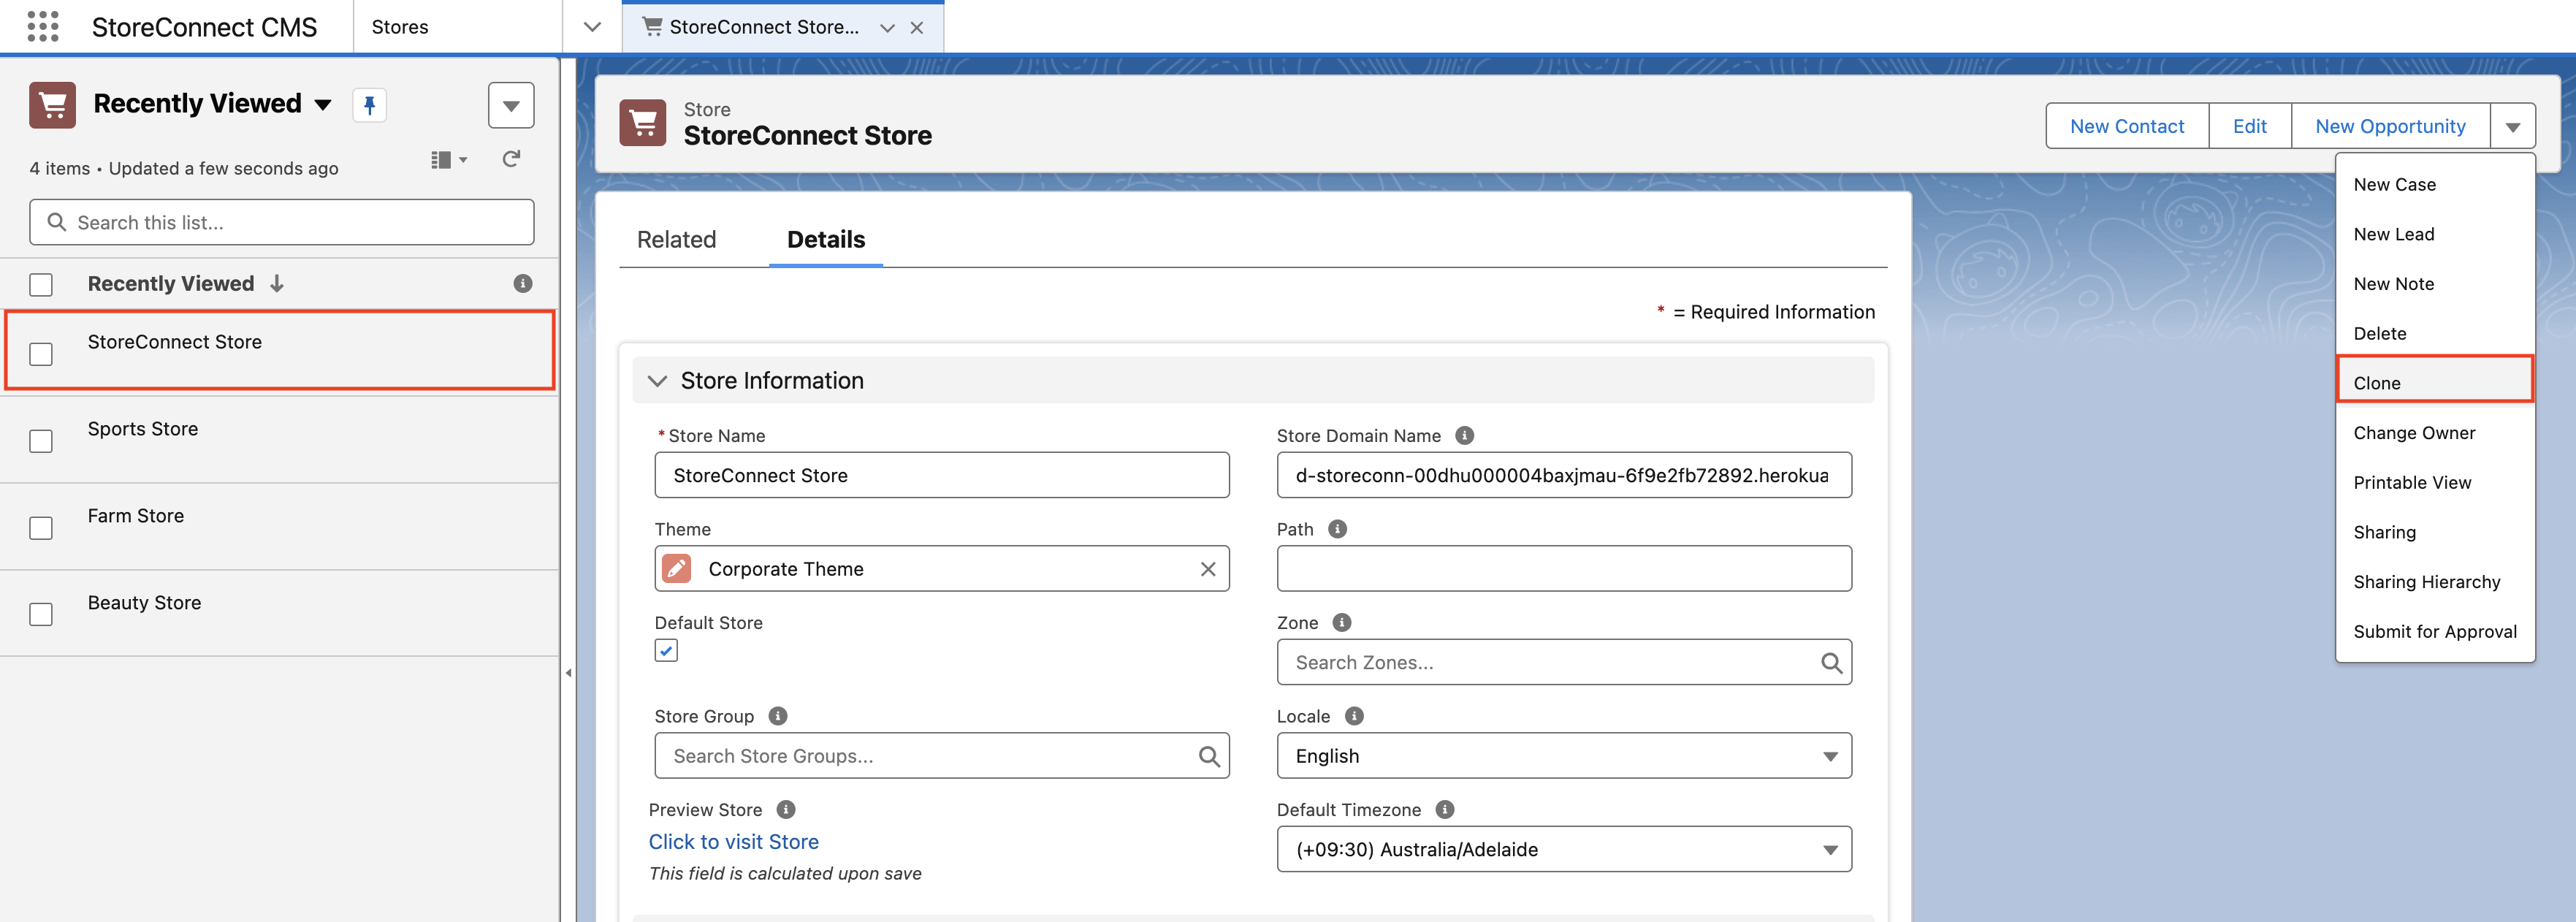
- Open the StoreConnect Store record.
-
Select Clone.
- Enter
StoreConnect Store USin the Store Name field. - Enter
usin the Path field. -
Set Default Timezone to
GMT-8 America/Los Angeles.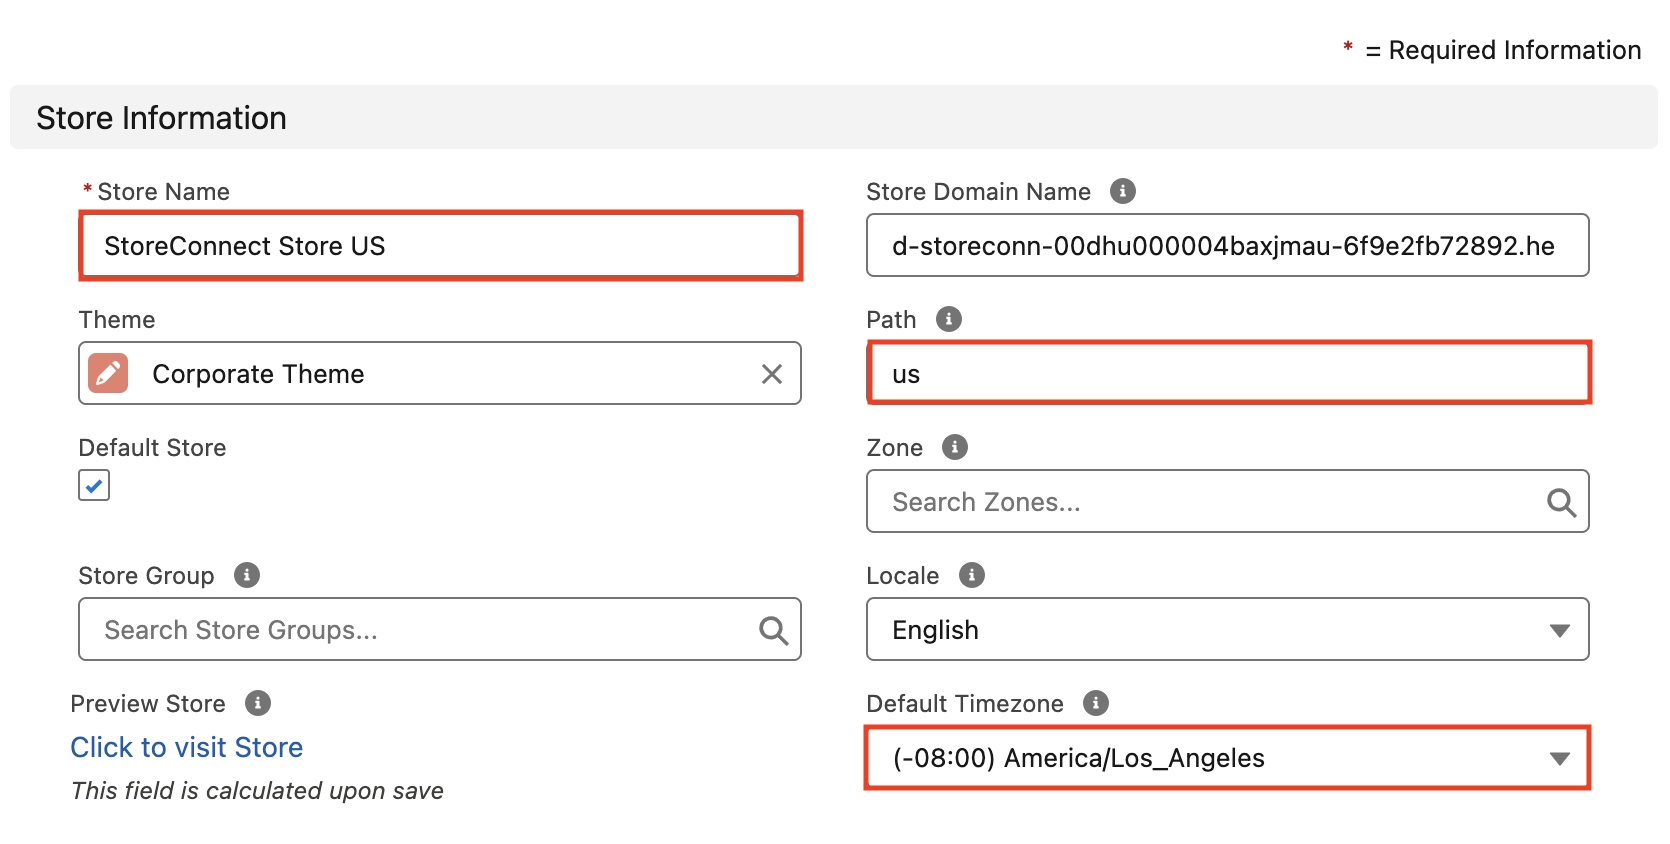
-
In the Currency section further down the record, set Currency to
USD.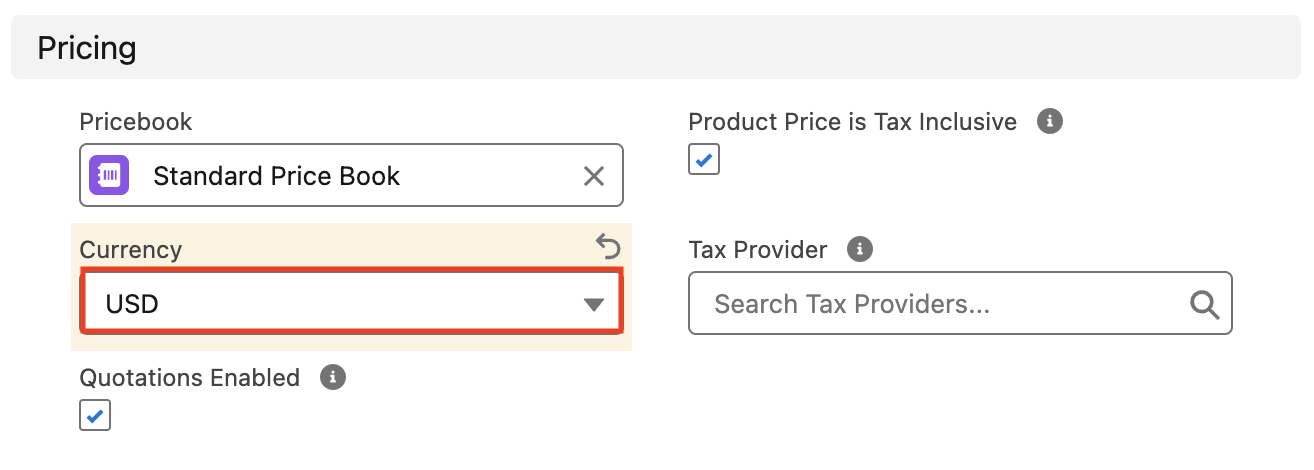
-
Save the record, then confirm the new store appears alongside the original in the Stores list.
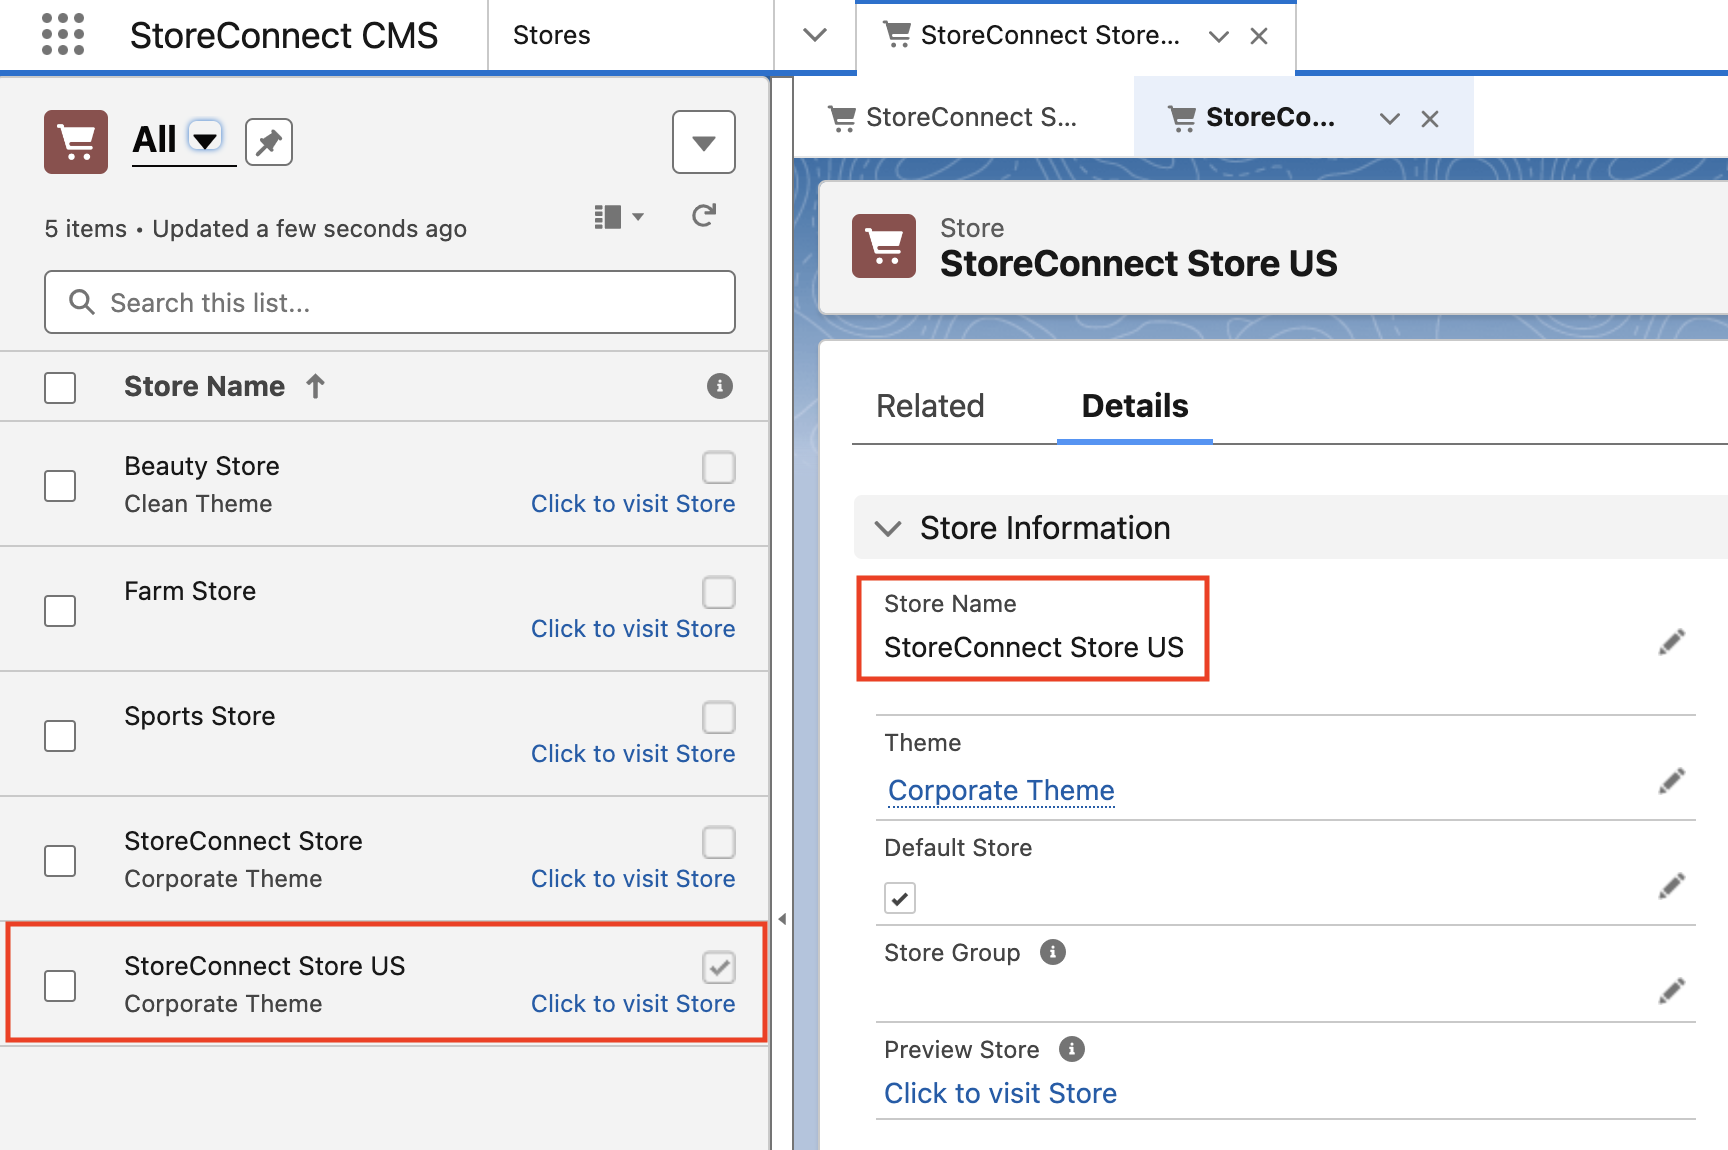
:::note The clone inherits many of the original’s settings, including its home page, terms and conditions page, and menu. You change the menu in step 9. The rest can be changed later. :::
Step 2: Add a payment option
-
On the StoreConnect Store US record, go to the related lists tab.
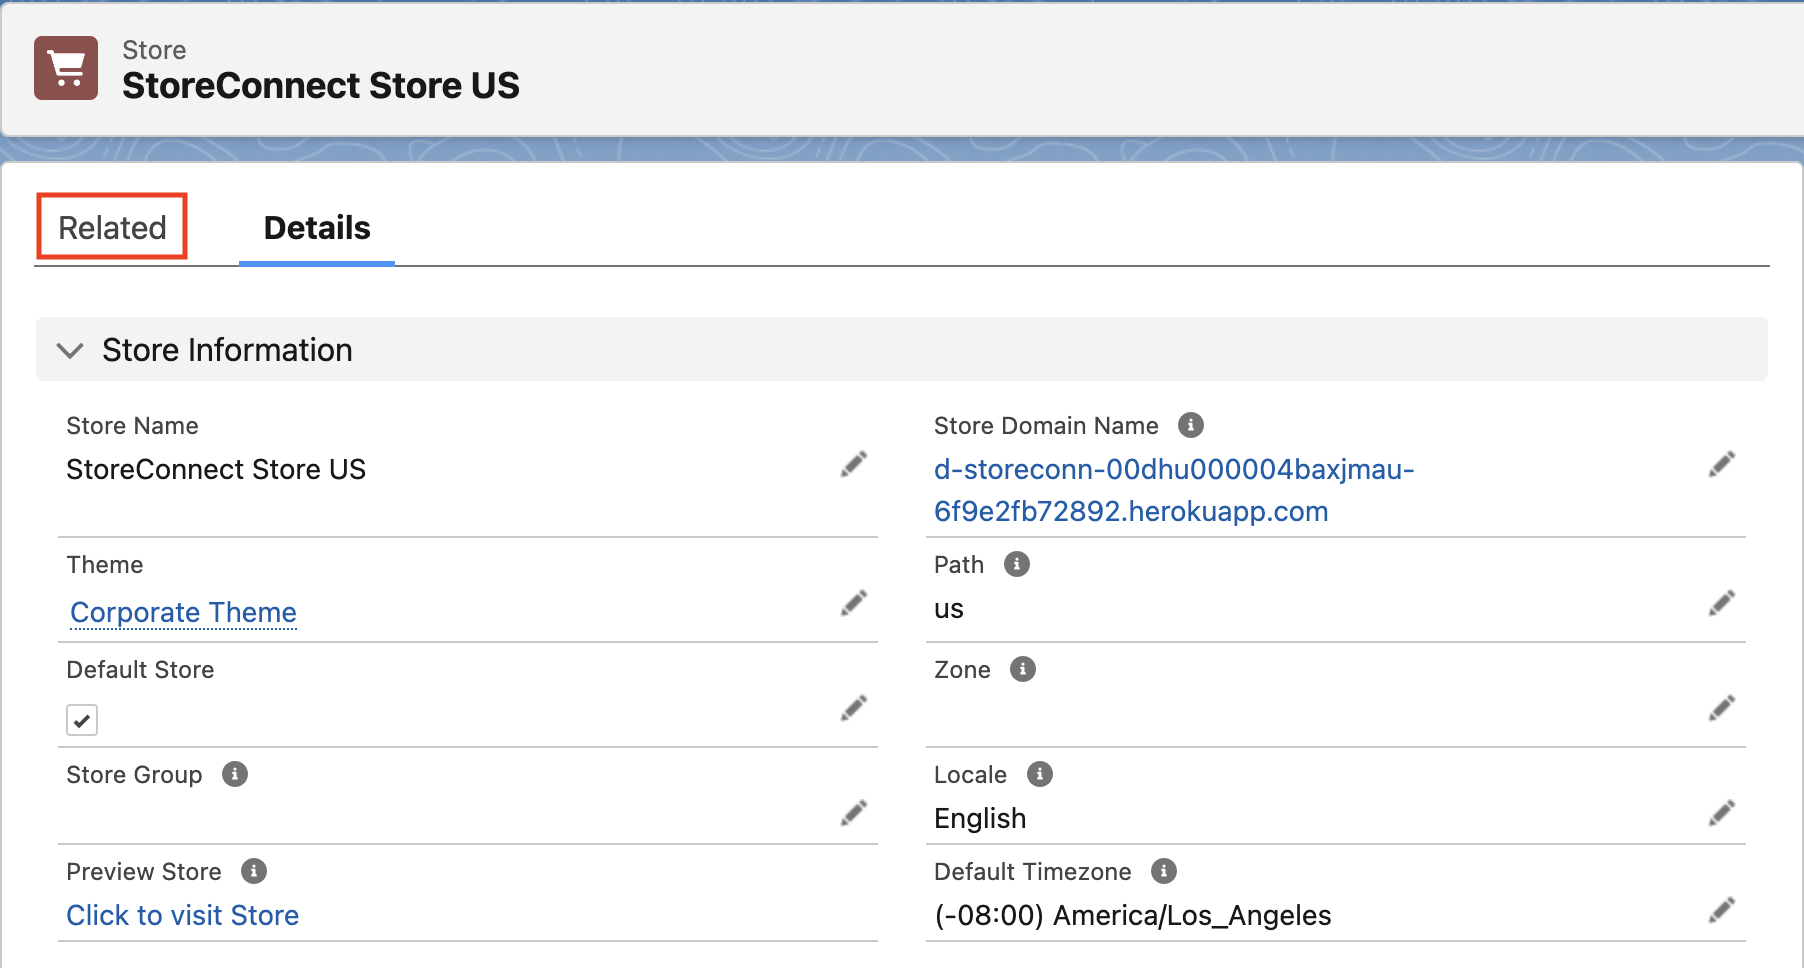
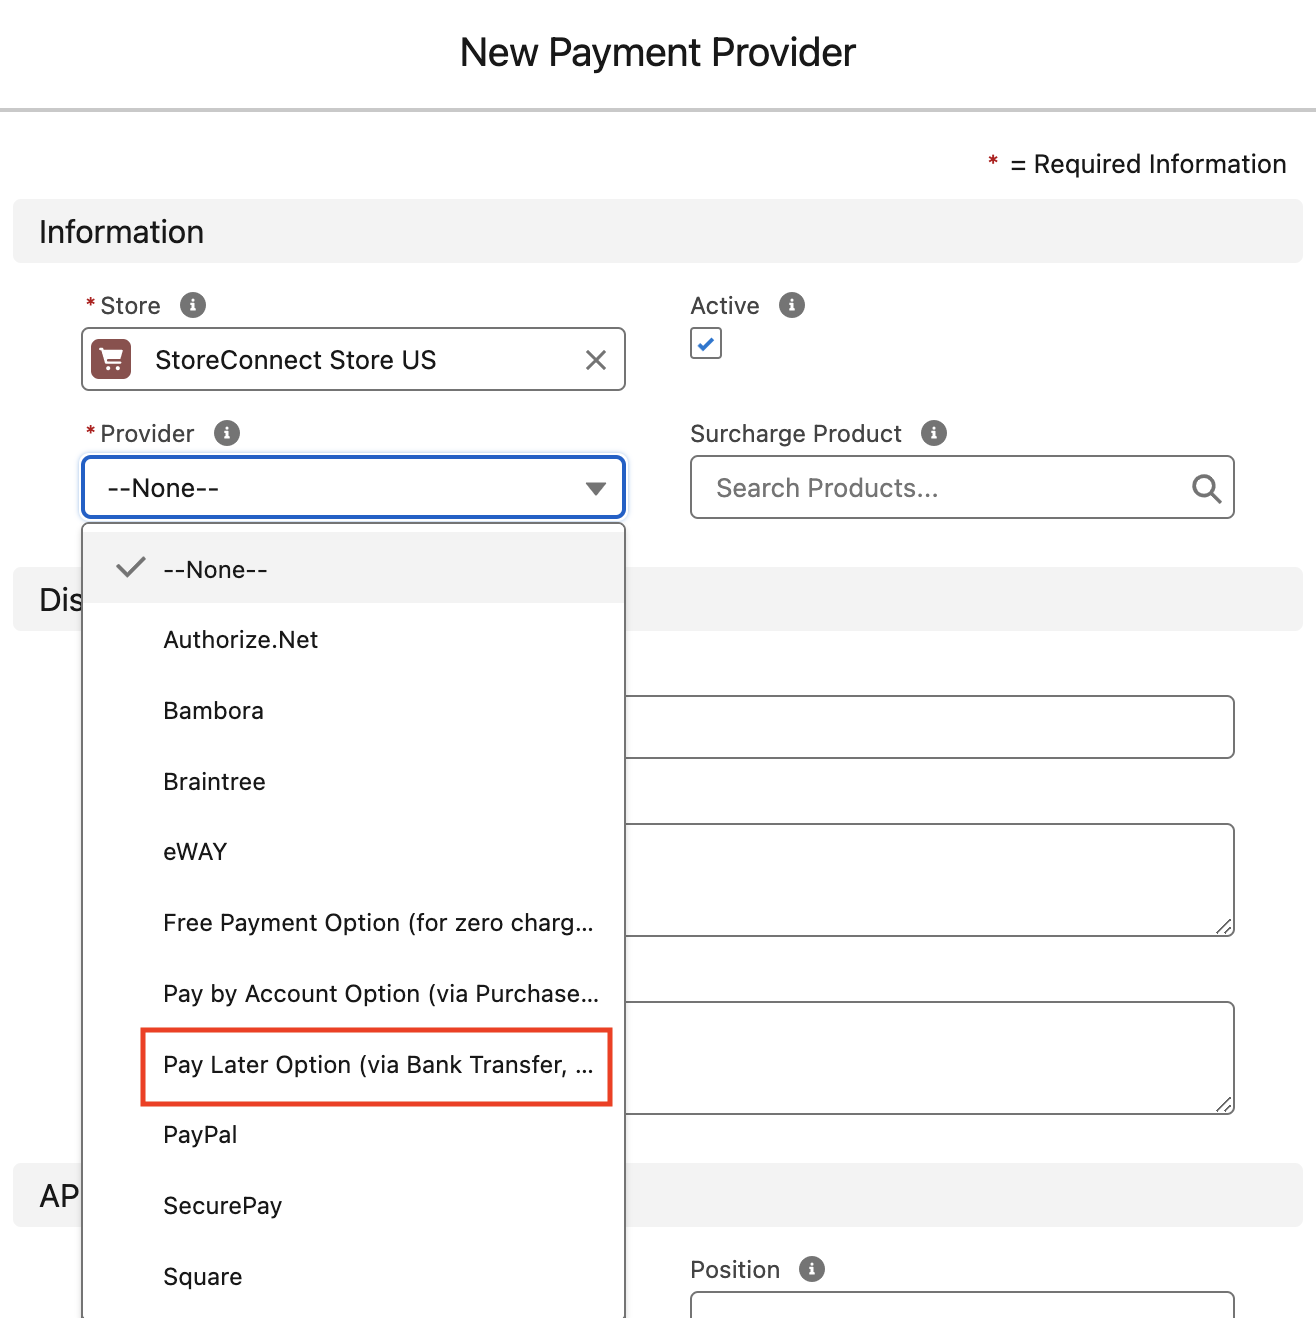
- Go to Payment Providers and select New.
-
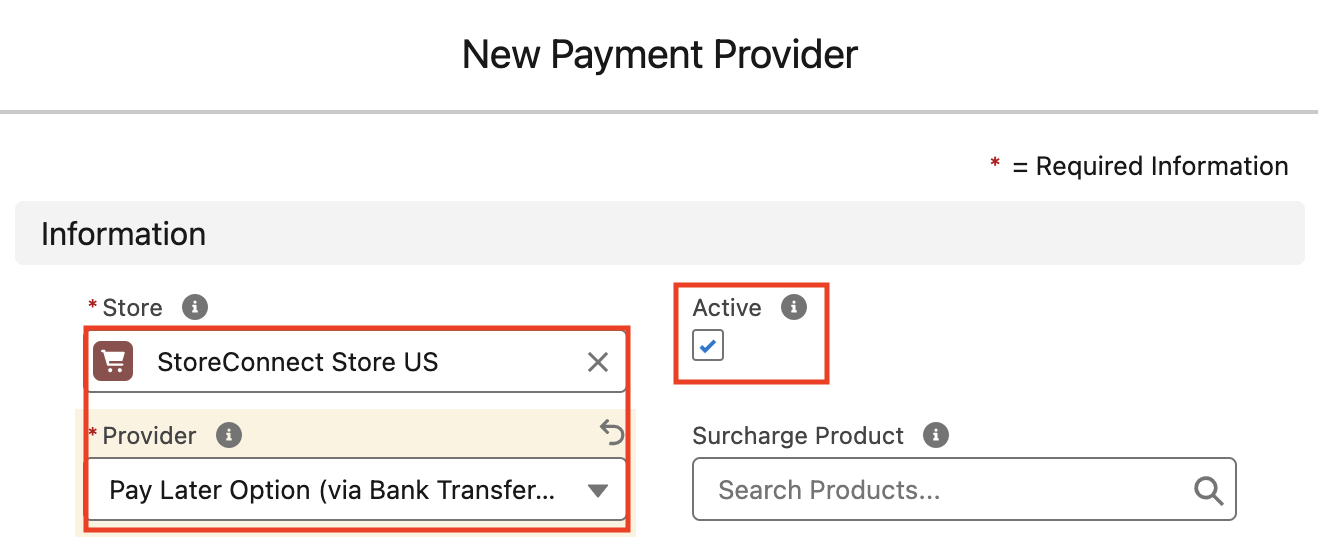
Select Pay Later Option.
-
Select the Active checkbox.
-
Enter
xin the API Mode field andxin the API Secret field. The Pay Later provider takes no real credentials, but both fields are required.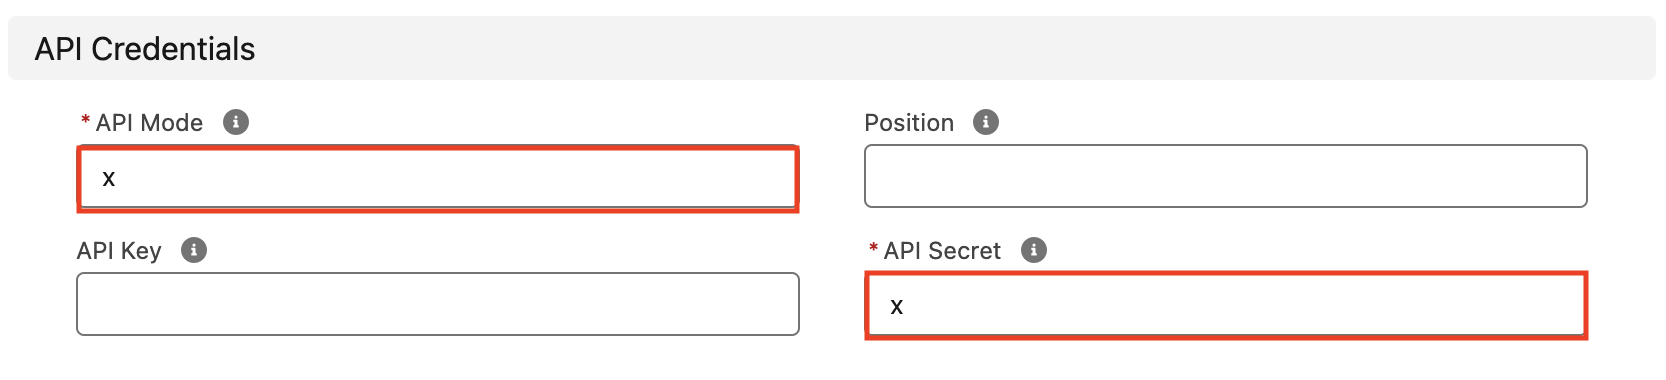
-
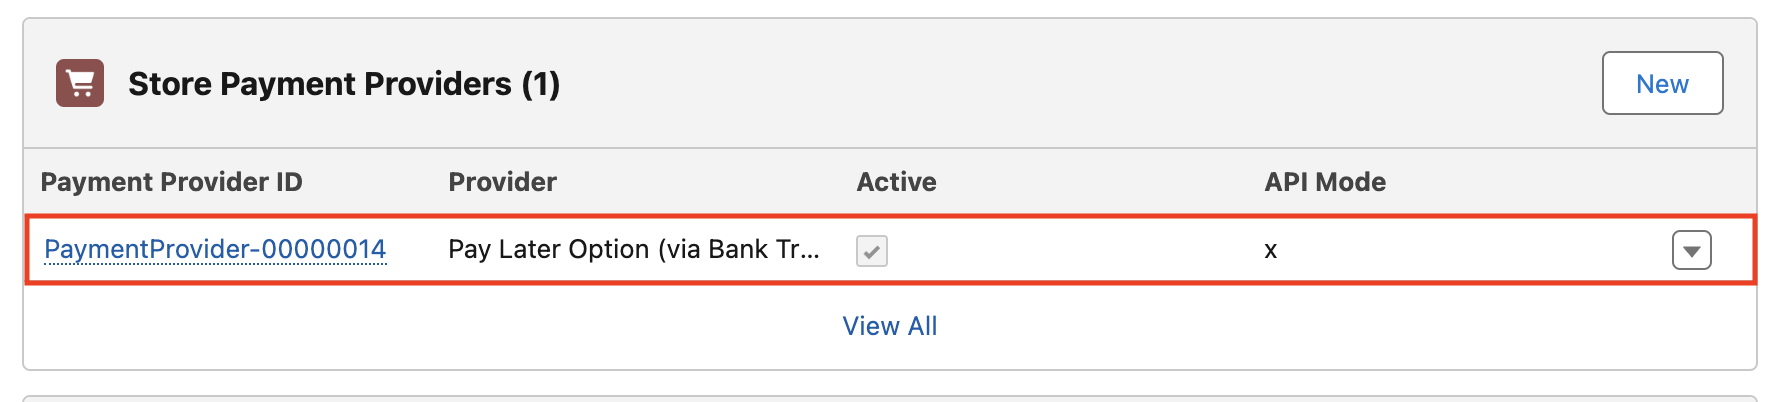
Select Save, then confirm the provider appears in the store’s Payment Providers related list. It is now available at checkout.
Step 3: Create the taxonomy
The taxonomy has to exist before you can attach product categories to it in step 6.
-
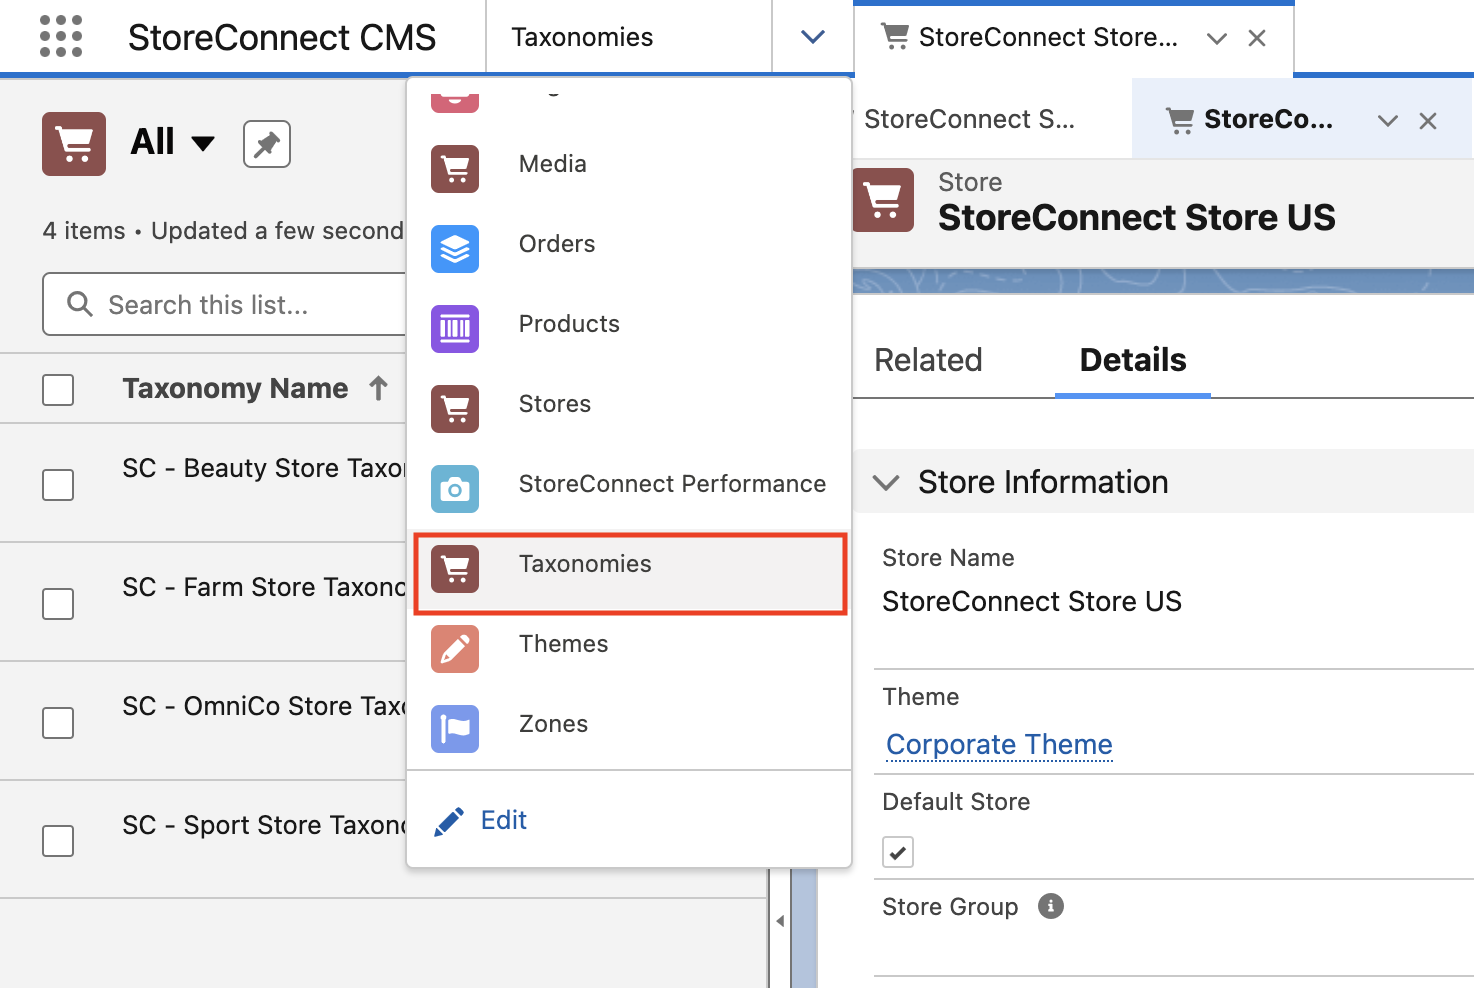
In the StoreConnect CMS app, go to the Taxonomies list.
-
Select New.

- Enter
SC - US Store Taxonomyin the Taxonomy Name field. -
Set Store Id to
StoreConnect Store US, so the taxonomy belongs to the new store rather than the original.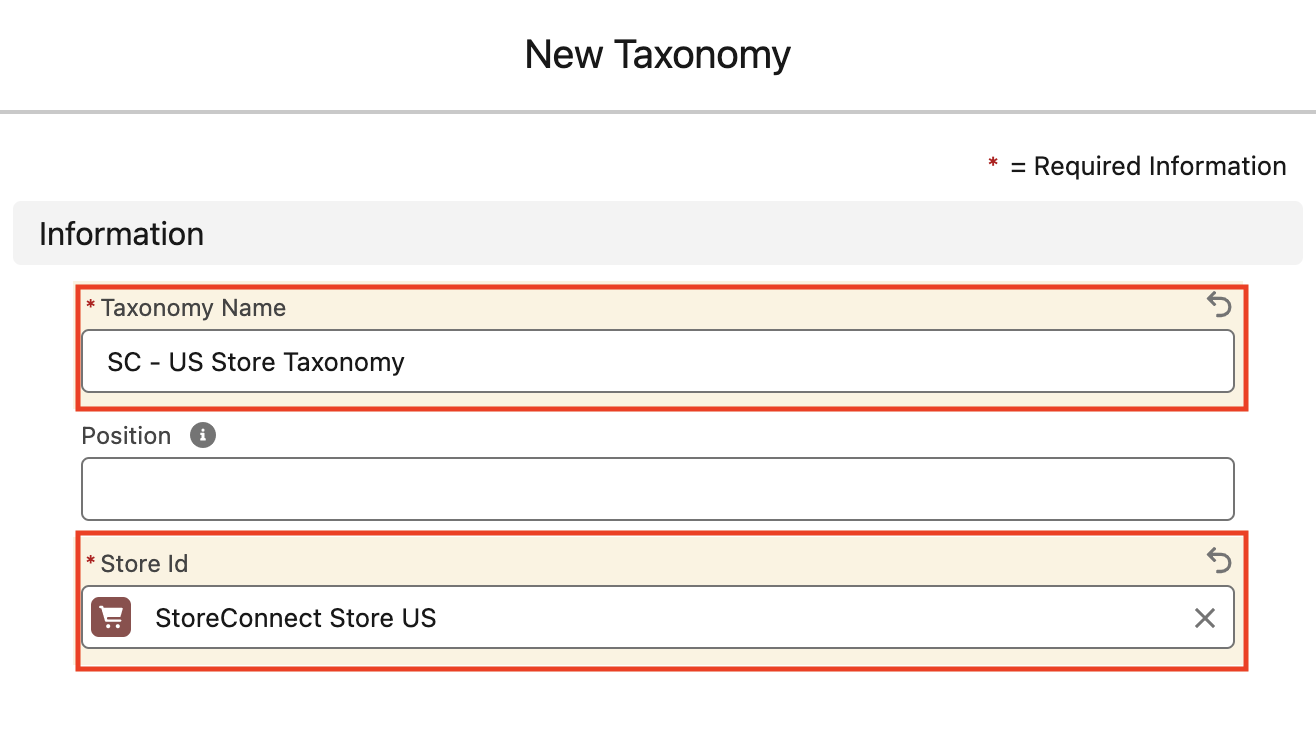
- Select Save.
Step 4: Create the price book
-
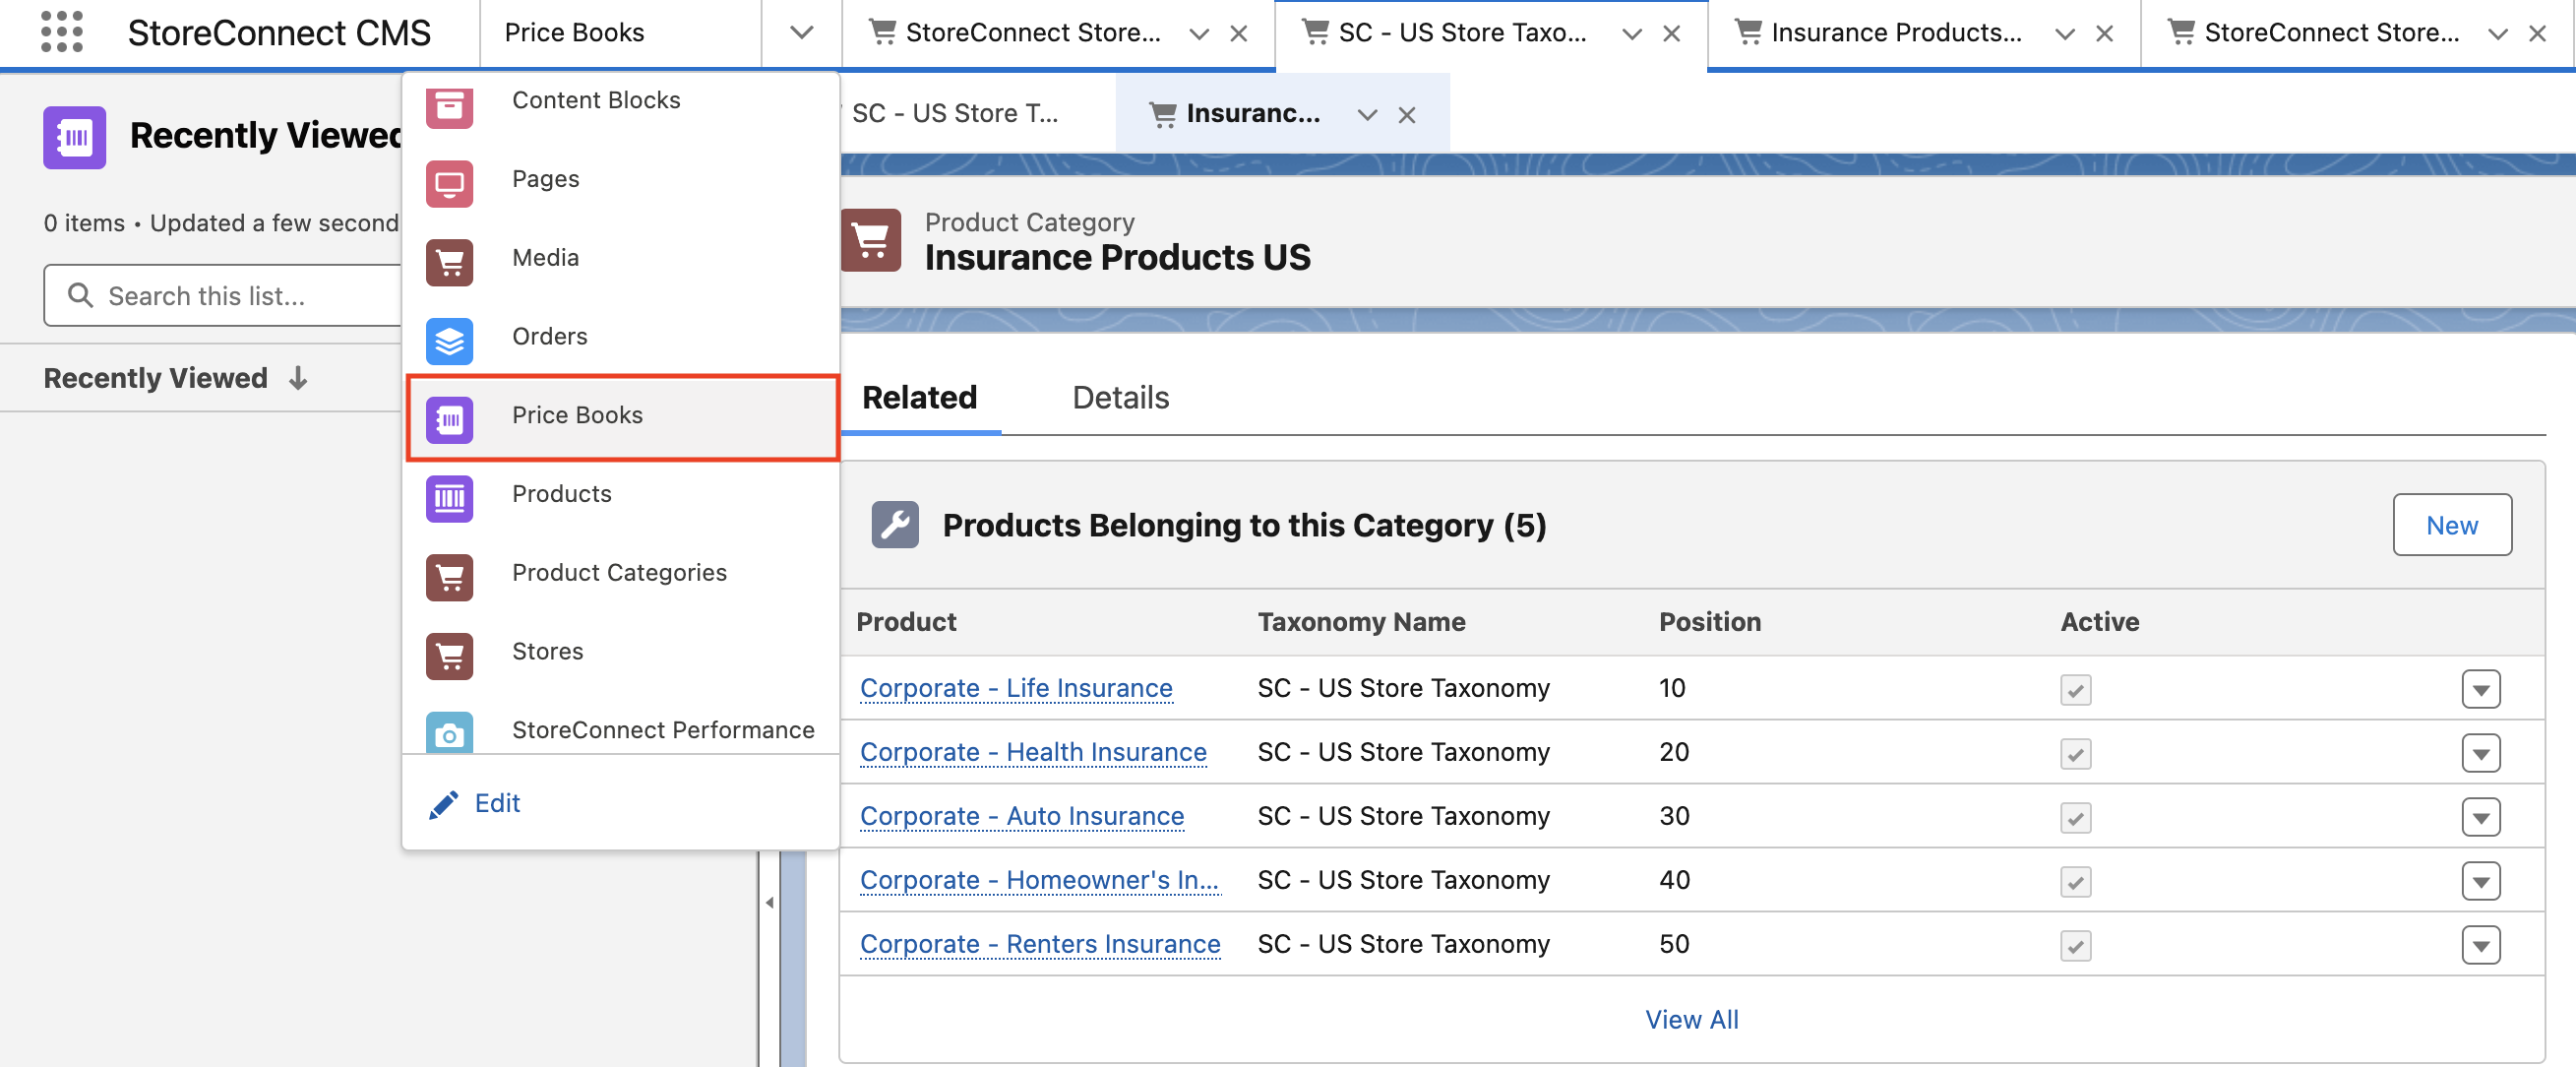
In the StoreConnect CMS app, go to the Price Books list.
-
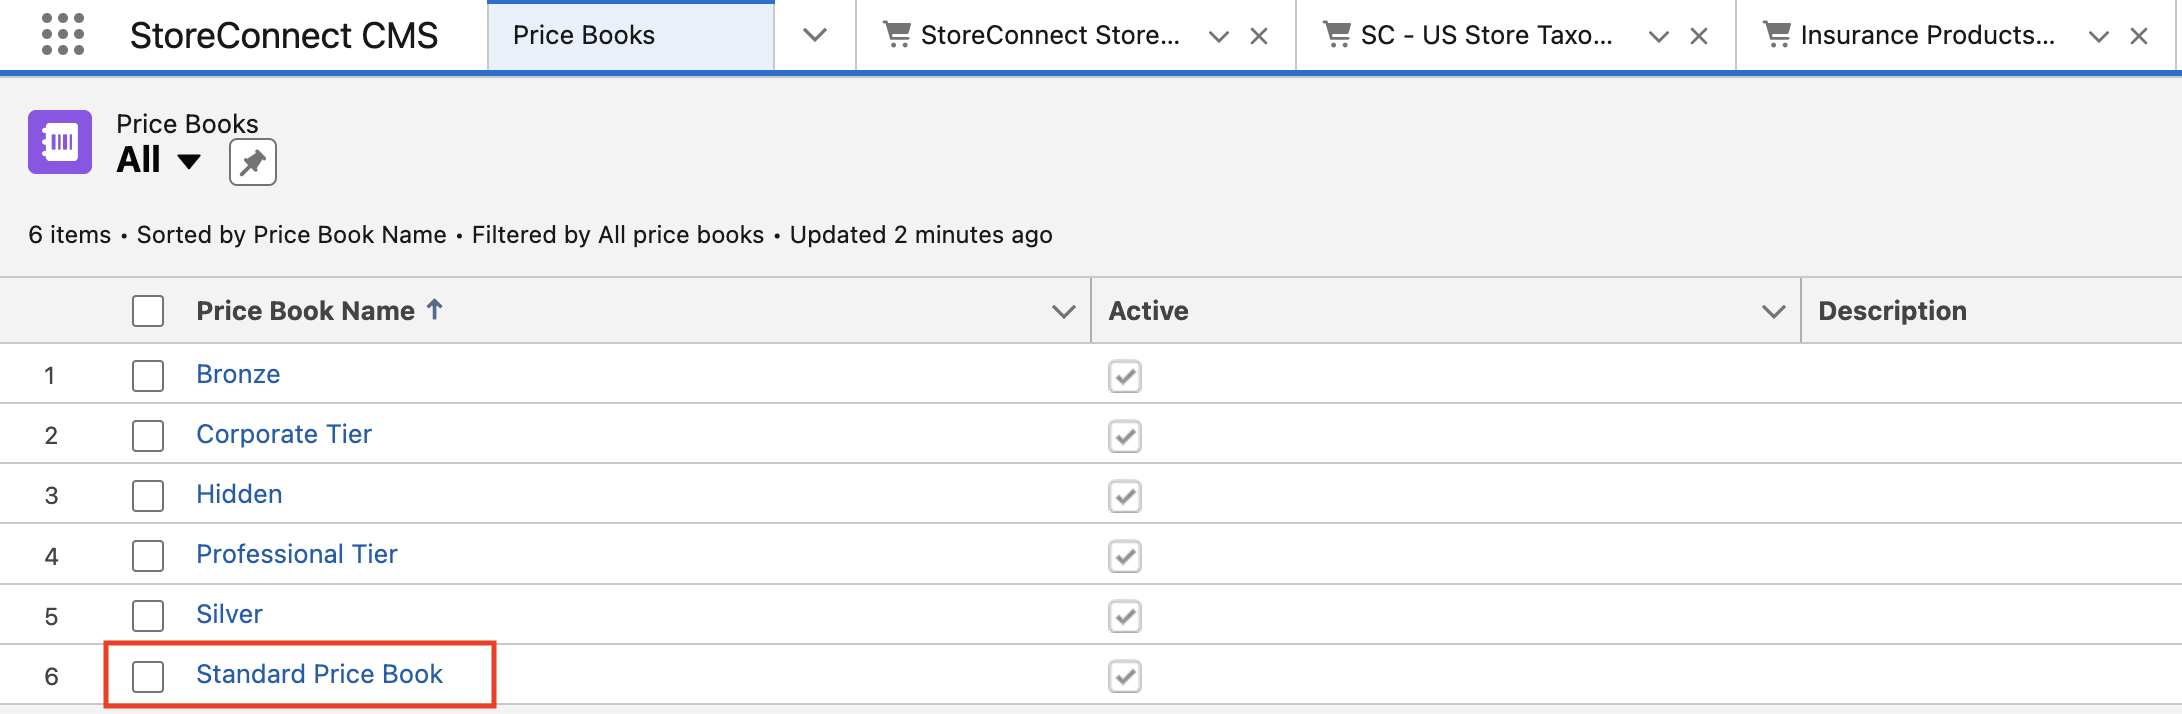
Open Standard Price Book.
-
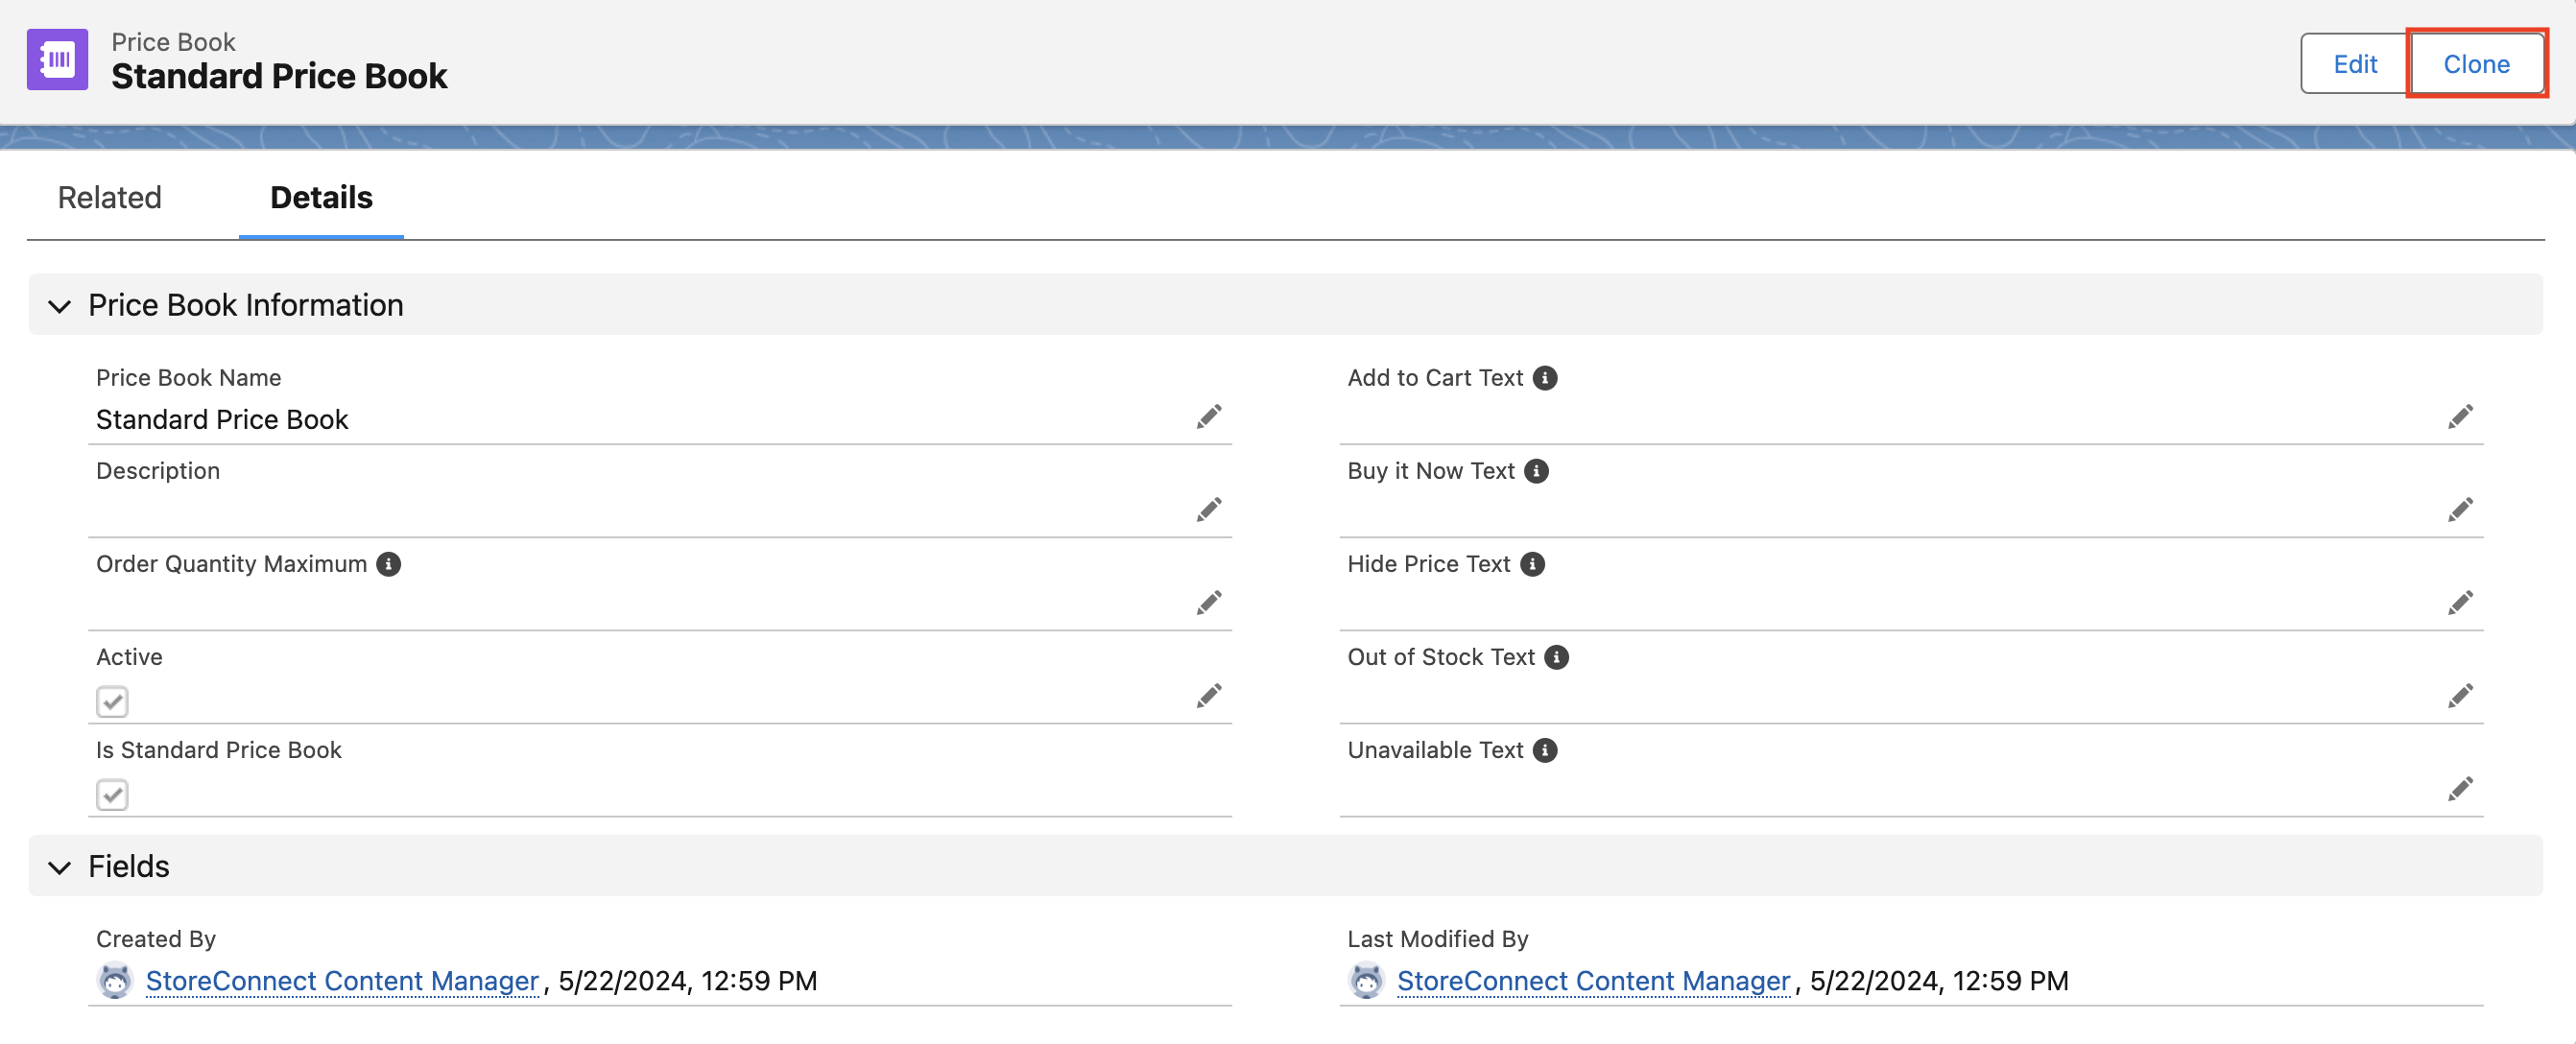
Select Clone.
- Enter
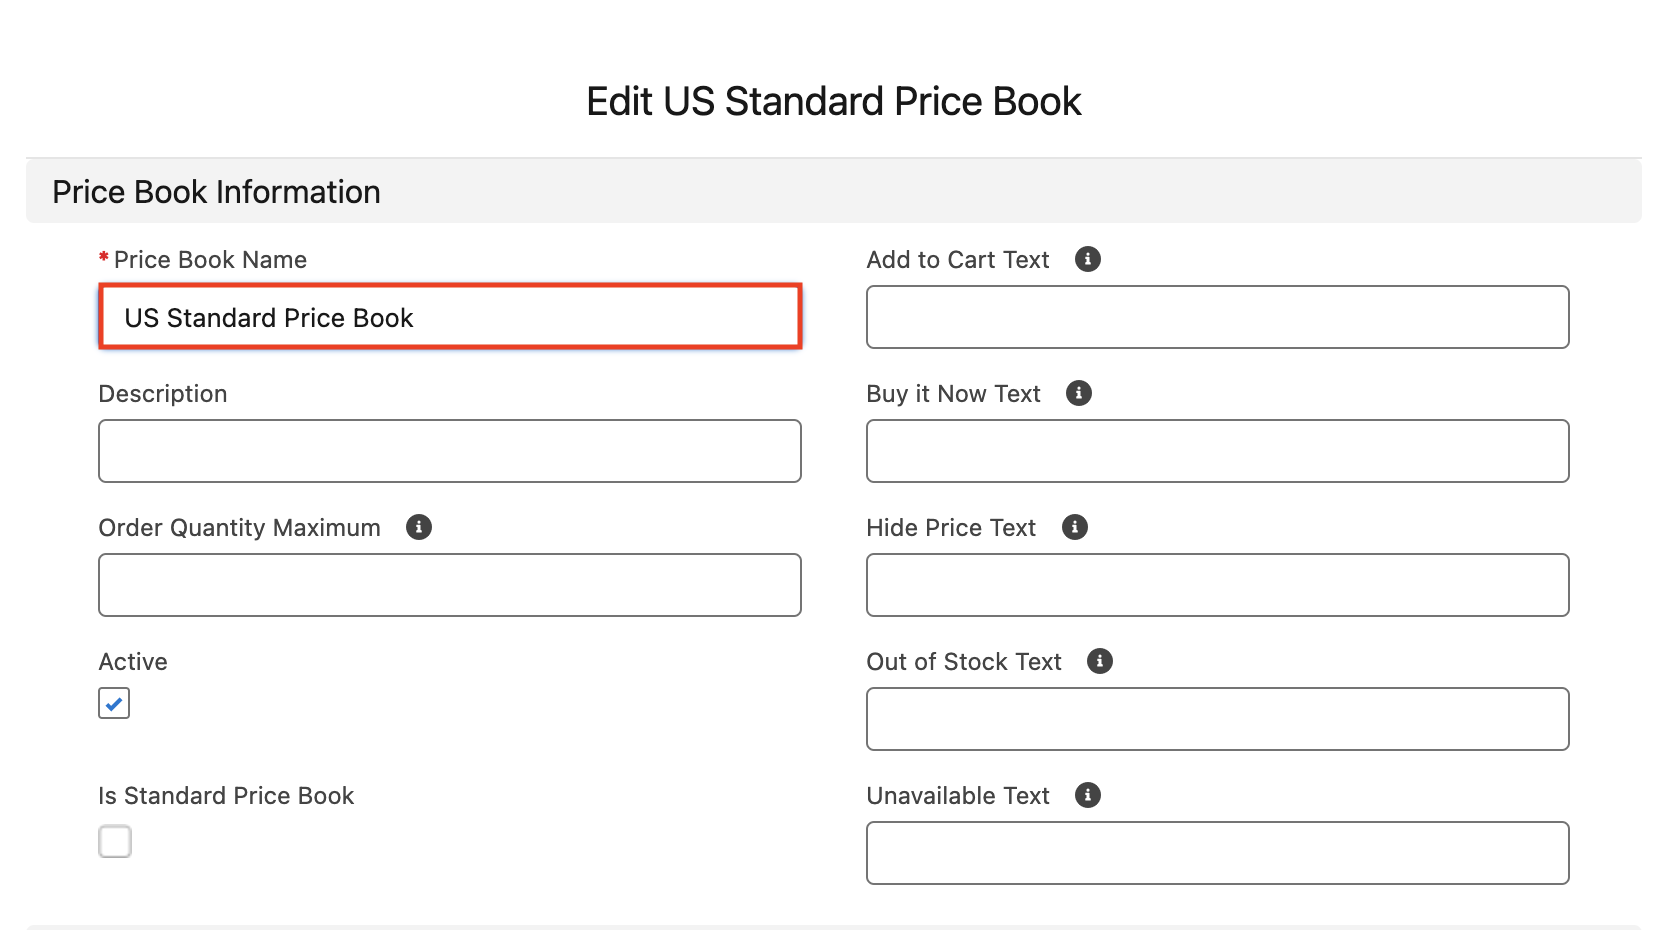
US Standard Price Bookin the Price Book Name field. -
Select the Active checkbox, then save.
Step 5: Assign the price book to the store
- In the StoreConnect CMS app, go to the Stores list and open StoreConnect Store US.
- Go to the Pricing section of the record and select Edit.
-
Set the Pricebook field to
US Standard Price Book.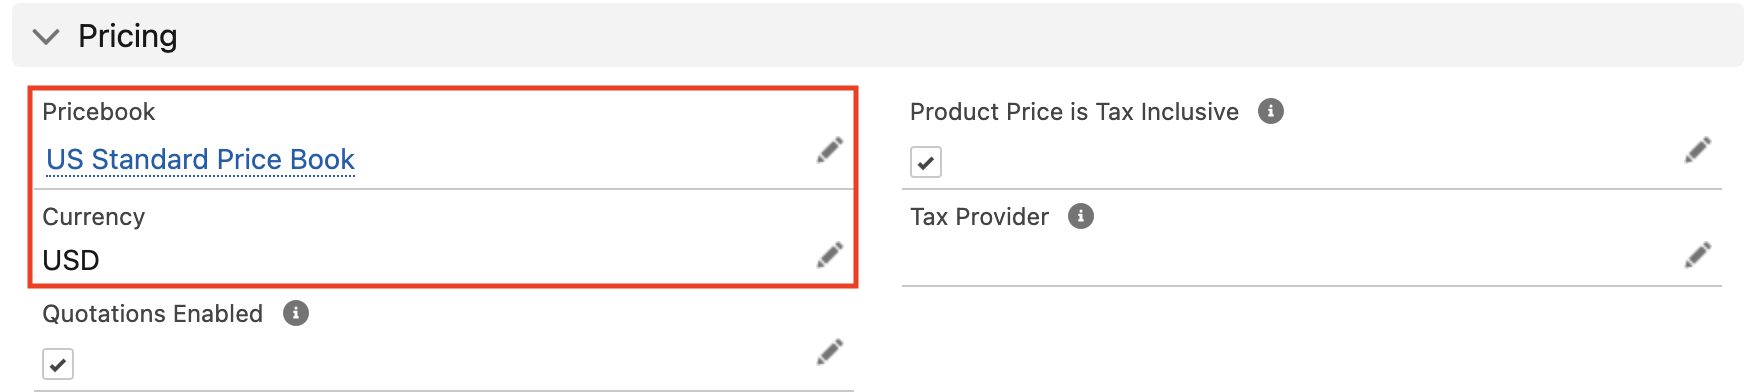
- Select Save.
Step 6: Create the product category
This example uses the insurance products that ship with the trial, so it needs a category to hold them.
-
In the StoreConnect CMS app, go to the Product Categories list.
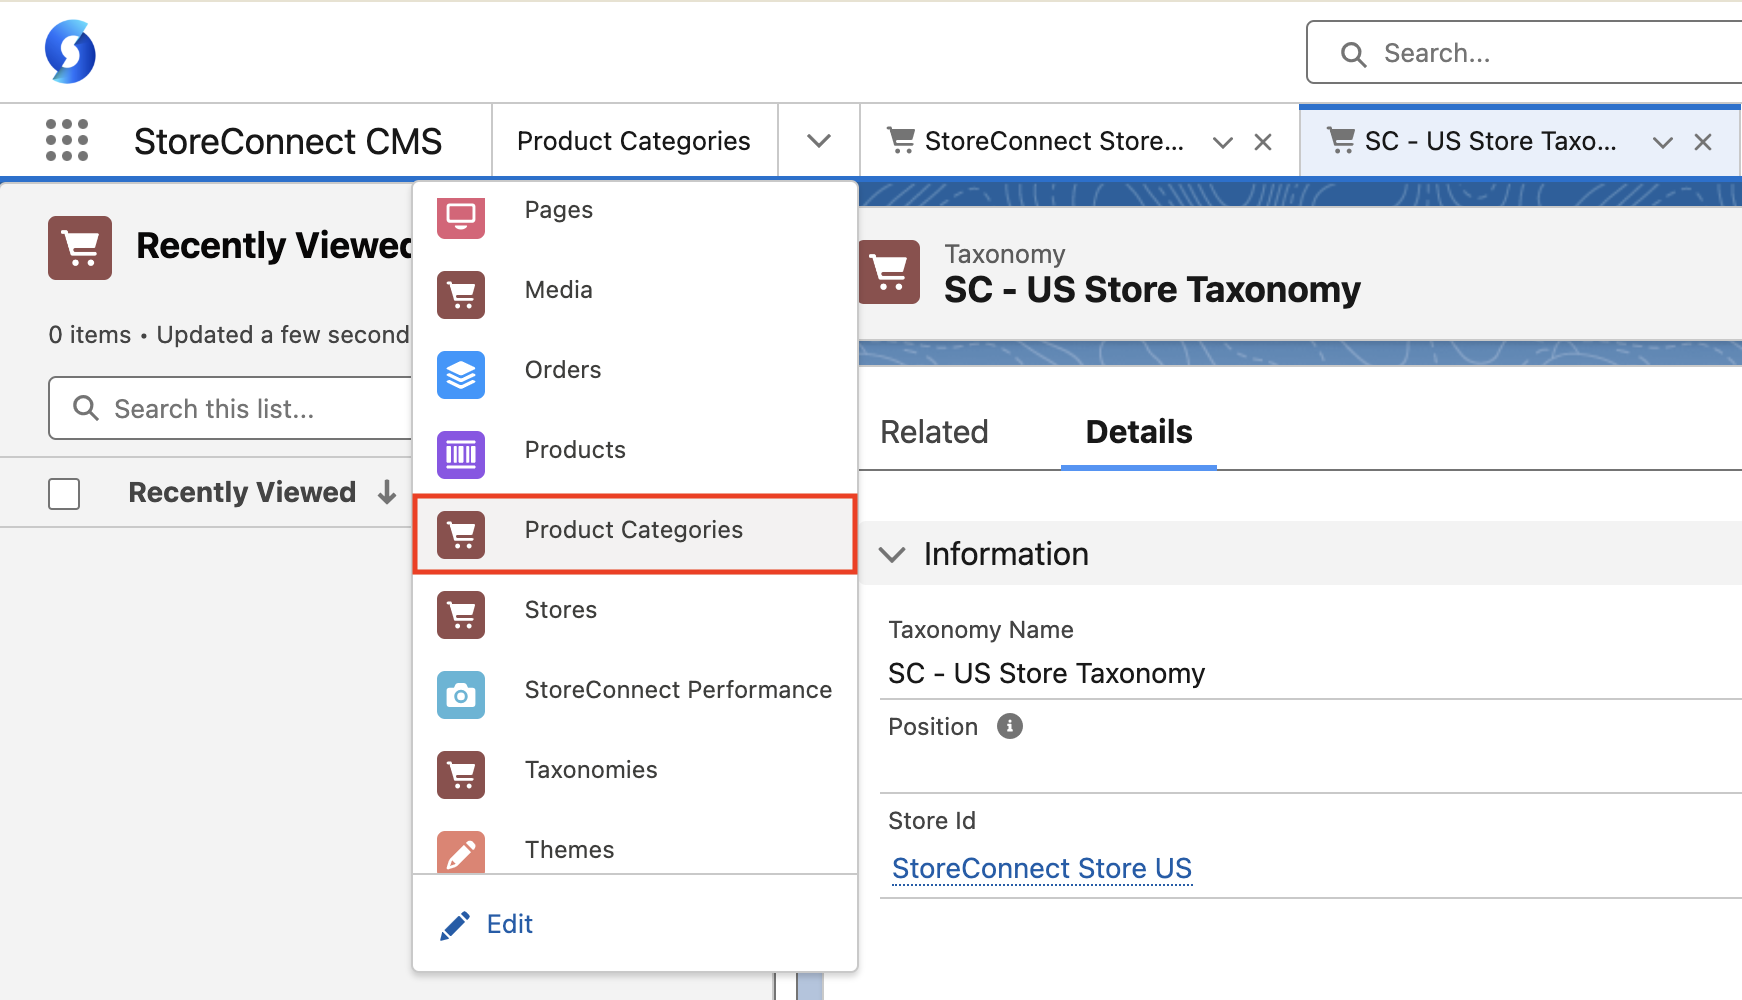
-
Select New.

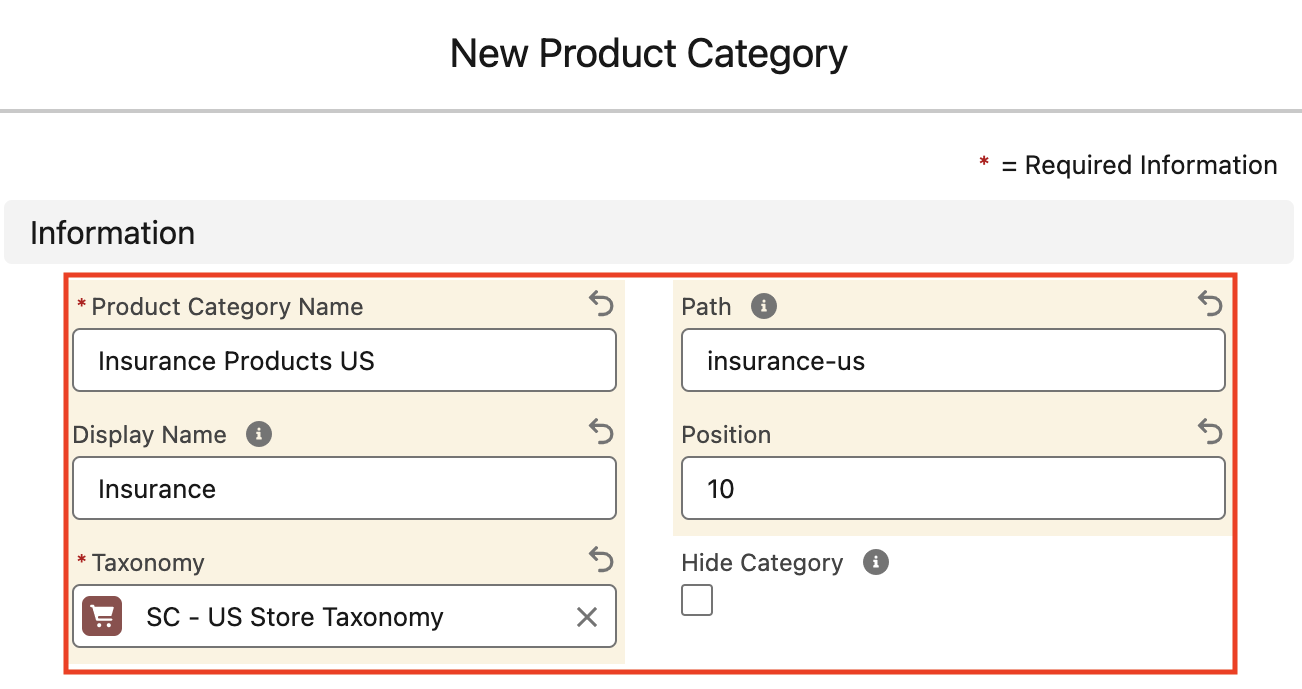
- Enter
Insurance Products USin the Product Category Name field. This is the name you see in Salesforce. - Enter
Insurancein the Display Name field. This is the name customers see on the storefront. - Set the Taxonomy field to
SC - US Store Taxonomy, the taxonomy you created in step 3. - Enter
insurance-usin the Path field. - Enter
10in the Position field. This orders the category relative to any other categories you add. - Leave Hide Category clear, so the category appears on the storefront.
-
Save the record.
Step 7: Add products to the category
-
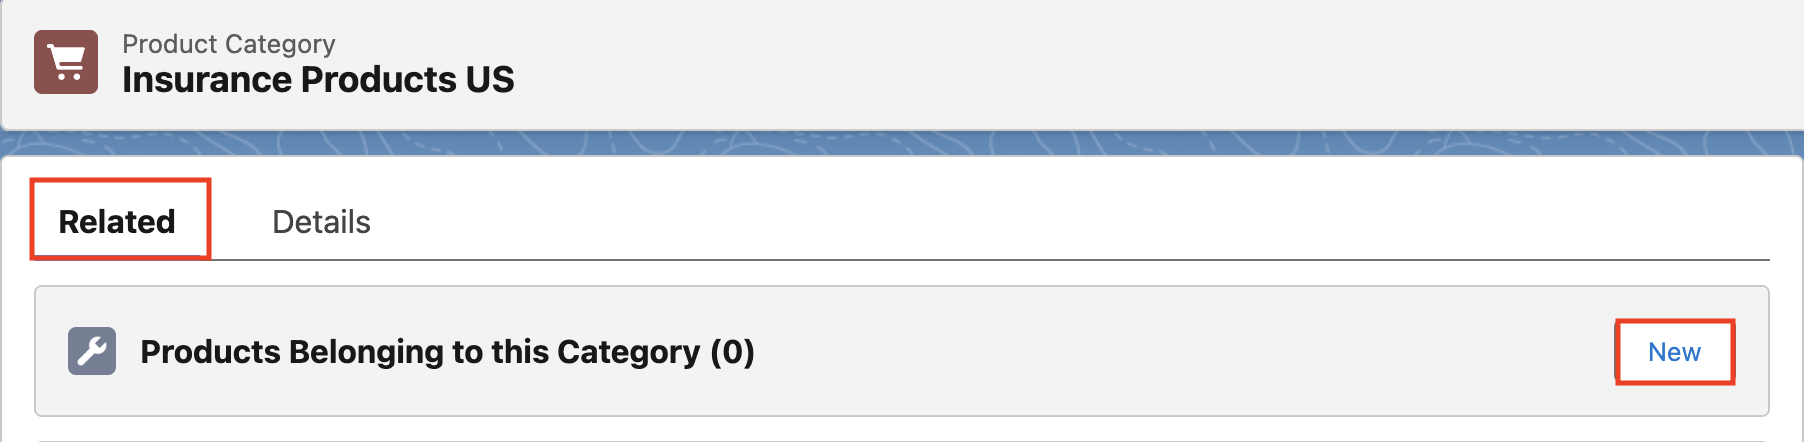
On the Insurance Products US category, go to the related lists tab and select New under Products Belonging to this Category.
-
Search for
insuranceand select Corporate - Life Insurance.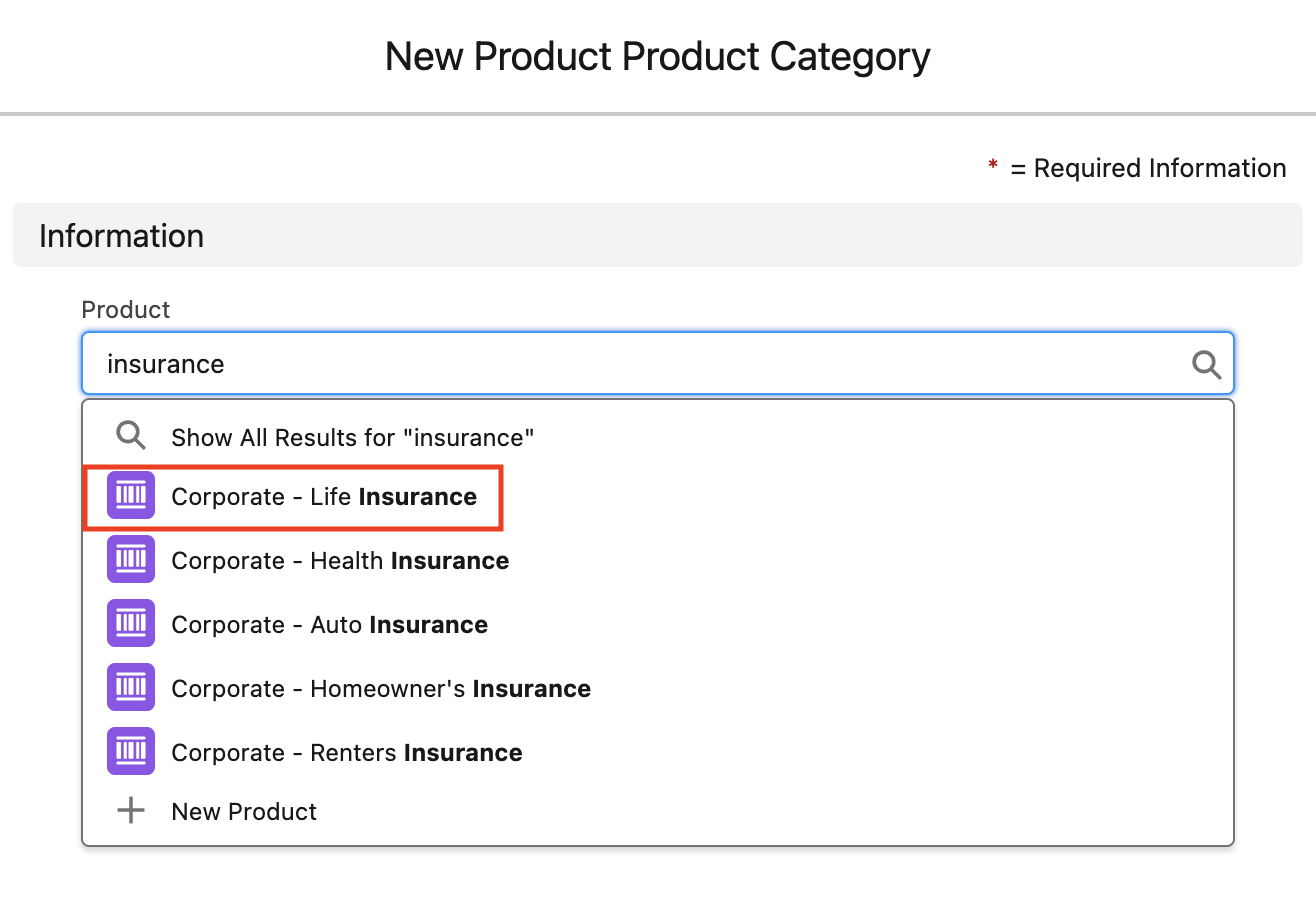
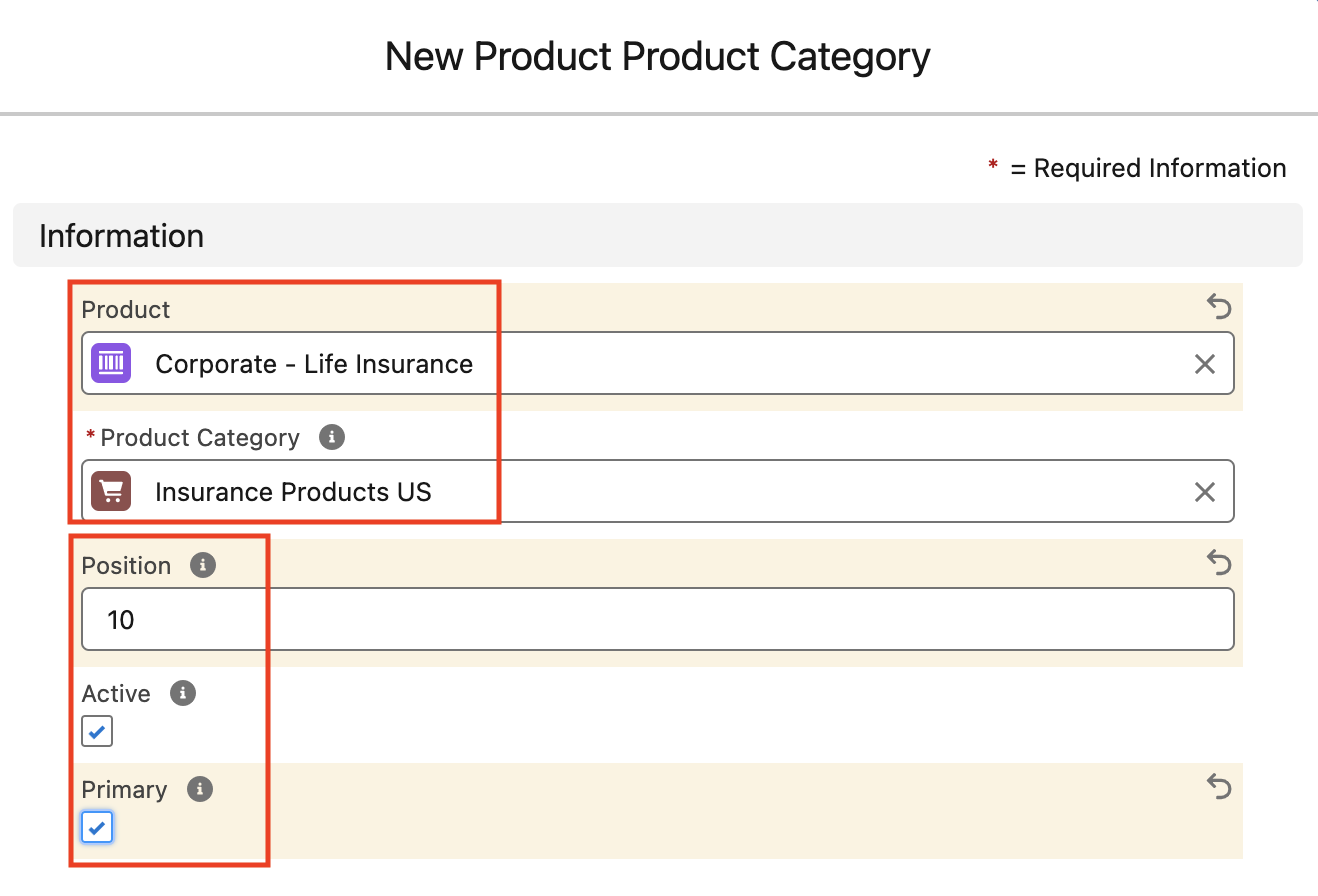
- Confirm Insurance Products US is the selected category.
- Enter
10in the Position field. This orders the product relative to others in the same category. -
Select the Active and Primary checkboxes, then save.
-
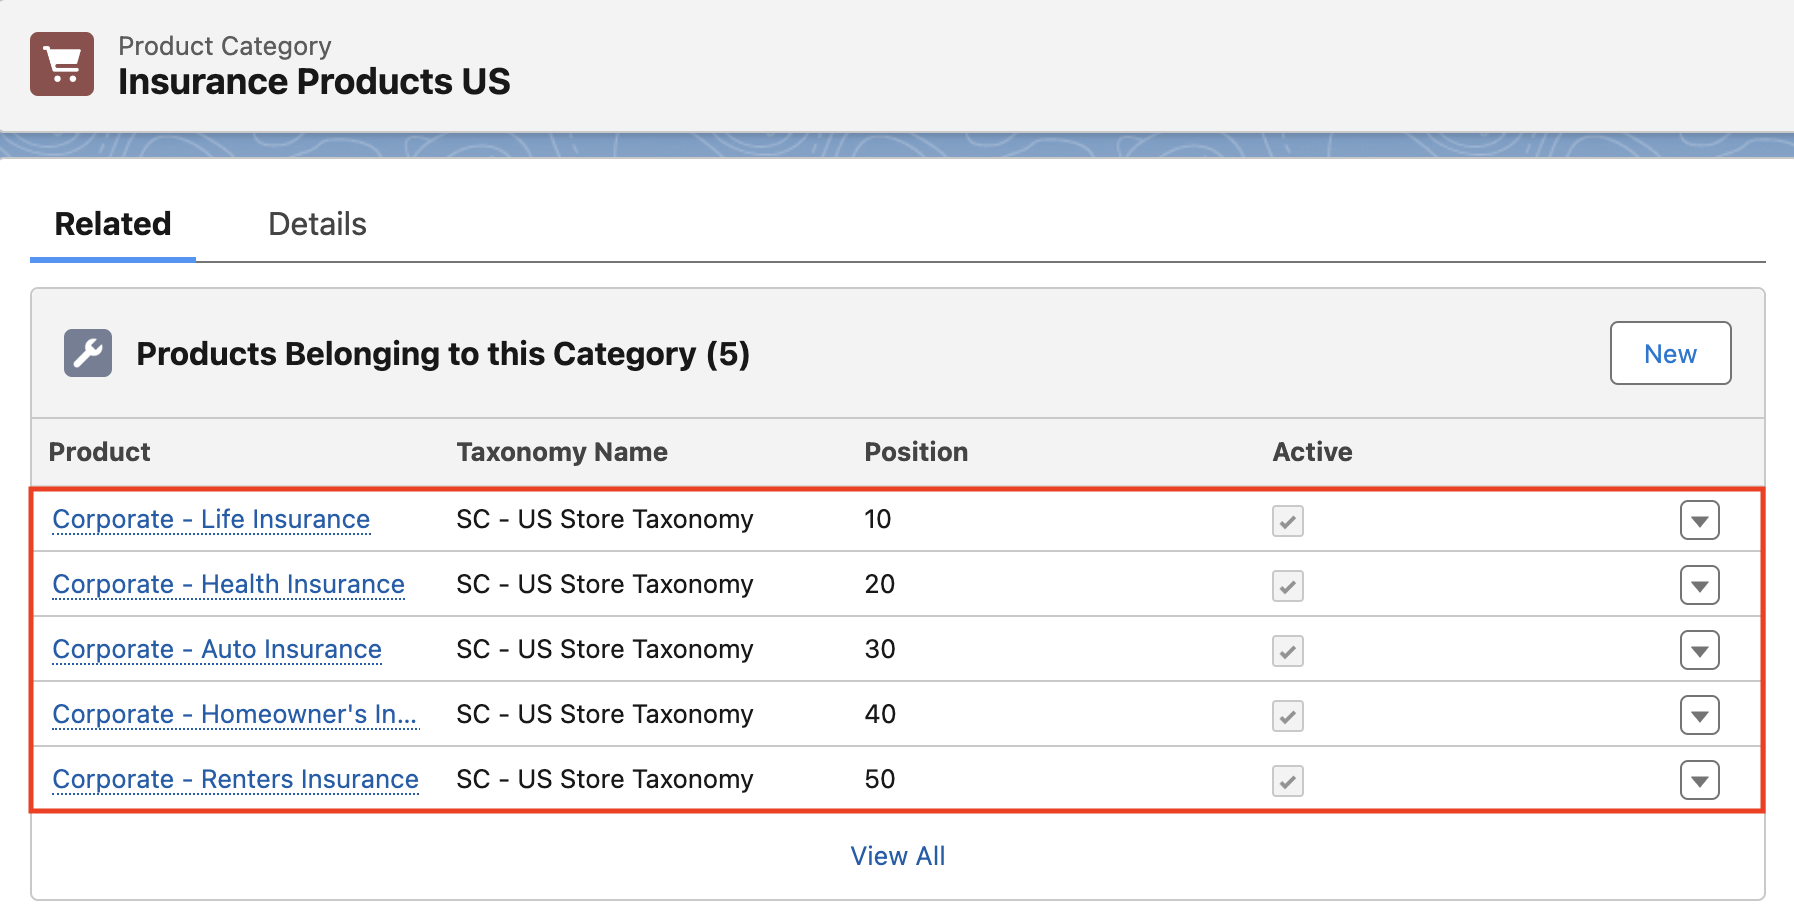
Repeat for each remaining insurance product, increasing Position by 10 each time to set their order.
Step 8: Price the products for the new store
This example increases the price of each insurance product by 10% for the US store.
-
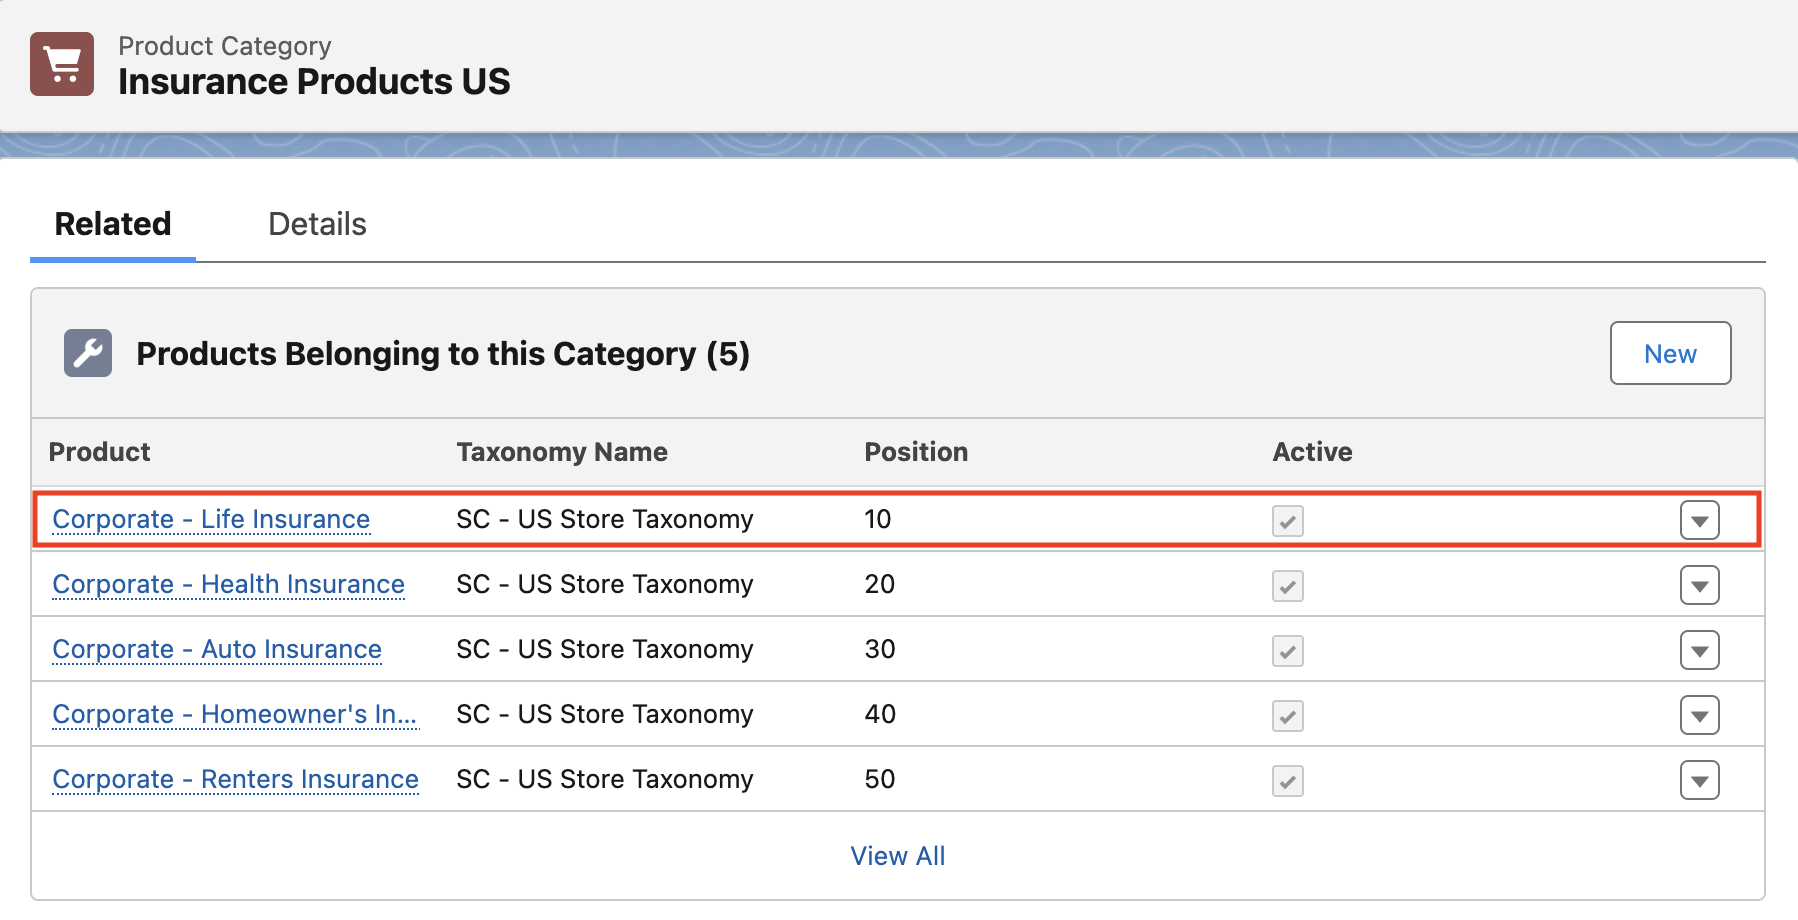
From the Insurance Products US related list, open the first product, Corporate - Auto Insurance.
-
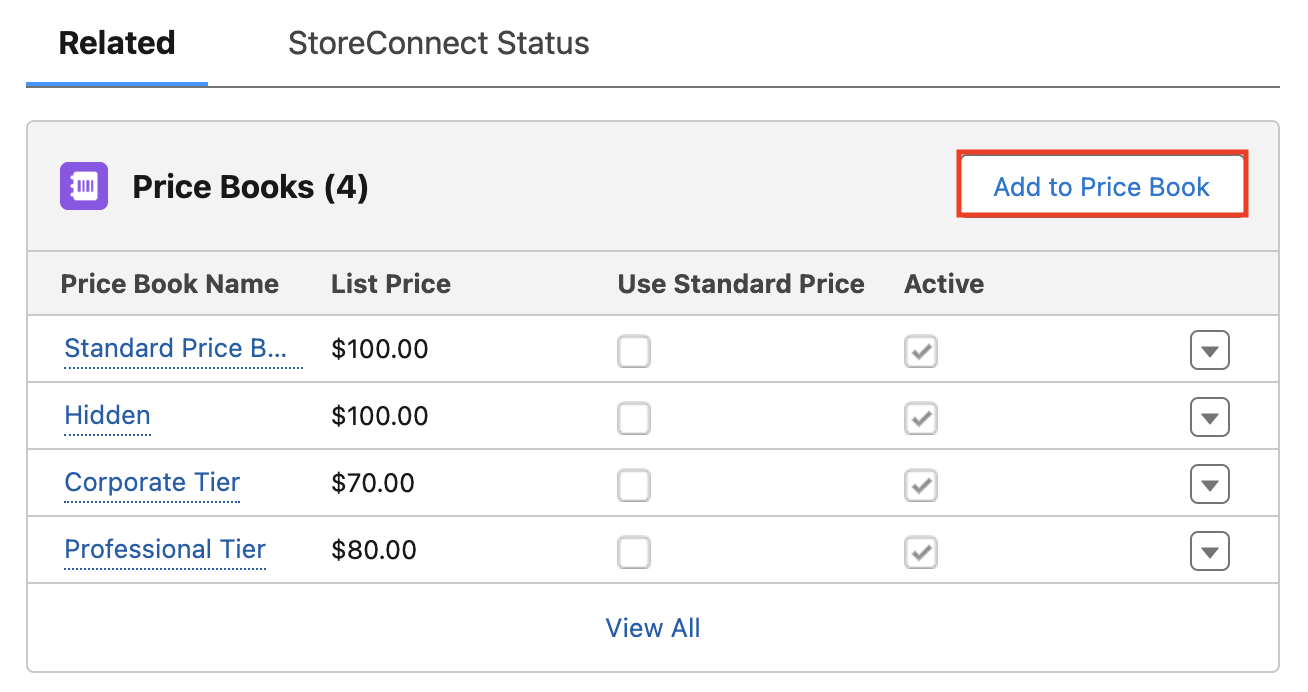
Go to the Price Books section and select Add to Pricebook.
-
Select
US Standard Price Bookand confirm the currency isUSD.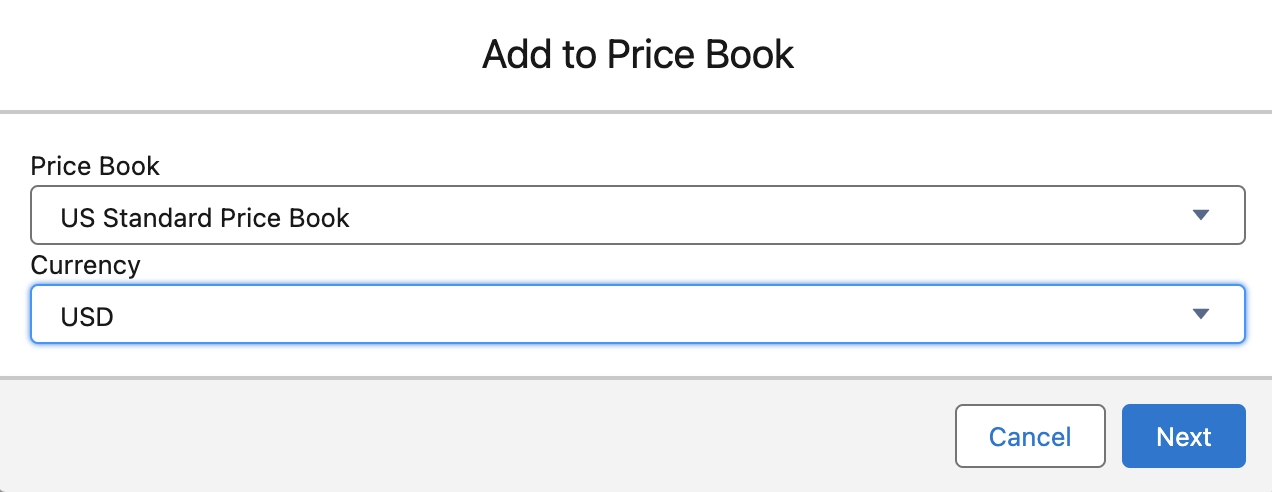
-
Enter
110.00in the List Price field, 10% more than the price in Standard Price Book.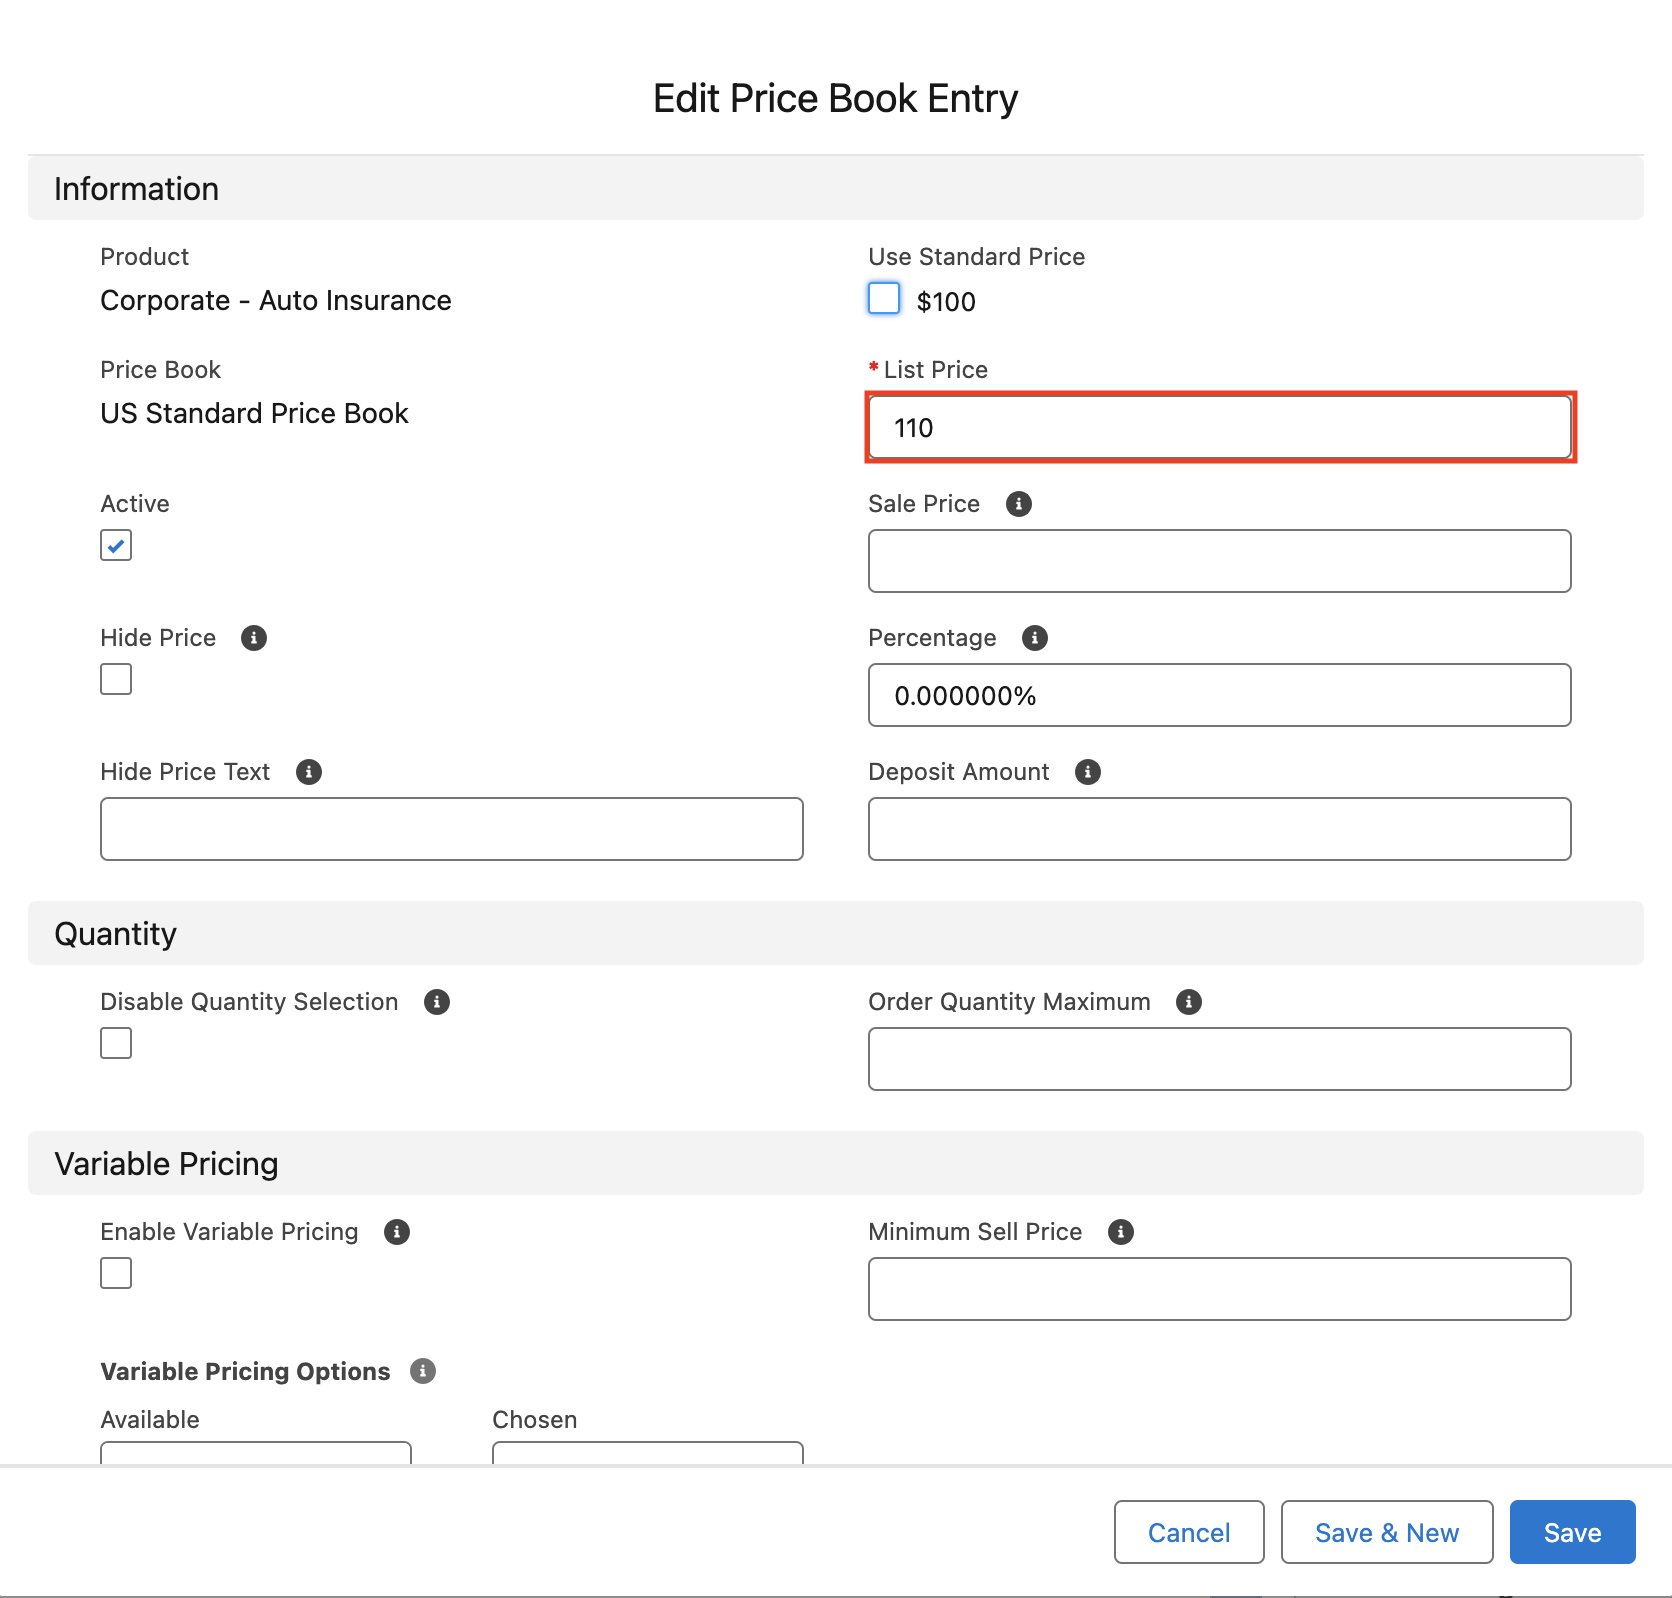
- Save the price book entry.
- Repeat for each remaining insurance product in the Insurance Products US related list.
:::tip You can make these price book entries in bulk with a tool such as Dataloader.io rather than one product at a time. :::
Step 9: Create the menu
This example clones the existing OmniCo - Main Menu for the new store.
-
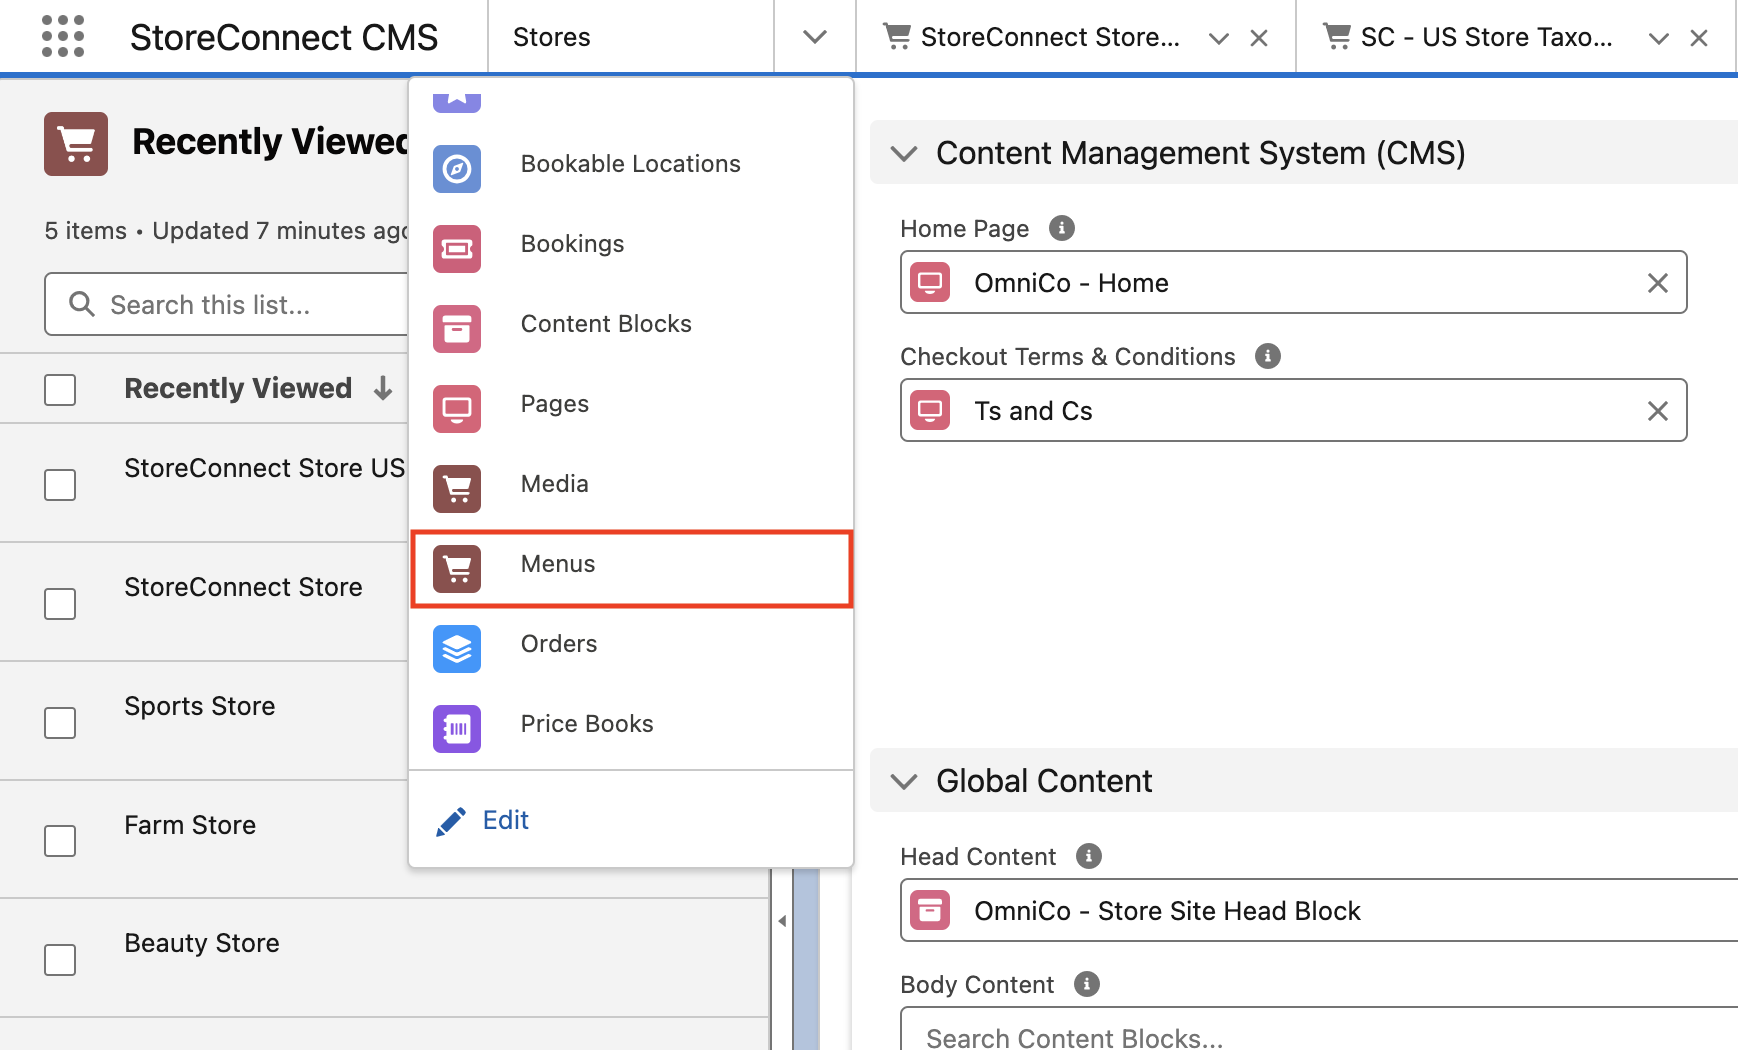
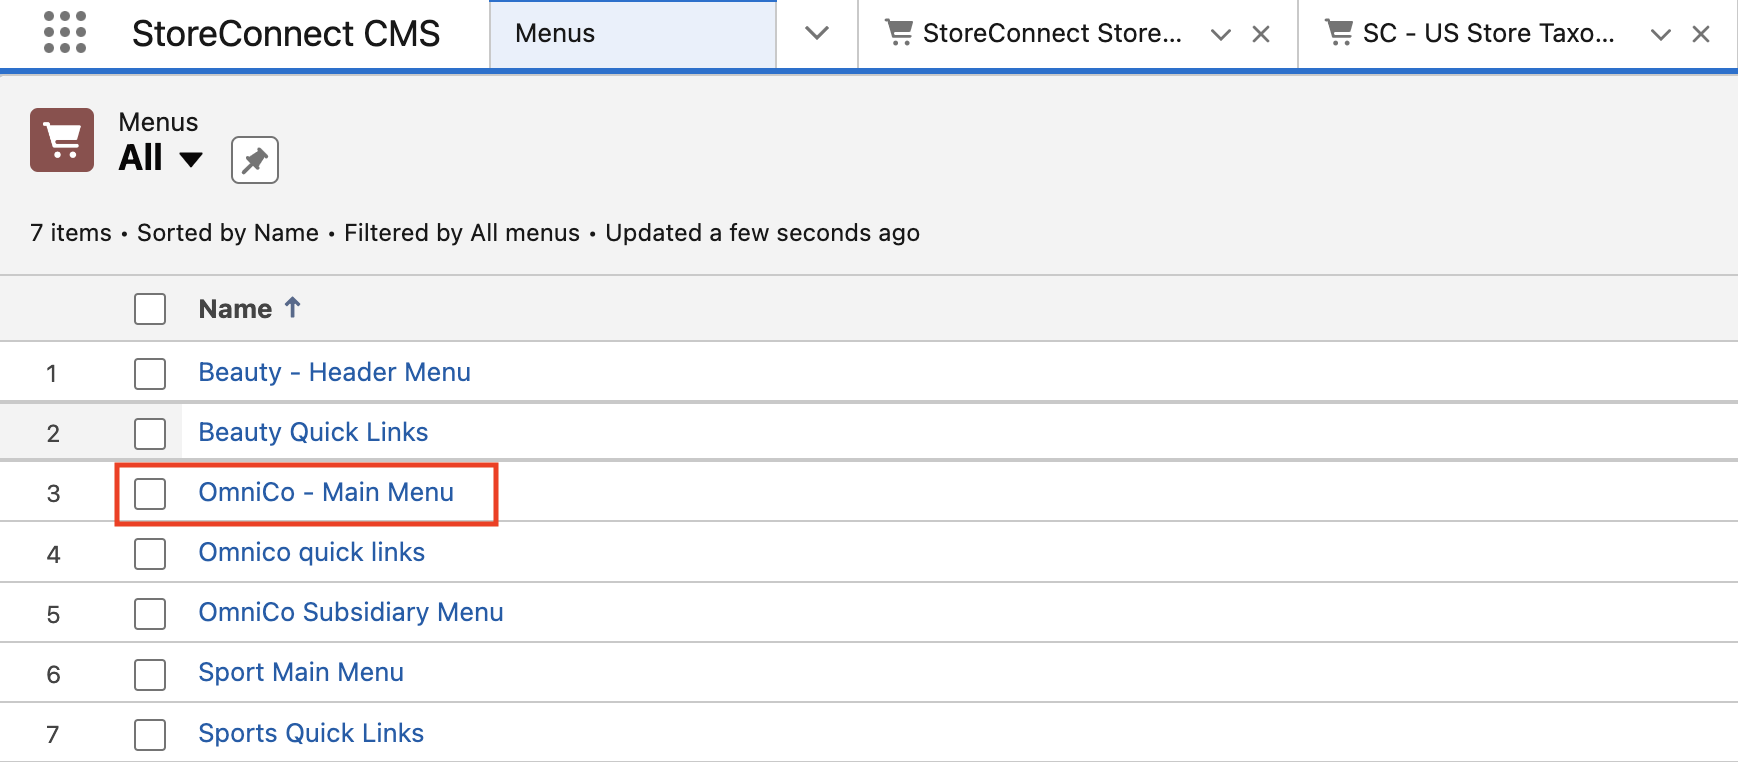
In the StoreConnect CMS app, go to the Menus list.
-
Open OmniCo - Main Menu.
-
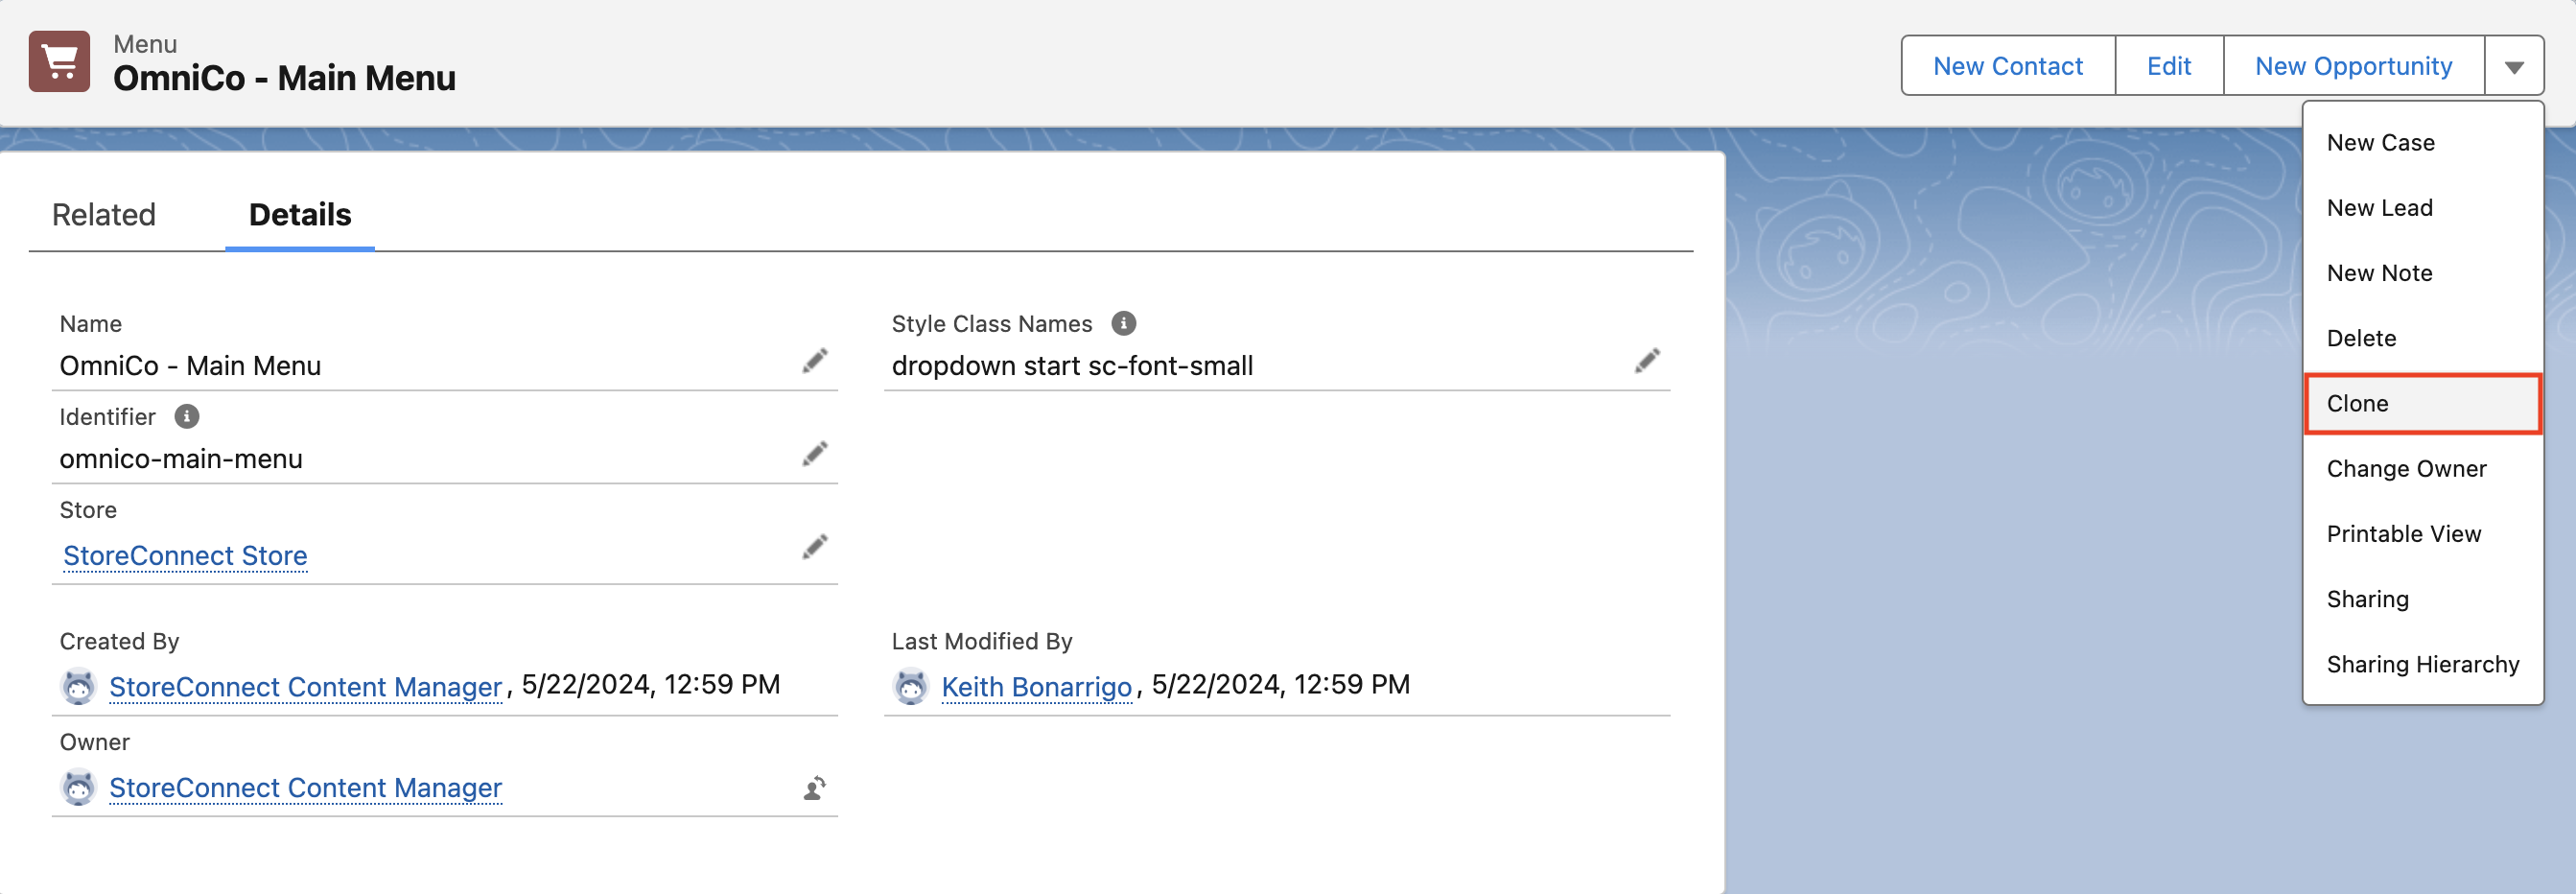
Select Clone.
- Enter
OmniCo - Main Menu USin the Name field. - Enter
omnico-main-menu-usin the Identifier field. -
Set the Store field to
StoreConnect Store US.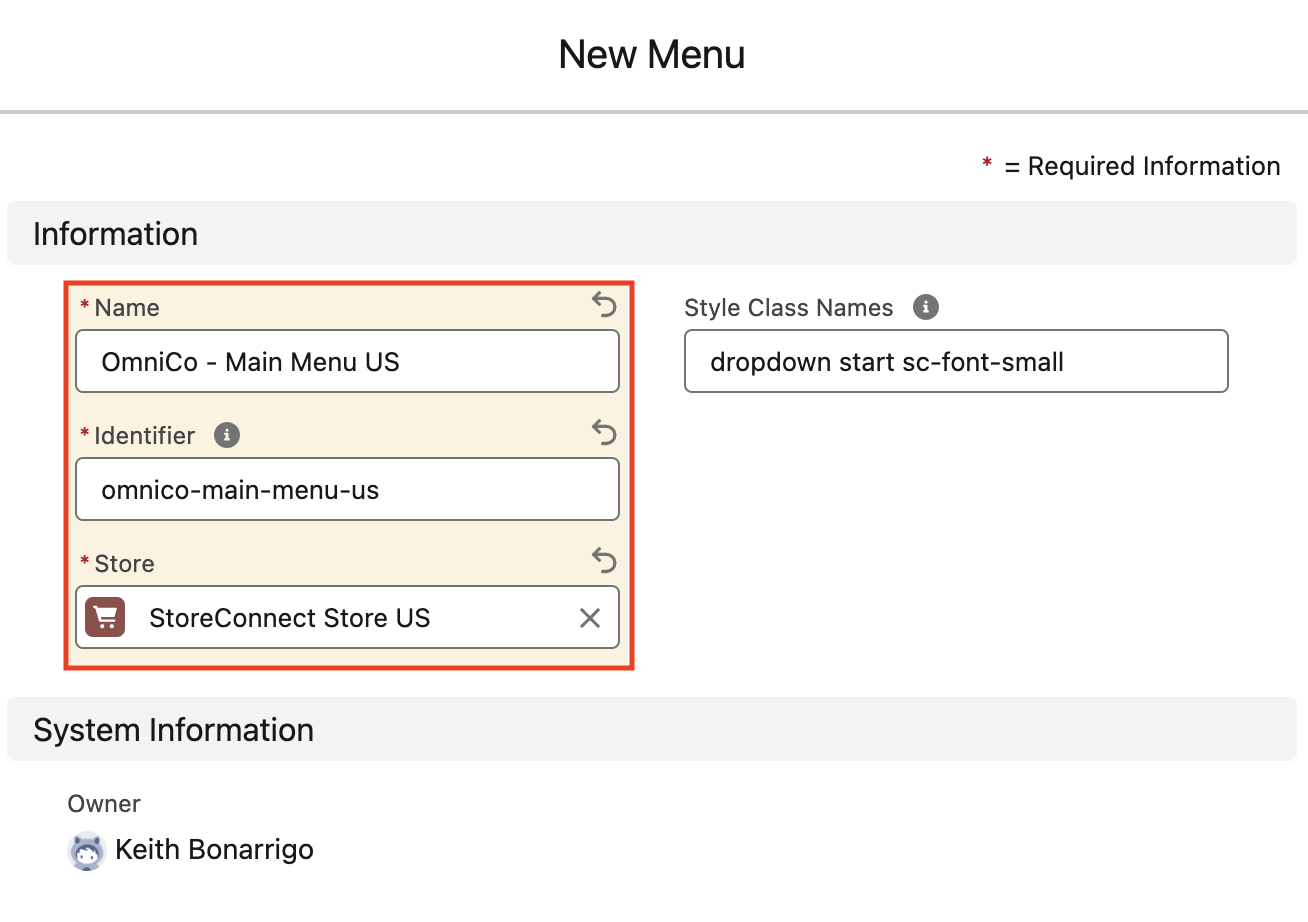
- Select Save.
Step 10: Add menu items
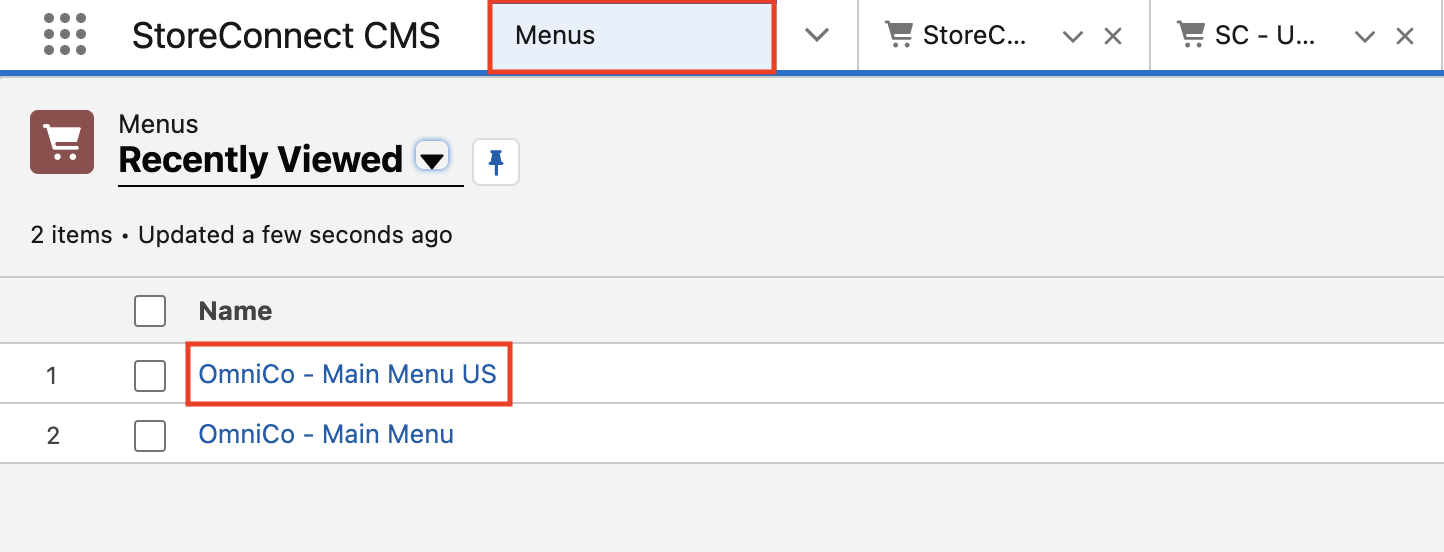
- In the StoreConnect CMS app, go to the Menus list.
-
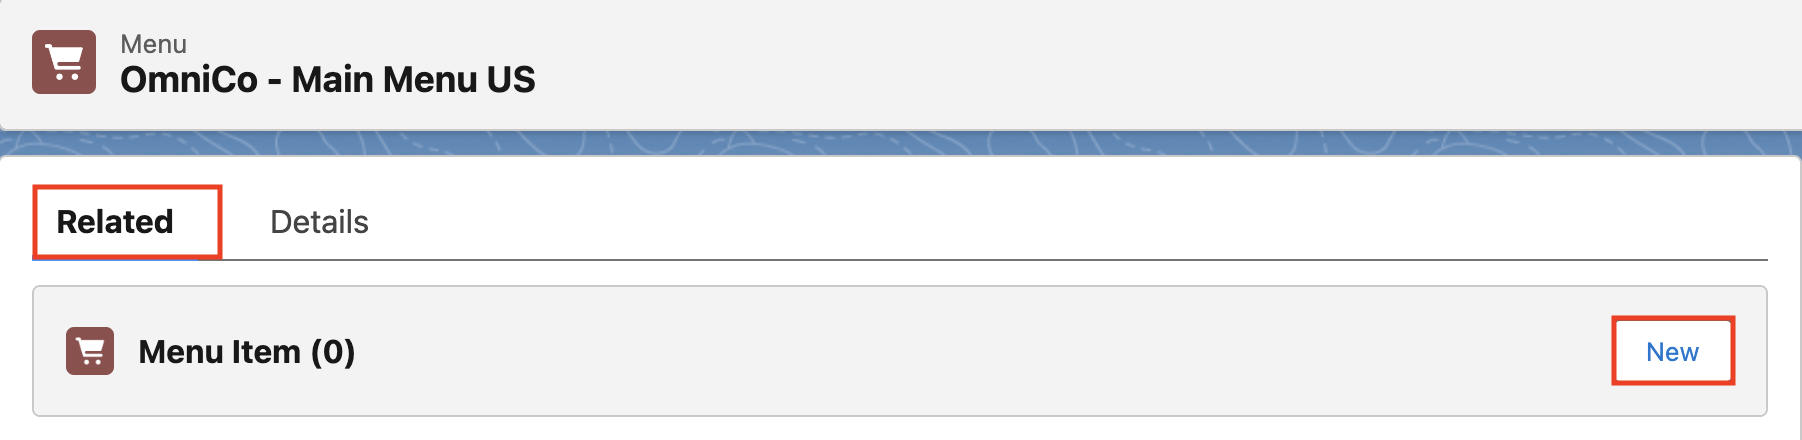
Open OmniCo - Main Menu US.
-
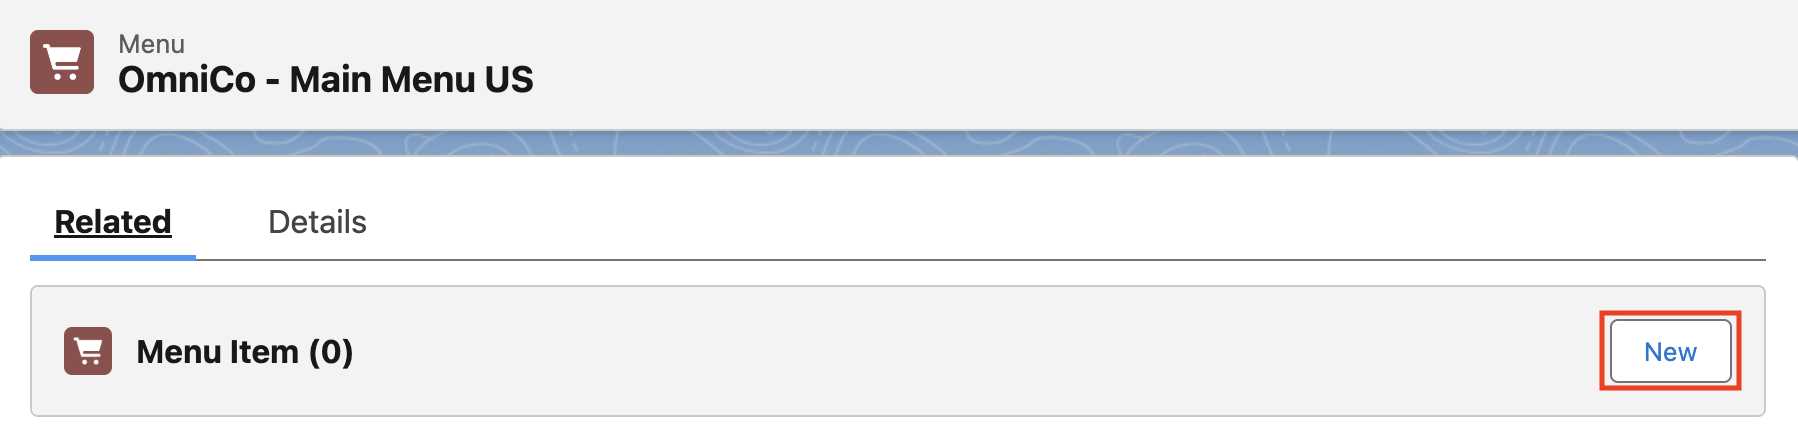
Go to the related lists tab.
-
Select New next to the Menu Items related list.
- Enter
Insurancein the Name field. - Enter
Insurancein the Display Name field. - Enter
insurance-usin the Identifier field, matching the category path from step 6. - Confirm the Menu field is set to
OmniCo - Main Menu US. -
Enter
10in the Position field, then save.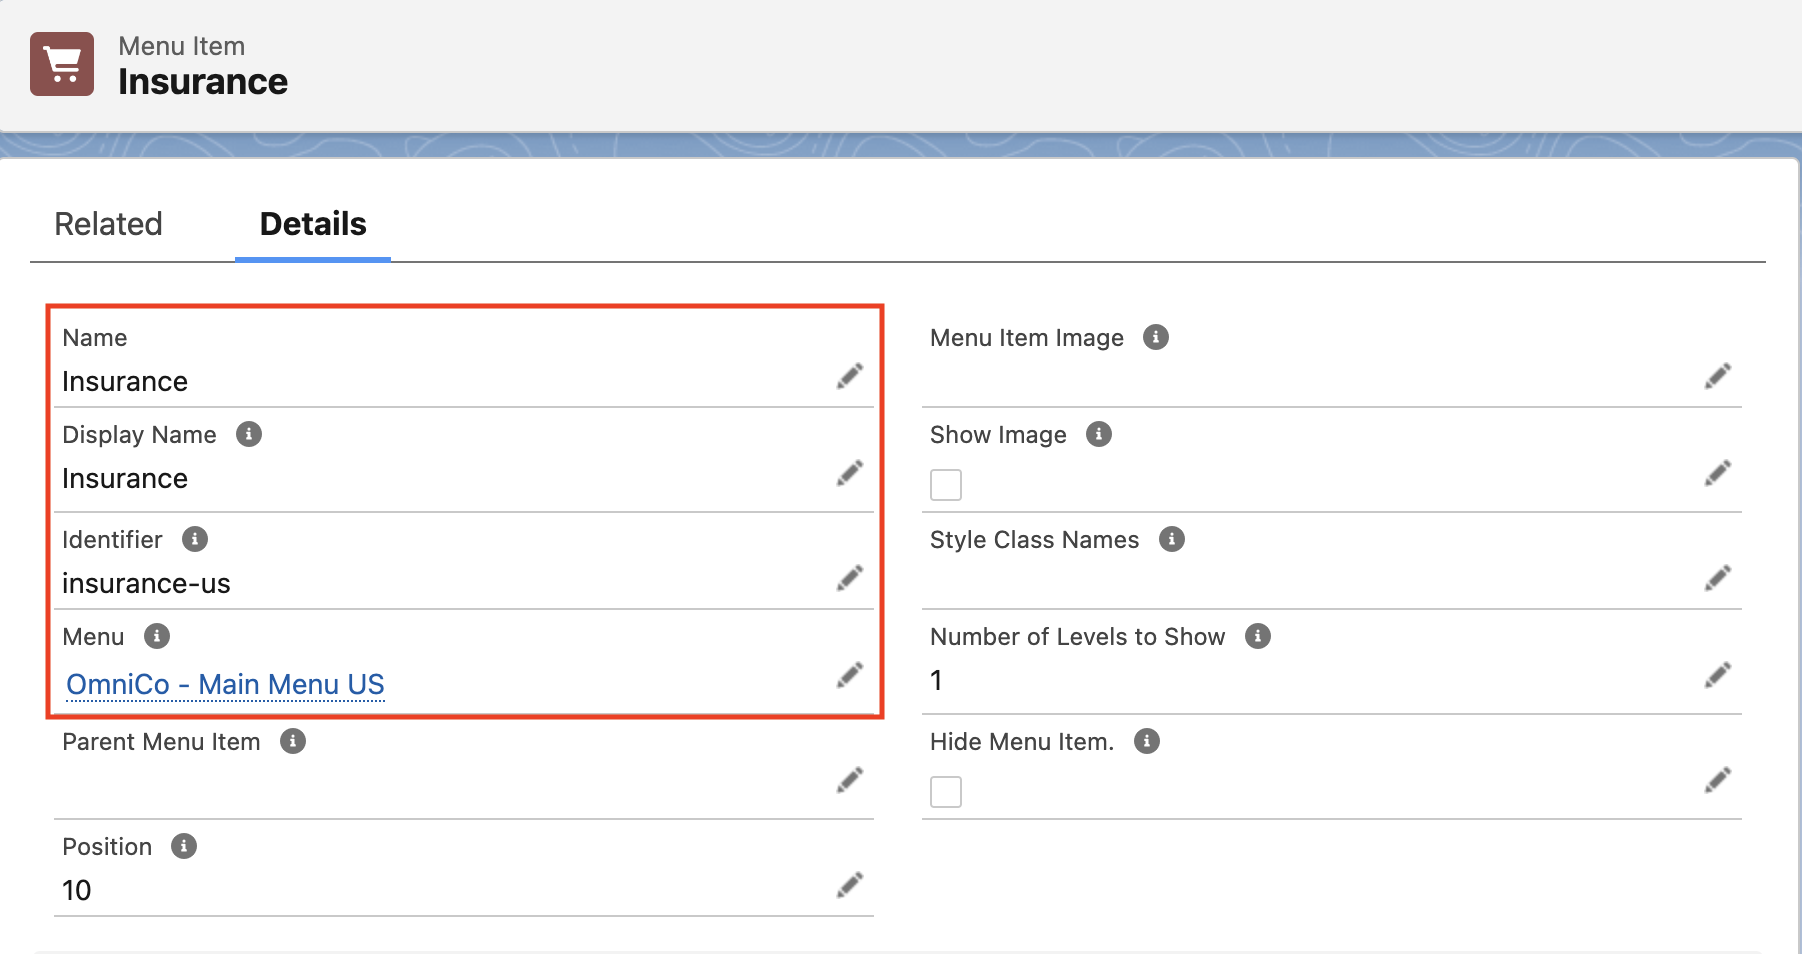
Step 11: Check the new storefront
- In the StoreConnect CMS app, go to the Stores list.
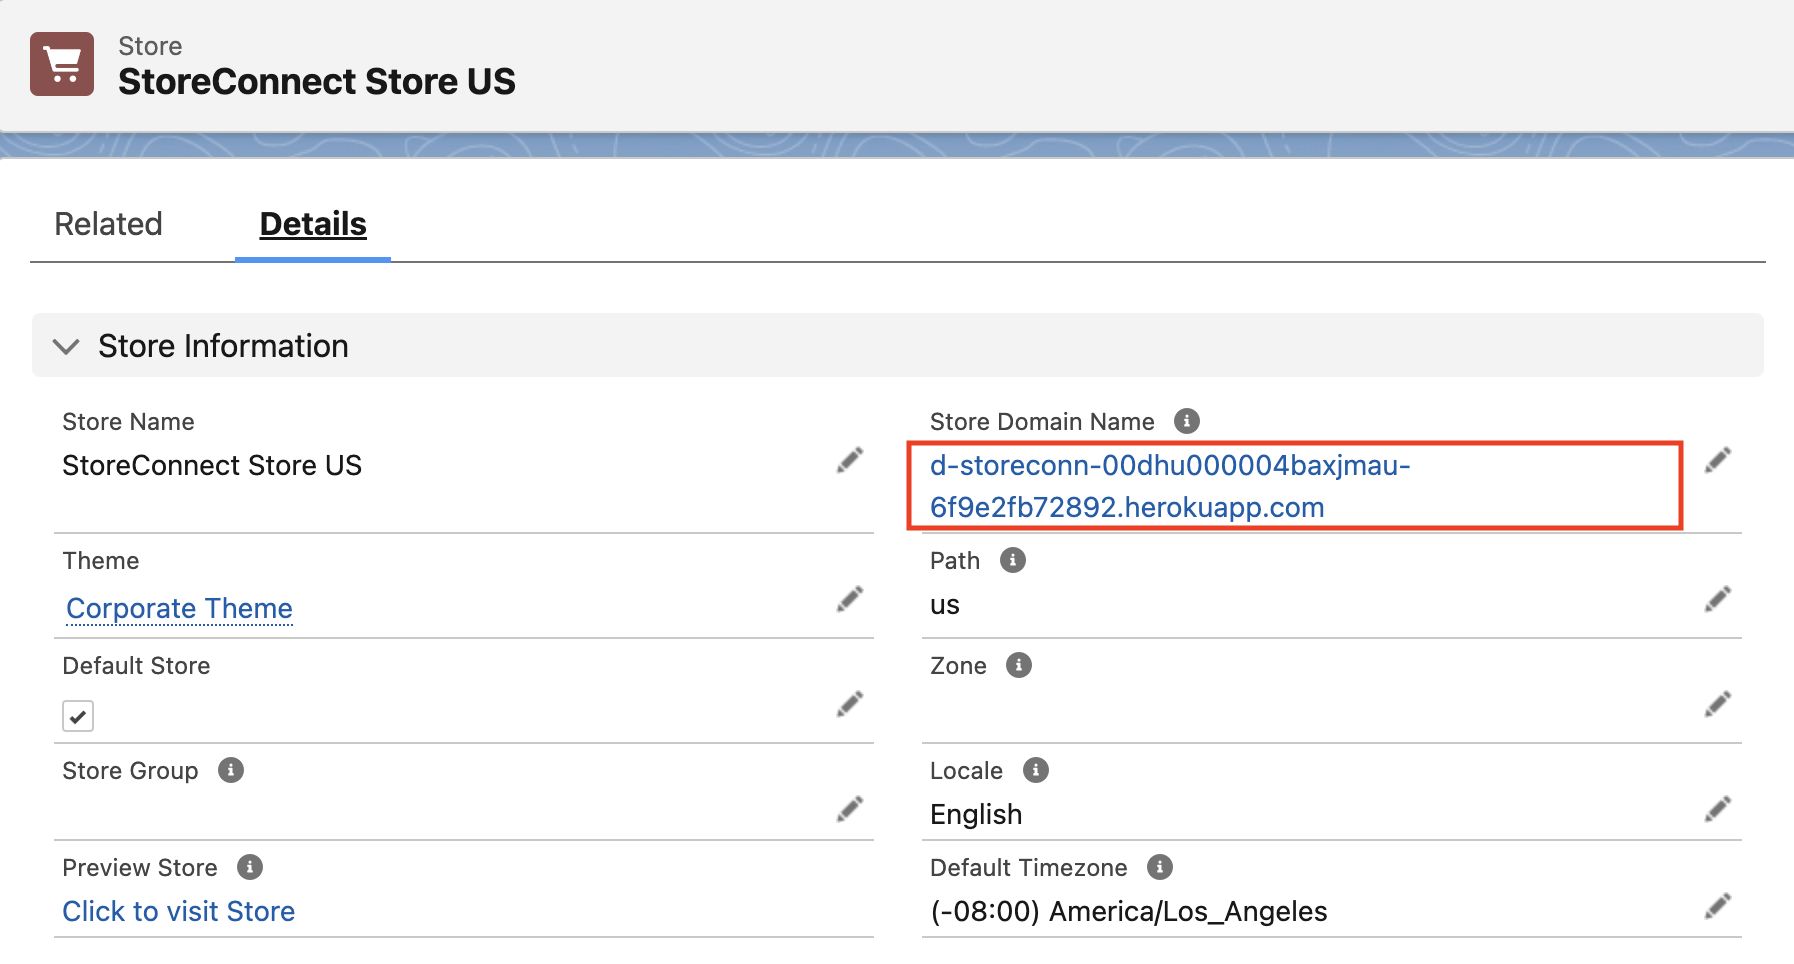
-
Select the URL in the Store Domain Name field. Your main store opens.
-
Add the store’s Path value,
us, to the end of the URL. The new storefront loads.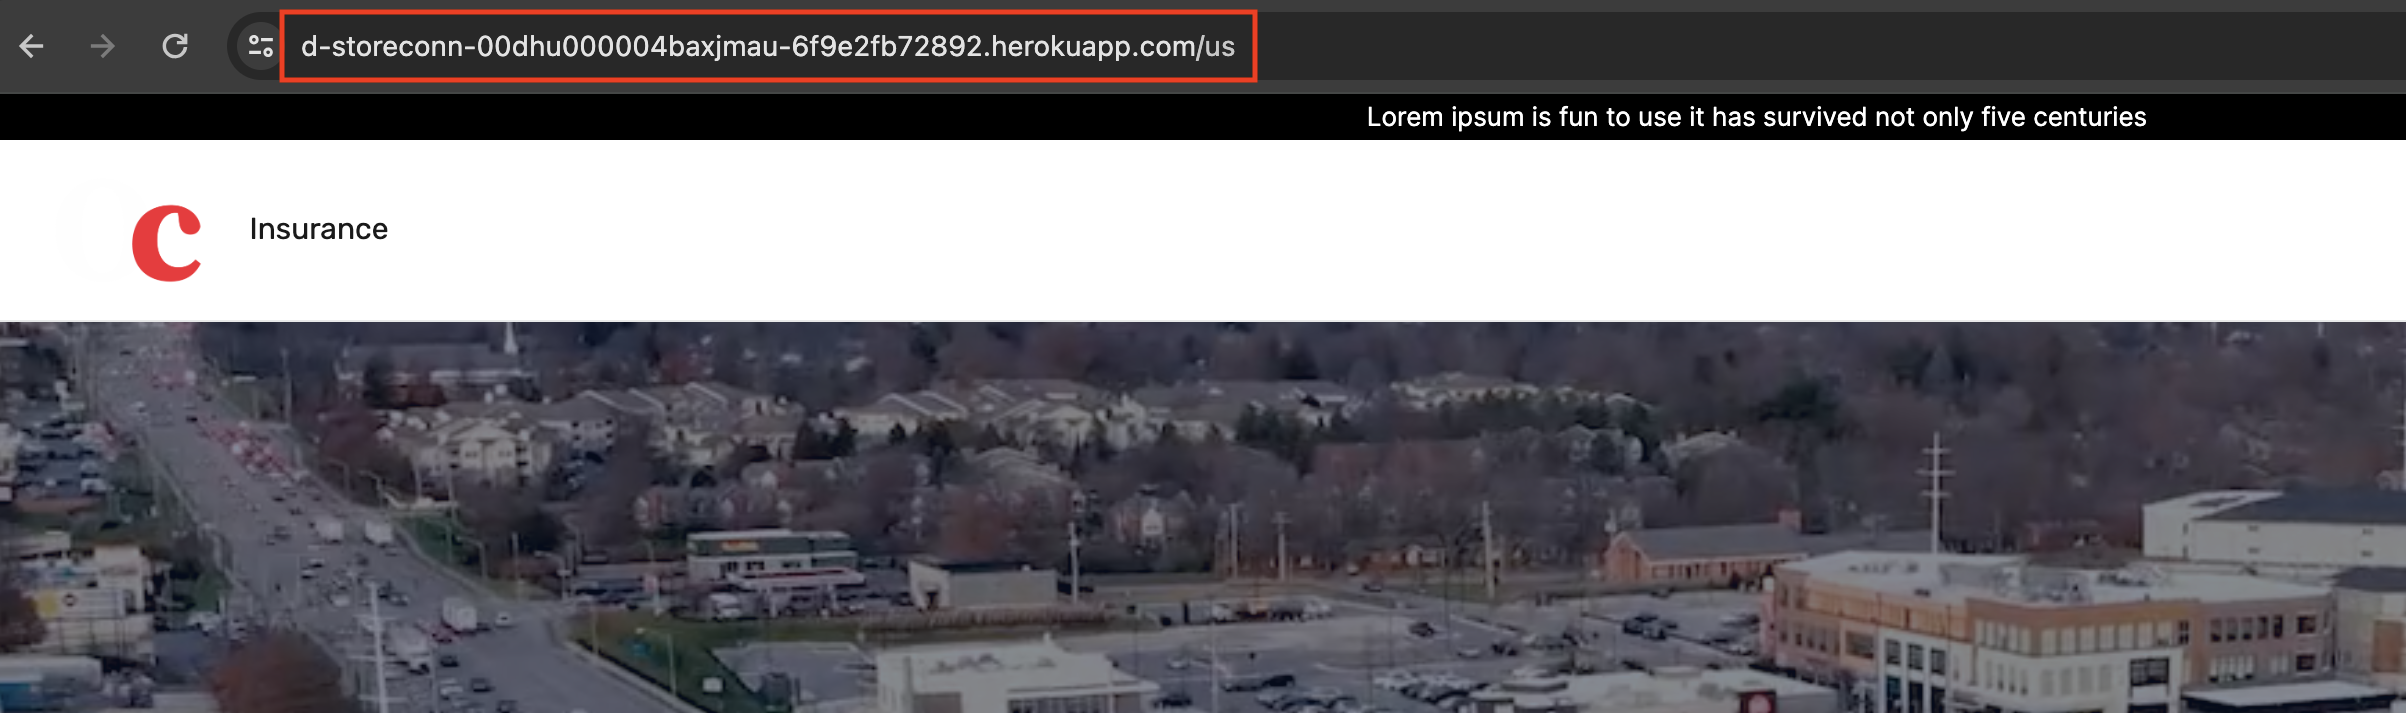
:::note This example uses the default store URL with a path, because that is how the trial installs. You can point a separate domain or subdomain at the new store instead. See connect a domain to StoreConnect. :::
Step 12: Place a test order
-
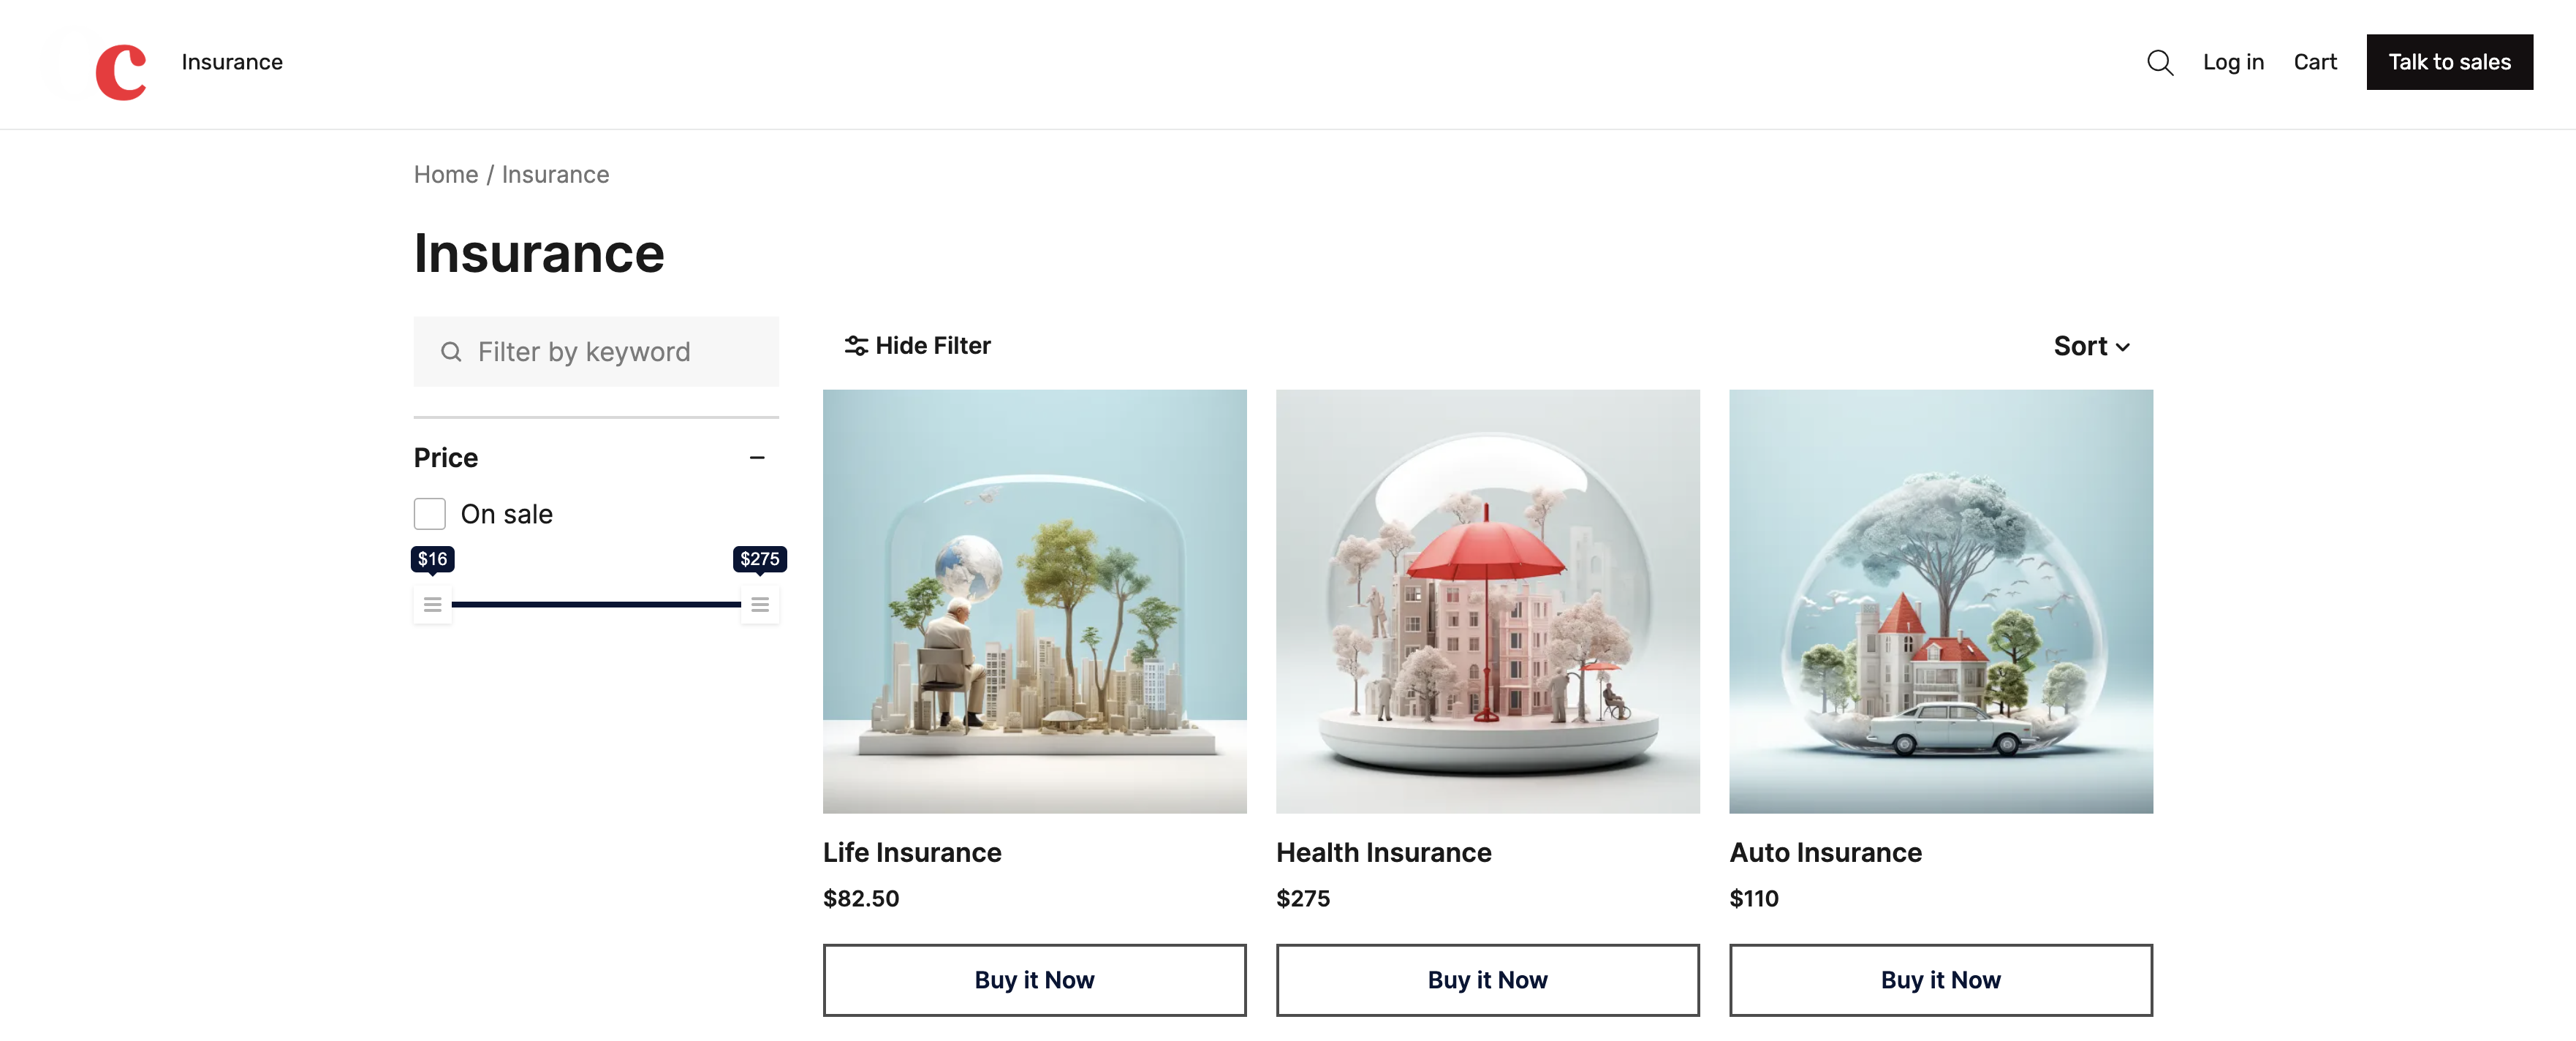
Select Insurance in the header menu. The insurance products appear with their new US pricing.
-
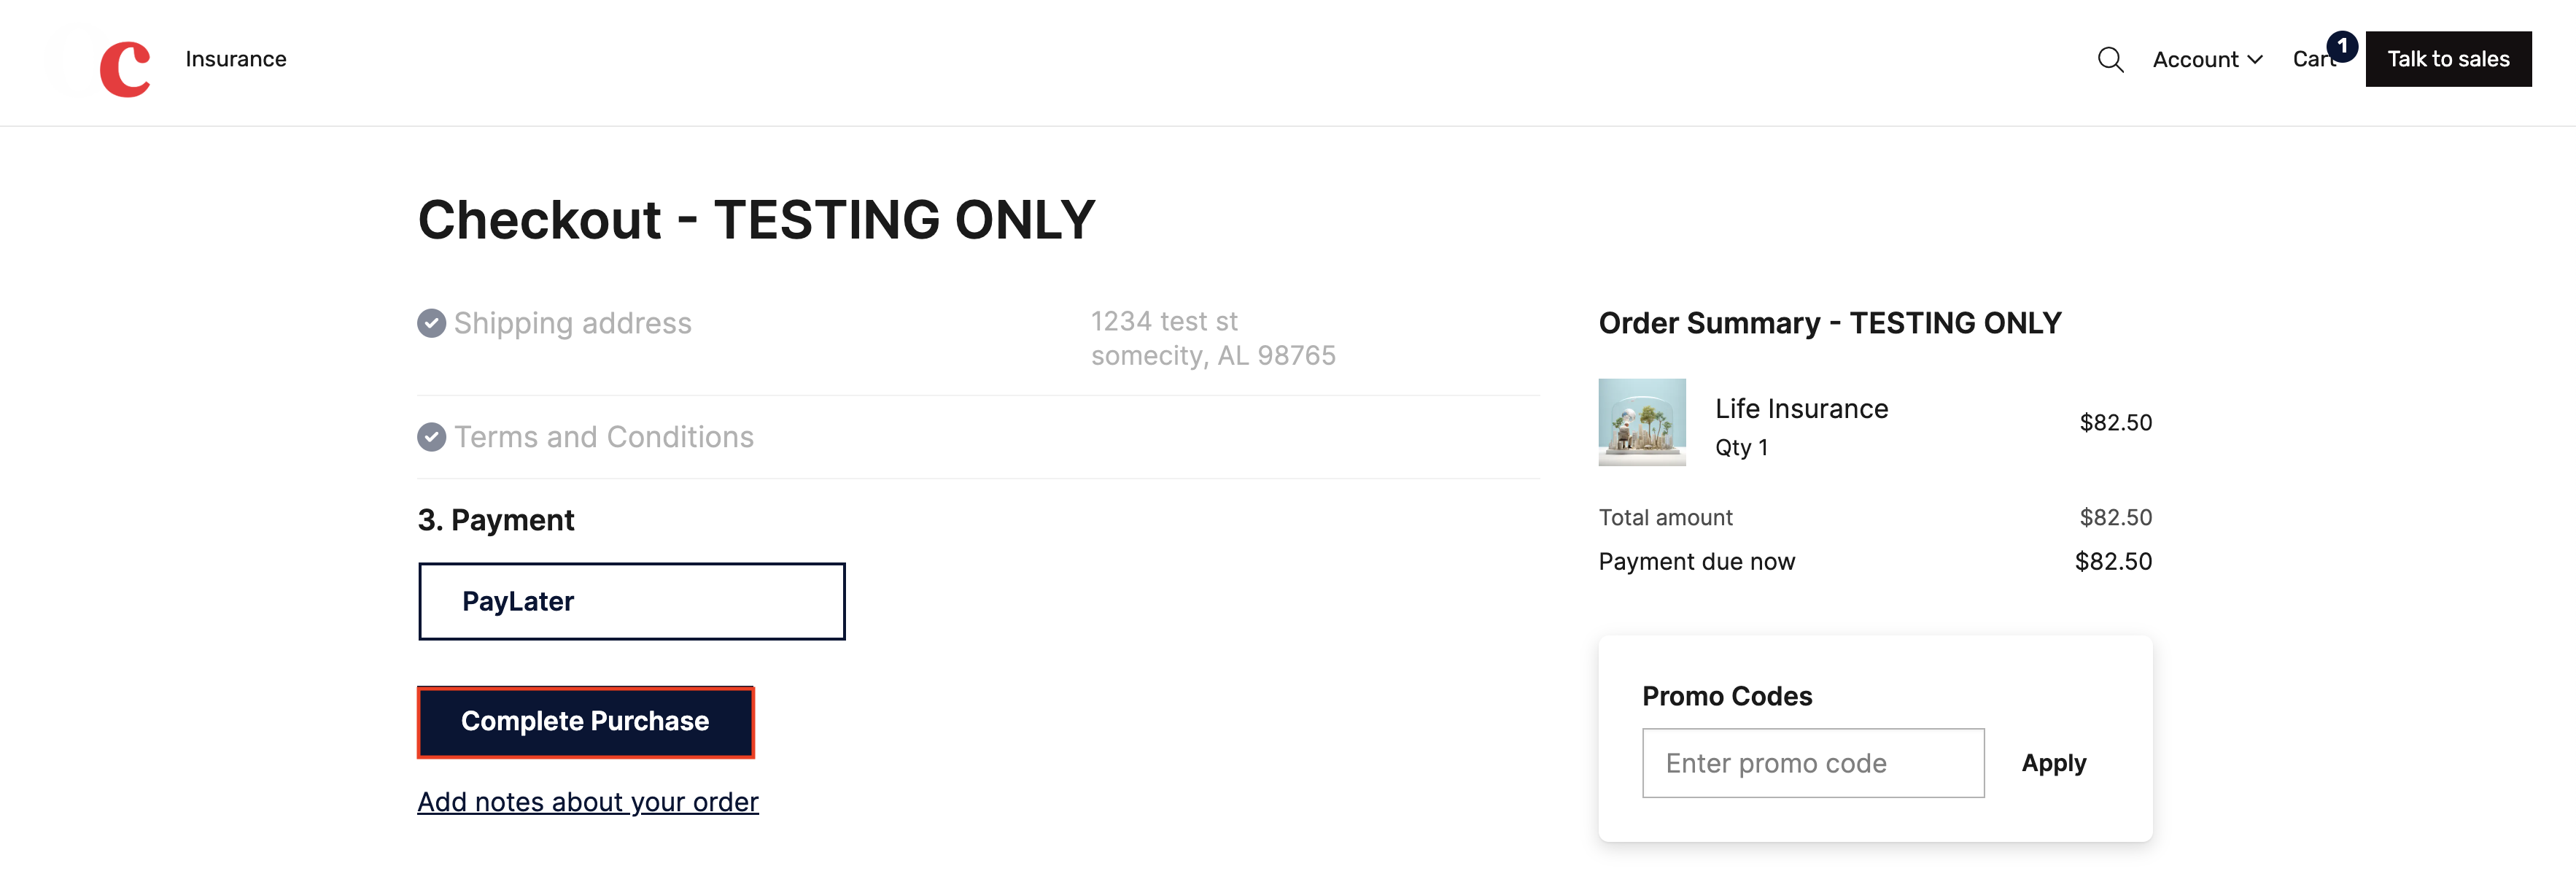
Select an insurance product and go through checkout, paying with the Pay Later option.
-
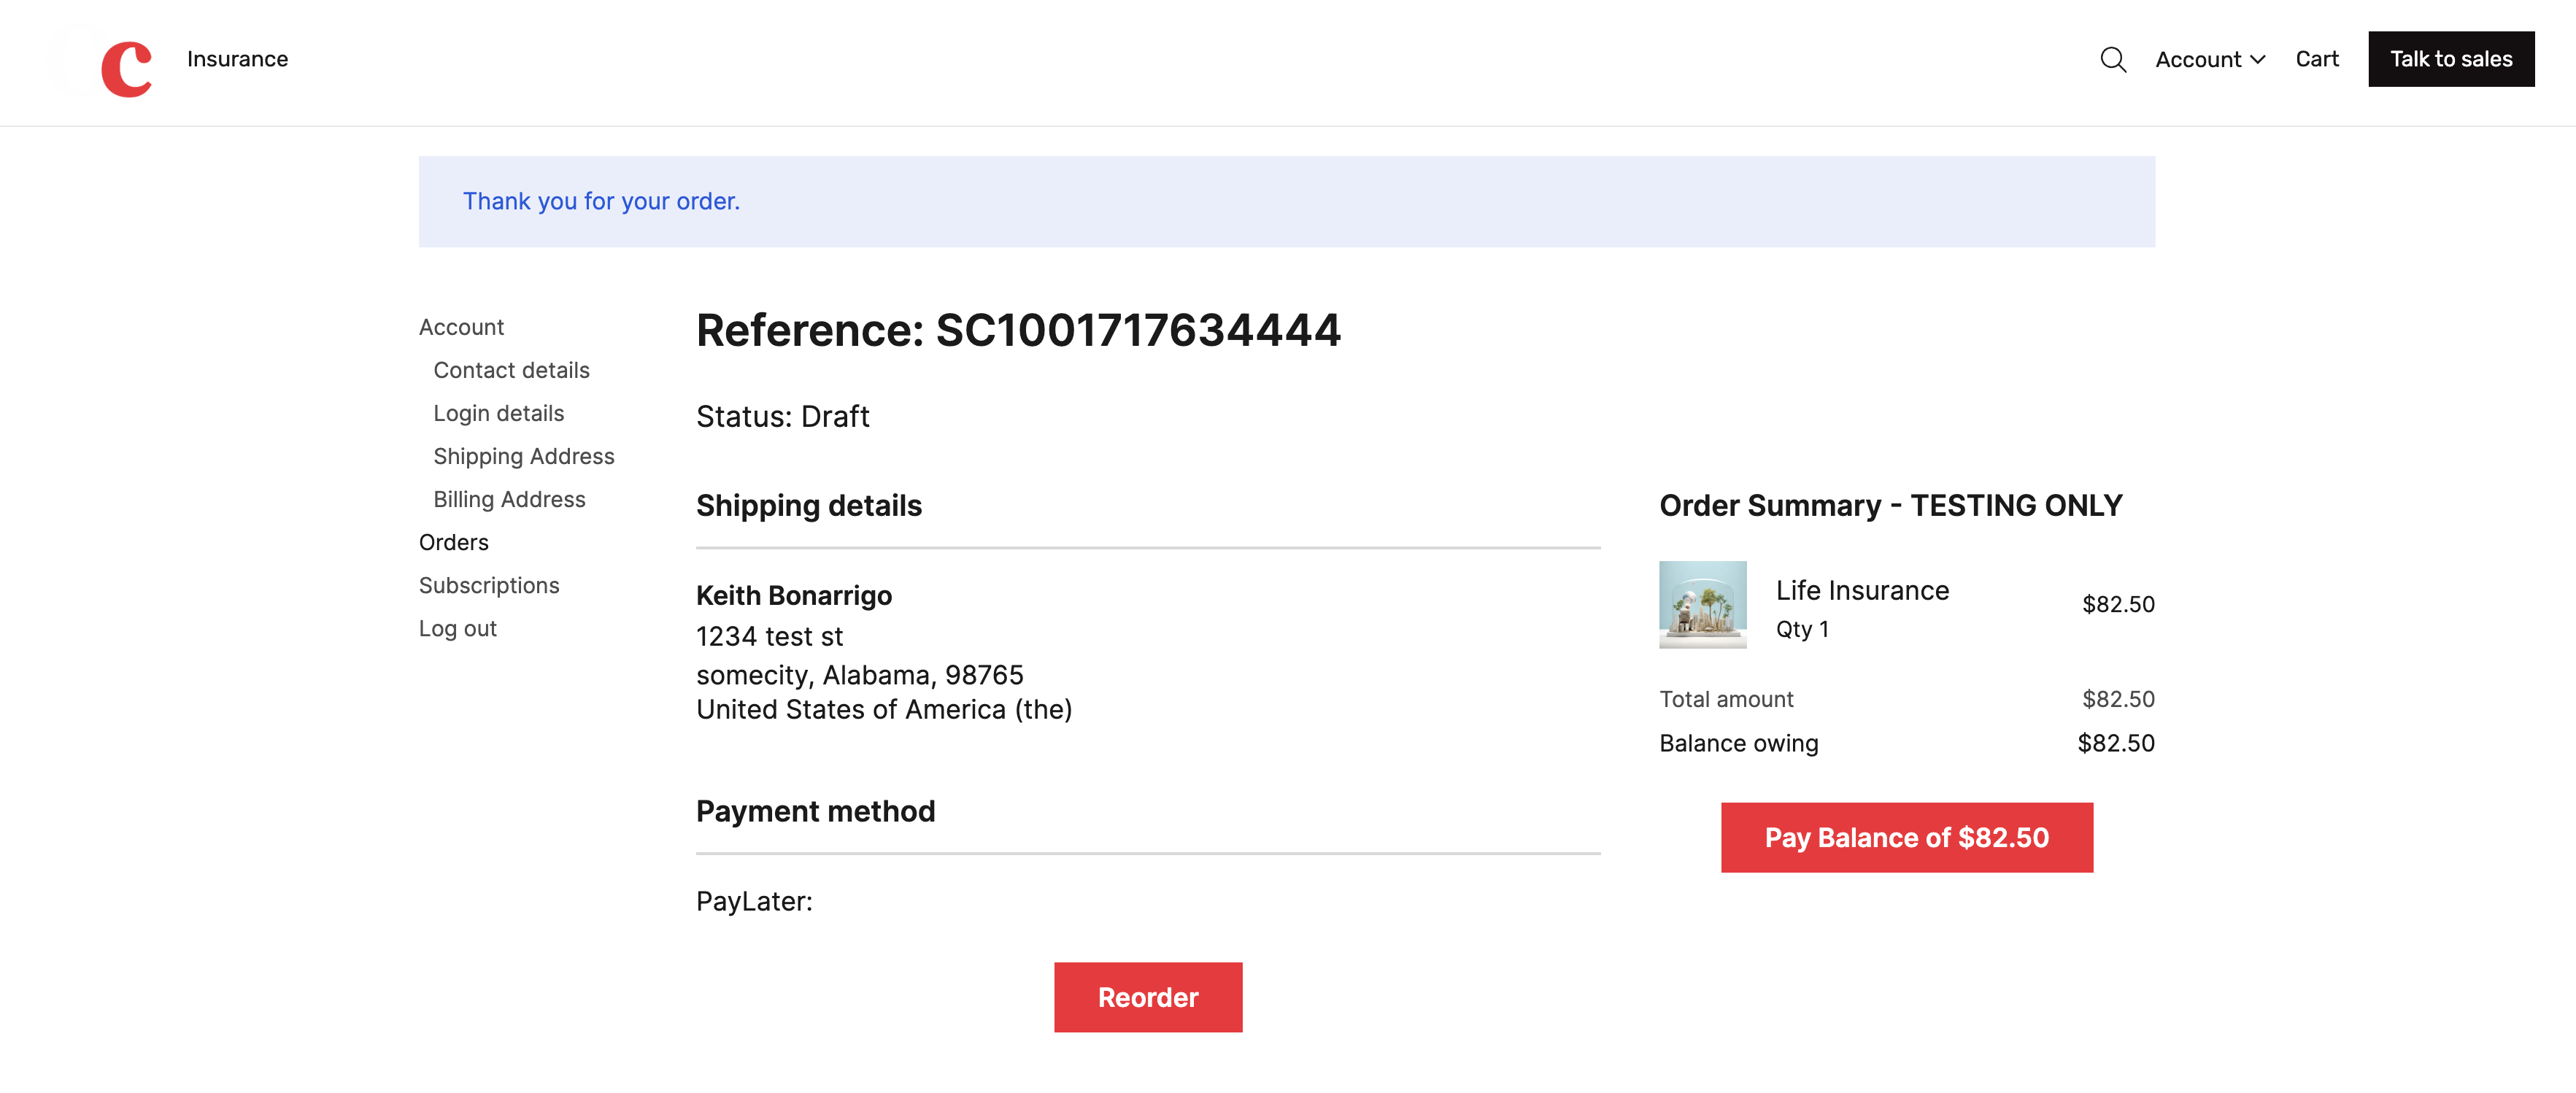
Confirm the order completes.
-
In Salesforce, open the resulting Order record and confirm it is linked to StoreConnect Store US, priced in
USD, and using the Pay Later provider.
You now have a second storefront that charges in US dollars and sells insurance products, running alongside your original store in the same Salesforce org.
What customers share between stores
Customer accounts are shared across every store in your Salesforce org. The same username and password works on all of them, customers sign in separately on each store, and usernames and email addresses are unique across the whole org. You cannot restrict a customer account to a single storefront. See logins across multiple stores.
Was this article helpful?
Thanks for your feedback! It helps us improve our docs.