

Click-and-collect configuration
On this page
Click and Collect is a term used by eCommerce stores offering their customers local pickup, or in-store collection of their orders without having to wait for it to be delivered. It’s also known by the industry term BOPIS (Buy Online, Pickup In Store). See Omnichannel fulfillment models for how this compares to other fulfillment models.
Setting up Click and Collect
Click and Collect uses the following objects:
- Store object
- Activates shipping methods for Click and Collect
- Stock Location object
- Where the goods are located
- Collection Point object
- Definable name where customer collects goods from
- Product object
- Configures your product available for Click and Collect
- Stock Level object
- Define much stock is available to sell
Step one - enable storewide shipping
Even though customers are physically collecting their ordered goods, we consider Click and Collect as a method of shipping. Because of this you will need to enable shipping in your Store object.
See Enable your store shipping to find out how to do this.
Step two - create a stock location
Once you have enabled shipping for your store you can start assigning inventory to use the Click and Collect shipping method.
Your store may have one or more locations that hold stock. For instance, Warehouse stock and Retail storefront stock. You can create as many “Stock Locations” as you have warehouses or storefronts that hold available stock.
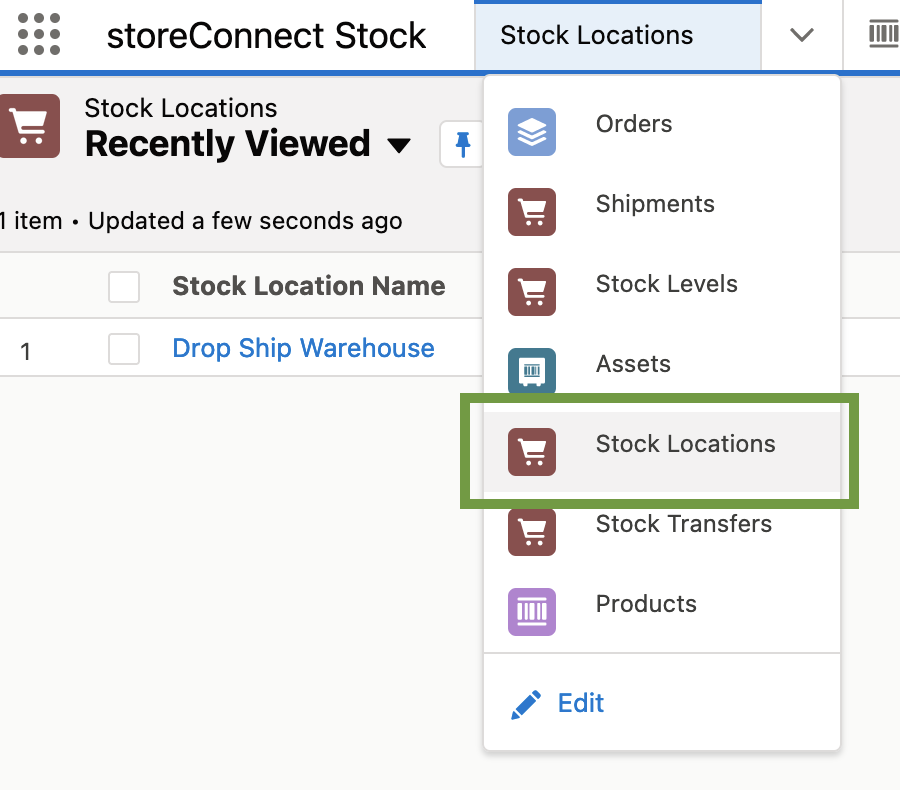
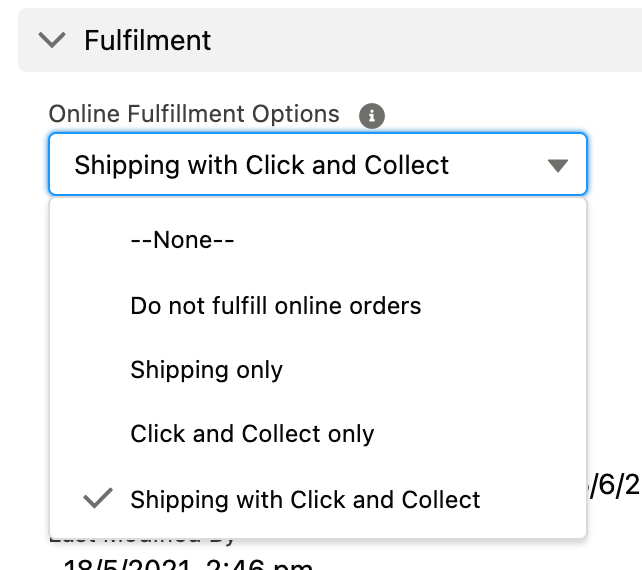
Not all stock locations may have Click and Collect facilities. So, for each Stock Location you will need to define the “Online Fulfillment Options”.
:::warning
This field is the switch that makes a location collectable. A stock location left
on Shipping only offers no pickup, no matter how the collection point, product and
stock records are configured, and nothing reports an error. If you have completed
every other step and no pickup option appears at checkout, check this field first.
Choose the option that includes click and collect.
Two other settings on the location are just as silent:
- Active must be checked. An inactive stock location is excluded from click and collect entirely, exactly as if the fulfillment option were wrong.
- The location must be linked to the store through a Store Stock Location
record. Without that link, the storefront’s own
current_store.pickup_enabled?check reports that the store has no click and collect at all. :::
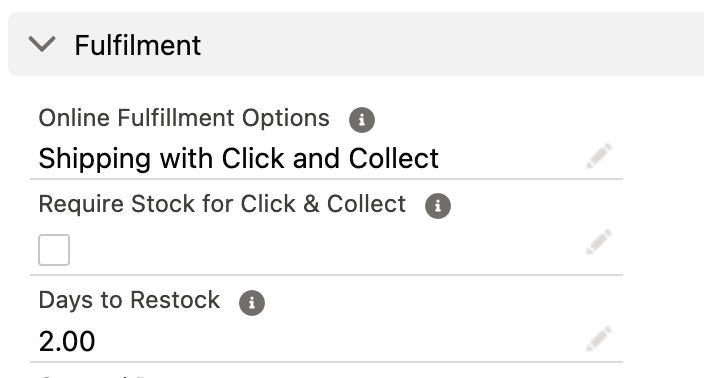
Optionally, you may also want to set the days to restock and a requirement that stock is physically present for the option to Click and Collect.
Step three - create a collection point
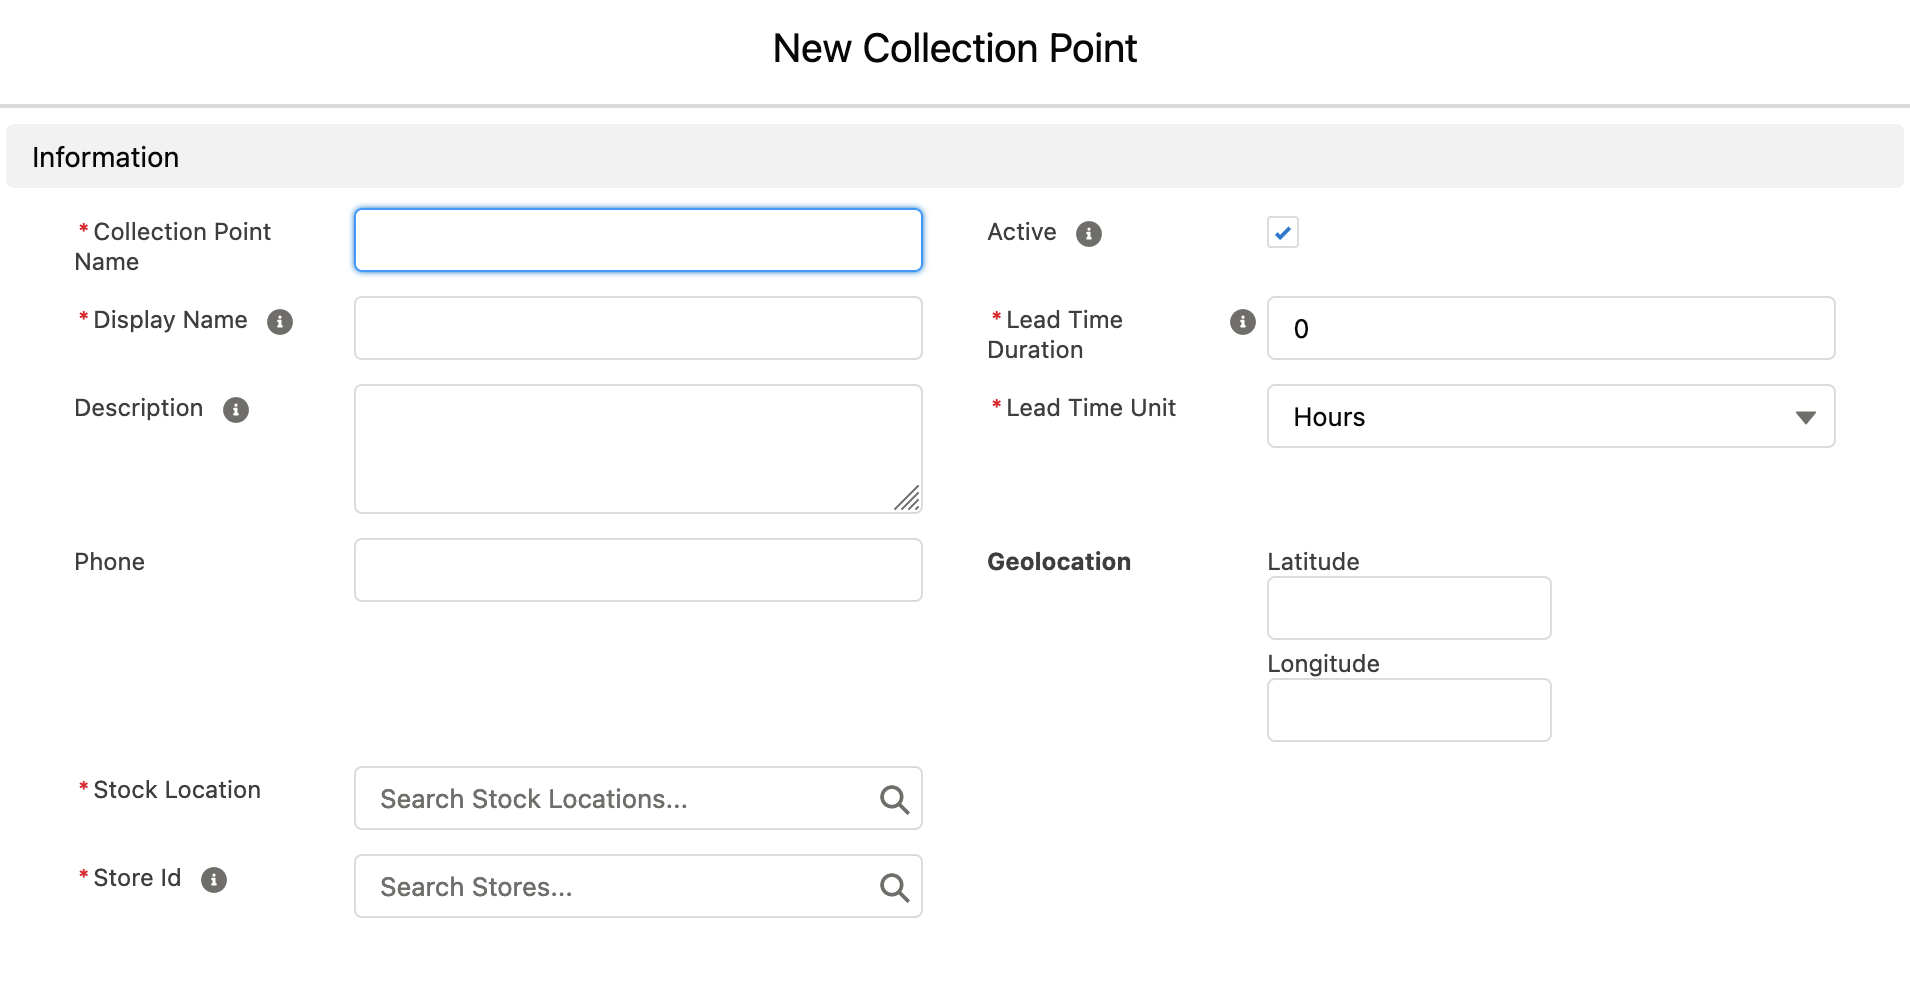
Collection Points are essentially the fancy names for your warehouses or showrooms that customers will see. You can add your opening hours, a description and phone for customer convenience.
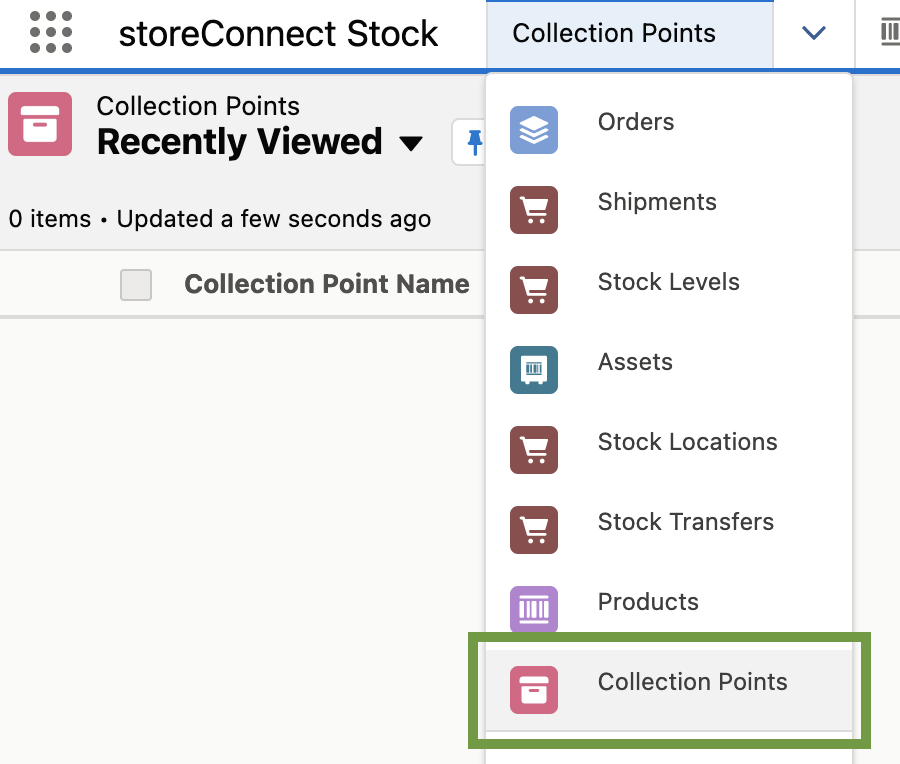
If you really want to add an impression, you can include geolocation longitude and latitude parameters to your collection point. Your own Salesforce Administrators and/or Partners can utilize geolocations in building a custom feature showing Collection Points on a map.
:::warning A stock location with no usable collection point disappears from the checkout. The location is only offered when at least one of its collection points survives these three tests, and no error is shown when none do:
- The collection point is Active.
- It belongs to the store the customer is shopping.
- Its Zone, if one is set, matches either the shipping address or the billing address on the cart. A collection point with no zone is always offered; one with a zone the customer’s address falls outside of is dropped, so a location can be collectable for one customer and invisible to the next. :::
Step four - make your product Click and Collectable
In your Product object you will need to configure the Shipping Method to now include a “Pick up in store” option.
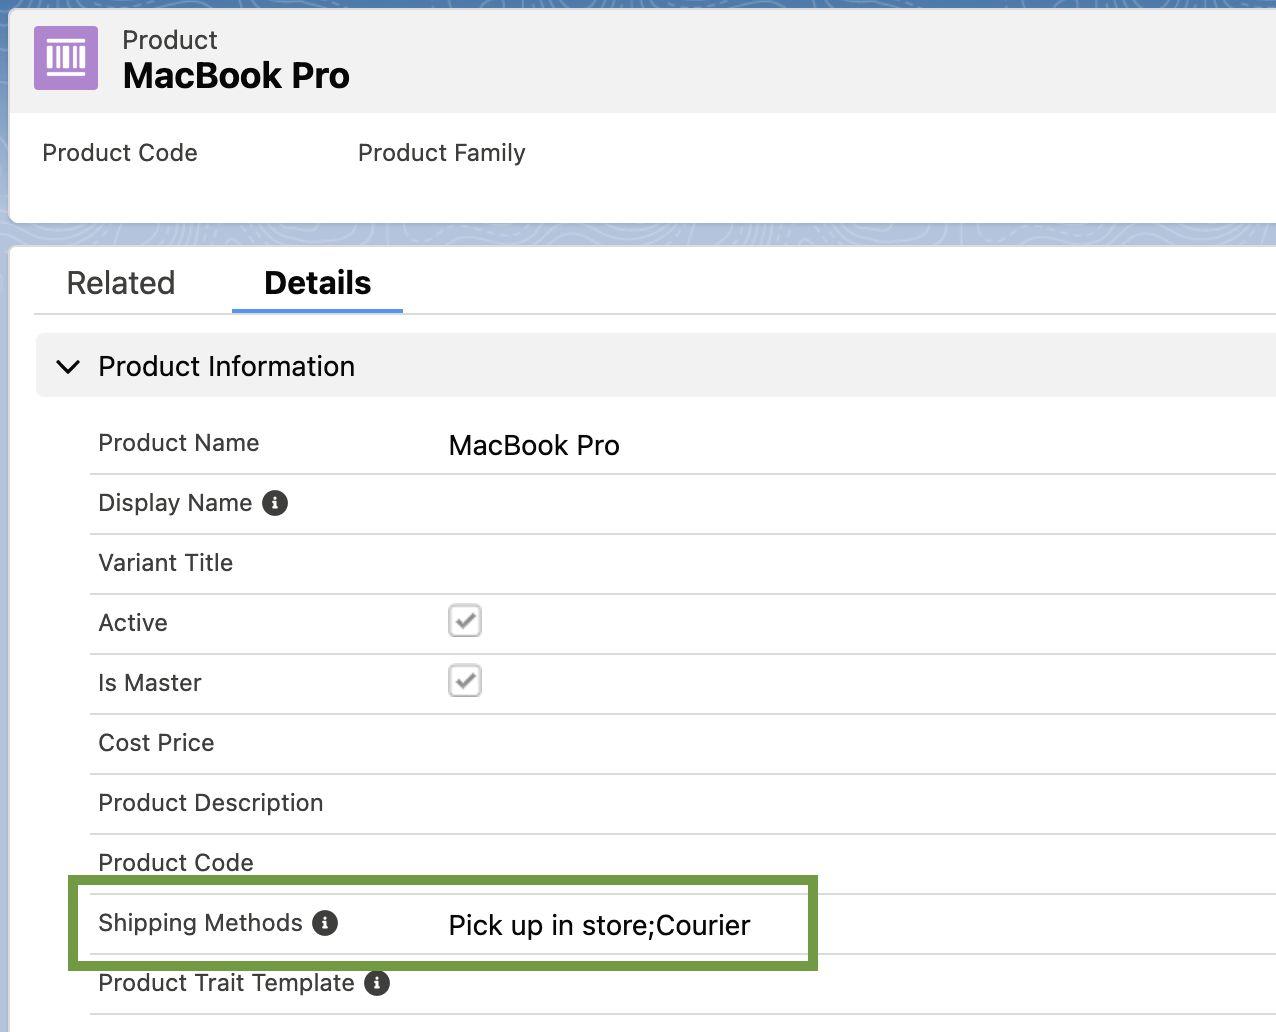
Edit the Product object, select the “Pick up in store” option and using the right arrow, move the option into the “Chosen” box.
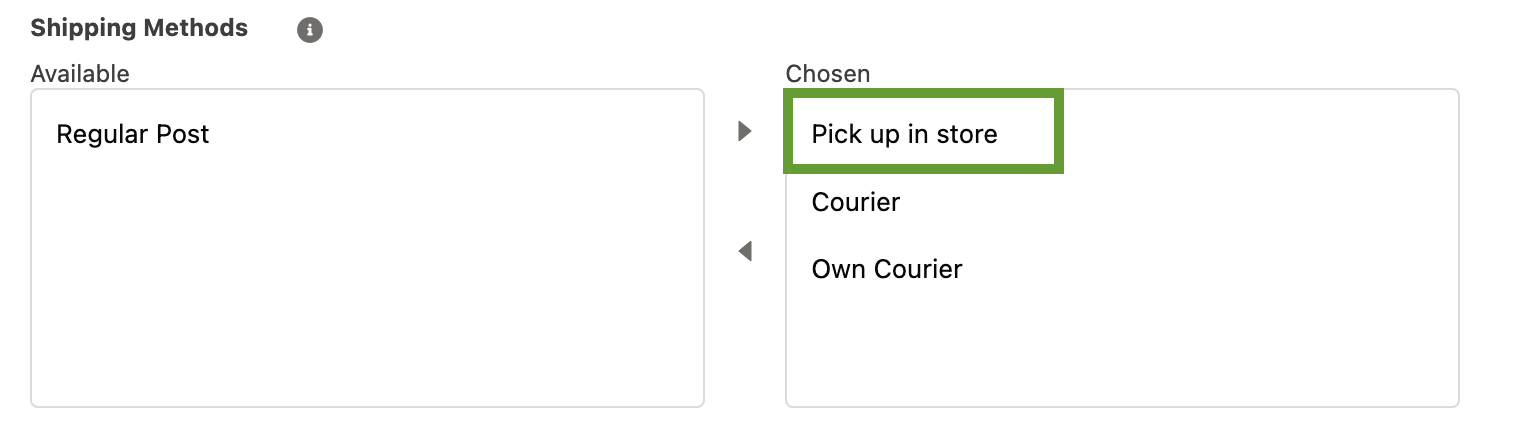
The product is now configured for Click and Collect.
Step five - set your stock levels
To have a functional Click and Collect you need stock to sell.
If you are tracking your inventory then you must:
- Have available stock, and/or
- Have backorderable stock
If you are not tracking your inventory then the above is not required.
:::warning When Track Inventory is on, a missing Stock Level record silently removes the location from the checkout. For every product in the cart that tracks inventory, StoreConnect looks for a Stock Level record at that stock location with an Available to Sell figure of at least the quantity ordered. If any tracked product in the cart has no such record, the whole location is reported as out of stock rather than unavailable, and the default theme then leaves it out of the click and collect list. Nothing reports an error.
So every inventory-tracked product you want collectable needs a Stock Level record per collectable location, with enough Available to Sell to cover the order. Products with Track Inventory switched off are treated as always in stock and need no Stock Level record.
Whether an out-of-stock location is shown as unselectable or is treated as available later depends on Require Stock For Pickup and Days to Restock on the stock location. :::
Both (1) & (2) above are set within the Stock Levels object and if you are still in the Product object from the earlier step then simply click on the “related” tab.
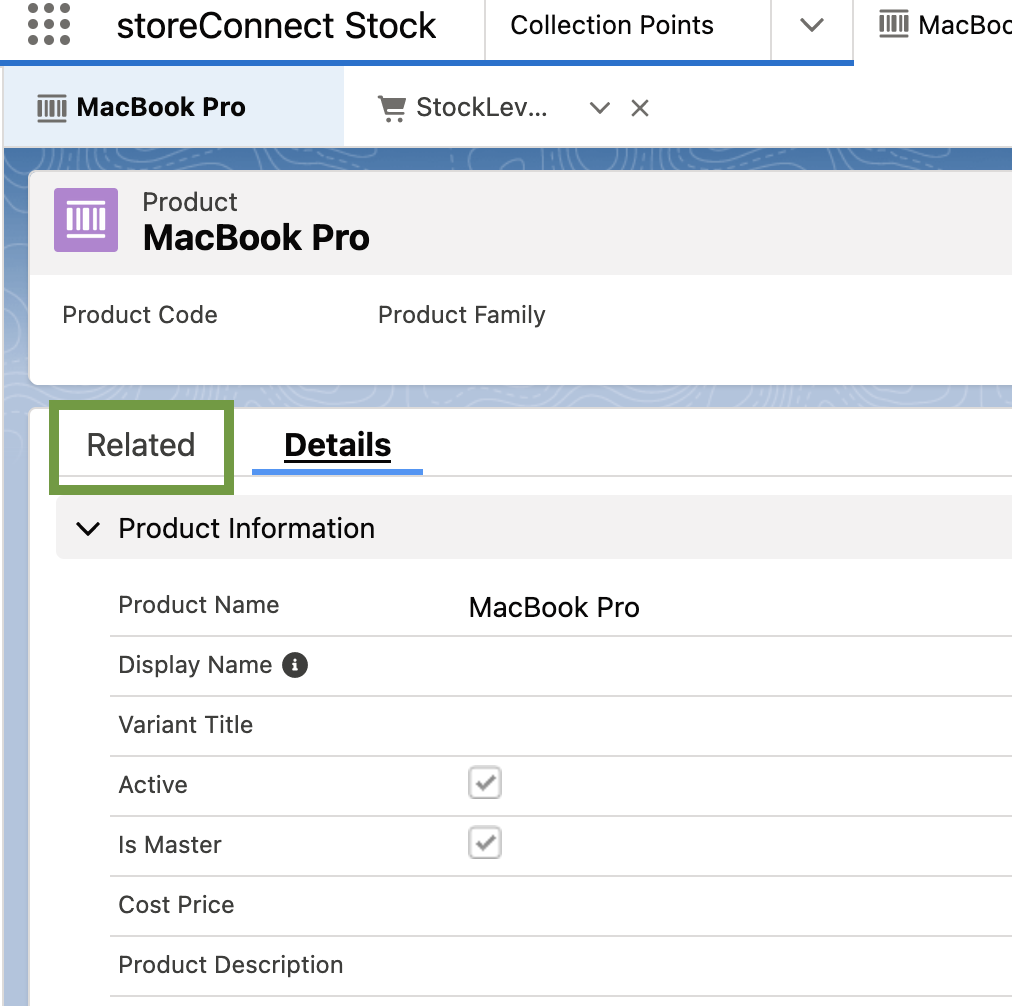
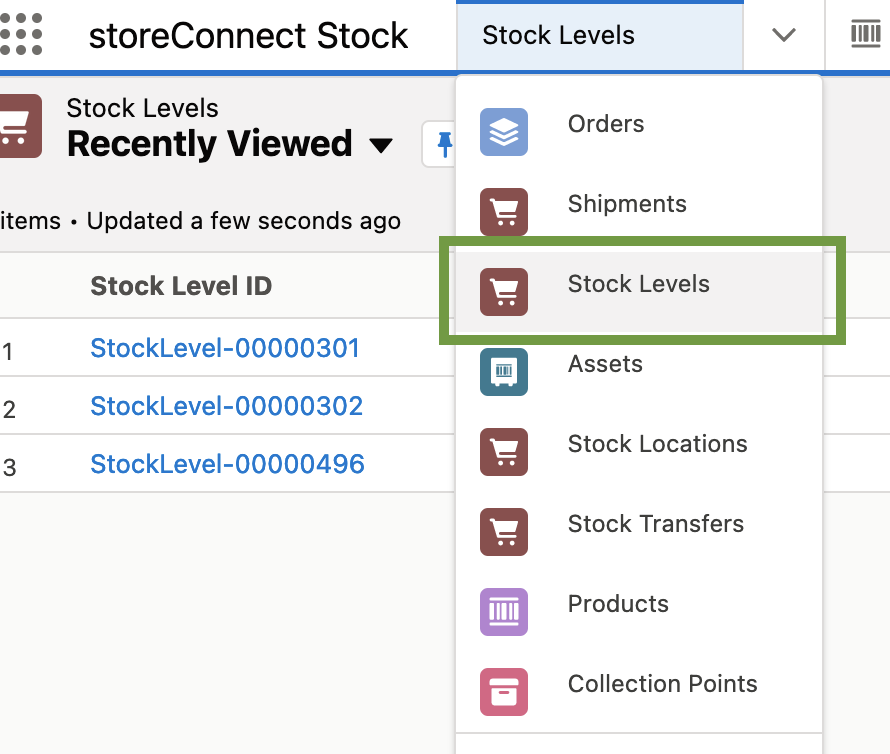
Otherwise, you can find the Stock Level object using the dropdown menu.
Have available stock
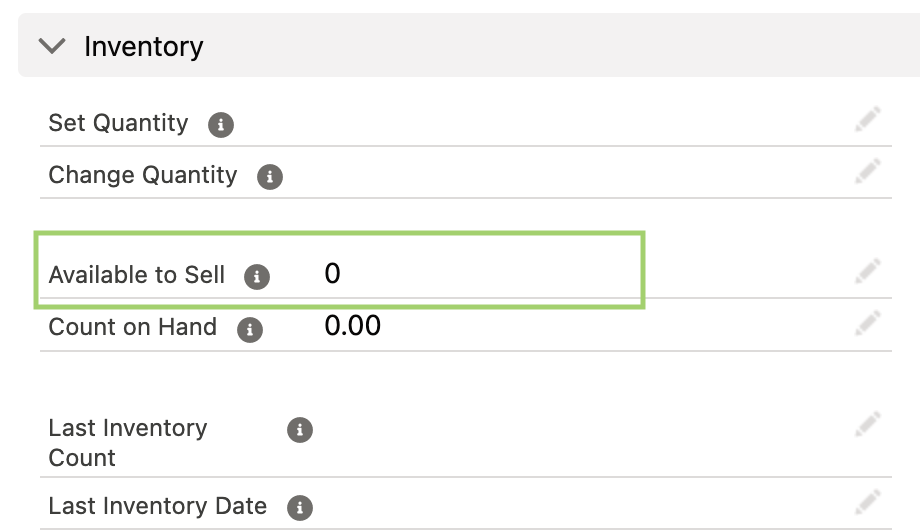
Stock Levels is simply that. It is the object which keeps track of the amount of stock you have to sell. When you have available stock, set your “Available to Sell” option to the amount of stock you have on hand to sell.
Have backorderable stock
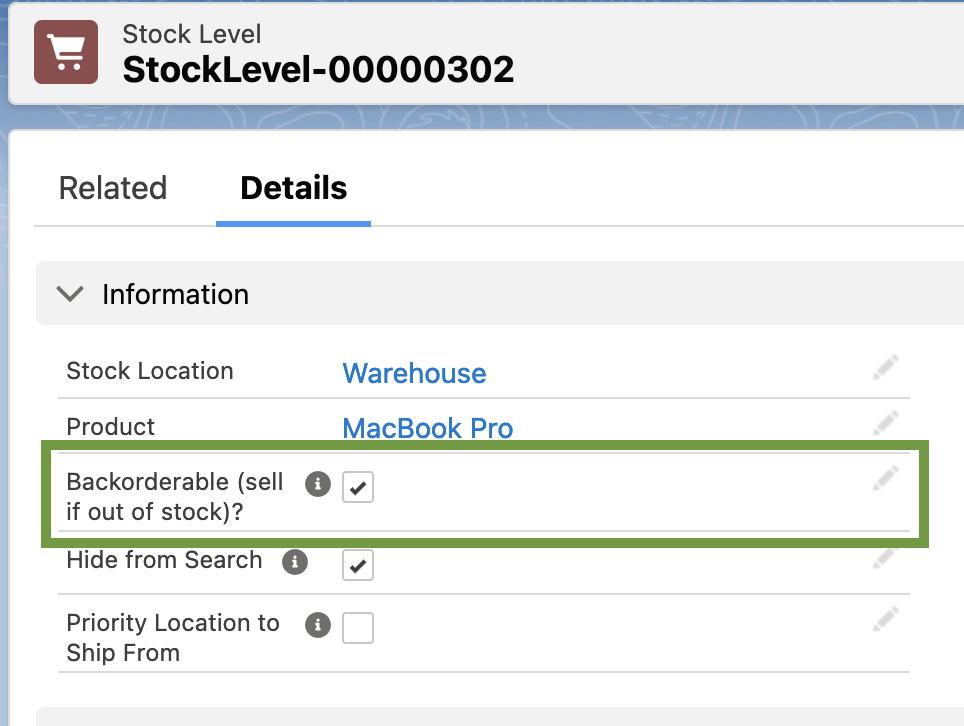
Backorderable is automatic if Track Inventory is off but if Track inventory is on, using the Backorderable checkbox on the stock level record allows backorders while still tracking stock levels.

Then you’ll need to turn on “Backorderable” within the Stock Levels object.
Step six - check your theme renders the pickup options
Steps one to five configure Click and Collect in Salesforce. The storefront still has to display it, and that is a separate thing.
The default theme does this for you. A custom theme, or any theme with its own
hand-written checkout, must render the pickup options itself. Pickup options are not
shipping rates: they live on their own collection, so a delivery step that loops
current_cart.shipping_rates alone will show no pickup choice at all, with a fully
correct configuration behind it and nothing reporting a problem.
The options are on current_cart.pickup_options (also available per line on
current_cart_item.pickup_options). Each is a
PickupOption carrying the stock_location,
one or more collection_points, and in_stock? / disabled? /
immediately_available? flags.
Pickup and delivery share the checkout form’s method field, so both sets of radio
buttons use the same input name. The value of a pickup radio is the option’s
form_value joined to the chosen collection point’s id with an underscore:
```liquid
{% assign method_field = form.fields[“method”] %}
{% for option in current_cart.pickup_options %} {% unless option.disabled? %} {% for point in option.collection_points %} {% endfor %} {% endunless %} {% endfor %} ```
Remember the empty state too. A checkout that decides whether to show “no delivery
options available”, or whether to enable its continue button, by testing
current_cart.shipping_rates.size alone will block a pickup-only cart.
:::note
current_store.pickup_enabled? and current_cart.pickup_options do not answer quite
the same question. pickup_enabled? only counts stock locations linked to the store
through a Store Stock Location record, while the cart’s pickup options are built
from every active, collectable stock location. A location that is missing its
Store Stock Location link therefore produces selectable pickup options on the cart
while pickup_enabled? still returns false, and a section gated on that attribute
renders nothing.
Adding the missing link is the fix. If you are writing a custom checkout and want to
be certain, test current_cart.pickup_options directly rather than
current_store.pickup_enabled?.
:::
Terms
Object: In Salesforce, an object is another name for a database table. A database table is essentially a spreadsheet where fields exist as columns and records as rows. Complete the “Understand Custom & Standard Objects” Trailhead to understand more about Objects.
Geolocation: Geolocation is 1) the process of determining a website visitor’s location based on the IP address they are reported as coming from, and 2) a feature by which Salesforce Admins and/or Partners can custom build showing Collection Points on a map. See Click and Collect for more information.
Backorderable: This is when a product can be sold to customers even if it is temporarily out of stock.
Was this article helpful?
Thanks for your feedback! It helps us improve our docs.