

Example - Create a bookable event
On this page
This topic walks through an example of how to set up a bookable event in StoreConnect. You can adapt this example for the event you want to create, or see bookable events and services to learn about all the record creation and configuration steps.
Event details used in this example
- Event name: Exclusive Investor Dinner
- Price: $1,000
- Location: Physical Site
- Date: Saturday 7 June 2025. Use a future date when you follow this example, because past dates are never offered for booking.
- Time: 7 to 11pm
- Maximum available tickets: 200
- Minimum required to run the event: 50
- Reservations are for 2 guests: the person purchasing the event and another attendee
- Time to checkout: 15 minutes after added to cart
What the end product should look like
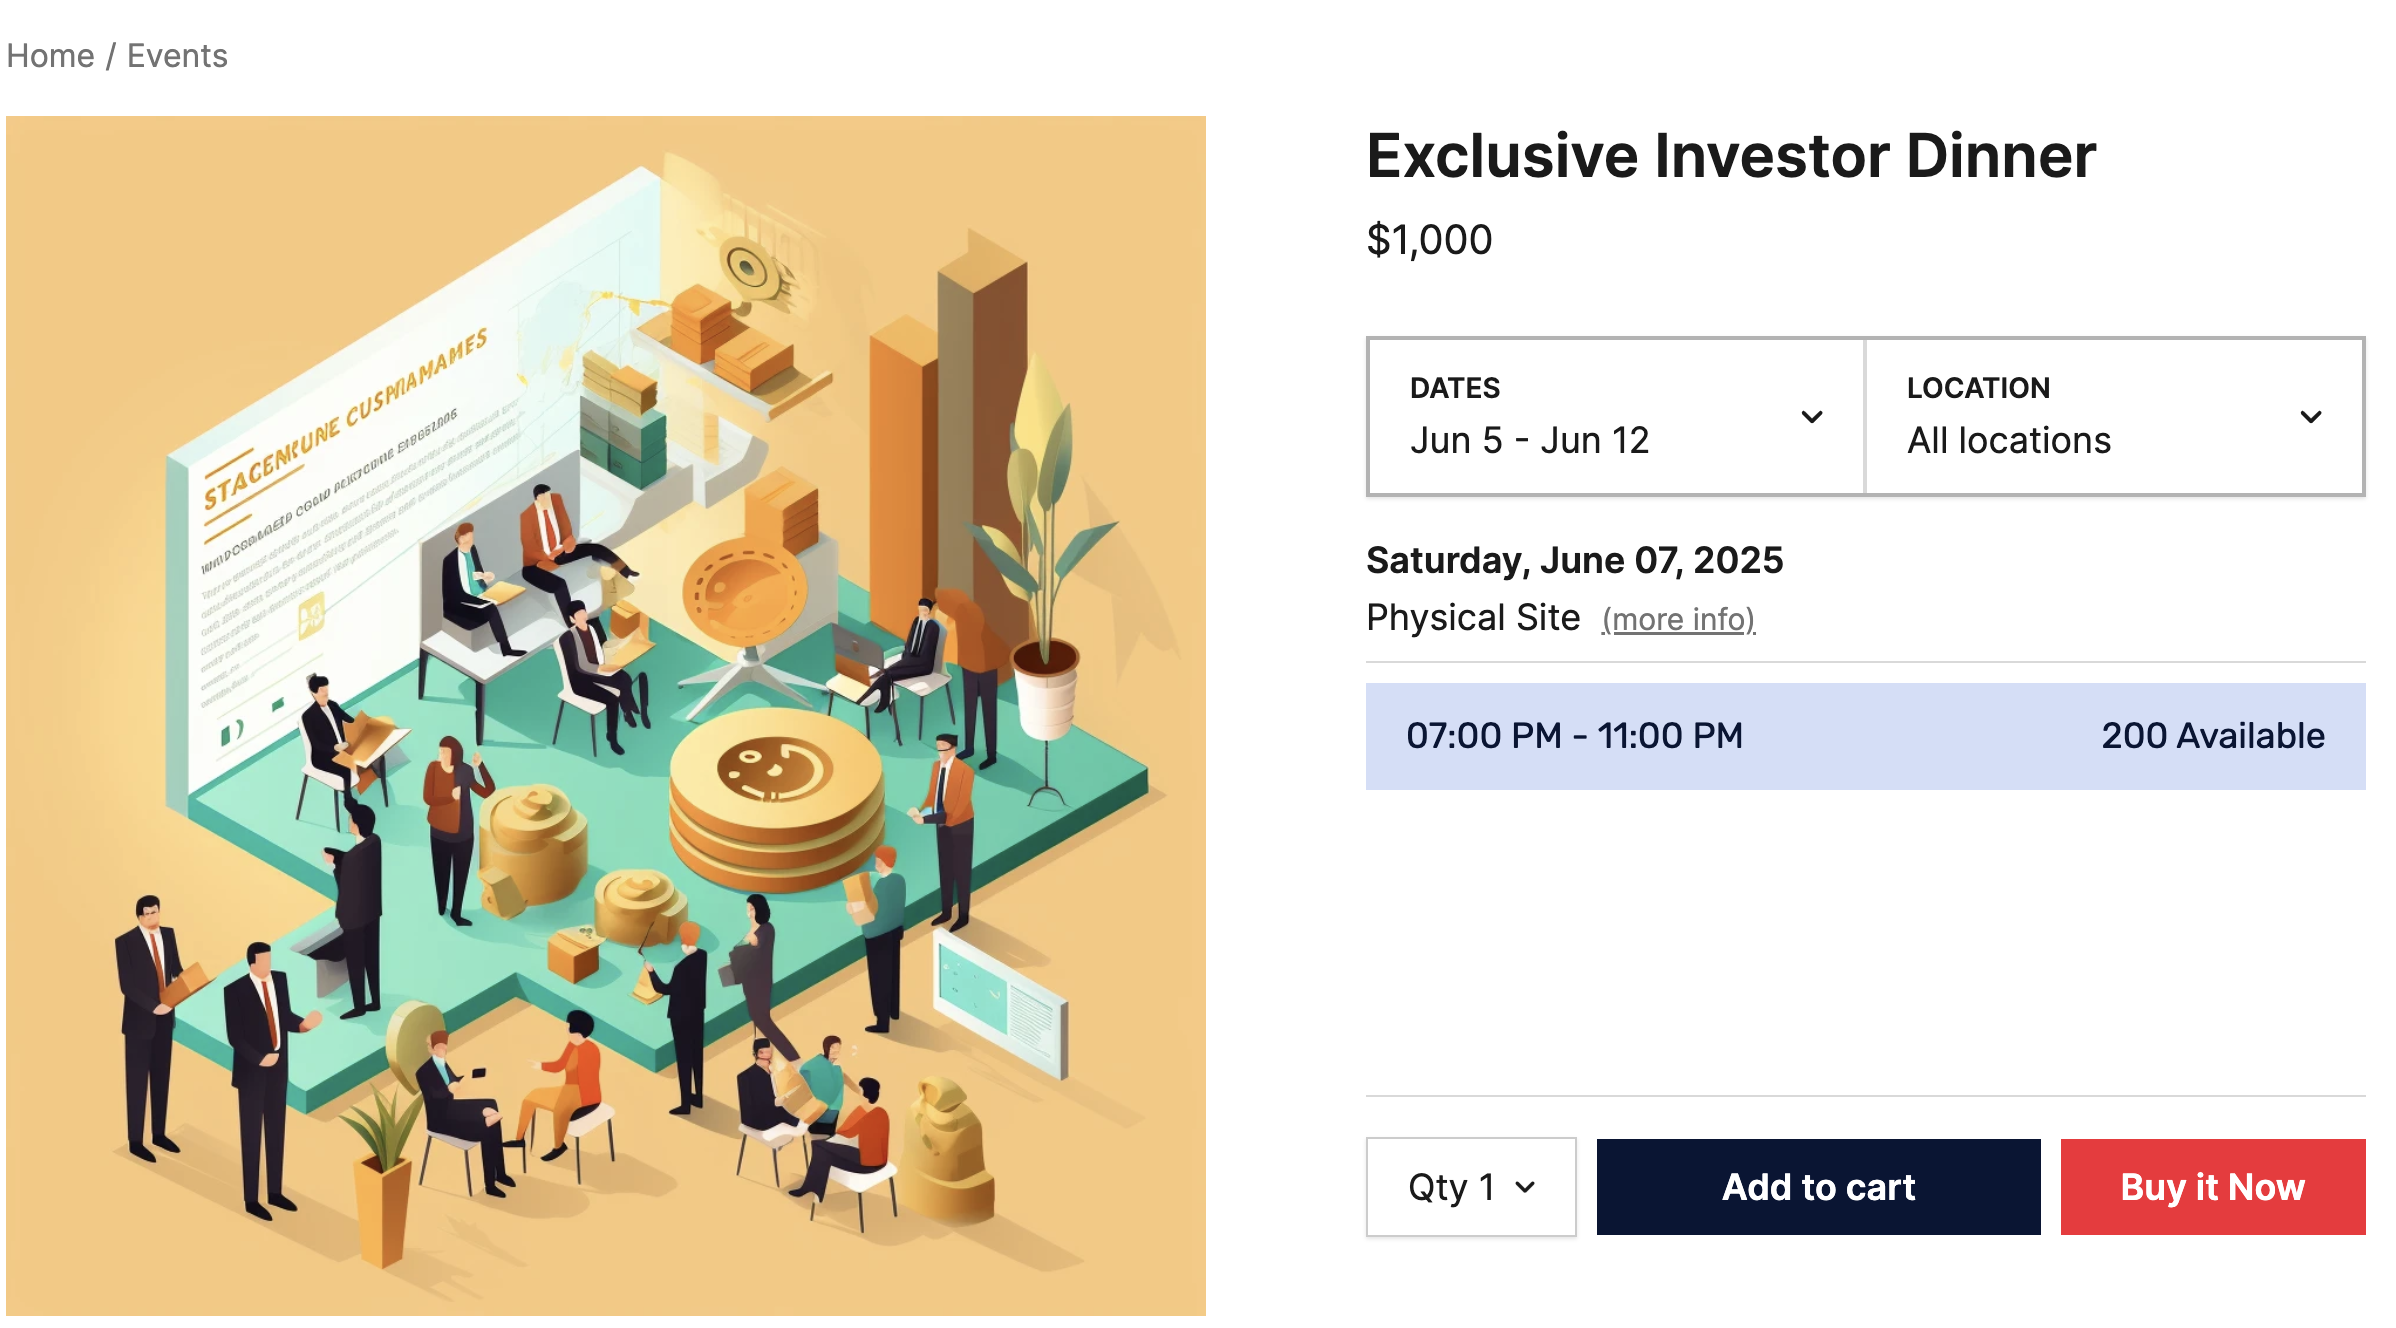
Before you begin
- Your Salesforce profile uses the SC Product Layout for the Product object. The standard Salesforce Product Layout does not include the Booking Information section used in Step 2. To change the layout assigned to your profile, see assigning page layouts.
- A product for the event exists, with a price in your store’s price book. This example uses a product named Corporate - Exclusive Investor Dinner, priced at $1,000.
Step 1: configure the booking timer for the store
-
Open the Store record for your store. This example uses StoreConnect Store.
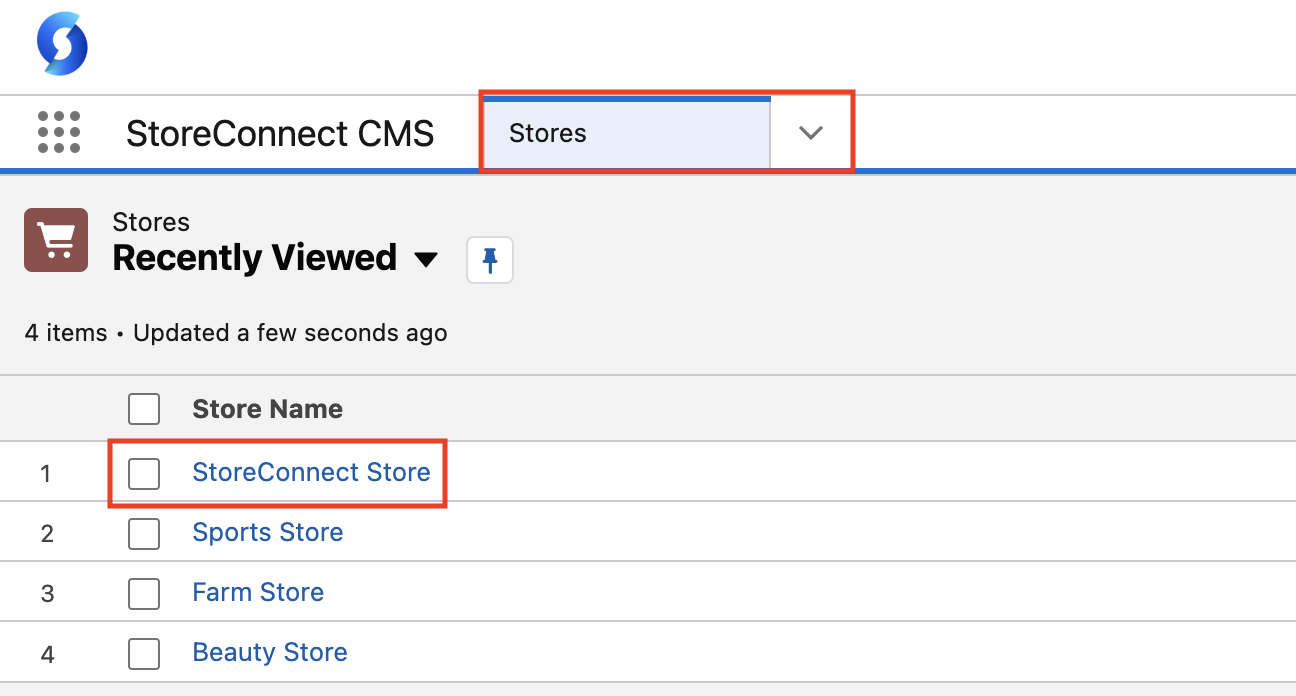
- Select the Products tab and scroll to the Booking System section.
- Set Booking Hold Duration (mins) to
15. -
Select Save.

Step 2: add booking information for the product
- Go to the Products list and open the Corporate - Exclusive Investor Dinner product.
- In the Booking Information section, edit the following fields.
- Booking Duration (mins) -
180 - Booking Start Buffer (mins) - leave blank
- Booking End Buffer (mins) - leave blank
- Select Require Attendee Details for Bookings.
- Max Attendees Per Booking -
2
- Booking Duration (mins) -
- Select Save.
:::warning Give the event a price. Do not select Hide Price on its price book entry.
A hidden price turns the event into a quote request, and a quote request does not create the Booking and Bookable Event records or reserve the slot. The customer ends up holding a quote for a seat that was never booked. See Bookable products and quote requests. :::
:::tip For an event with nothing to ship, also select Virtual on the product so checkout skips the shipping address. This example leaves Virtual unselected, so Step 7 shows a shipping address. :::
Step 3: define a bookable location for the event
- Go to the Bookable Locations list.
- Select New.
- Set Bookable Location Name to
Physical Site. - Set Store to StoreConnect Store.
- Set Standard Timezone to the time zone of the location. This field is required.
- Select Active.
-
Select Save.
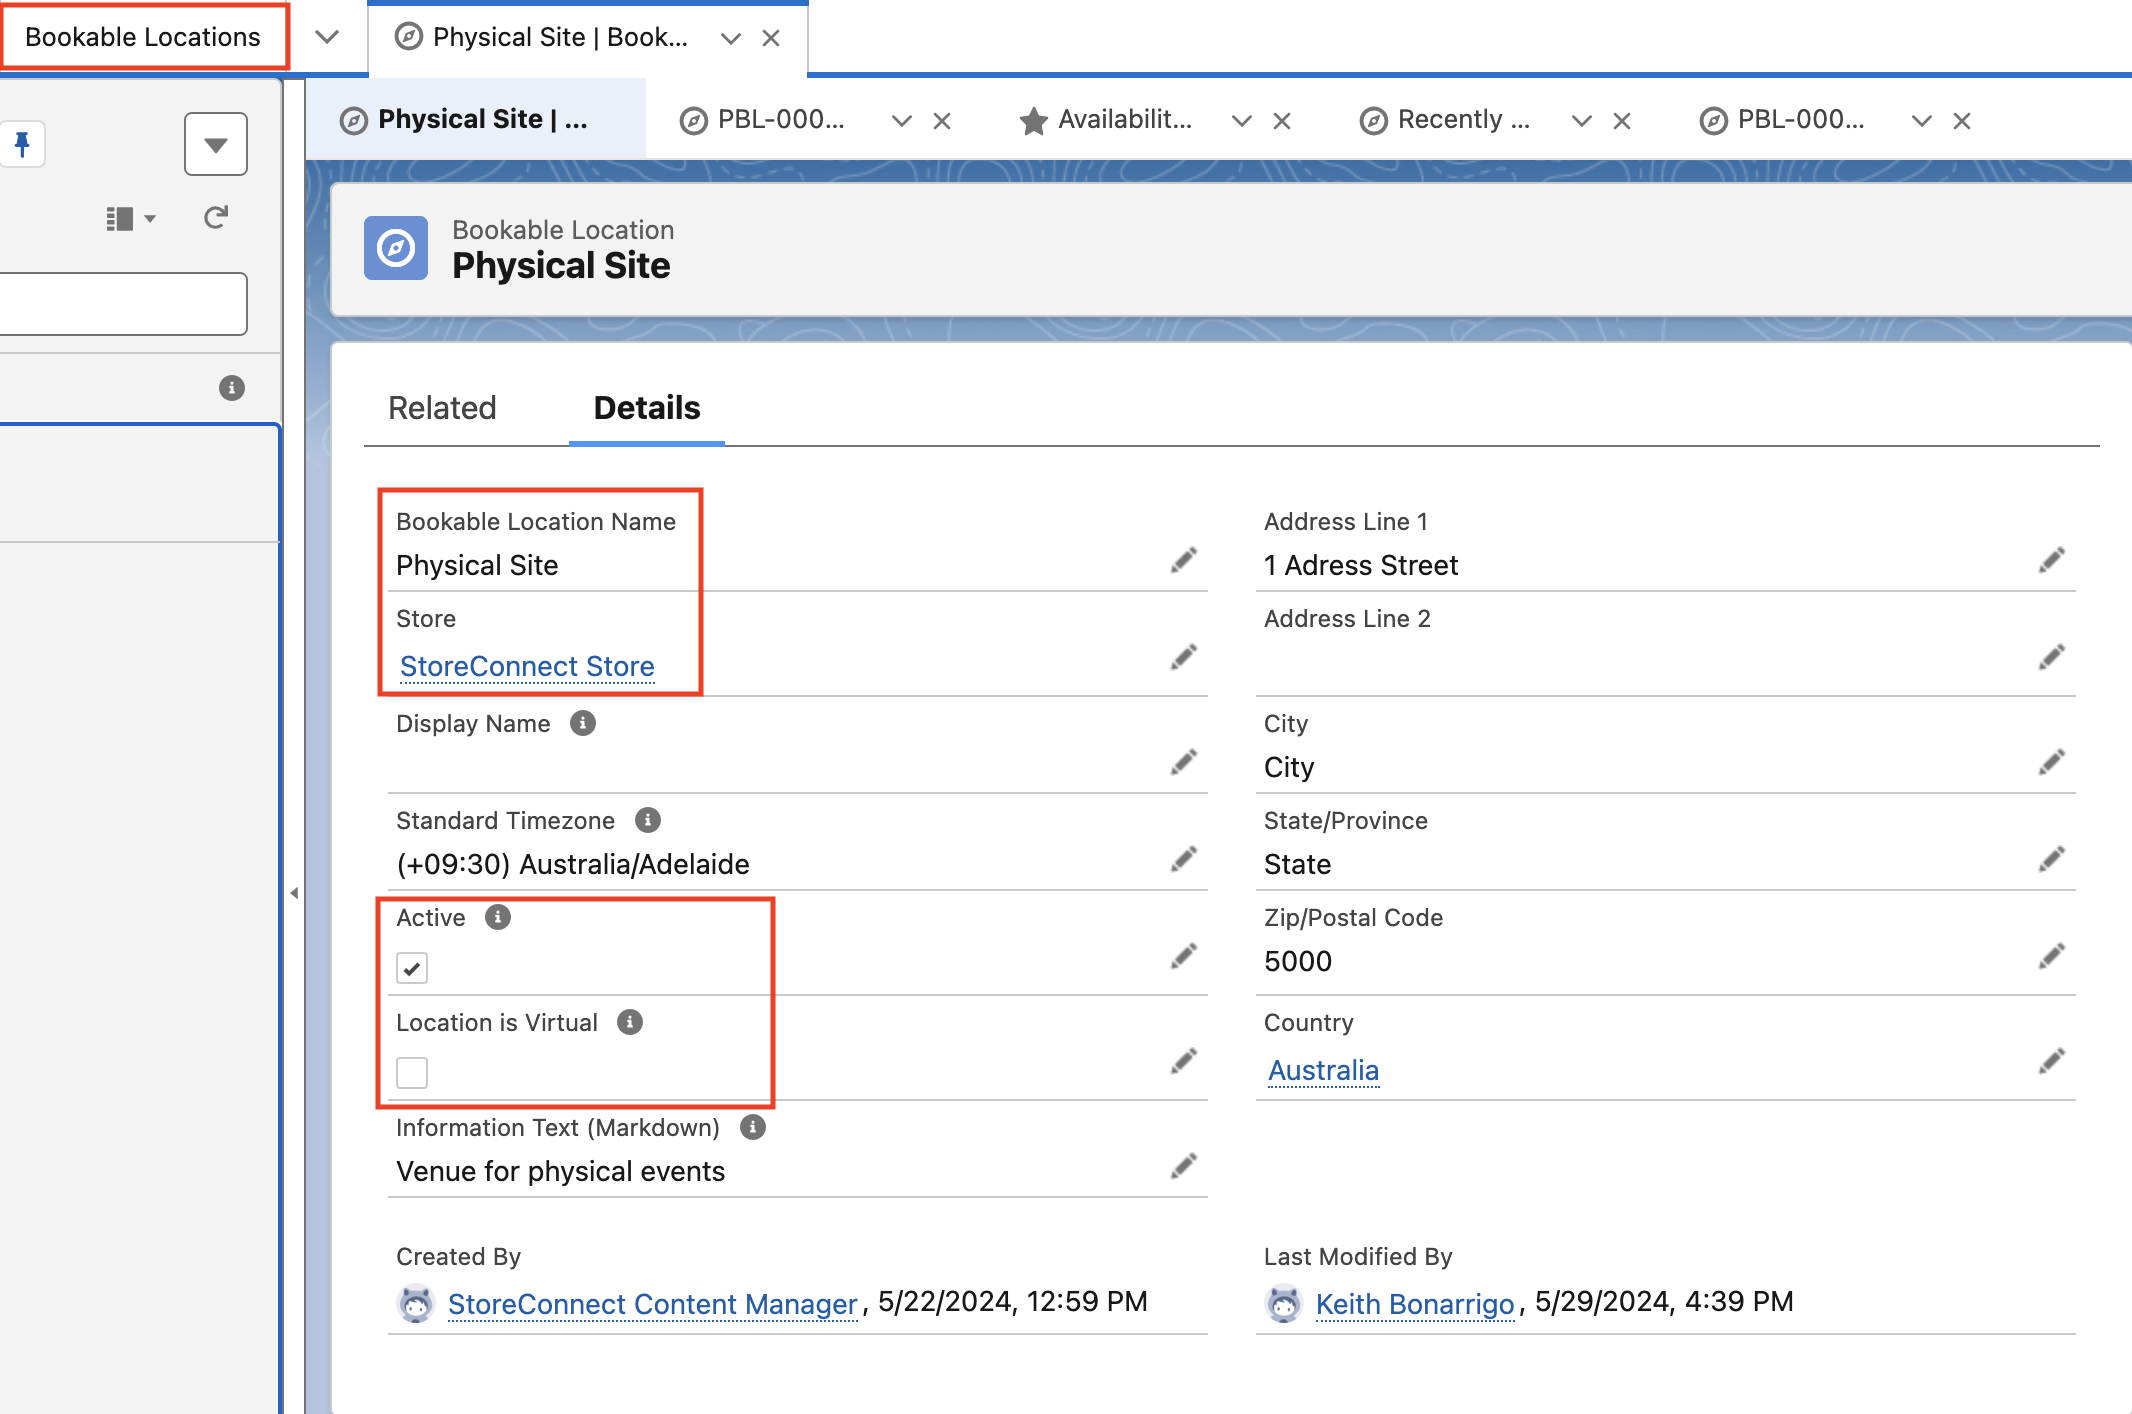
Step 4: define the product for the bookable location
- On the Physical Site bookable location record, select New in the Product Bookable Locations related list.
- Set Product to Corporate - Exclusive Investor Dinner.
- Set Maximum Bookings to
200and Minimum Bookings to50. -
Select Save.
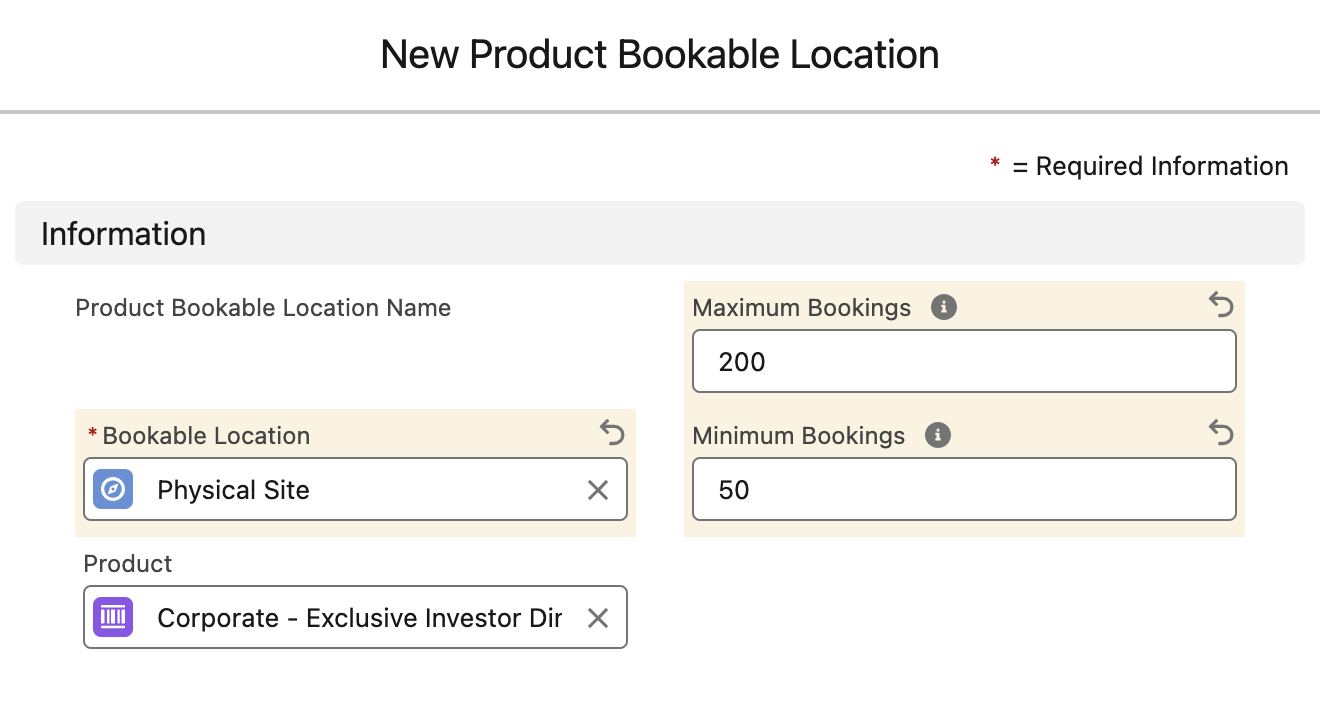
Step 5: define availabilities for the bookable event
- On the Product Bookable Location record you just created, select New in the Availabilities related list.
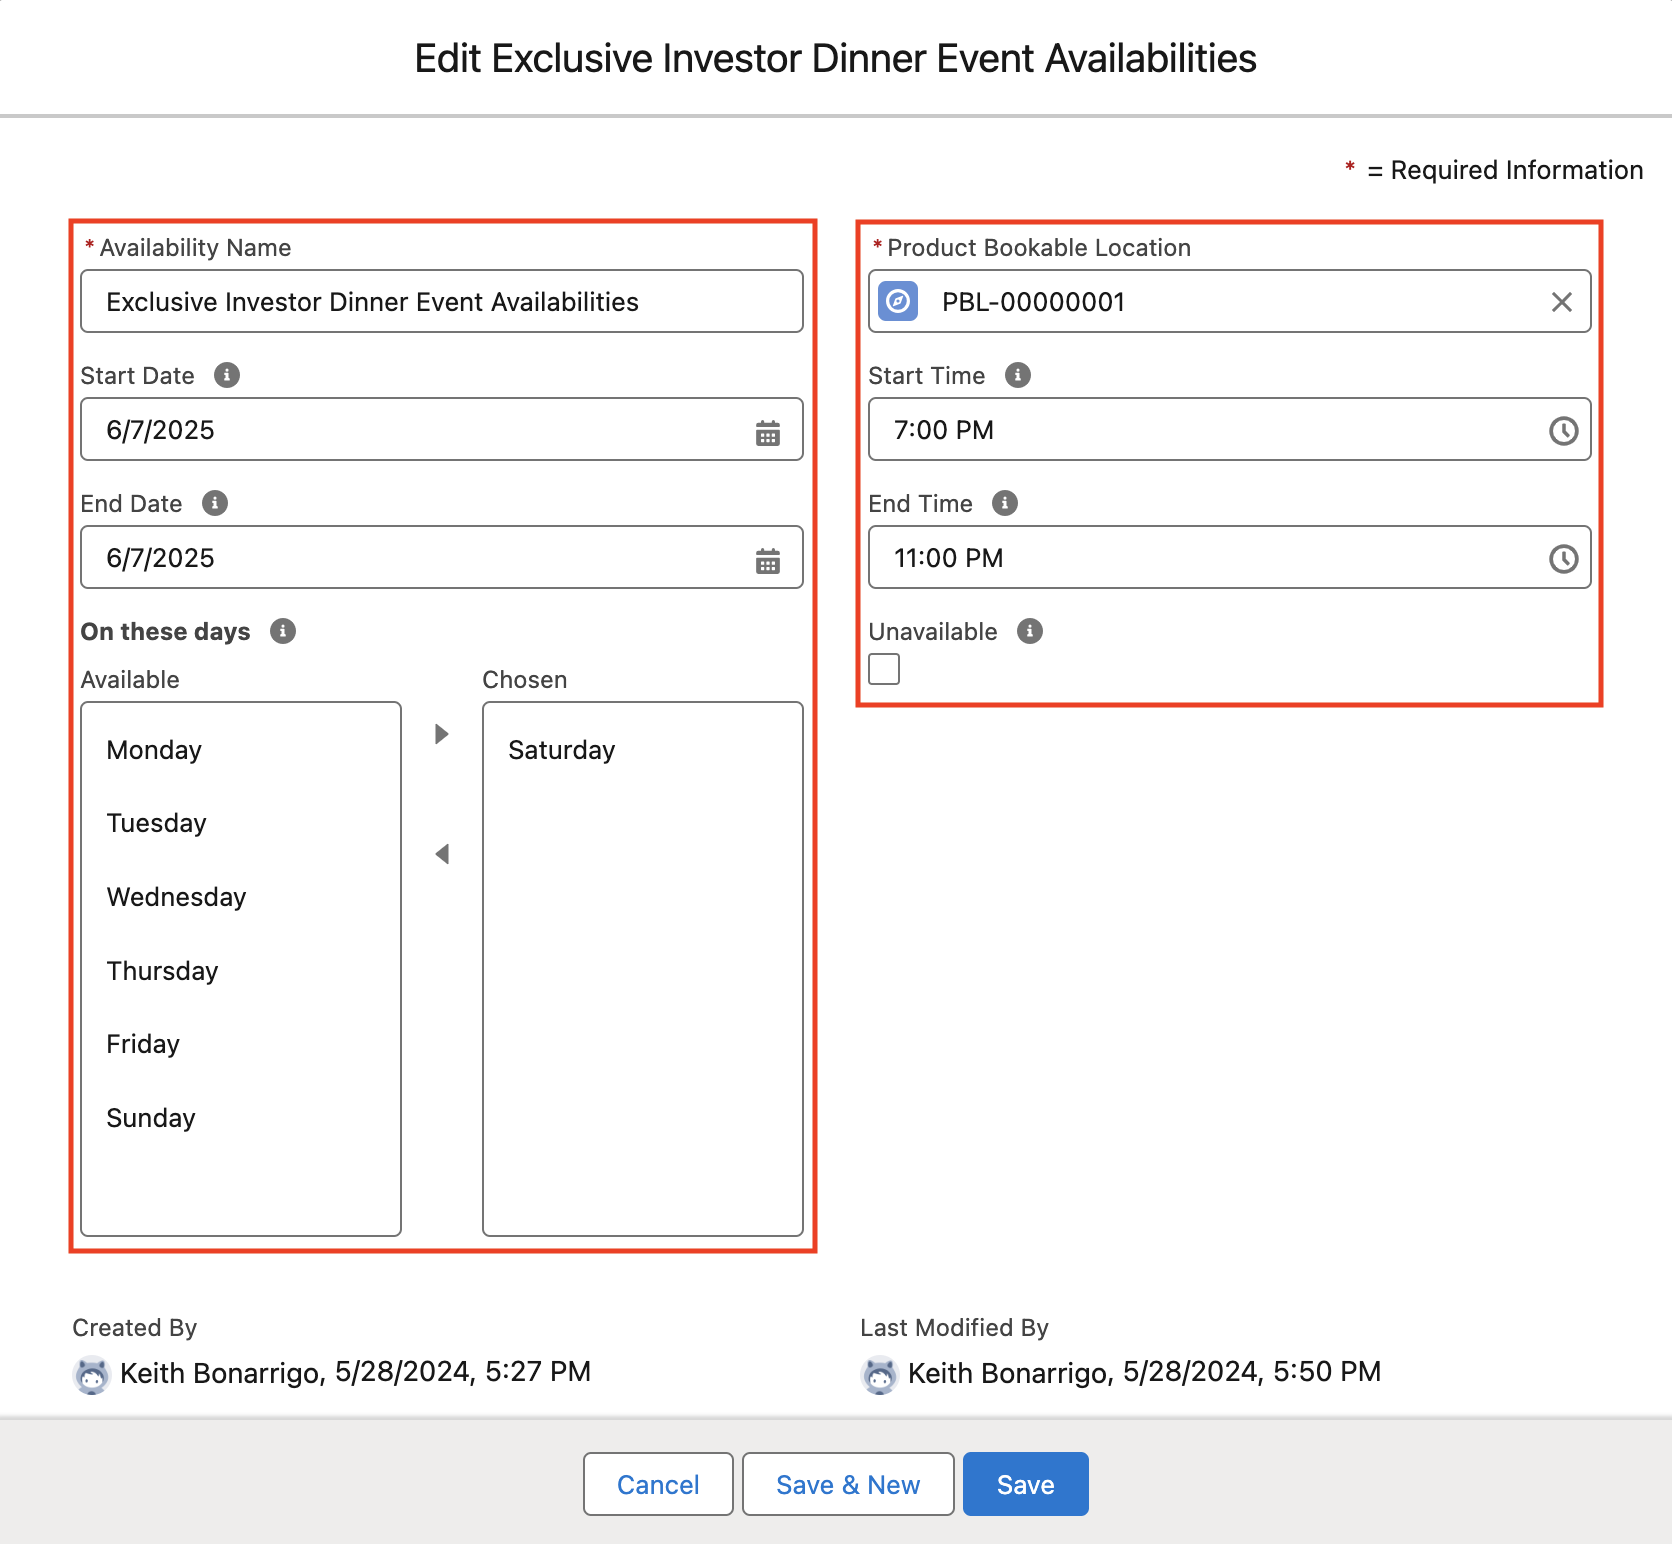
- Enter the following details:
- Availability Name -
Exclusive Investor Dinner Event Availabilities - Start Date - 7 June 2025, or your future event date
- End Date - the same date
- Start Time -
7:00 PM - End Time -
11:00 PM - On these days - Saturday. If you use a different date, select its weekday.
- Availability Name -
- Check that the time between Start Time and End Time is at least the product’s Booking Duration (mins) plus any start and end buffers. Salesforce does not save the record otherwise.
-
Select Save.
Step 6: test the bookable product
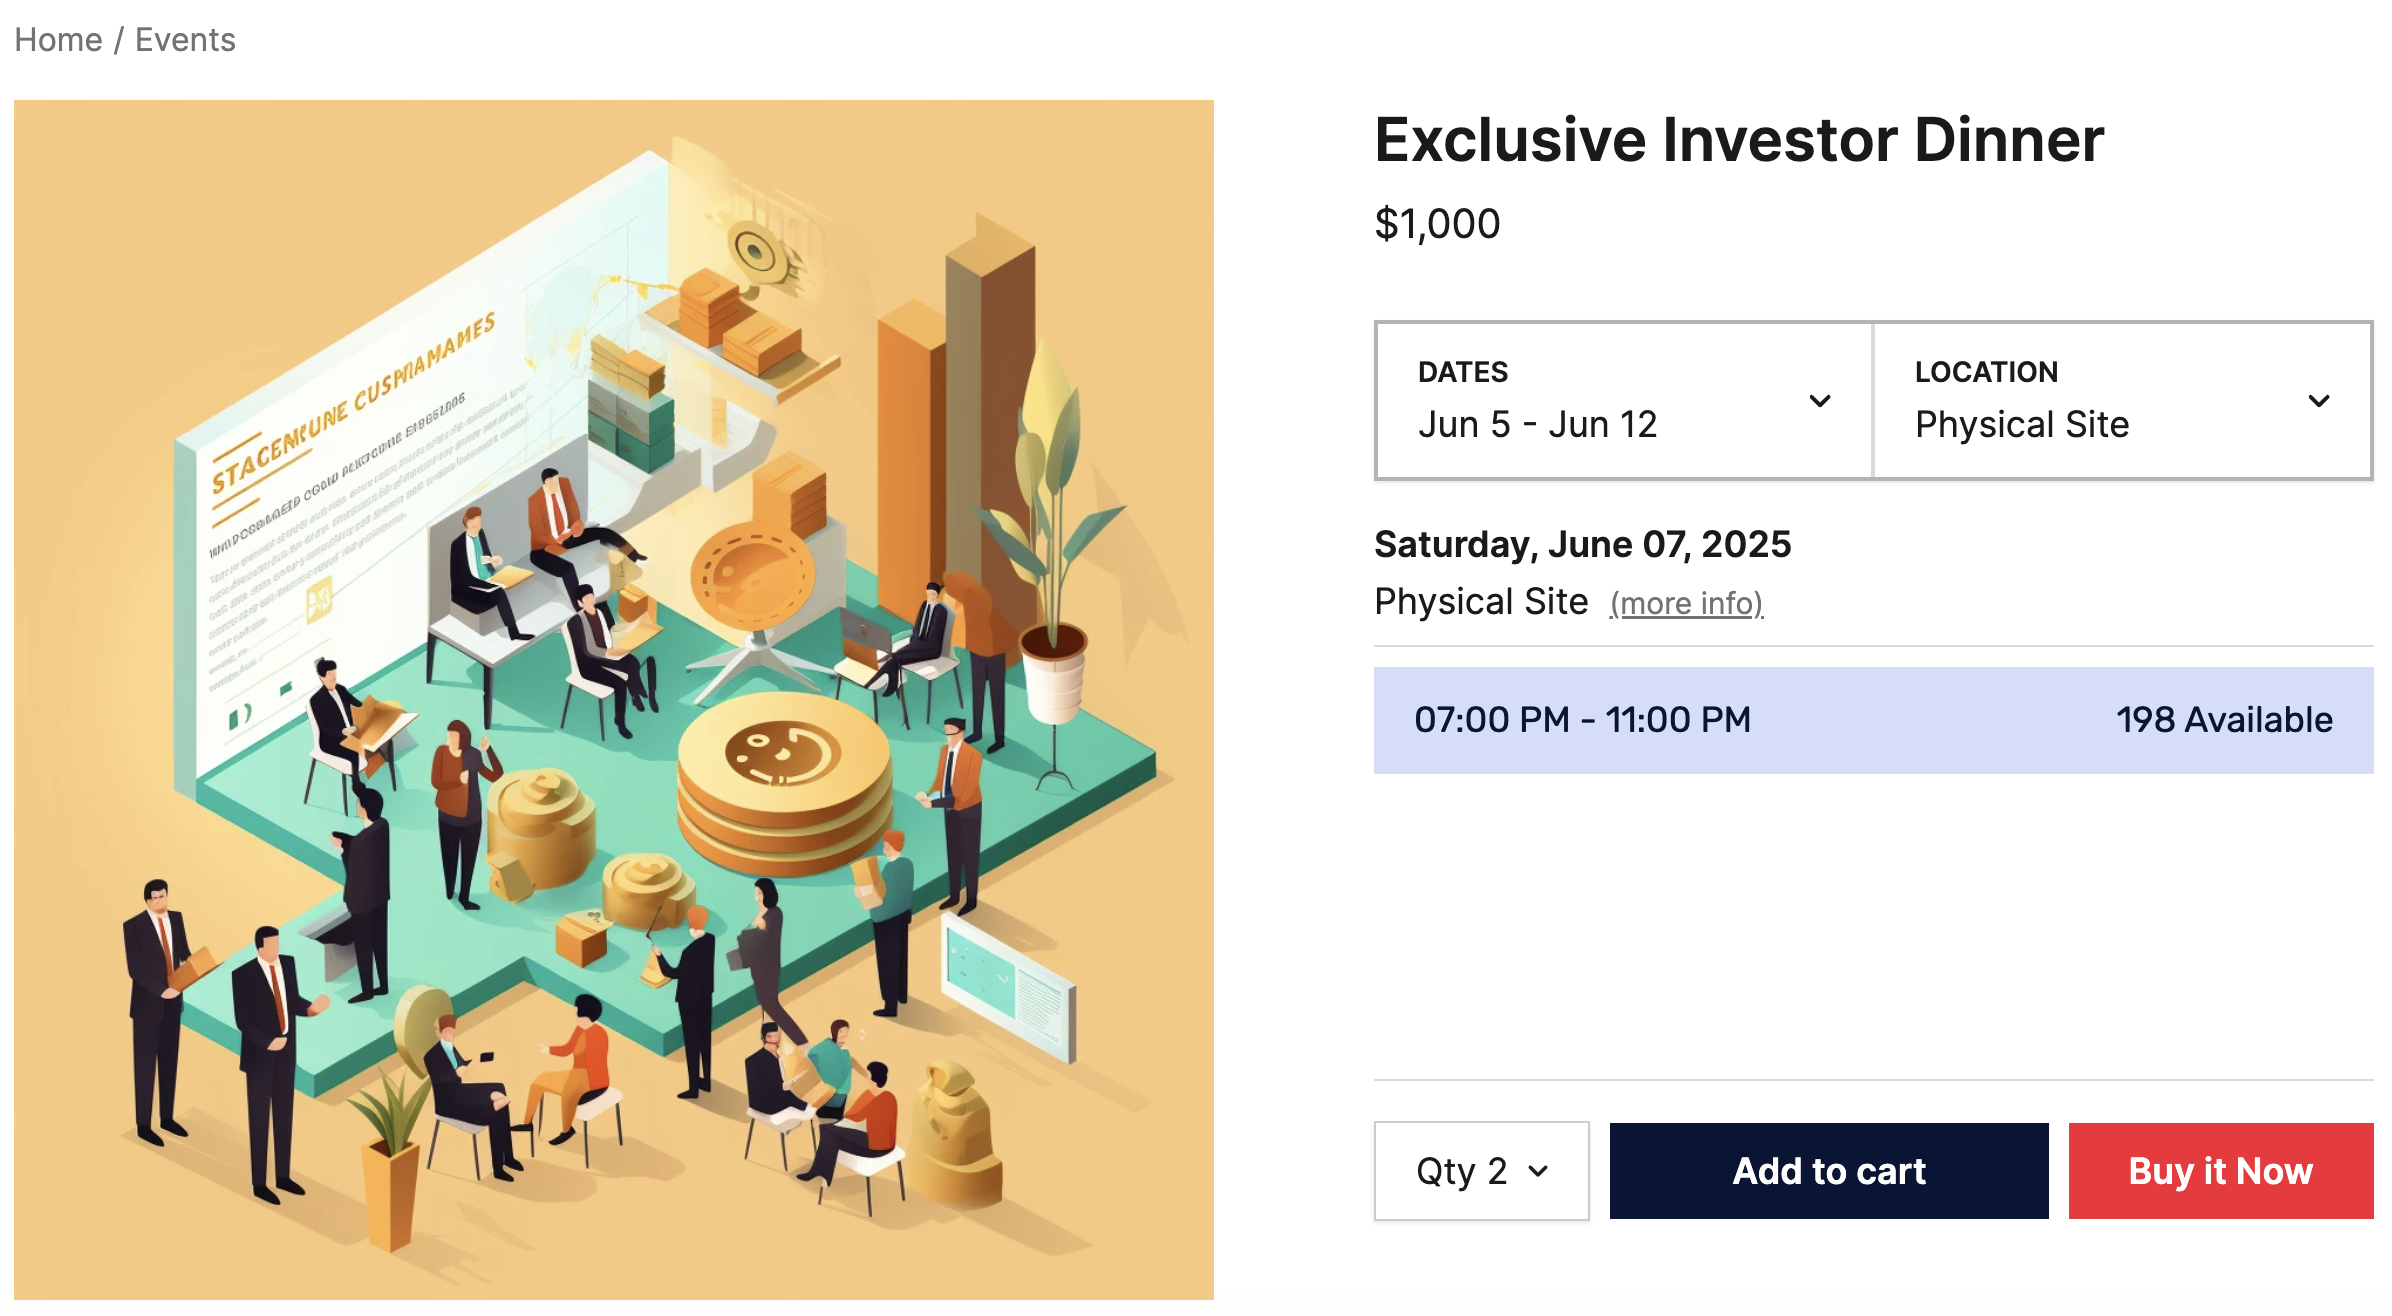
- On your store website, open the Exclusive Investor Dinner product page.
- In Dates, choose a range that includes the event date.
- In Location, choose Physical Site.
The page shows the event date, Physical Site, and a 07:00 PM - 11:00 PM time slot with the number of places available. If no dates show, see troubleshoot bookable events.
Step 7: buy a ticket
- On the product page, select the 07:00 PM - 11:00 PM time slot.
- Set the quantity to
2. - Select Buy it Now.
-
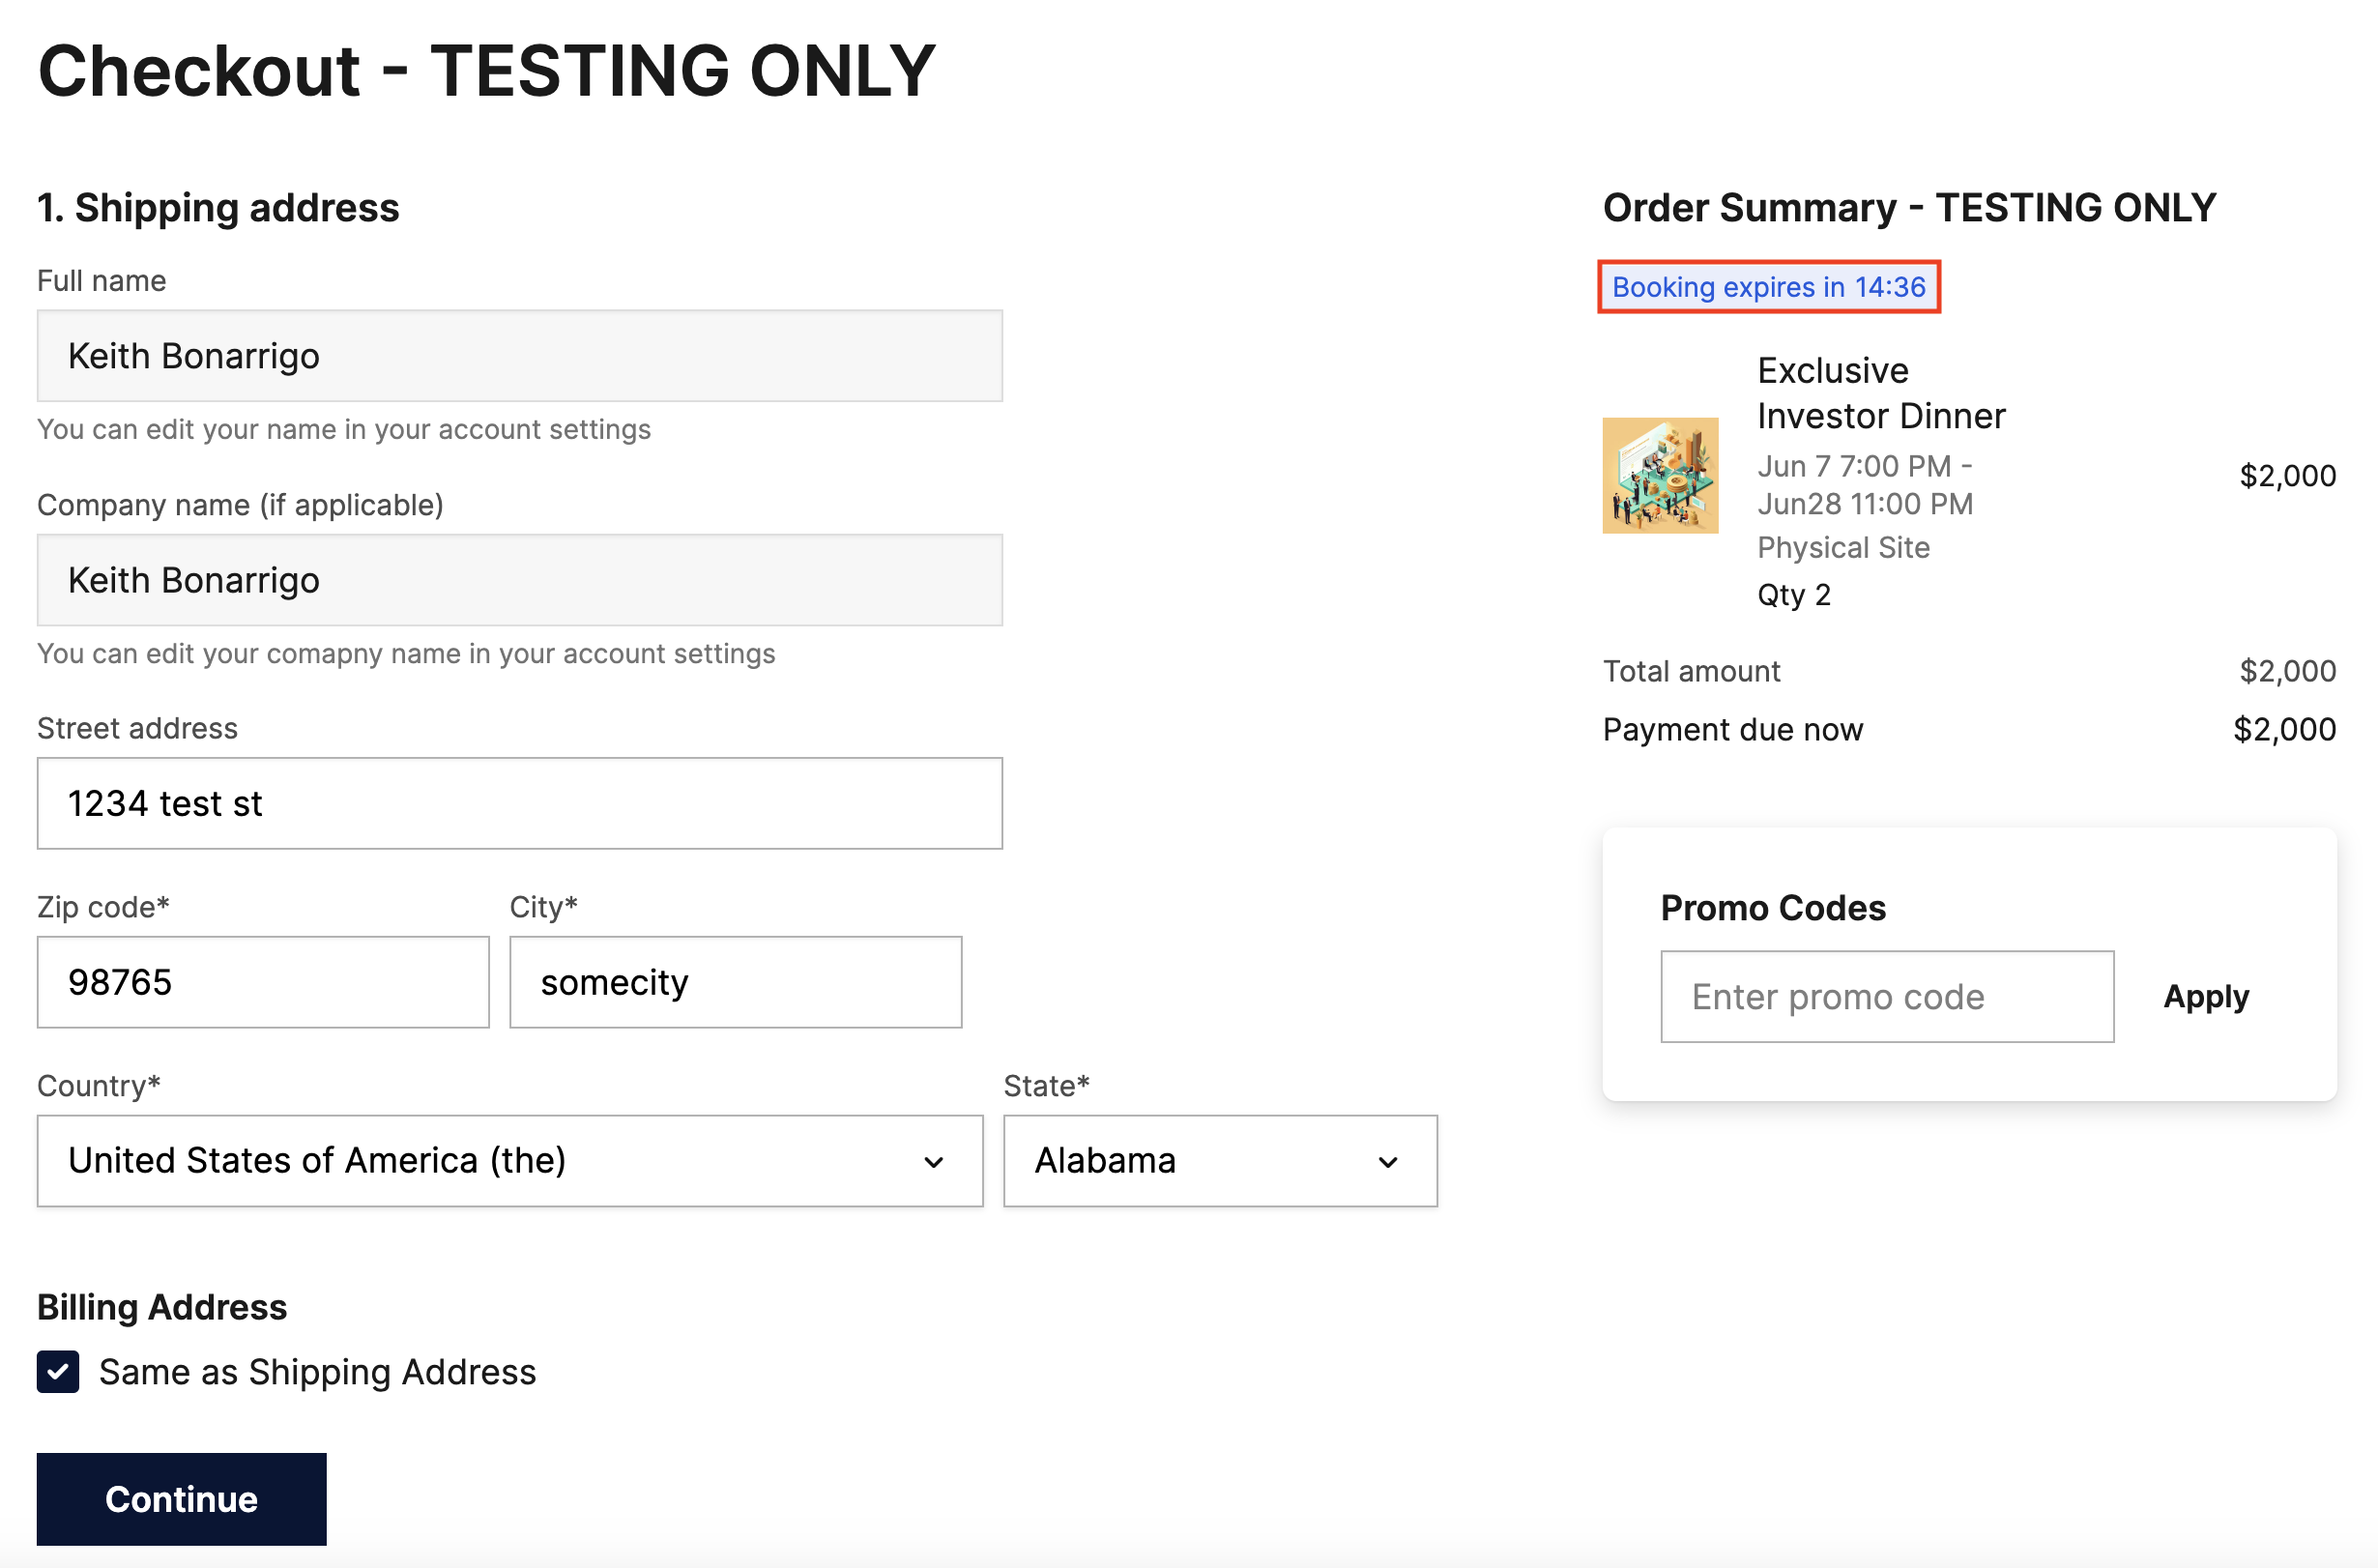
Fill in your shipping and billing information, then accept the terms and conditions on the next page. The cart timer shows how long the booking is held, as configured in Step 1.
- Select the Send me an invoice option for payment.
-
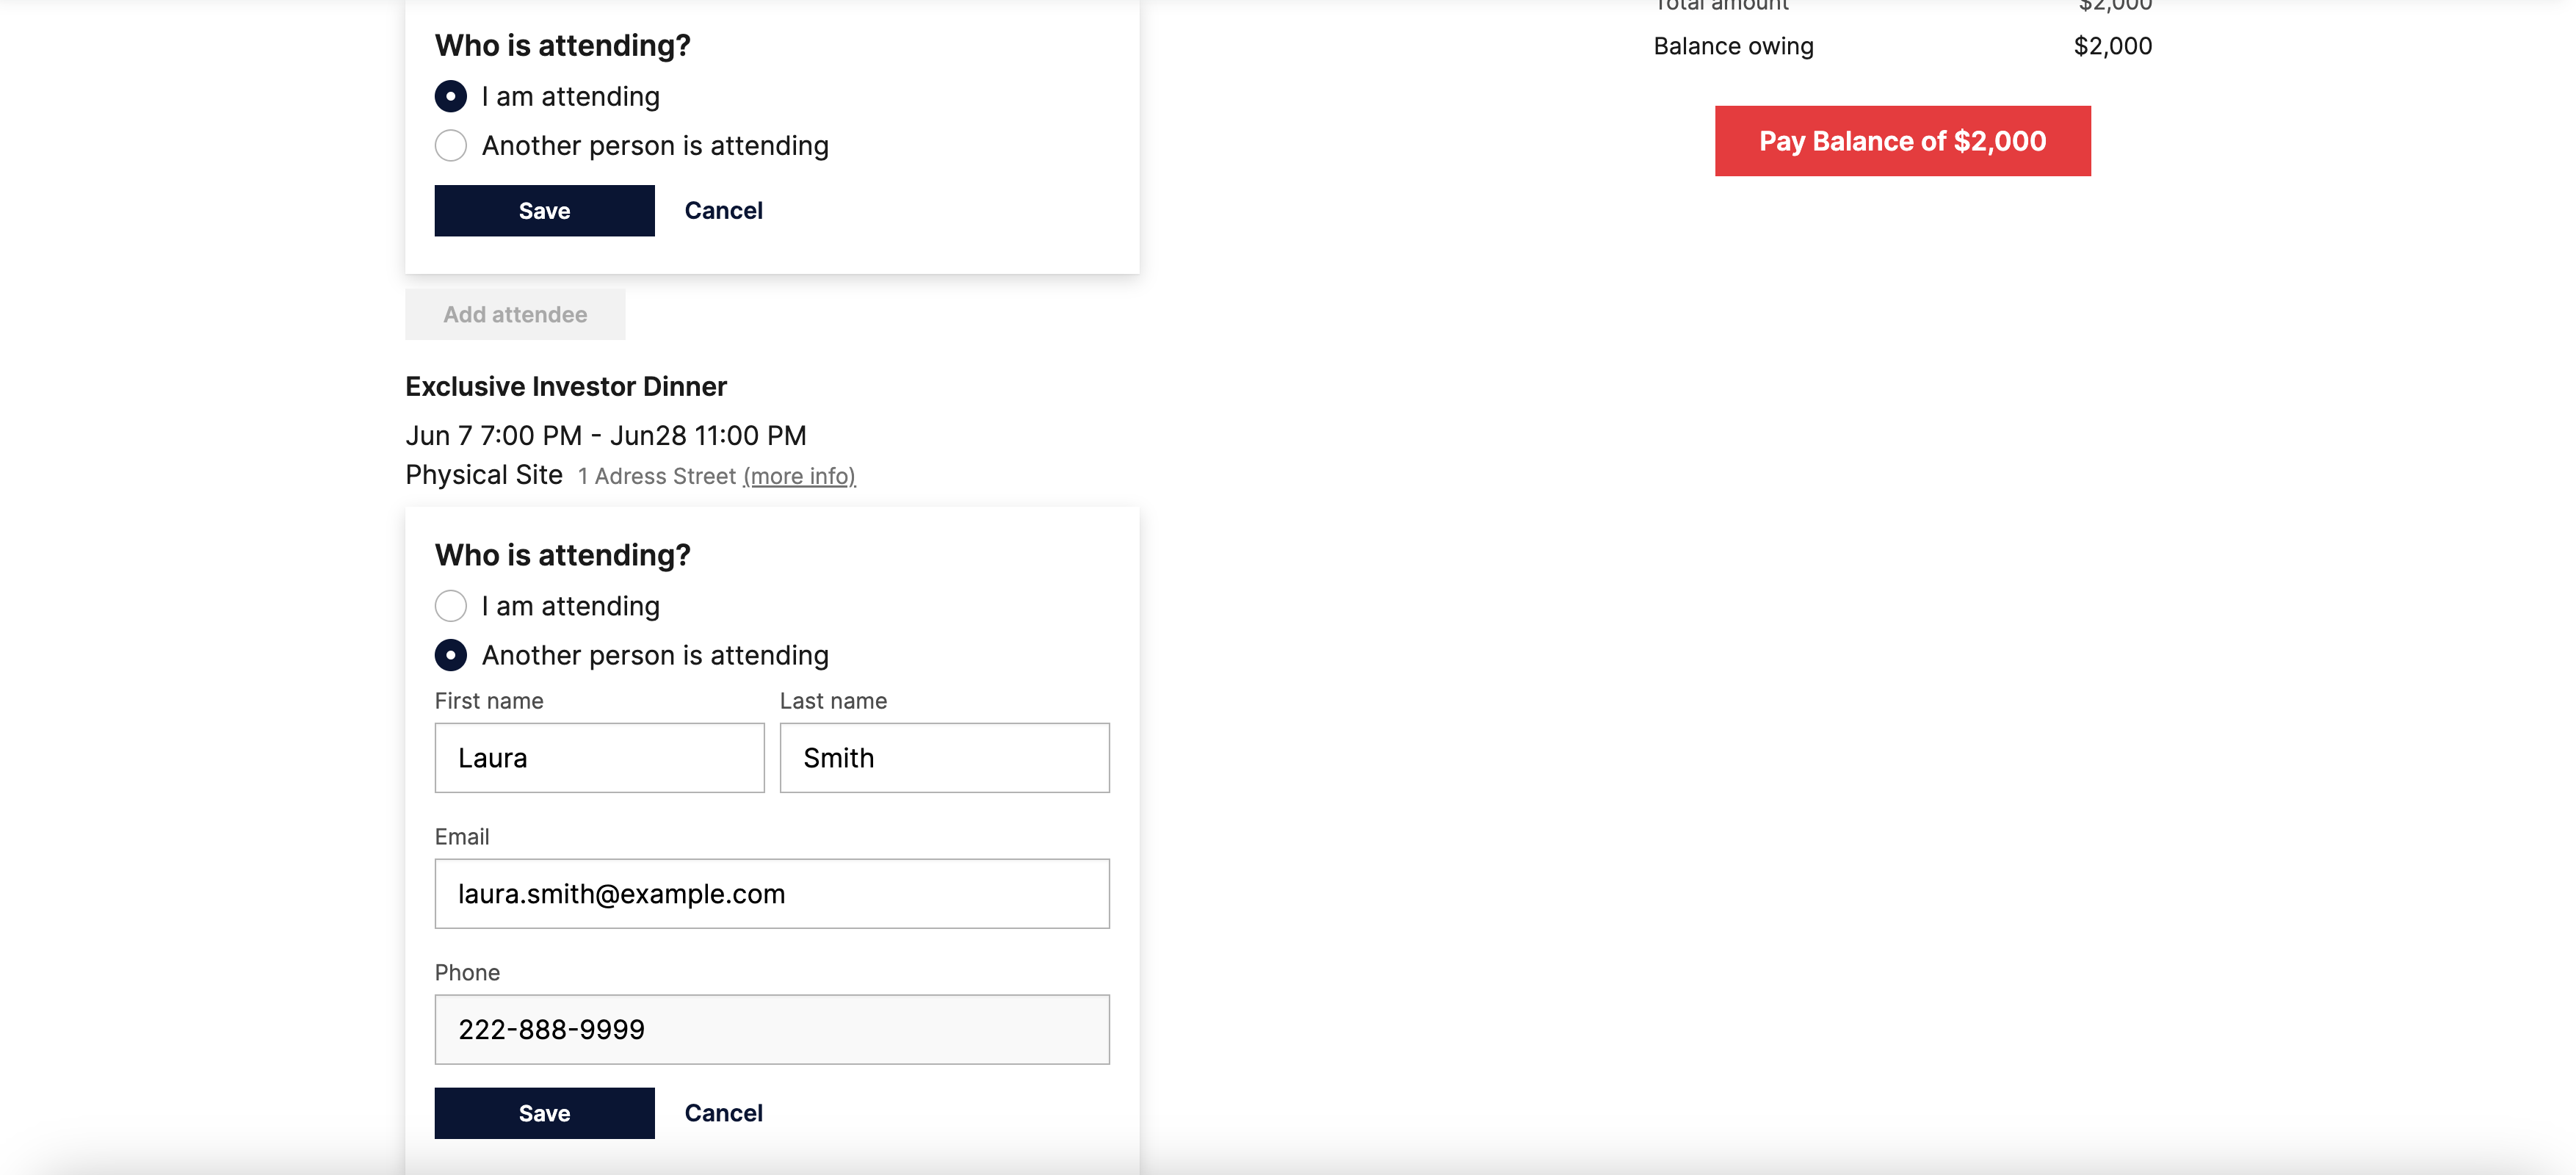
Complete the order. The order page opens with the message “Your booking has been received. Please also make sure to submit the attendee details below.” and an Add attendee button for each booking.
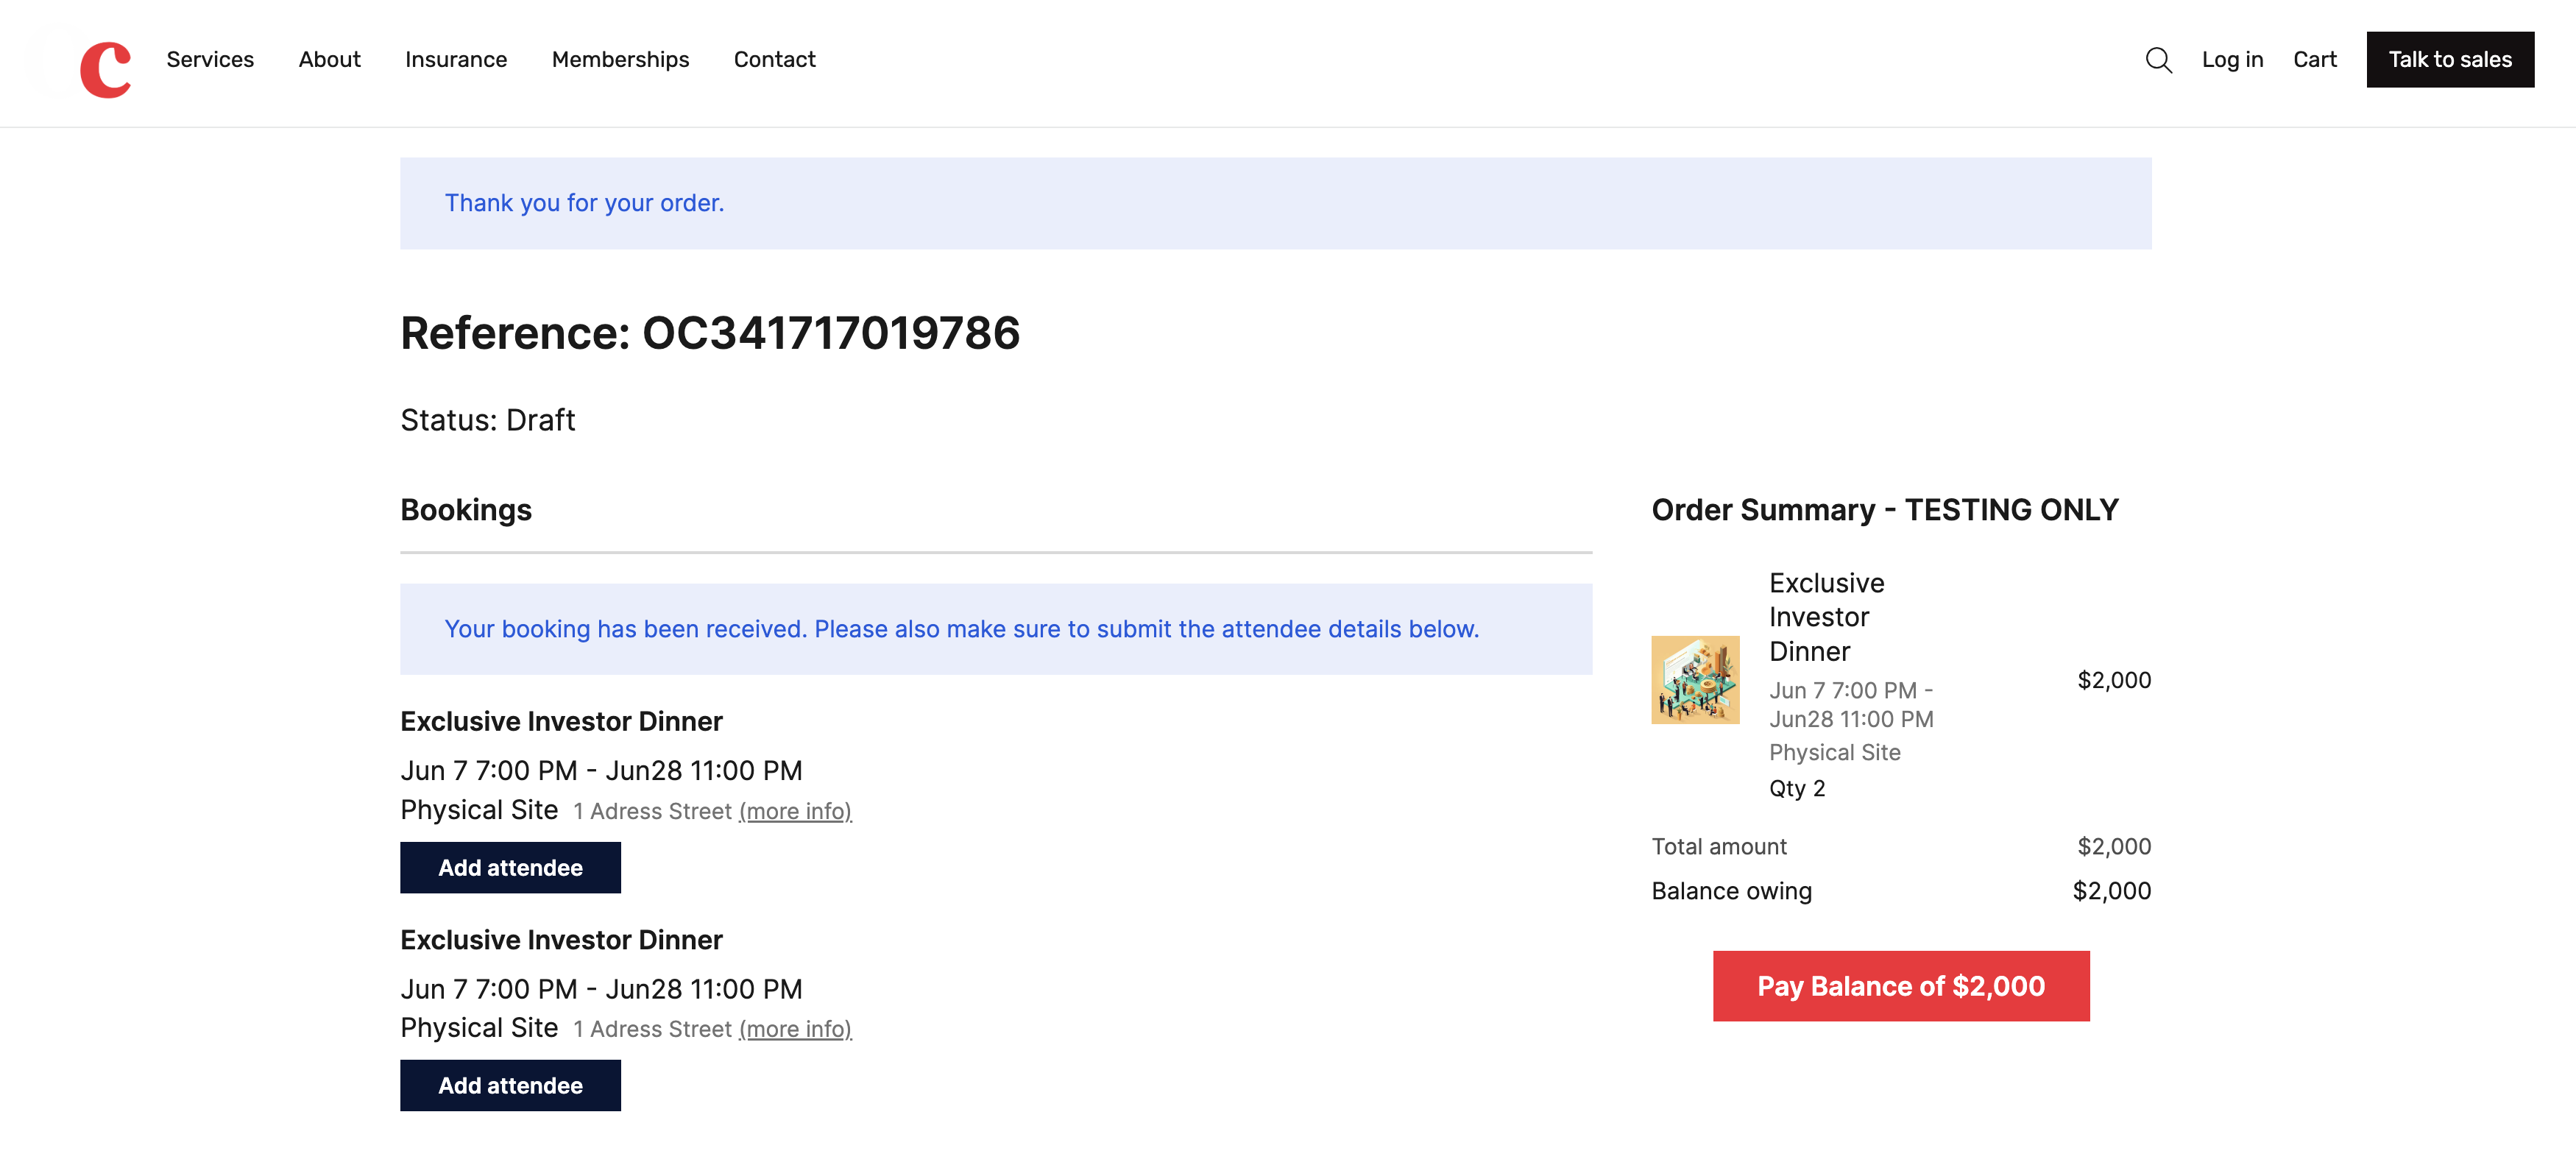
- On the first booking, select Add attendee, choose I am attending, and select Save.
-
On the second booking, select Add attendee, choose Another person is attending, enter a first name, last name, and email address, and select Save.
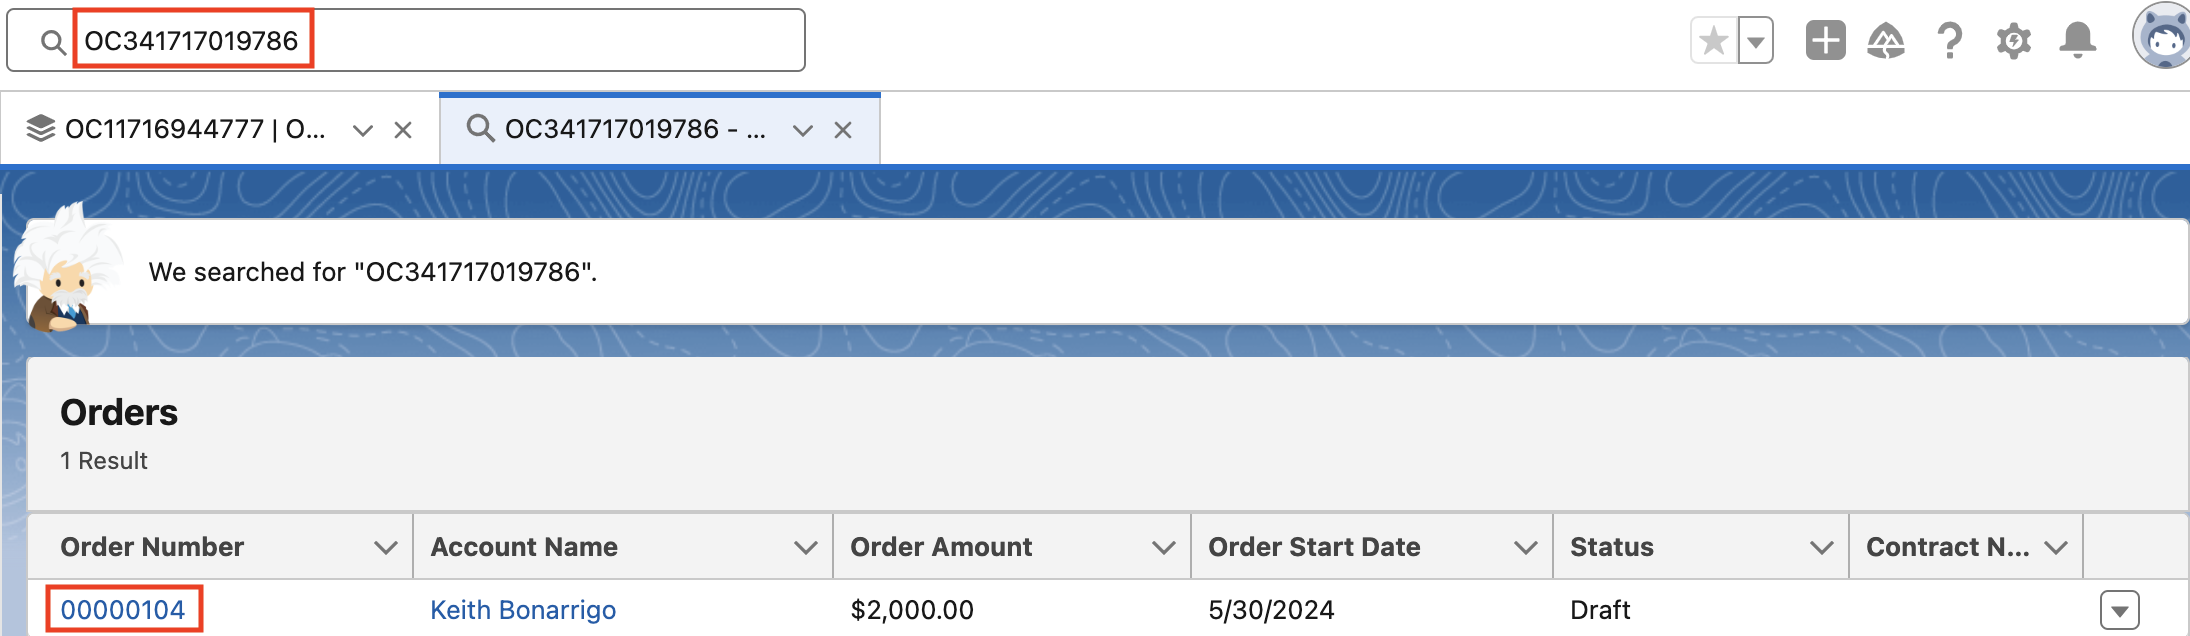
- Copy the order reference shown at the top of the order page, for example
OC341717019786.
Step 8: check the order in Salesforce
-
Search Salesforce for the order reference you copied, and open the order.
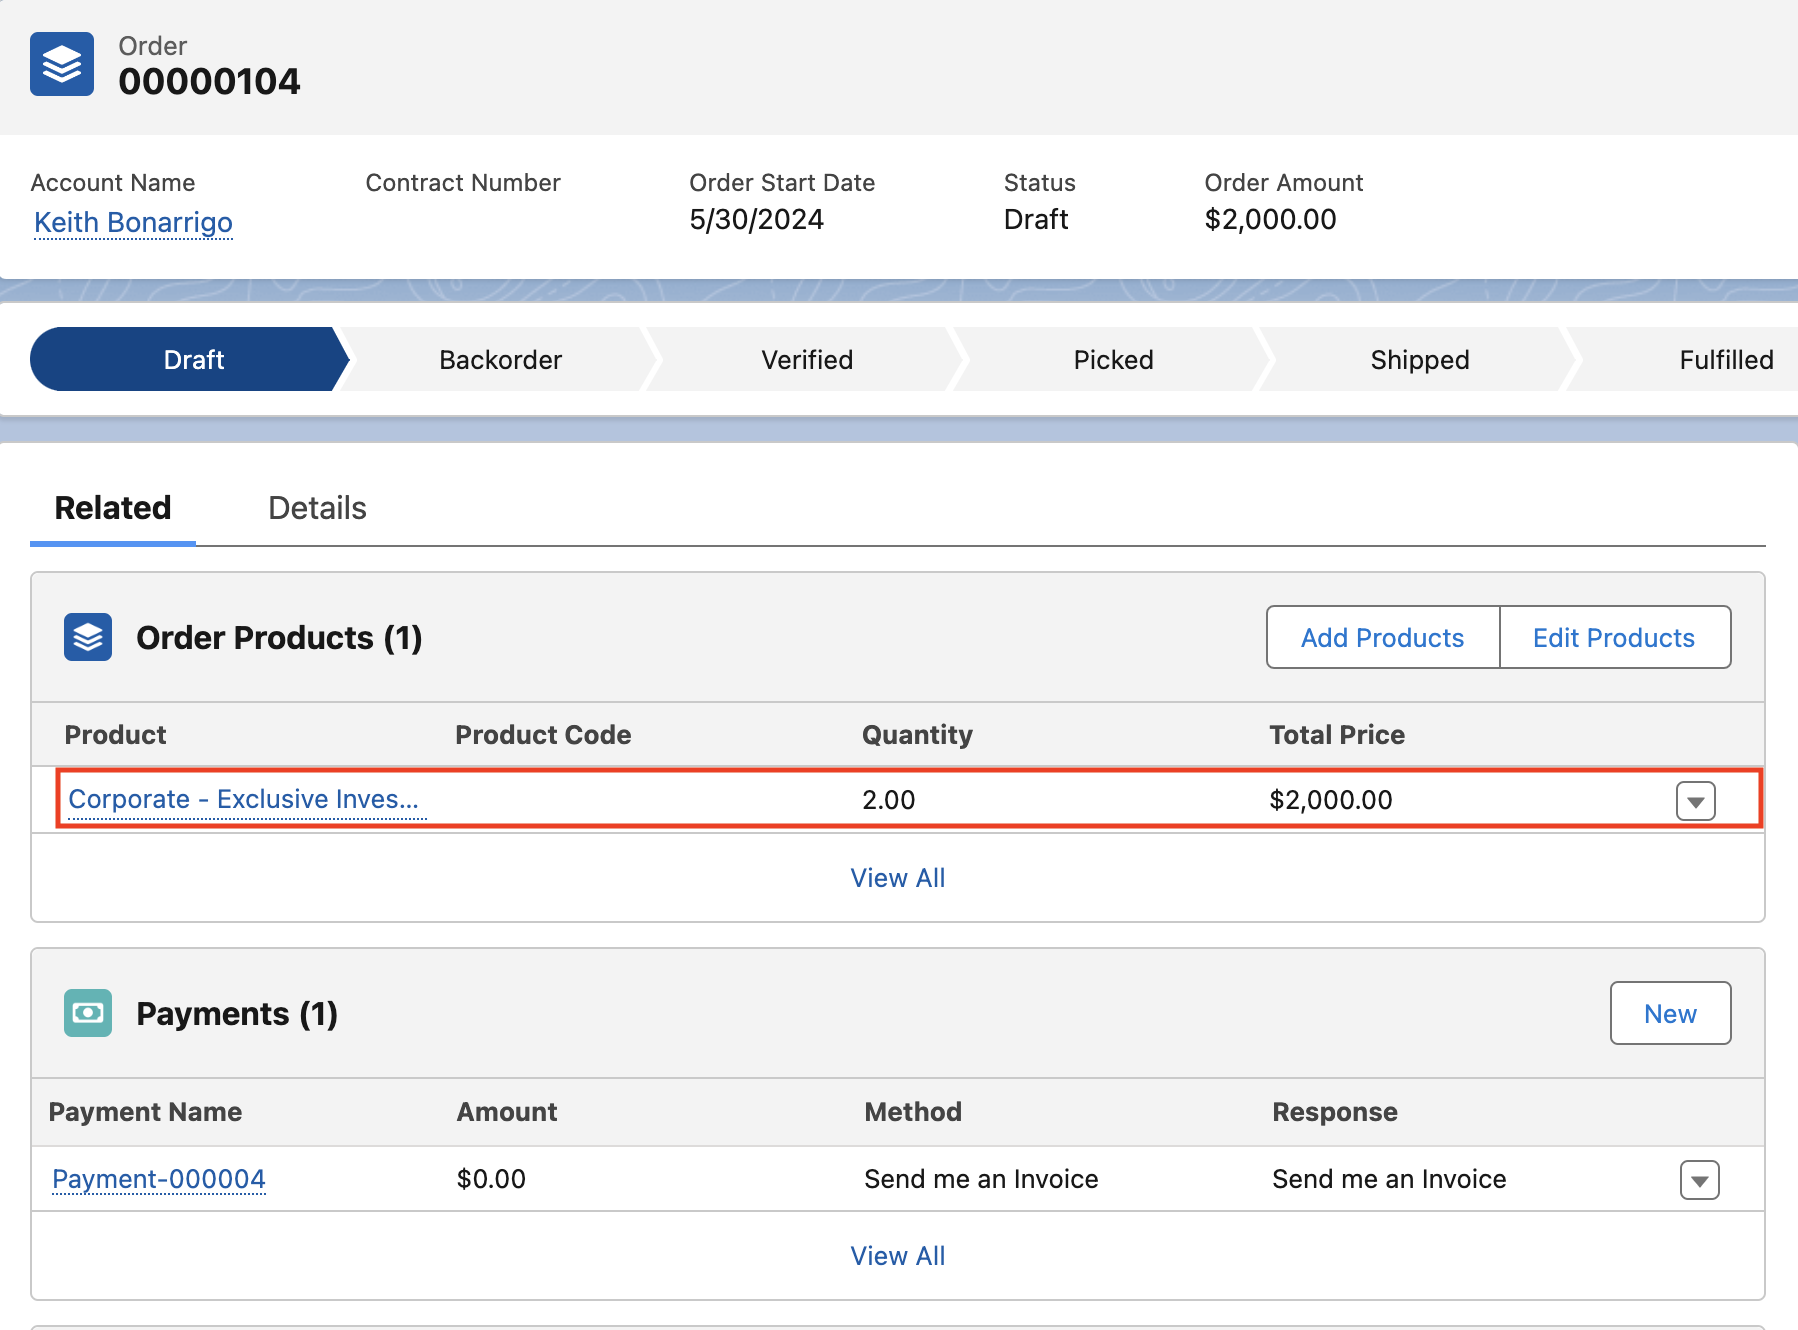
-
In the Order Products related list, open Corporate - Exclusive Investor Dinner.
- On the Order Product record, go to the Bookings related list. The order has two bookings, one for each ticket.
-
Open each booking and check its Booking Attendees related list for the attendee you entered.
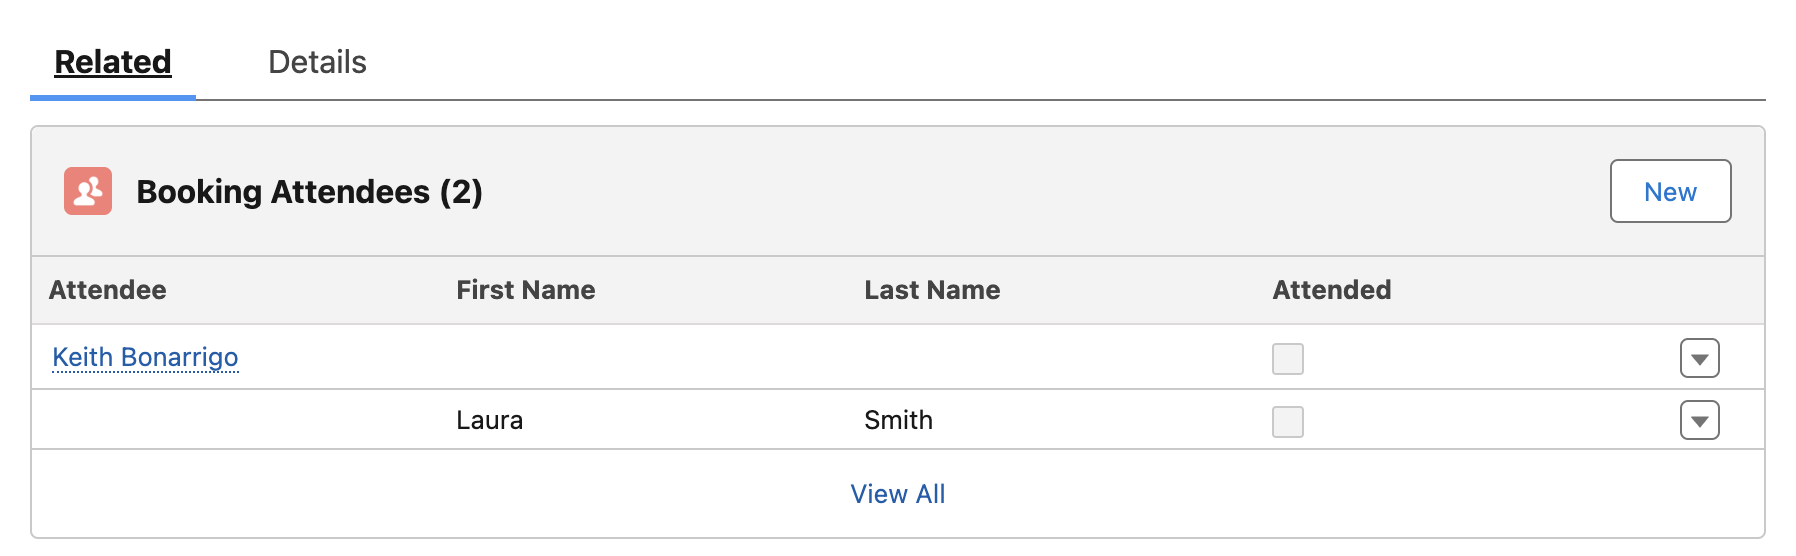
The order now has two Booking records for the 7 June event at Physical Site, each with its attendee, and the slot shows two fewer places available on the product page.
Was this article helpful?
Thanks for your feedback! It helps us improve our docs.