

Create multiple products
On this page
Create multiple products at once from a single data-table screen, rather than building them one at a time. You choose which fields to capture, add a row for each product, then save the whole table in one step — each product is created along with its price book entry and category links.
You can create up to 500 products at a time.
If your product data already lives in a spreadsheet, or you want to update products that already exist, use the CSV importer instead — see Upload and update multiple products via CSV.
Before you begin
- You have StoreConnect Administrator permissions.
- The categories you plan to assign already exist. You can’t create categories from this tool, so set them up first — see Product categories.
Open the tool
-
Search for Product Setup in the App Launcher.
-
Click Create Bulk Products.
Set up the data table
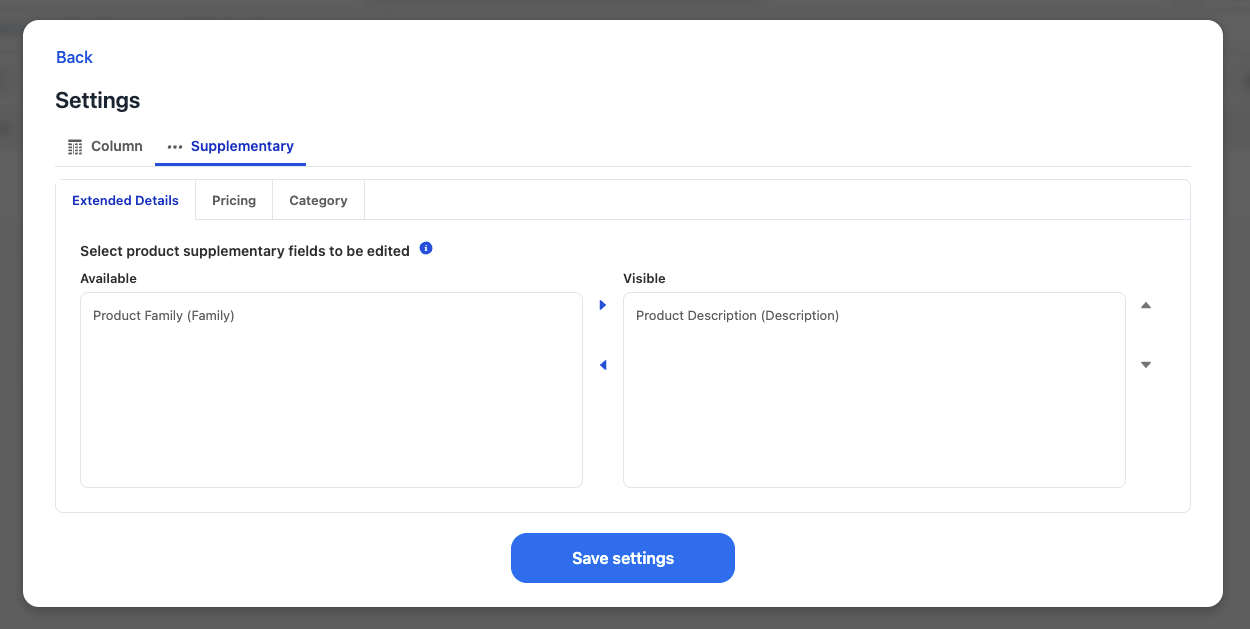
Choose the columns for your data table before you add any products. These are the fields you fill in for every product.
-
Select the columns you want, drawn from three groups:
- Product — the product record itself: Product Name, Display Name, Active, Available On Date, and supplementary fields such as Brand, Condition, and Product Description.
- Pricing — the price book entry created with each product: Price Book, List Price, and Active.
- Category — the category each product links to. This column connects products to existing categories; it doesn’t create new ones.
-
Click Save Settings. StoreConnect remembers your choice and reuses it next time, so you set the table up only once.
You can change the columns at any time from the settings cog.
Navigate the new products list
Click an icon to do specific product setup tasks.
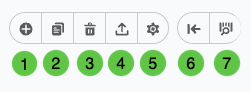
| 1 Add | 2 Clone | 3 Delete | 4 Upload | 5 Settings | 6 Back | 7 Filter |
Manually add products
-
Click + to add a row, then type values directly into the table, like a spreadsheet. Every product stays visible, so you can edit freely until you save.
-
Open a row’s Pricing and Category tabs to set its pricing and category fields.
-
Repeat for each product you want to create.
Import products from a CSV
Instead of typing each row, you can load products from a CSV file using the upload option. They appear as rows in the table, where you can review and edit them before saving.
Apply the same value to multiple rows
To set one value across many products — for example, marking them all Active:
-
Select the rows you want to change.
-
Change the field once.
-
Apply the change to every selected row.
Save and fix errors
-
Review the table, especially any rows you imported from a CSV.
-
Click Save. StoreConnect creates every product in one step, together with its price book entries and category links.
-
Check each record’s status in the table:
- A green indicator means the record saved.
- An orange warning means something needs attention. Valid records still save where possible, and only the flagged records are held back.
-
Fix the flagged rows in place and save again. Repeat until every row is green.
After saving
You can’t add product images here. Once your products exist, add their images separately — see Adding media to products.
To check your work, open the Products list view and confirm that each new product has its price book entry and category.
Was this article helpful?
Thanks for your feedback! It helps us improve our docs.