Create StoreConnect apps
On this page
To make everyday functions easier to manage, you can build special apps for working with Salesforce and StoreConnect data.
You might build an app for a specific team (such as your warehouse team) or for everyone in your business to use. Apps can be used to scope certain business functions, and restrict them to those with app access.
Before you begin, you’ll need access to Salesforce’s Lightning app builder.
In the example below, we will create an app for managing orders.
Create a lightning app
The App builder is a wizard that guides you through each setup step.
- Go to Salesforce Setup.
- Find and open the App Manager.
-
Click New Lightning App.
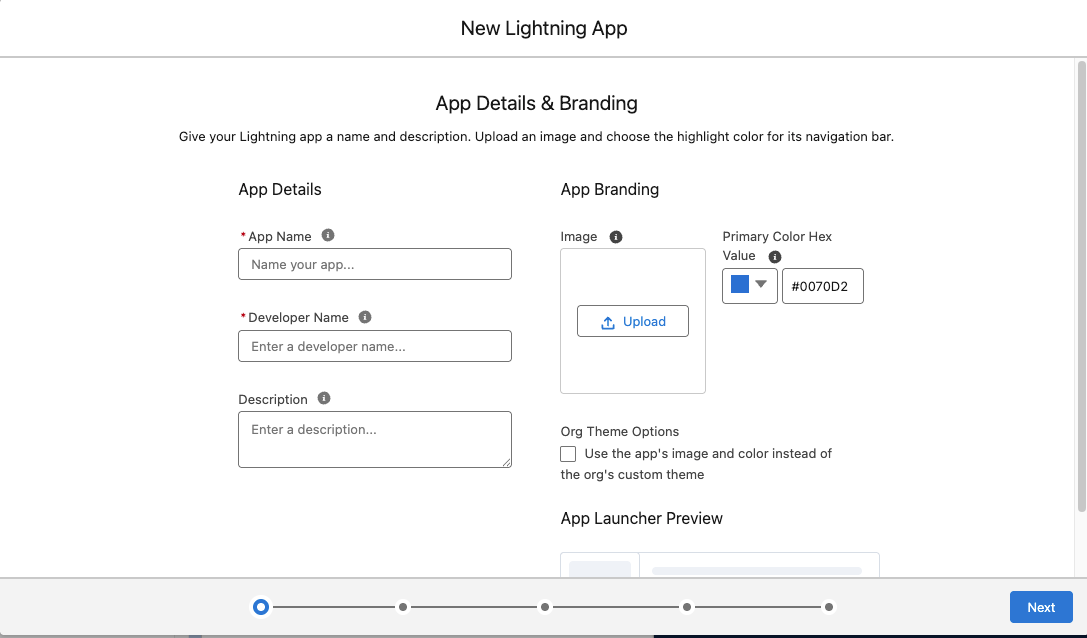
- Name the app Orders Manager.
- Add a Developer Name for referencing the app.
- Add a description so you and others know what this app is for.
- If you want, add an image that will appear in the app launcher.
- Click Next. The App Options window opens.
- Choose Console Navigation and click Next.
- Click Add Utility Item.
- Select StoreConnect Sync and StoreConnect Navigation.
-
Select the Start Automatically options on both tabs.
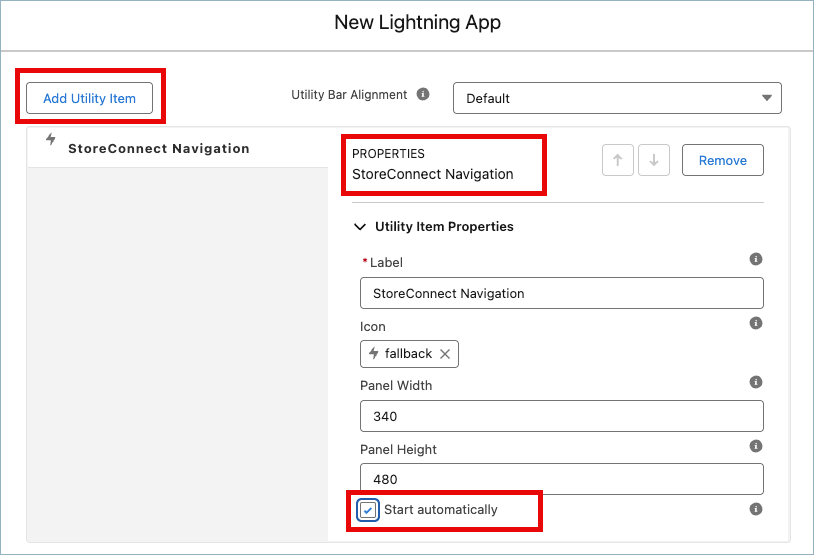
- Click Next.
- From the Available Items list, select and add:
- Orders
- Subscriptions
- Any others that may be useful, like Home.
-
Sort the items in the order you want them using the up and down arrows.
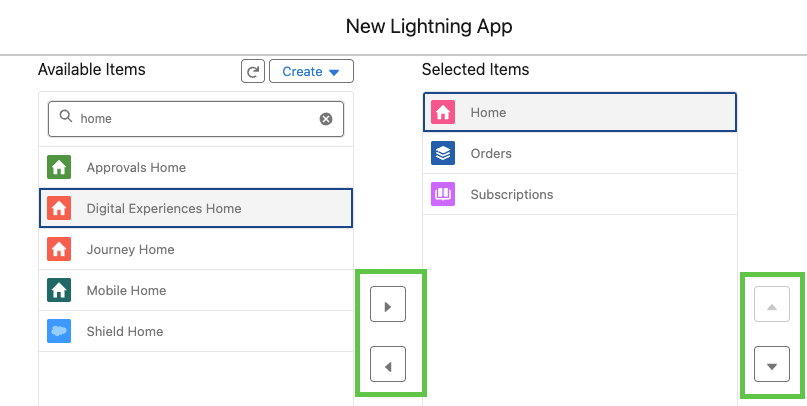
- Click Next.
- Set the Navigation rules for each record type by selecting Subtabs of and then making a selection from the list.
- Do this for each record type, then select Next.
- Choose which of the Available Profiles can access the app. Add them from the left list to the list on the right.
- Click Save & Finish.
Launch the app
The app is only accessible to the user profiles you selected in the app.
- Go to the App Launcher and search for Orders Manager.
- If you want to make the app more accessible, you can change the order of it in the App Launcher list.
Was this article helpful?
Thanks for your feedback! It helps us improve our docs.