

Adding custom CSS
On this page
There are several ways to customize your StoreConnect store’s CSS. Which one suits you depends on how much CSS you have and how often it changes.
On this page
- Add CSS to the Custom Styles field
- Use style blocks to upload your CSS
- How to add CSS theme assets
- How to add CSS using content blocks
- Third party CSS libraries
Which method to use
| Method | Use it for | Where it renders |
|---|---|---|
| Custom Styles field | Small tweaks, and quick checks while developing a theme | <head>, in a <style> tag, before style blocks |
| Style blocks | Larger CSS you want split into separate, individually ordered records | <head>, after the Custom Styles field, before the head content block |
| Theme assets | A finished stylesheet file on a theme you control | <head>, via the theme’s theme-supplement.css asset |
| Content blocks | Short rules scoped to one page or block | Wherever the content block is rendered |
Add CSS to the Custom Styles field
Custom styles are small stylesheet tweaks. This is also the option to use while you are developing a new theme and want to see a change on your site quickly.
Anything you put here is wrapped in a <style> tag and rendered in the <head> of every
page, before any style blocks and before the head content block. Enter valid CSS with no
<style> tag of your own. See Customize a theme using CSS for more
information.
-
Go to your store’s Store record.
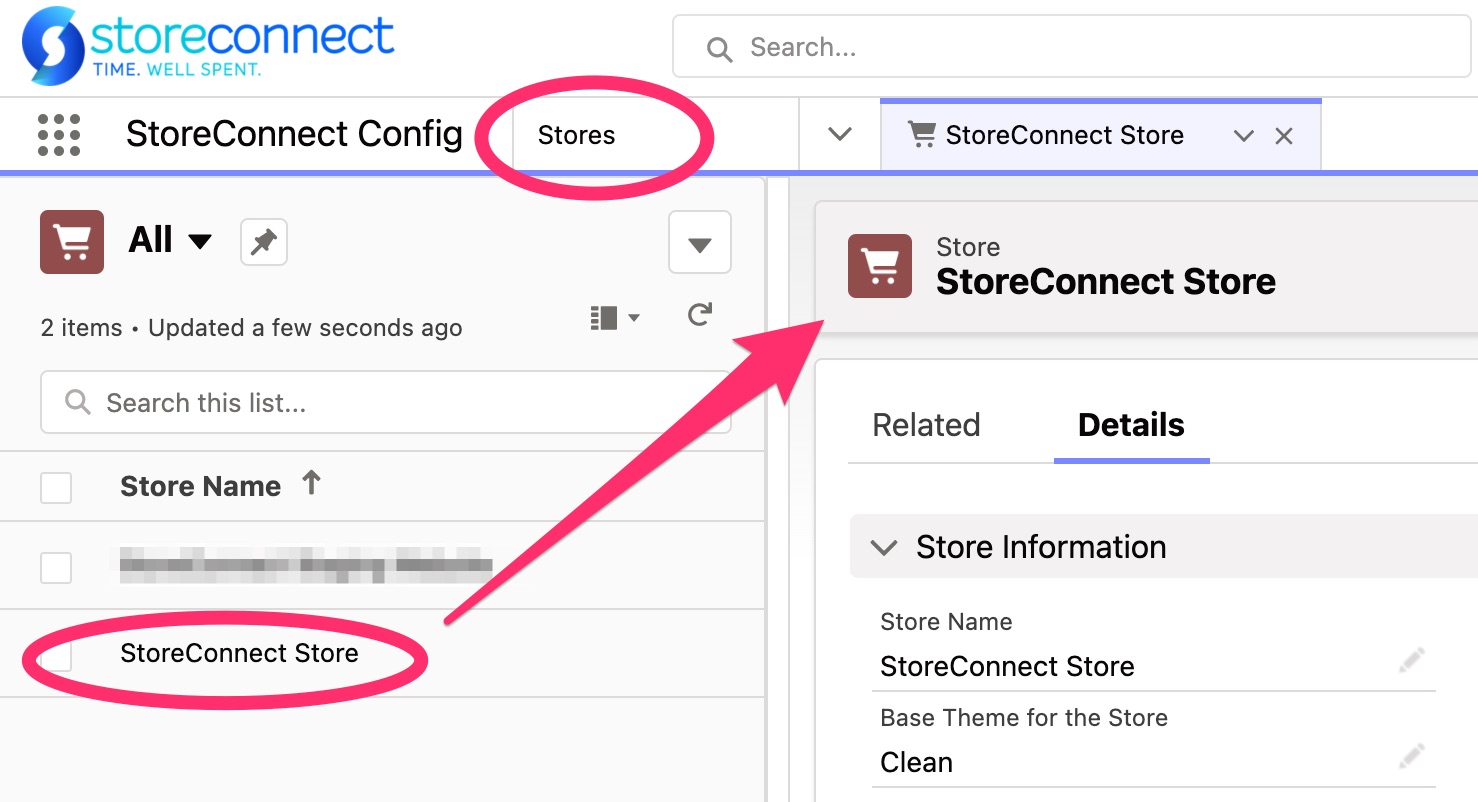
- Find the Custom Styles field under the Global Content section.
- Select the pencil icon, or select Edit.
- Insert your custom styles into the field.
- Select Save.
Your CSS applies to every page of the store on the next page load.
:::note
A large amount of CSS in this field makes the Store record page long and awkward to work with, and harder to maintain than the same rules split across style blocks. Move to style blocks once you have more than a handful of rules.
:::
Use style blocks to upload your CSS
Style blocks keep your CSS organized and maintainable. They are the better option when you are making significant changes, because you can group or separate rules and review each one quickly.
-
Go to the Style Blocks list and select New.
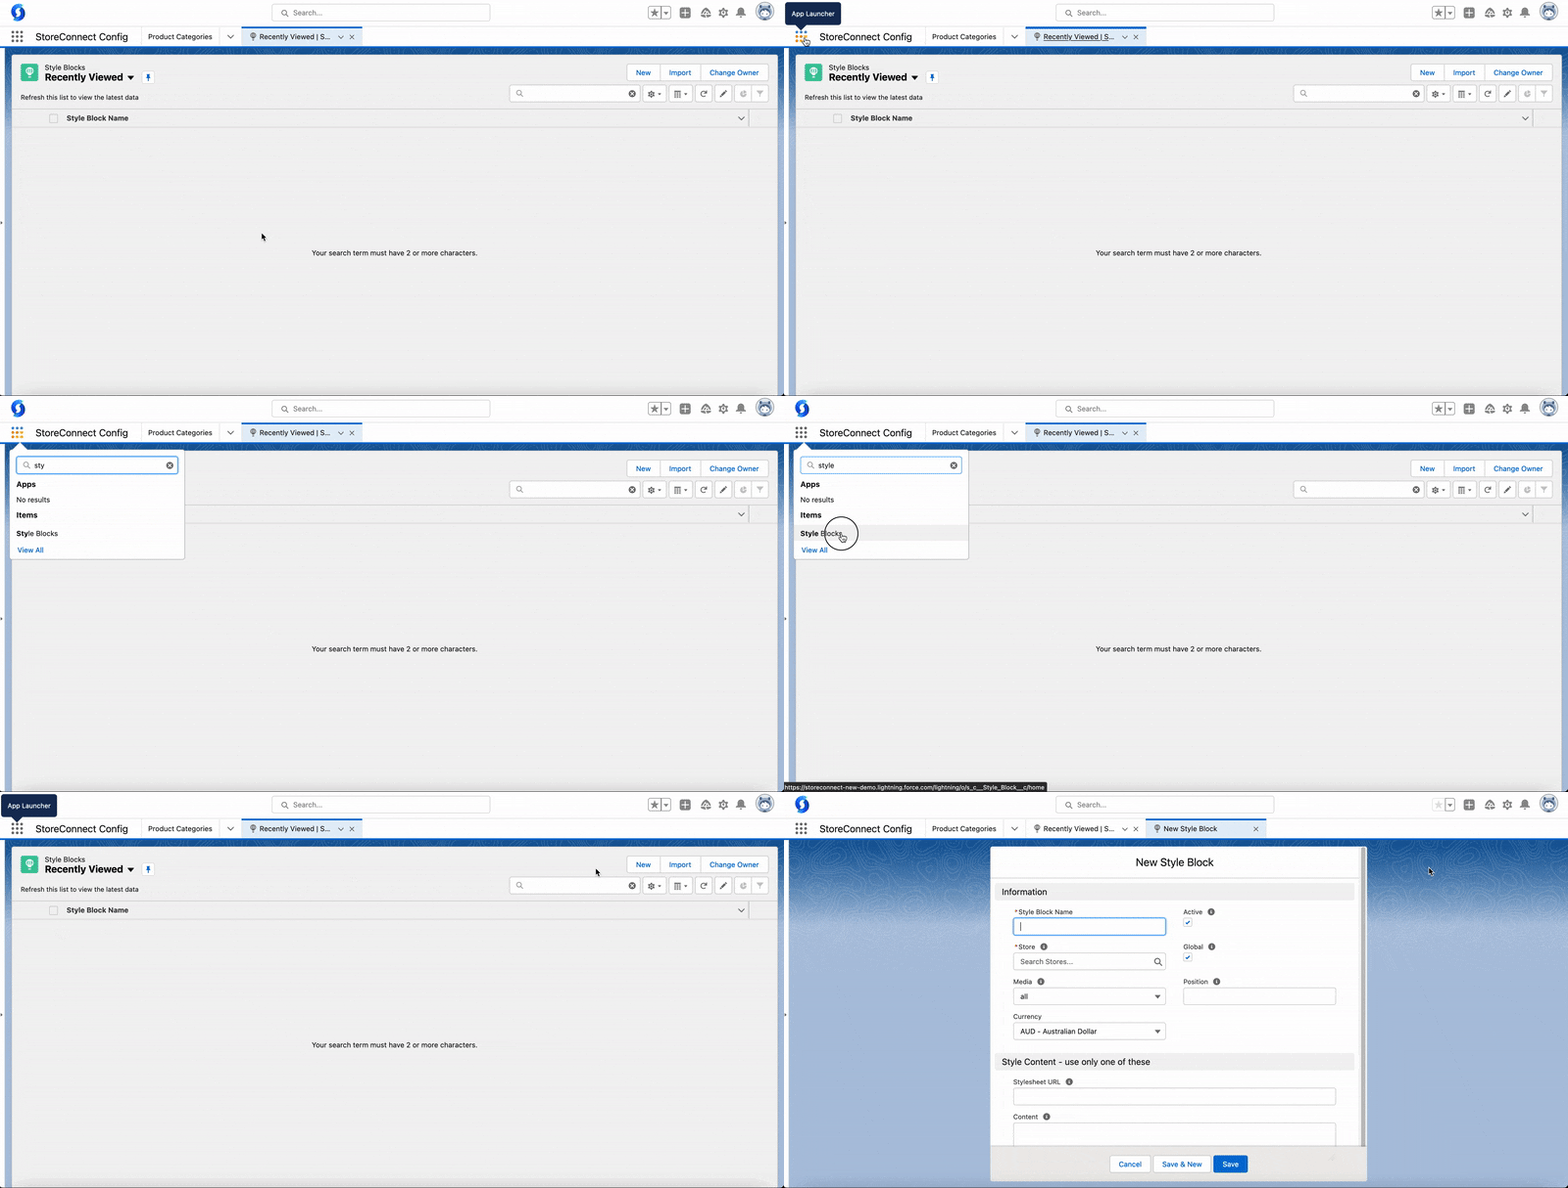
- Give it a useful name and assign it to your store.
- Set the configuration:
- Media — the media type the CSS is meant for:
all,print, orscreen. This is written out as themediaattribute on the rendered tag, so it does affect when the CSS applies. - Active — only active style blocks are included on the website.
- Channels — the surfaces the CSS applies to. Select Web for your online store, POS for the point of sale app, or both. This field is required, and a style block without Web never loads on your online store even when it is active and global.
- Global — include the CSS automatically on every page. Leave it unchecked and the style block is not included on your store at all.
- Position — the order style blocks load in. Lower numbers load first.
- Media — the media type the CSS is meant for:
- Define the style content, using one of:
- Stylesheet URL — an external link to bring in your CSS.
- Content — your CSS rules, written without
<style>tags.
- Select Save.
An active, global style block set to the Web channel is rendered in the <head> of
every page, wrapped in a <style> tag, or as <link rel="stylesheet"> when you set
Stylesheet URL. Style blocks render after the Custom Styles field and before the
head content block. You can create as many as you need.
How to add CSS theme assets
You can upload a CSS stylesheet file to the theme assets. This is a good option when you have a finished file and want to reference it rather than paste your entire CSS into a field. It requires an active theme in your store.
If you are developing a new theme, use one of the other options during development and move to a theme asset when you are done. You cannot edit the CSS directly in the theme object interface, so every change means uploading a new file.
- Go to the Theme list and open the theme you are working on.
- Select the Related tab.
- Under Theme Assets, select New.
- Set the key to
theme-supplement.css. - Upload your CSS file.
- Select Save.
The theme injects that file into the <head> of every page. See
Theme assets and styling for the full asset system.
How to add CSS using content blocks
Sometimes you need a few CSS rules on a single content block or page. You can put CSS in
a content block as long as you wrap it in a <style> tag yourself.
- Create a content block and select the No added styling template.
- Write your CSS in the Content field, wrapped in a
<style>tag.
You then have two options for using that content block.
The first option renders it from your head content block, which makes it global:
```
{{ all_content_blocks[‘your-content-block-identifier’].render }} ```
The second option is to relate the content block to a page or to another content block. The CSS then applies only where that block is rendered, not across the whole site.
Third party CSS libraries
StoreConnect does not support third party CSS libraries such as Bootstrap. If you include one, you do so at your own risk.
StoreConnect uses its own CSS library, which can conflict with a third party library. If you understand the risk, you can reference the library from a style block or directly in your head content block.
- Create a content block and select the No added styling template. If you already have a head content block, go to step 4.
- Provide a name such as “Head Content”, or a name of your choice.
-
Paste the link tag provided by your third party library.
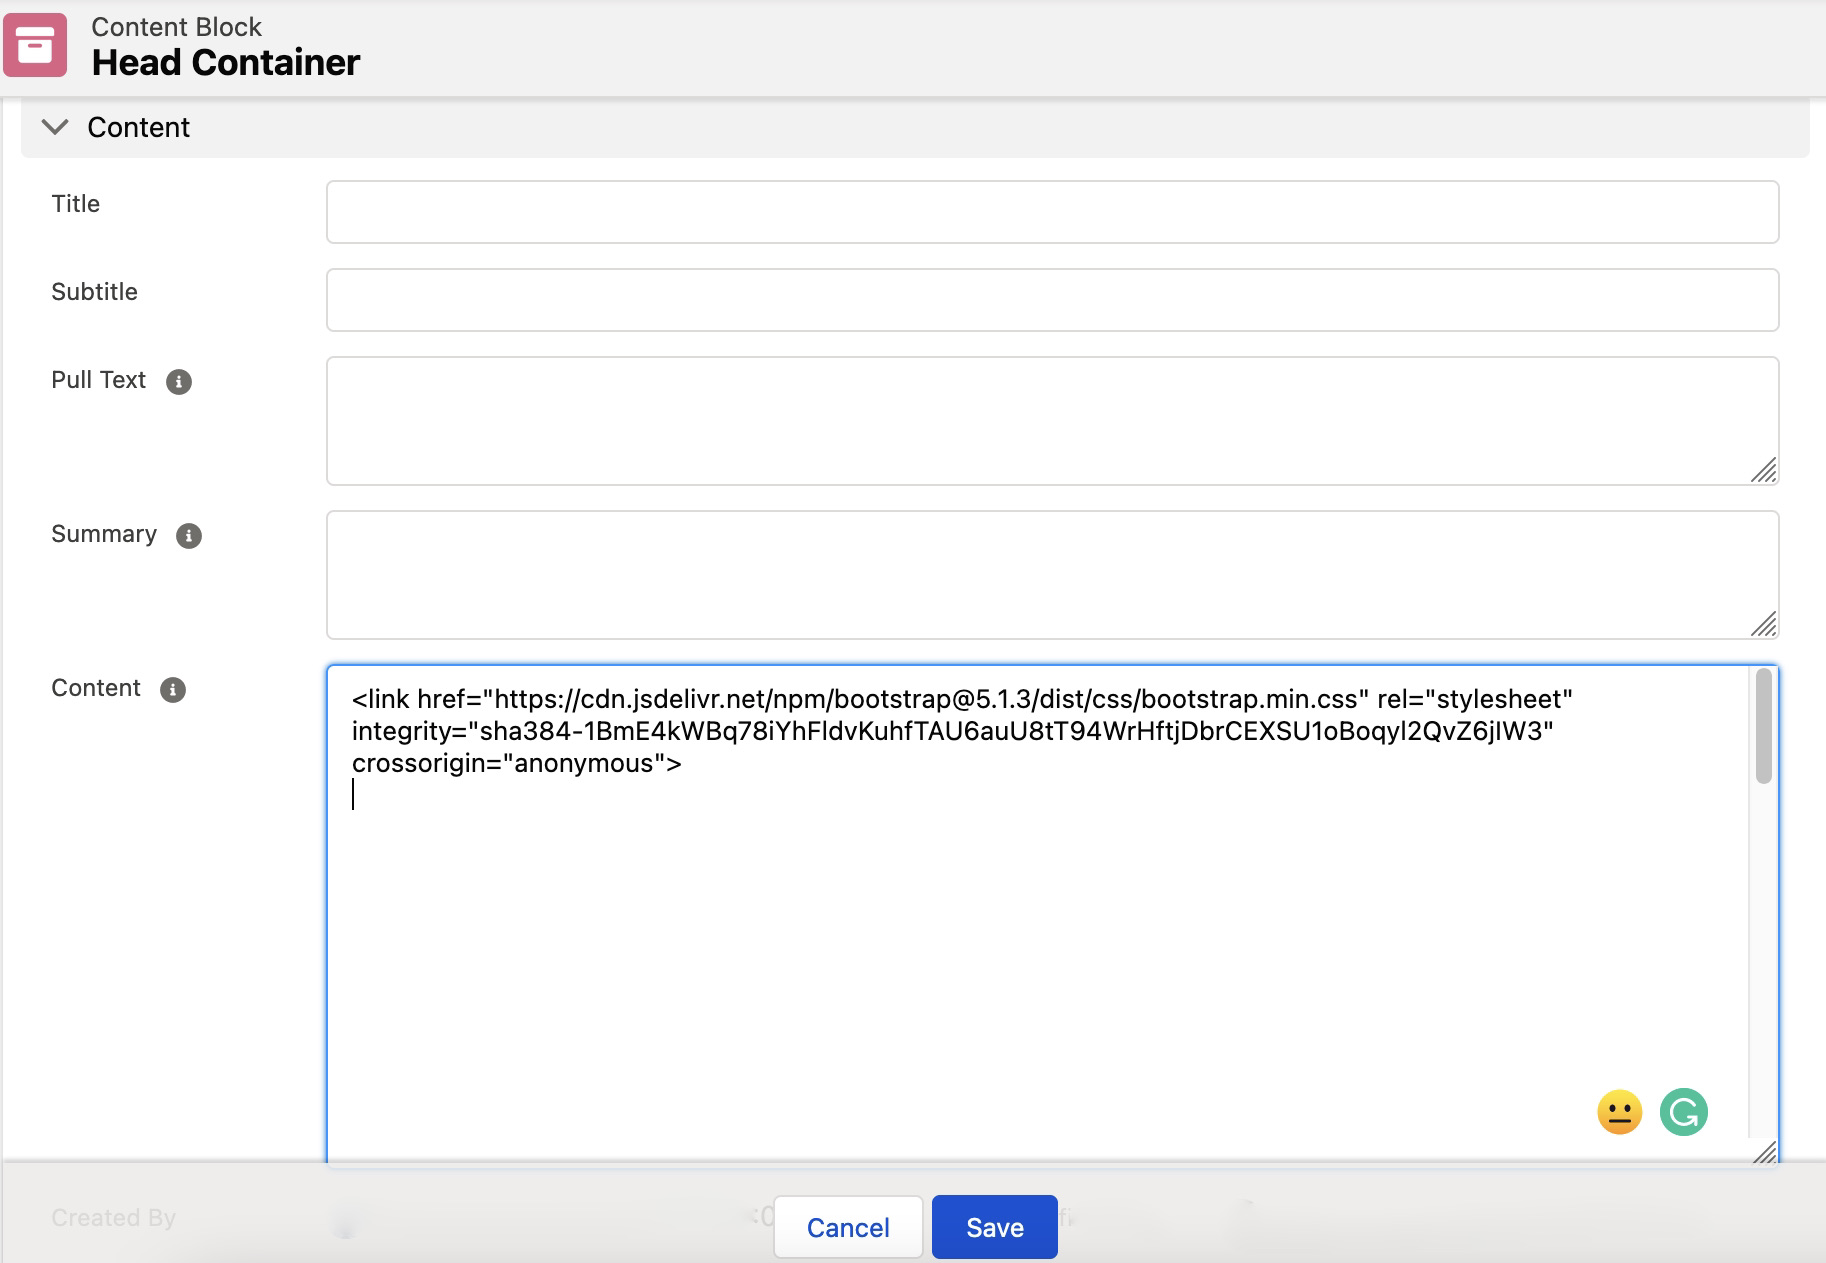
- Select Save.
- Go to your Store record and assign the content block as the head content:
- Under the Global Content section, select the HTML Head Content Block field.
- Search for your head content block.
- Select Save.
- Check your site to confirm there are no design conflicts with the library.
The library’s stylesheet now loads in the head of every page on that store.
Was this article helpful?
Thanks for your feedback! It helps us improve our docs.