

How POS design works
On this page
There are many ways you can design your point of sale in StoreConnect. Almost every screen in the POS can be built how your business wants it. Menus, pages, lists, everything.
This topic talks you through the structures behind the POS design, so you can decide what you want to change and how.
The three building blocks of POS
| Building block | What it controls | How to change |
|---|---|---|
| Action group | Navigation: what staff can tap, and what happens when they tap it | Configure Salesforce records, no code |
| Layout | A screen of records: which fields appear, how they are filtered, and which actions are available | Configure Salesforce records, no code |
| View | Your own markup in place of the standard rendering | A template written in HTML, CSS, JavaScript, and Liquid (some code) |
You can design a complete register using only action groups and layouts by configuring records. But if you want to change anything more substantially, you need to use POS views as well. A view can achieve what the combination of layouts and filters cannot.
Let’s start with the basics, and learn more about views below.
Action groups
An action group is a set of tappable actions on a POS register. The sidebar down the left of the POS, the row
of icons across the top, and the home screen grid of category tiles are all list or grid action groups.
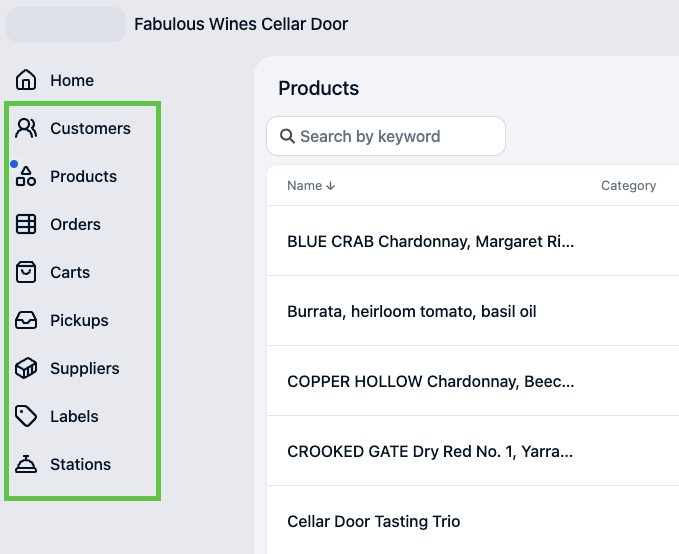
Each item in a group is a POS Action Item with its own Display Name, Icon, and Color. Its Action field sets what happens when staff tap it: such as open a layout, open another action group, open a view as a modal, etc.
You can also create nested menus using Child action groups.
Layouts
Each screen on the register is based on a POS layout. So when you tap through to a page and see a list of records or a payment screen, this is a POS Layout you can change.
There are four layout types:
| Page Type | Shows | Typical use |
|---|---|---|
list |
Many records, as rows | A customer list, an order list |
grid |
Many records, as cards | A product catalog browsed by touch |
record |
One record, read only | An order summary |
form |
One record, editable | Creating a customer, the End Shift form |
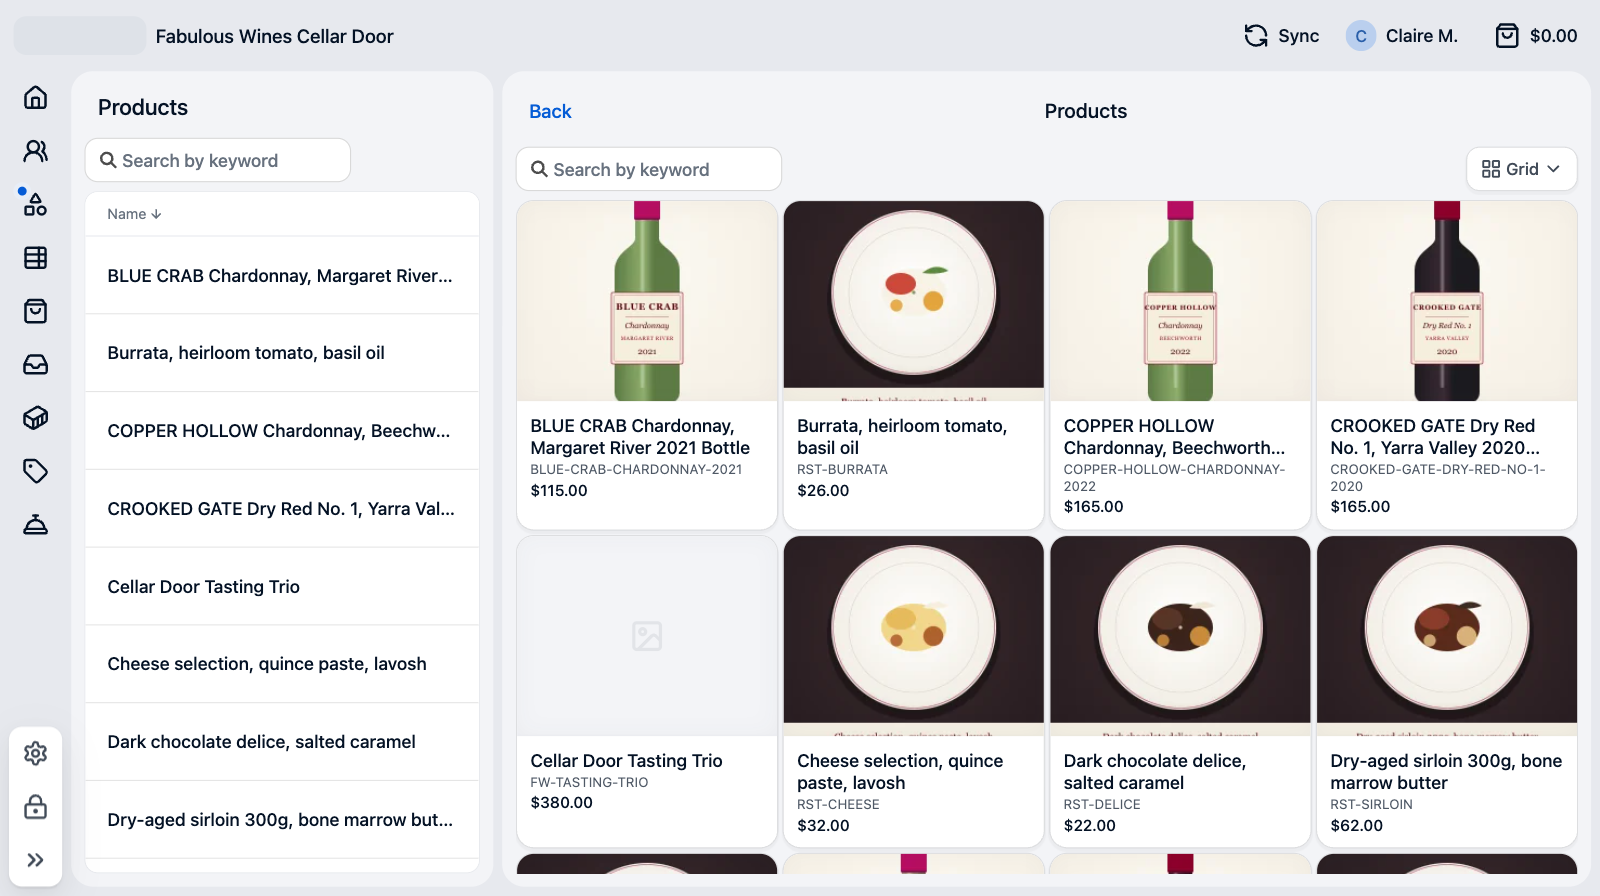
A list and a grid show the same data two ways. Use a grid where staff pick by sight,
such as products with images, and a list where they scan text.
:::note
A grid layout and a grid action group are different things with similar names. A grid layout shows records as cards, pulled from the object the layout is bound to. A grid action group shows action items you defined by hand. A product catalog is a grid layout; a home screen of tiles is a grid action group.
:::
Actions on layouts
A layout supports three actions:
- Primary action is the main button on the screen, such as New Customer on a customer list.
- Secondary action sits in the corner, for actions staff use less often, such as Cancel.
- Record action an action that occurs when staff interact with a record. For example, on a product grid, tapping on an item adds it to the cart.
Filters and hidden filters
You can use filters and hidden filters to display records a certain way to staff. Hidden filters can’t be interacted with, and are used to manage what is displayed on a page. Explicit filters enable staff to interact, to refine lists and drill into product categories and sub-categories.
Views
A POS View is the most customizable element in POS design, because it is essentially an HTML template that can contain HTML, CSS, JavaScript, and Liquid. This means setting up and maintaining views requires some front-end coding expertise.
There are four places a view can go, and each one hands your template different data to work with:
- On a layout, replacing the records list. The search bar, filters, and buttons stay put.
Your template runs once for the screen and gets every record on the page, so on a
gridlayout you draw the whole grid rather than one card. - On a layout field, replacing how one field renders. The rest of the screen stays standard and one column is yours. This is the one that runs per record.
- On an action item, replacing what the button itself looks like. It doesn’t change what tapping the button does.
- Opened by name from an action, where
modal:open:viewshows your view as a modal andnav:viewopens it as a full screen. These reference the view’s Identifier instead of pointing at it with a lookup field.
See POS views for what each of those hands over, and for how to create and update the records.
Views can incorporate built-in POS actions through the scAction function, such as
add to cart, start checkout, print a receipt, or save a record.
Design implementation
There’s a couple of ways you can implement POS designs.
- Build them yourself. Create and edit the records in Salesforce.
- Have an AI agent build them. An agent with the StoreConnect AI skills and an authenticated Salesforce CLI can do most design tasks based on plain language prompts. See Build POS with an AI agent.
Both routes produce the same records, so you can start with an agent and carry on by hand, or the reverse.
Was this article helpful?
Thanks for your feedback! It helps us improve our docs.