

Add a supplier list to POS
On this page
There are a number of reasons for staff to access product suppliers from POS, including to:
- Follow up on order delivery times and shipping status
- Request advice about a product, such as product care
- Report defective goods and arrange returns
- Place an urgent order
To make a supplier list available to POS staff, each supplier needs an Account record in Salesforce.
This process covers the contact details staff need in order to reach a supplier. To record what you pay a supplier and the quantities you buy in, see Product suppliers.
Add a supplier to the POS supplier list
- In the apps menu in Salesforce, search for and open Supplier Accounts.
- Click New to create a new record. The New Supplier Account window opens.
-
In the Account Name field, search for a supplier.
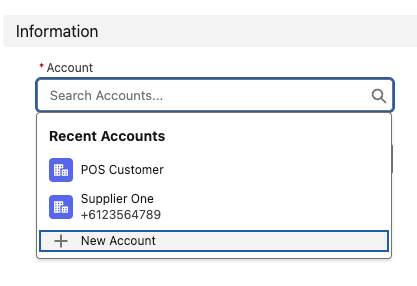
- If the supplier exists, select them and then select Save & New. This adds them to the list. Repeat step 3 for all existing suppliers.
- If the supplier does not exist, create an account for them, then add them to the supplier list.
If you used existing supplier contact records above and your store was set up before those records existed, sync those records to your website so the suppliers appear in the POS dashboard. See What records sync to your website.
Create a new supplier account
- In the apps menu in Salesforce, search for and open Accounts.
- Click New to create a new record. The New Account window opens.
- Enter the supplier Name and add the relevant contact details.
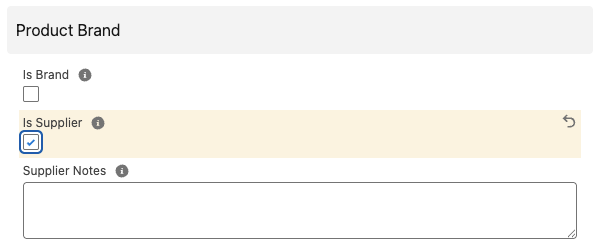
- Scroll to the Product Brand section and select the Is Supplier option.
-
Add any important information to the Supplier Notes field.
- Select Save & New to add another supplier.
- When you’re finished, select Save.
Add contacts for a supplier
For new suppliers, add contact details to the account record so staff know who to call.
- Open the supplier account record.
-
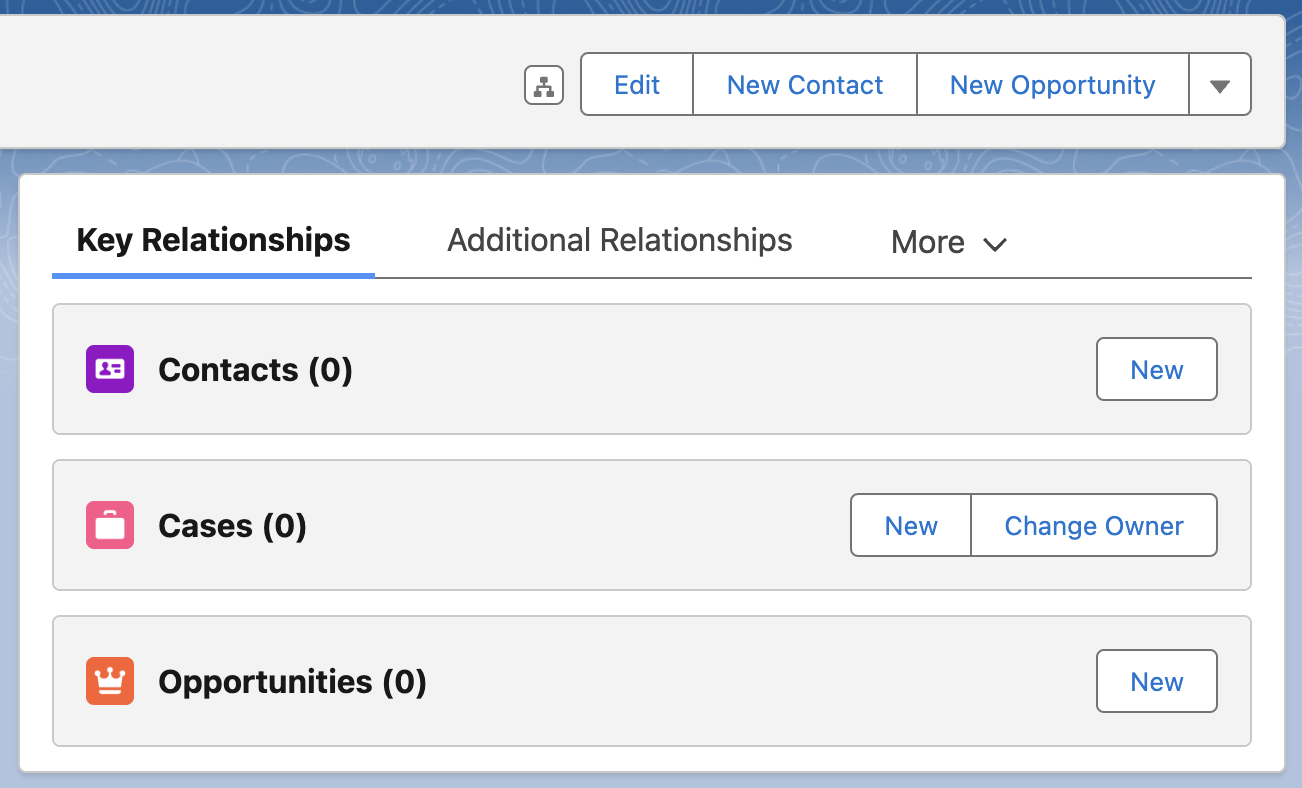
In the Key Relationships > Contacts section, select New.
-
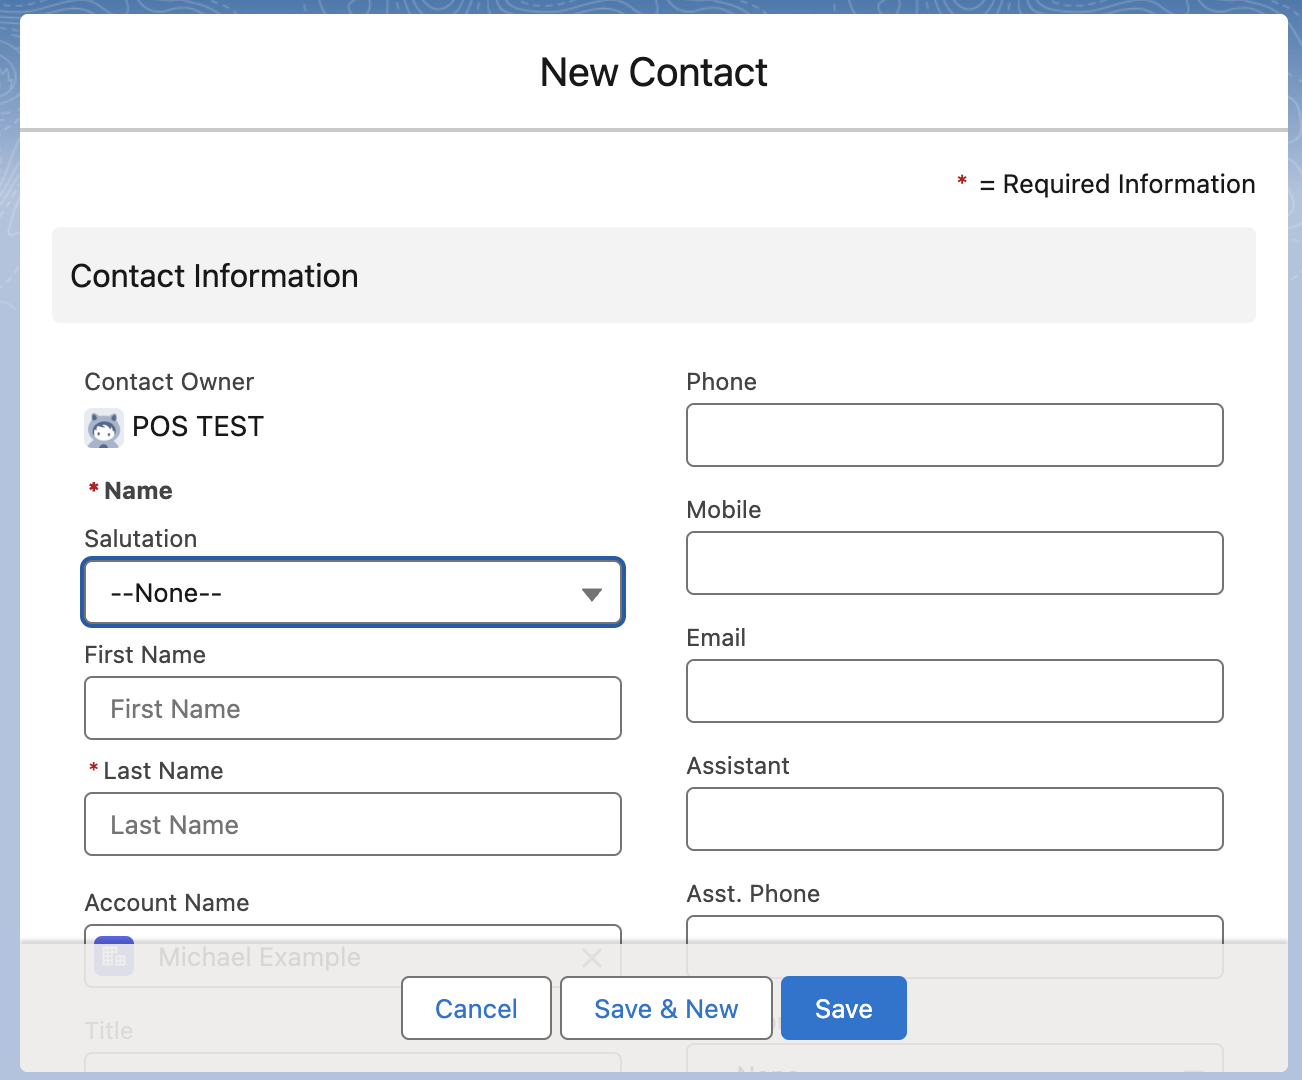
Enter a Name and fill in the contact information. Complete any other relevant fields, e.g. the department the contact works in (warehouse, sales, etc.).
-
Scroll down to add StoreConnect and Address information.
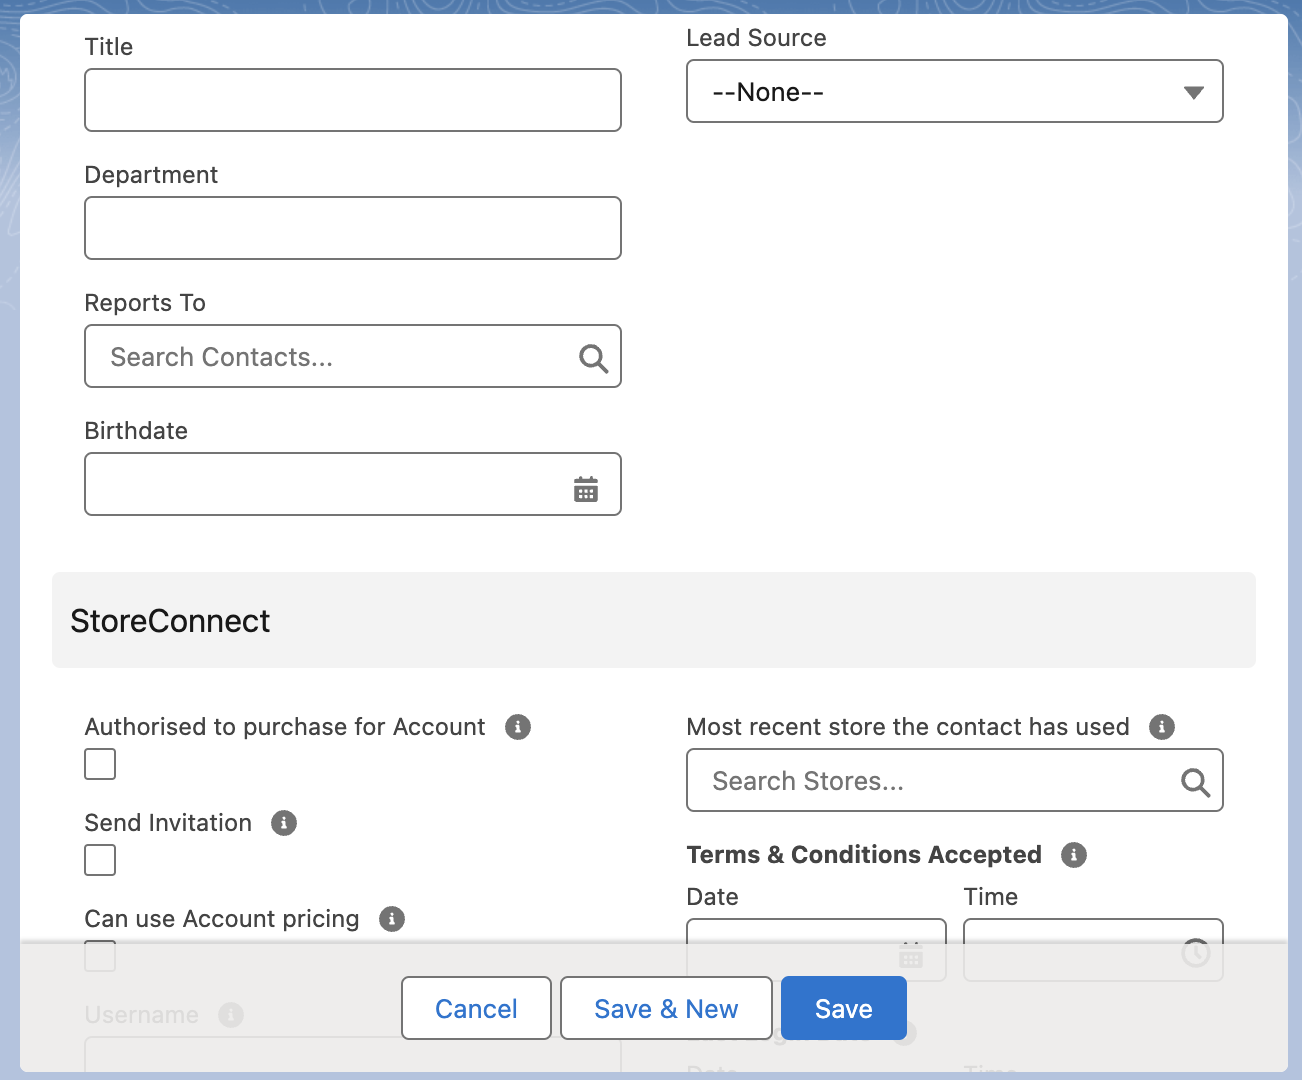
- Select Save & New to create another contact for this account.
- When you’ve finished adding contacts, select Save.
The contacts appear on the supplier’s account record, and POS staff can look them up from the supplier list on the dashboard.
Was this article helpful?
Thanks for your feedback! It helps us improve our docs.