

Language localization
On this page
Use this process to present a storefront in another language. You set the store’s locale, add a Theme Locale for that language, then add a Locale Translation for each piece of text you want to replace.
Three records work together:
- The Theme holds the storefront’s display and logic elements.
- A Theme Locale represents one language that theme can render in. A theme can have several.
- A Locale Translation replaces one key in that language. There is one record per piece of text.
Localization is normally done when you set up a store or sub-store.
Before you start
- StoreConnect must be installed, with a Store and Site accessible online. See Before you install.
- Your Store record needs a value in the Theme field. If it is empty, select a theme or create one.
- The user doing this work needs access to the Theme, Theme Locale, and Locale Translation objects.
Set the store’s locale
- Go to the Stores list and select the store you want to translate.
- Select the value shown in the Theme field. If this field is empty, select a theme or create one.
-
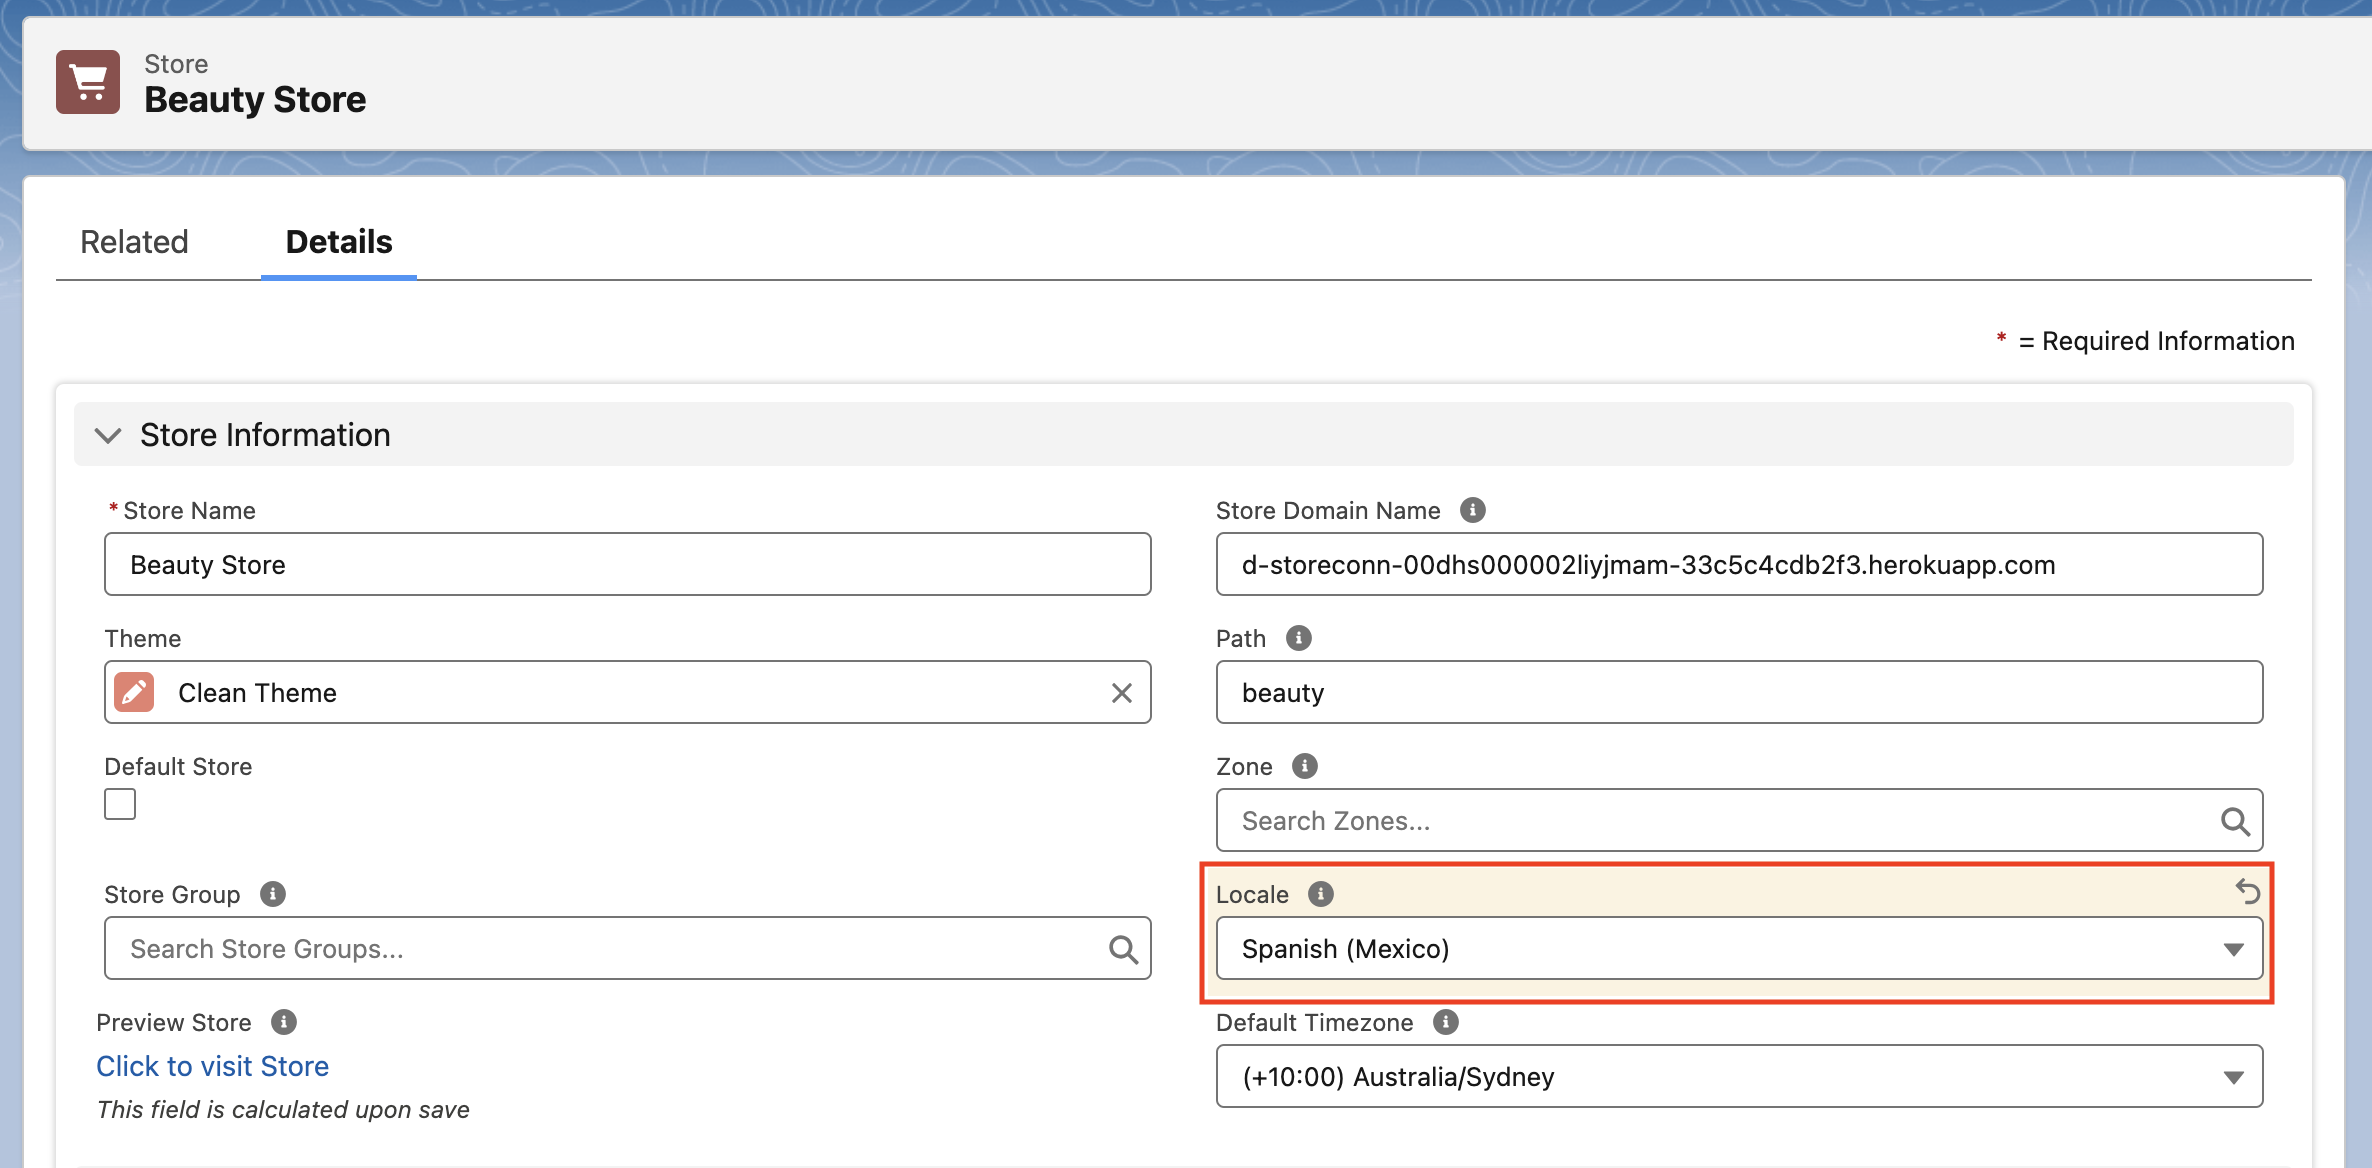
Select a value in the Locale picklist. This is the language shown on the public site. In this example, choose Spanish (Mexico).
Add a theme locale for the language
Each theme can have multiple locales, which present a storefront in a given language. To set up a language, define a locale for your theme:
- On the Theme record, go to the Related tab.
- Find the Locales related list.
- Select New.
- Give the Theme Locale Name a meaningful name. In this example, use “Spanish (Mexico)”. Then select the language this locale displays in the Locale picklist (
s_c__Code__c). In this example, select Spanish (Mexico). -
Check Active to make the language available in the current storefront.

Choose the keys to translate
Theme locales hold translations that correspond to specific keys in the storefront. Each key maps to a piece of text the theme renders, so setting a value for a key replaces that text in the selected language.
To find the key for a piece of text, look it up in your theme’s en.default.json translations file. The example below uses the five keys behind the login flow:
| Key | Default English value |
|---|---|
header.dropdowns.account.login |
Log in (link) |
auth.login.heading |
Sign in to your account |
auth.login.form.username |
Username |
auth.login.form.password |
Password |
auth.login.form.submit |
Log in (button label) |
Add the locale translations
Add one Locale Translation record per key you want to translate:
- Go to the Theme Locales list and select “Spanish (Mexico)”.
- Select the Related tab.
- Select New on the Locale Translations related list.
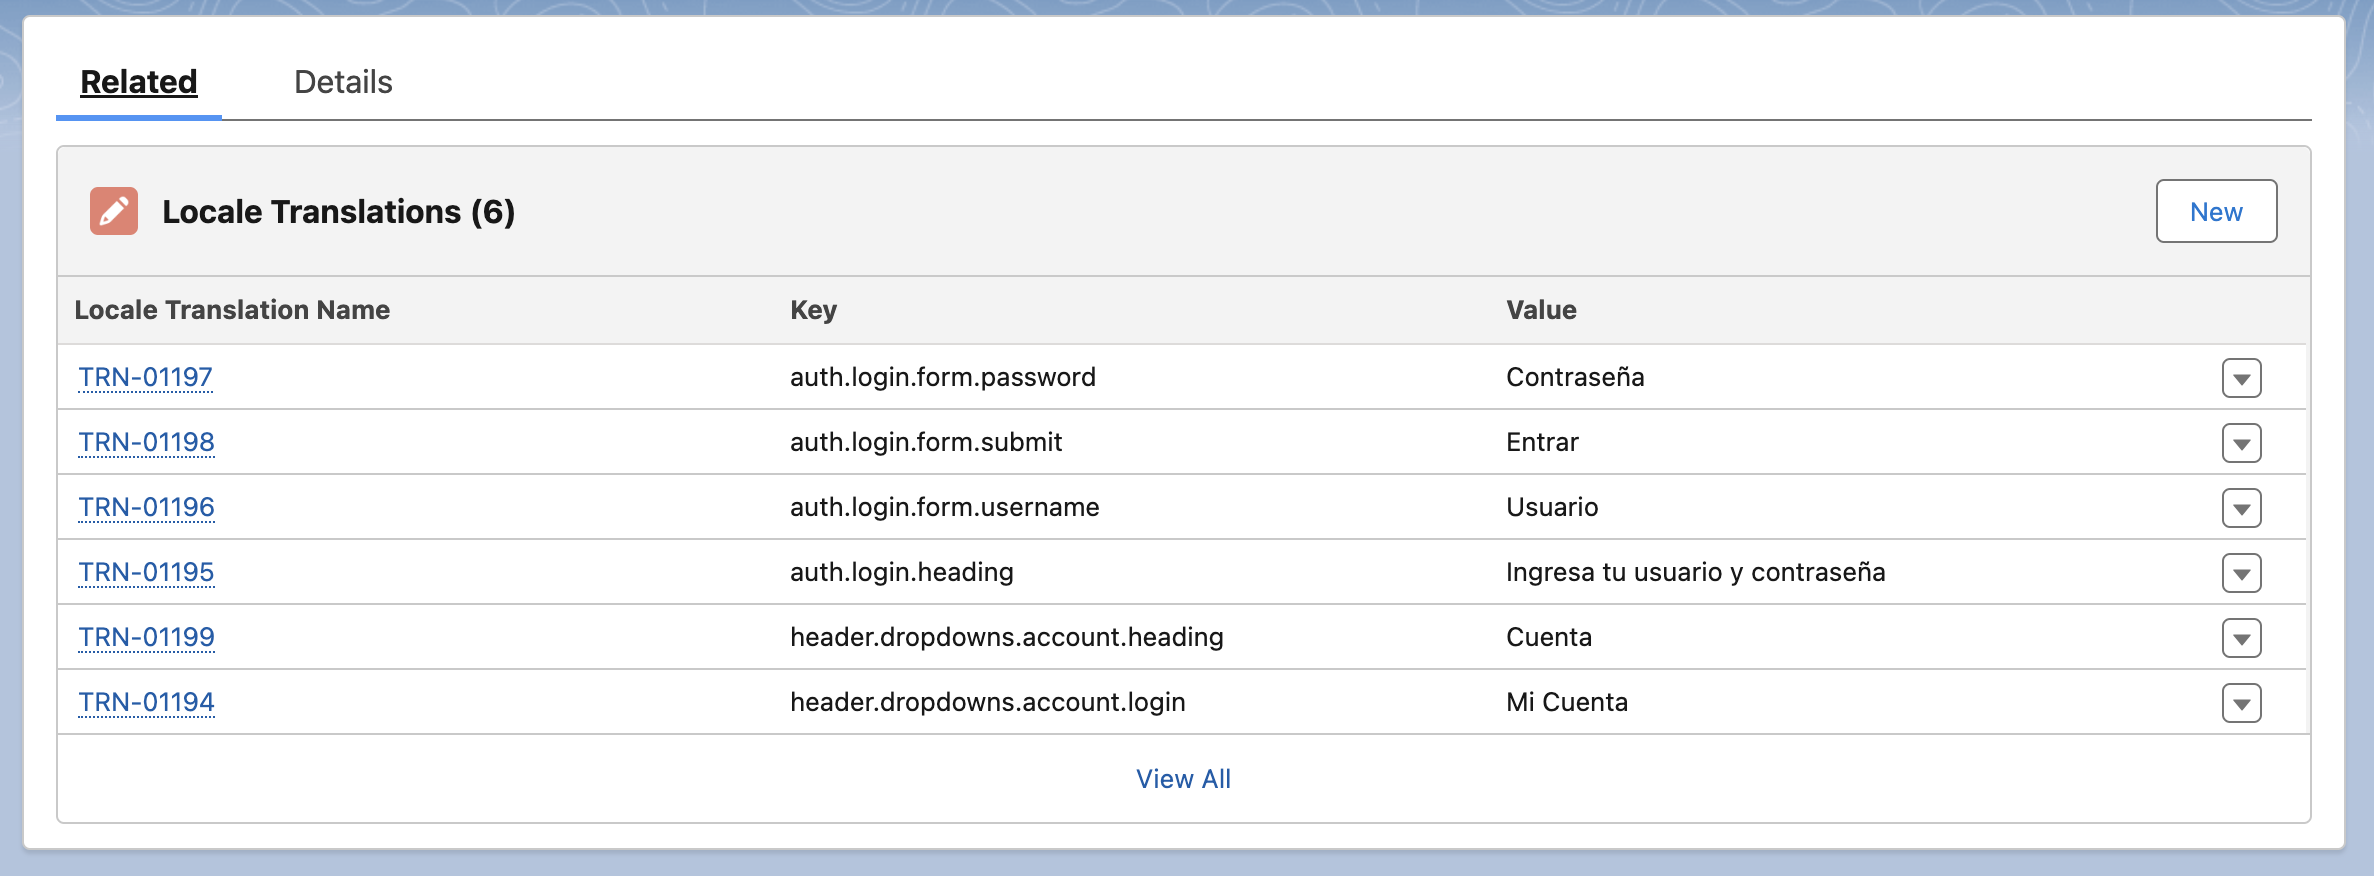
- Enter the key in Key and the text to display in Value.
- Select Save.
-
Repeat for each remaining key.
:::tip Replacing a long list of terms is quickest as a bulk upload from a CSV file via Data Loader, rather than one record at a time. :::
:::note Terms that include a number, such as a cart item count, need more than one wording per language. Rather than creating a separate key for each, add a single pluralized key and let the storefront select the correct form. See managing singular and plural numeric translations. :::
Example: translating the login flow into Latin American Spanish
These are the five values to enter for the keys above, to render the login flow in Latin American Spanish:
| Key | Value |
|---|---|
header.dropdowns.account.login |
Mi Cuenta |
auth.login.heading |
Ingresa tu usuario y contraseña. |
auth.login.form.username |
Usuario |
auth.login.form.password |
Contraseña |
auth.login.form.submit |
Entrar |
Test your translations
- Confirm the Locale field on the Store record is set to Spanish (Mexico).
- Go to your public storefront.
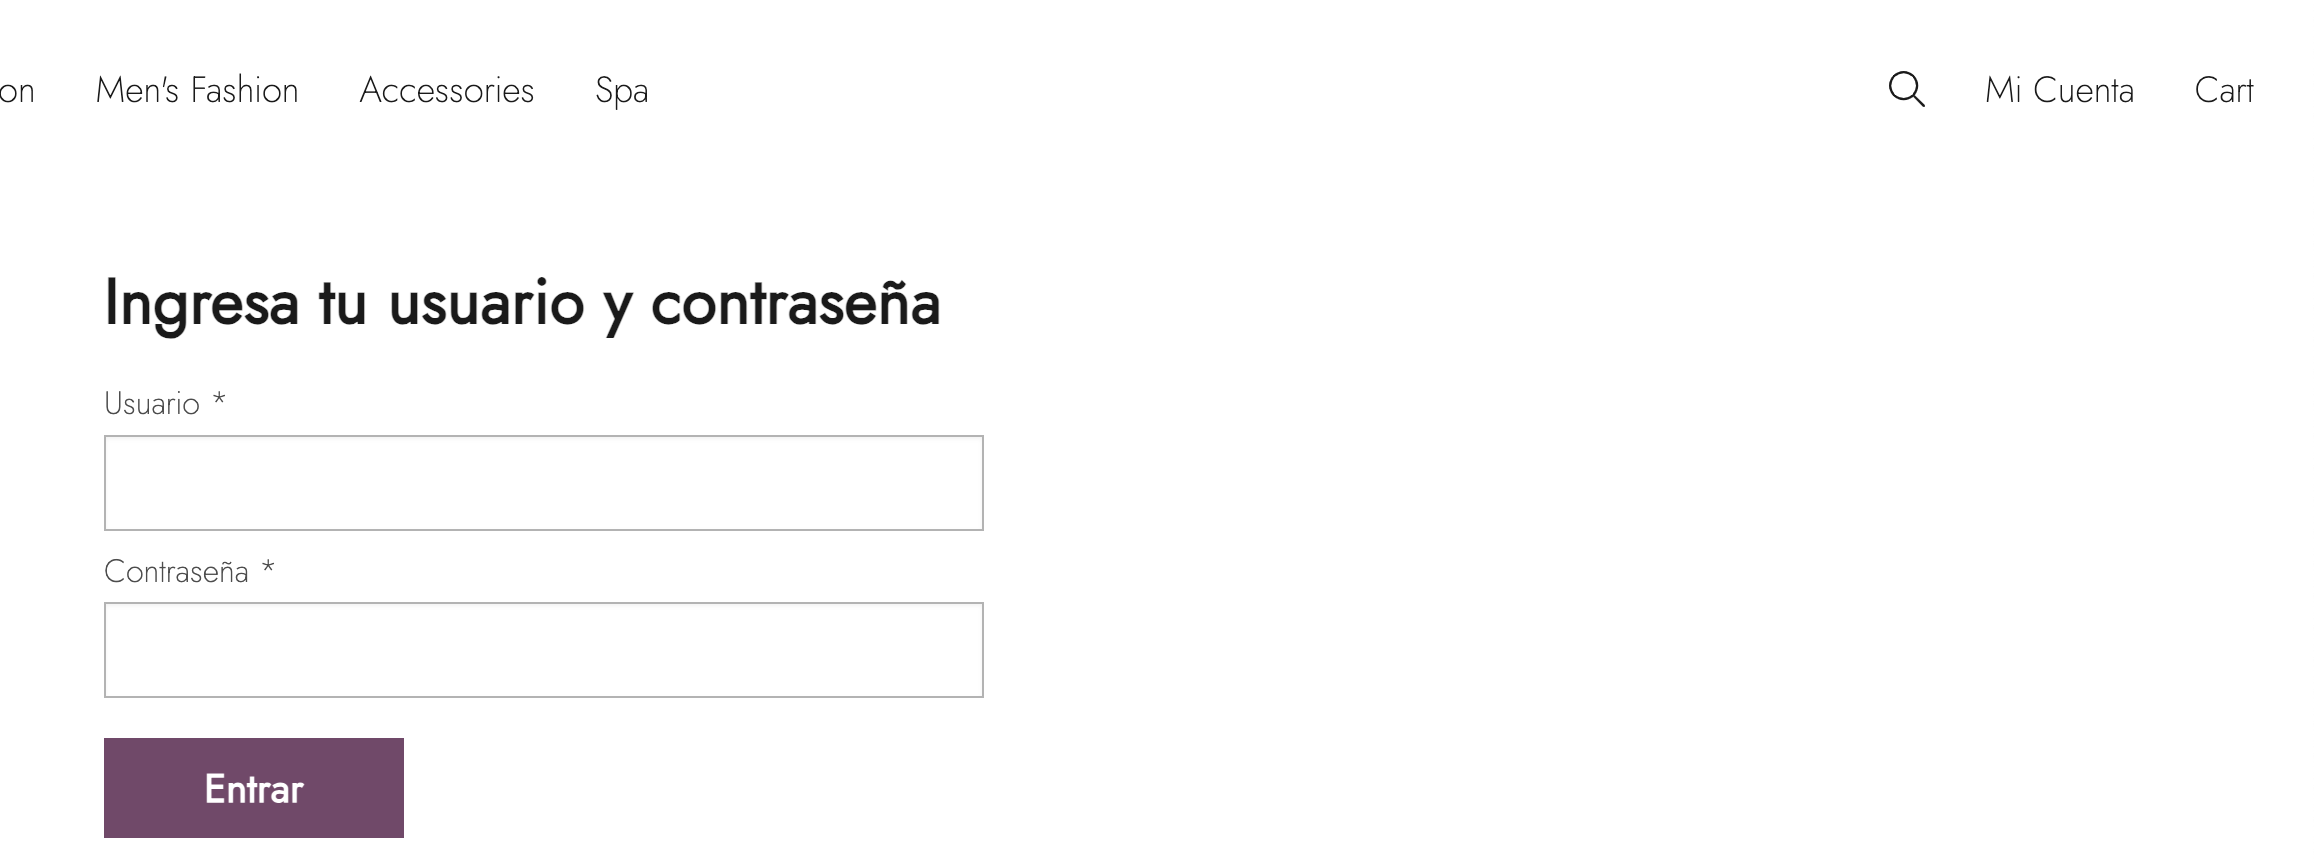
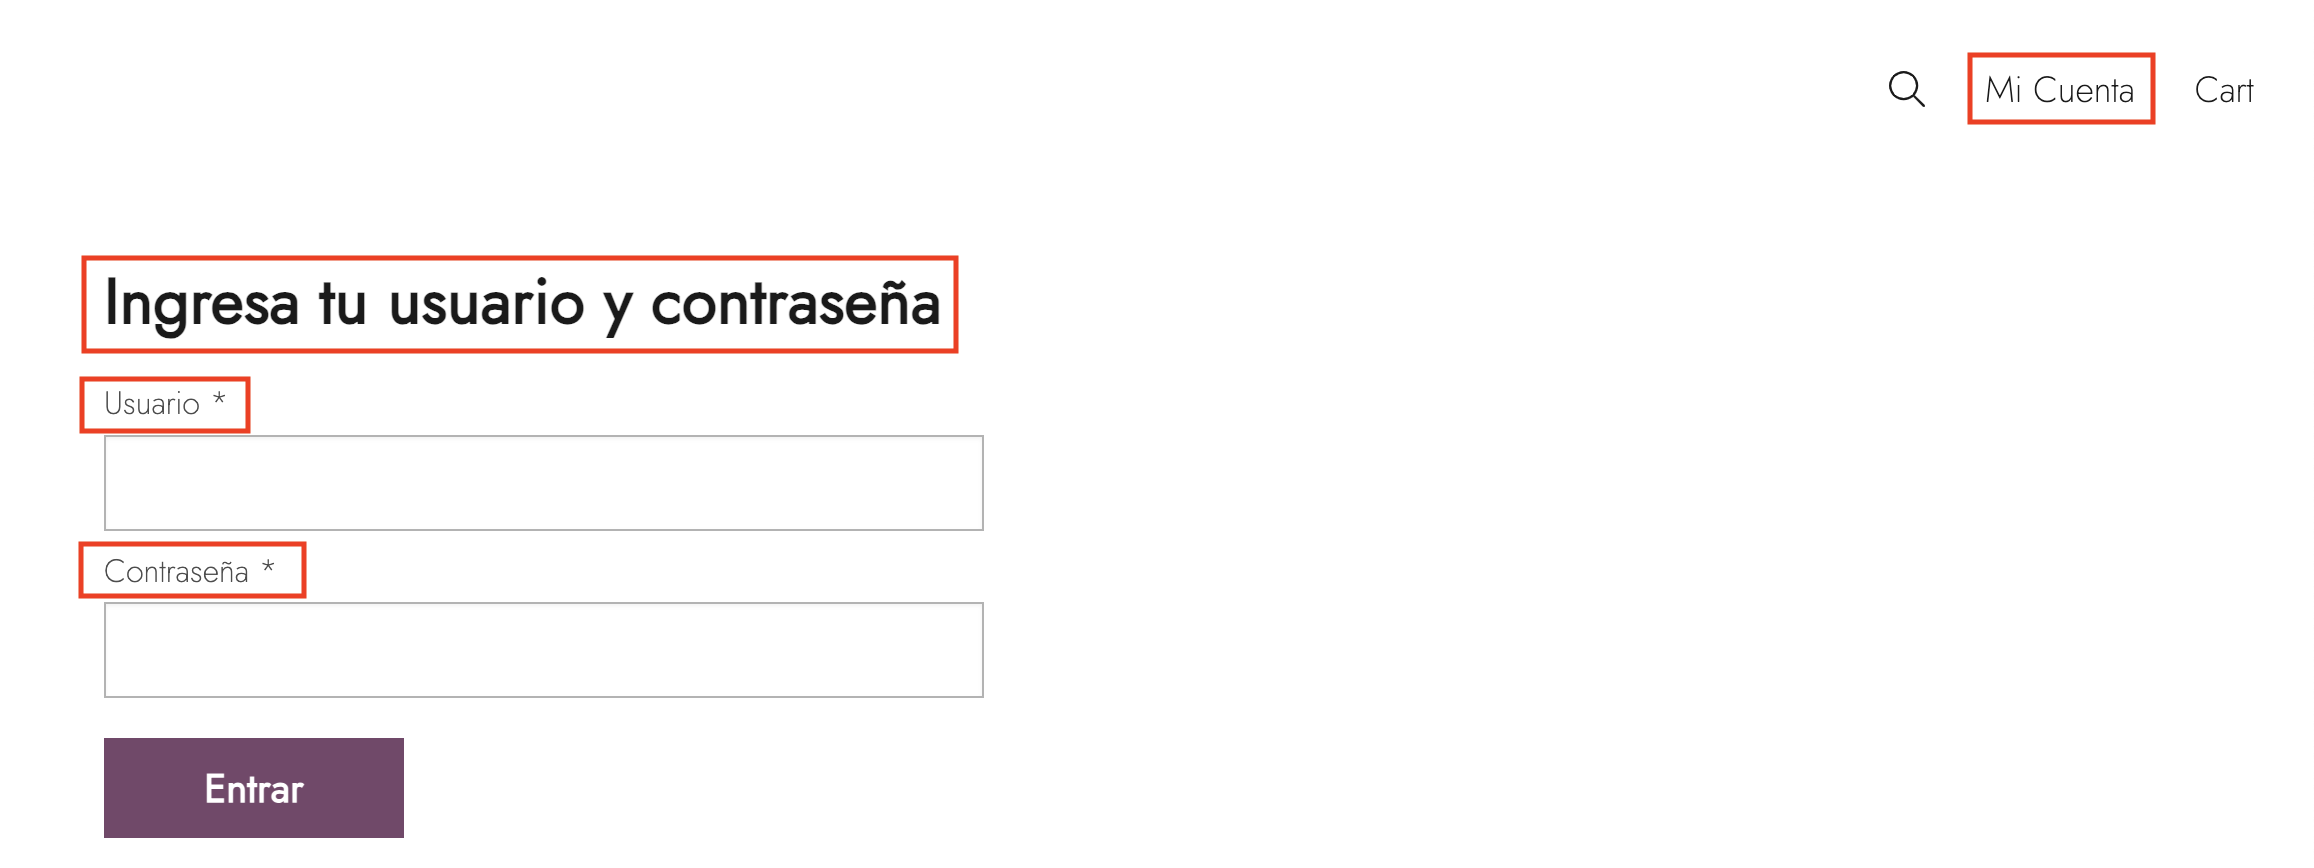
- Find the Log in link. This example uses the Clean Theme, where the link appears in the upper right. It should now read “Mi Cuenta”.
- Select the “Mi Cuenta” link.
-
Check the login form. It should now show the Spanish terms you defined.
Was this article helpful?
Thanks for your feedback! It helps us improve our docs.