

Navigate the POS dashboard
On this page
The POS dashboard is the home screen for every POS function. Use it to confirm store connectivity, track your shift balance, and lock and unlock the register when staff hand over.
Basic dashboard features
The dashboard below has no transaction in progress.
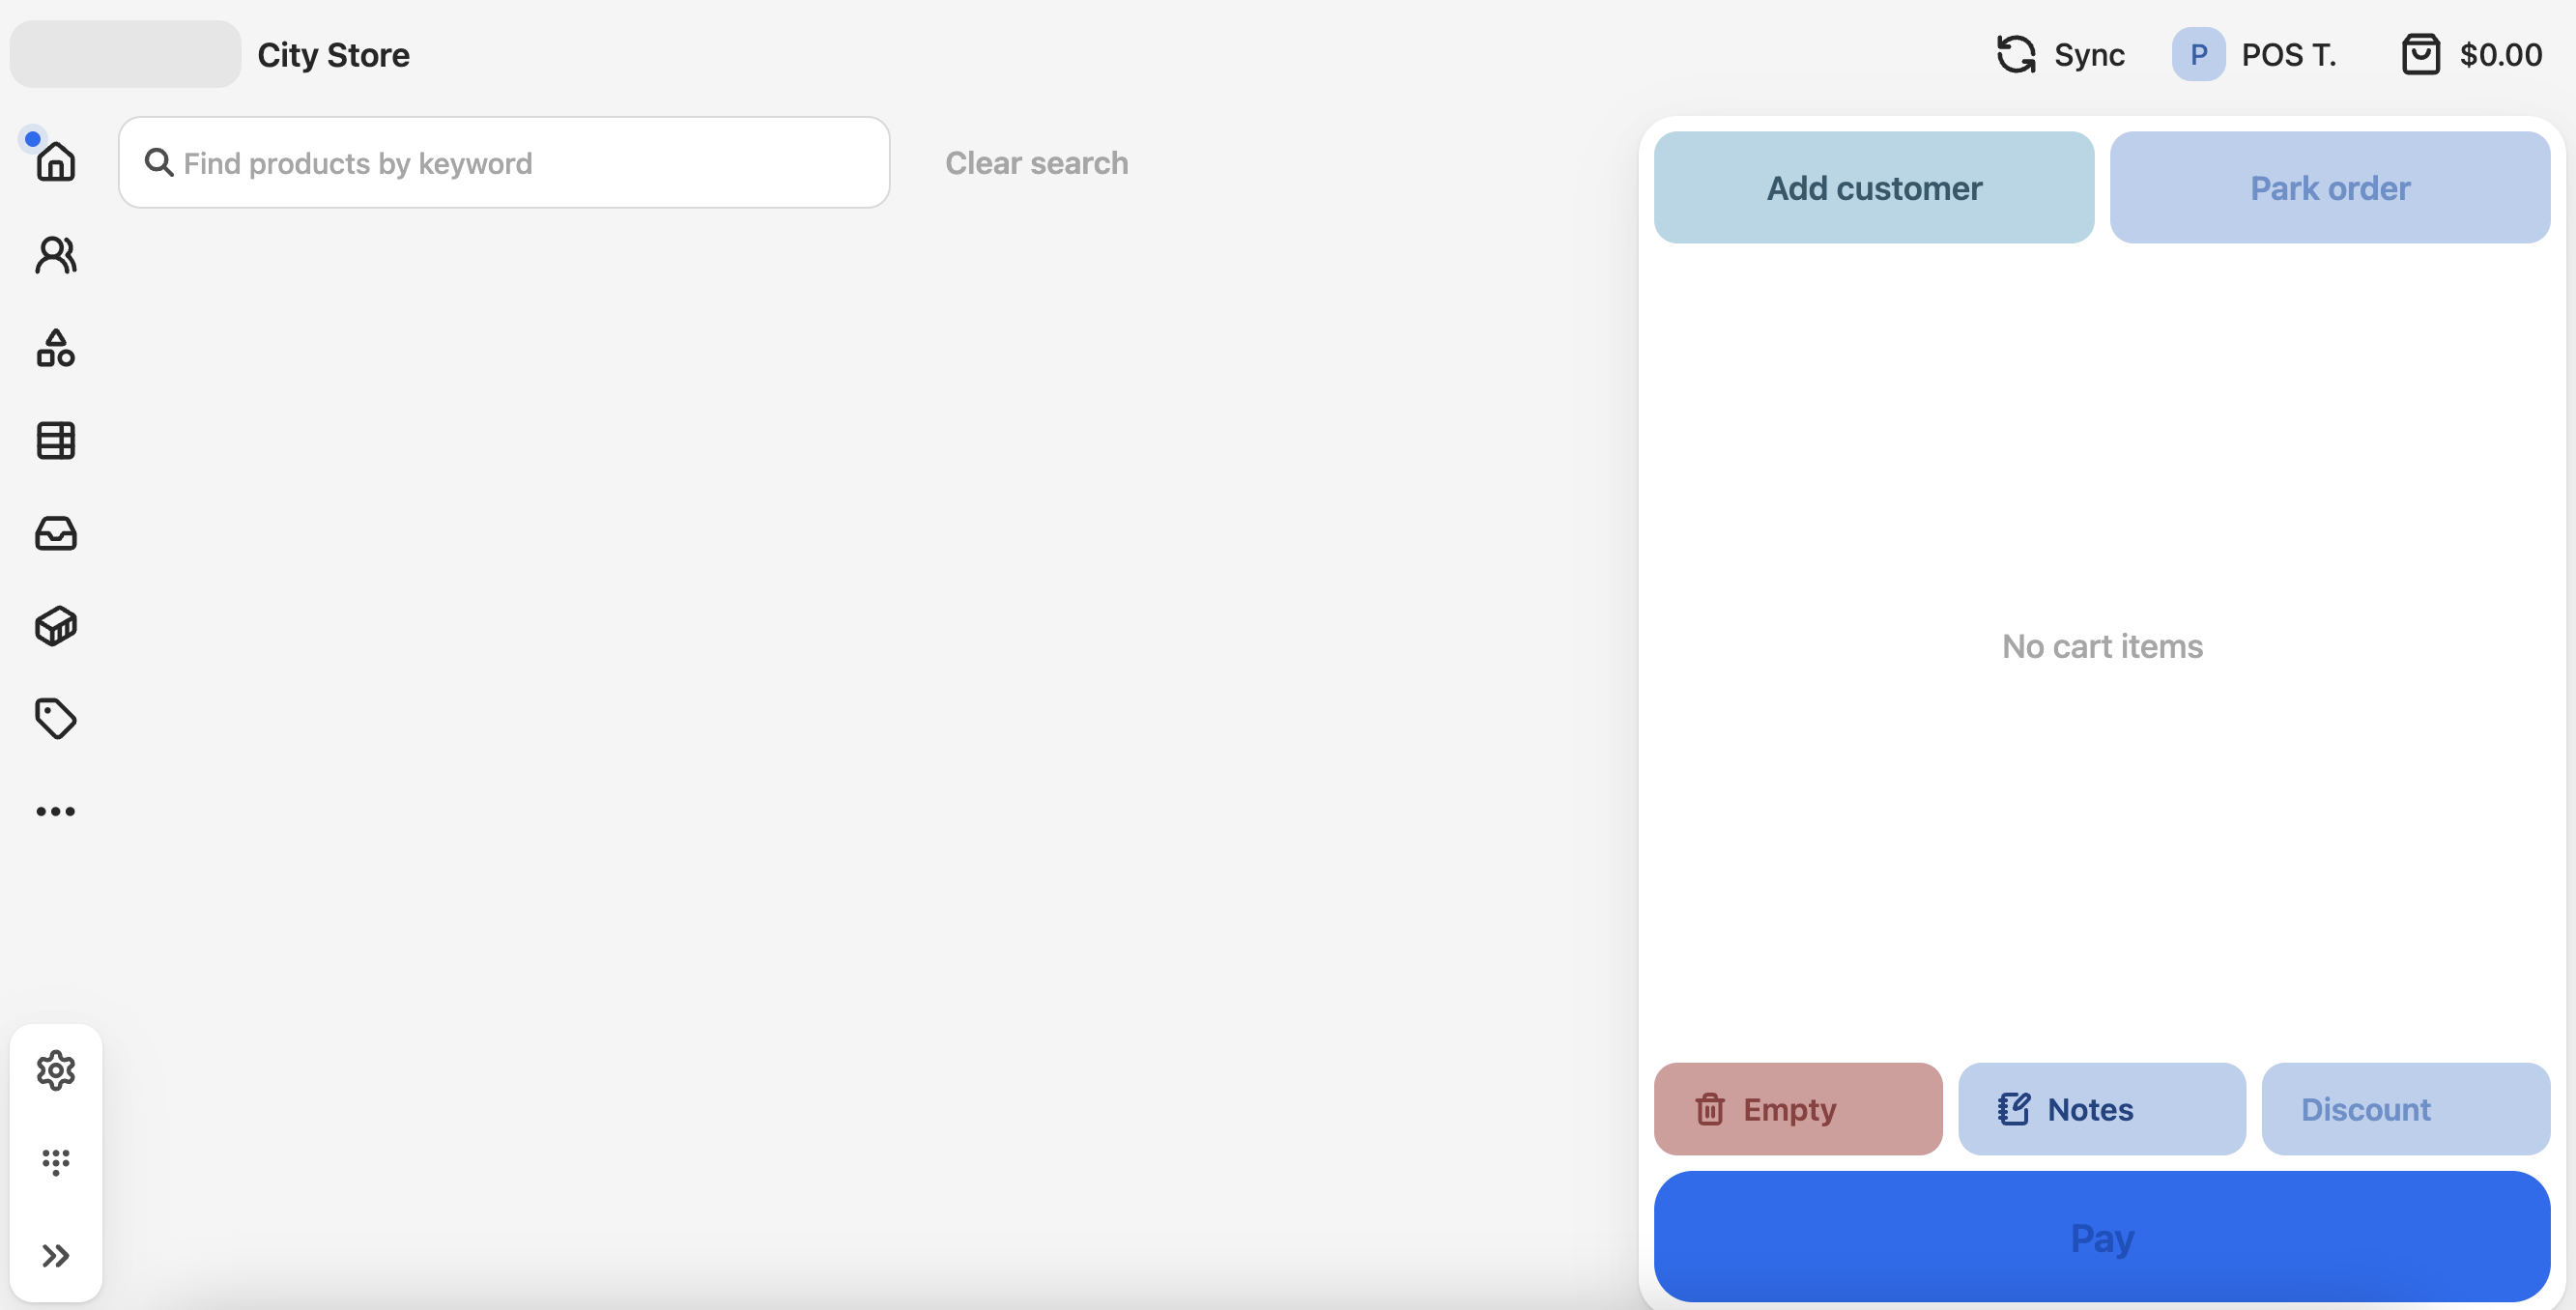
The main display area shows your product groups, usually as tiles for finding products. The right panel shows the current transaction on the register.
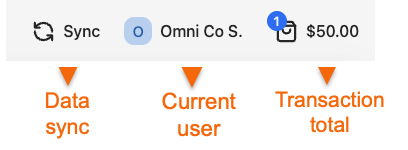
The menu in the top right shows current session information.
Sidebar functions
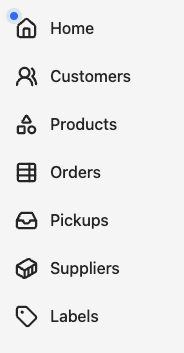
The top left menu gives you access to the transactional and lookup functions set up for this POS outlet.
The bottom-left menu is for store admin controls.
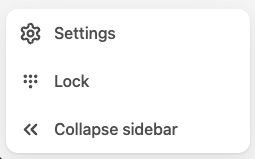
- Settings — opens store settings, with information such as labels, layouts, and the POS version.
- Lock — immediately locks the register. A user has to sign in again to make it active.
Navigating POS layouts
Layouts appear throughout the POS: in the sidebar menu, in search and lookup screens, and in custom workflow steps. There are three layout types, list, record, and form.
POS list layouts
A list layout shows multiple records in a scrollable view. You’ll see list layouts when browsing customers, orders, stock, or any custom view configured for your store.
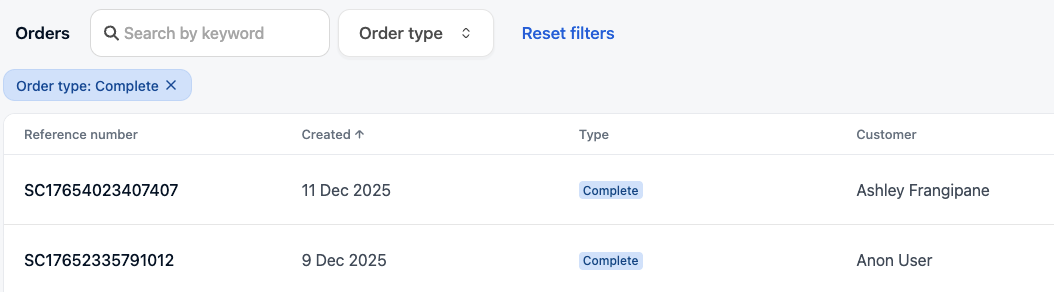
Use the search bar to find records by keyword. The list updates as you type.
POS list filters
When filters are available on a list layout, filter buttons appear below the search bar. Each button shows the filter name and its current value.
To apply a filter:
- Tap a filter button to open the filter control.
- Select or enter a value depending on the filter type:
- Select / Multiselect — choose one or more options from the list
- Date range — pick a From date, a To date, or both
- Number range — enter a minimum value, a maximum value, or both
- The list updates immediately.
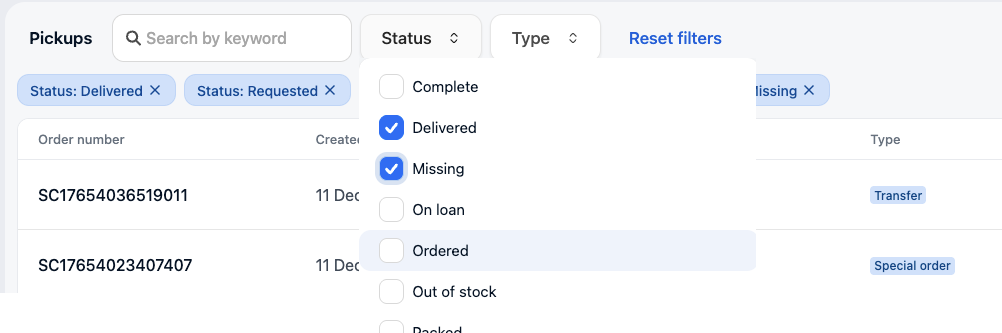
To clear filters, tap a filter button and remove the value, or use the Clear filters button that appears when any filter is active.
:::note Some filters are set by your store administrator and cannot be seen or changed by staff. These apply silently and are not shown in the filter controls. :::
No records found: If no records match your search or filters, a message explains what was applied, for example “No records found matching ‘Smith’ and Status Active”. Select Clear filters to broaden the results.
POS record layouts
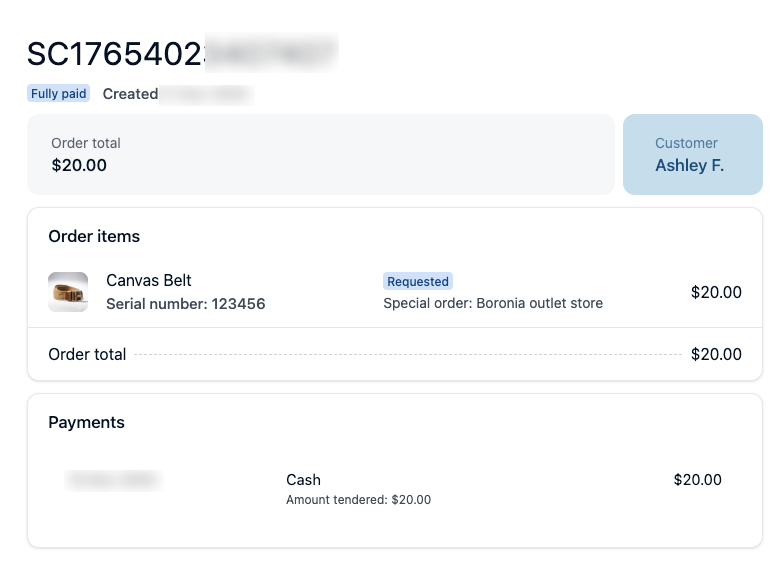
A record layout shows the details of a single record. Tap a record in a list to open it.
POS form layouts
A form layout presents editable fields for data entry. You’ll encounter form layouts when creating a customer, ending a shift, or completing a custom step in your store’s workflow.
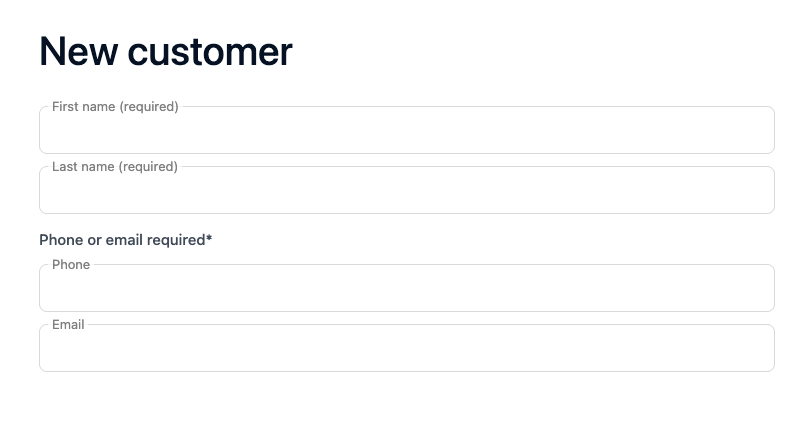
Fill in the required fields and submit to continue. Some fields may display custom content your store has configured rather than a standard input.
POS action buttons
Action buttons appear on layouts and let you move to the next step without navigating away. The primary action appears as the main button, there’s usually a secondary action to exit, or an actions menu to perform other tasks. See the checkmarked actions in the example below.
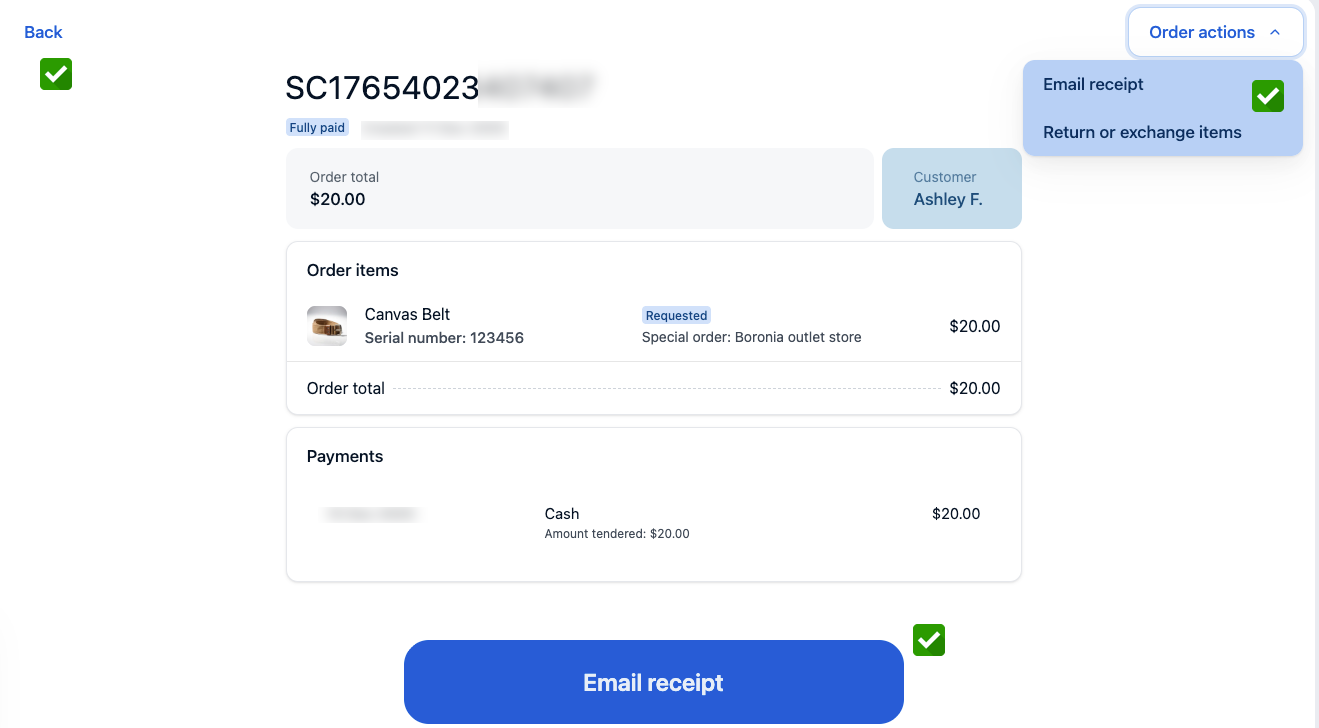
:::tip If a button you expect isn’t visible, the layout may not have that action configured for your store. Check with your store administrator. :::
Was this article helpful?
Thanks for your feedback! It helps us improve our docs.