

Add an outlet stock location
On this page
Add an outlet stock location so staff can manage inventory at a POS location. Once it is set up, you can see when items are running low, and other outlets can see whether you hold an item a customer wants.
Every outlet needs at least one associated stock location.
Before you start
- The outlet must already exist. See Set up an outlet.
Decide which path applies
Two paths lead off the same first steps. Choose before you begin:
- A stock location already exists for this location, because you are adding POS to an outlet you already stock. Link the existing one.
- No stock location exists for this location, because the outlet is new. Create one.
Link an existing stock location
- Open the relevant Outlet record in Salesforce.
-
In the Outlet Stock Locations related list, select New.
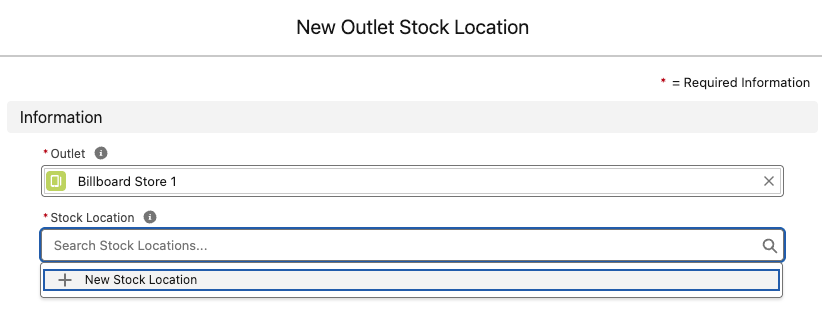
- Select the location in the Stock Location field.
- Select Save.
The stock location appears in the Outlet Stock Locations related list, and POS can track inventory against the outlet.
Create a new stock location
- Open the relevant Outlet record in Salesforce.
- In the Outlet Stock Locations related list, select New.
-
Select + New Stock Location.
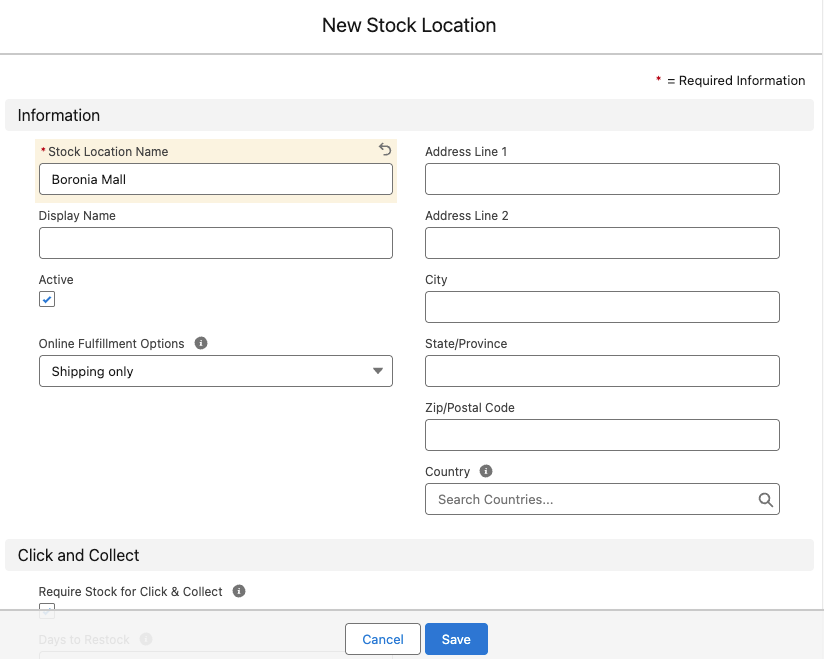
- Enter a Stock Location Name, such as
Riverside outlet. - Make sure the Active option is selected.
- If this location ships or receives goods, complete the address fields and configure the fulfillment options. Skip this if the location only sells over the counter.
- Select Save to save the new Stock Location.
- Select Save again to save the Outlet Stock Location.
The new stock location appears in the Outlet Stock Locations related list, and POS can track inventory against the outlet.
Was this article helpful?
Thanks for your feedback! It helps us improve our docs.