

Add a POS user
On this page
Use this process to give an employee access to the POS. Each employee signs in with their own Outlet User record at the start of a shift, which is what attributes each sale to the person who made it.
Before you start
- The outlet exists. See Set up an outlet.
- The employee has a Salesforce user record to link the Outlet User to.
Add an outlet user
-
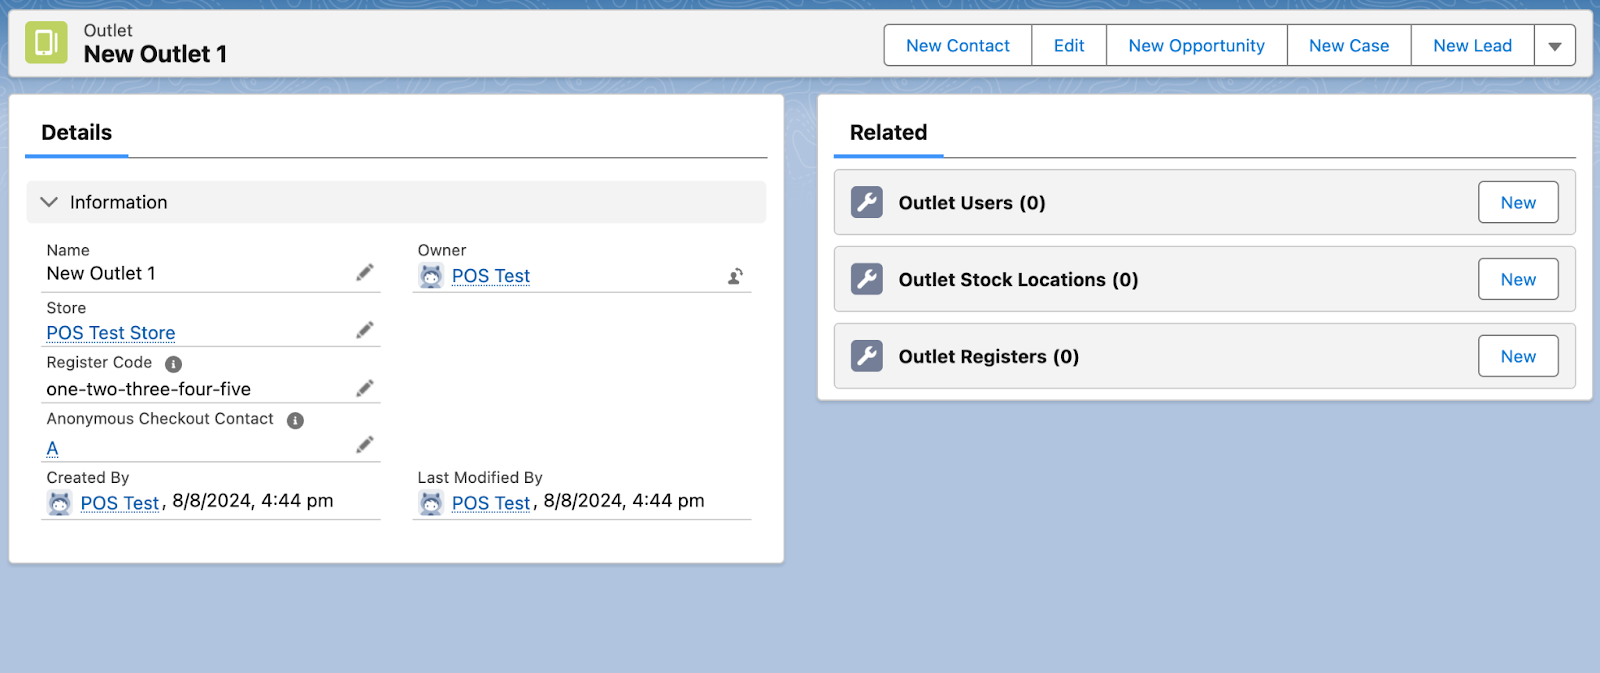
Open the relevant Outlet record in Salesforce.
-
In the Outlet Users related list, select New. The New Outlet User screen opens.
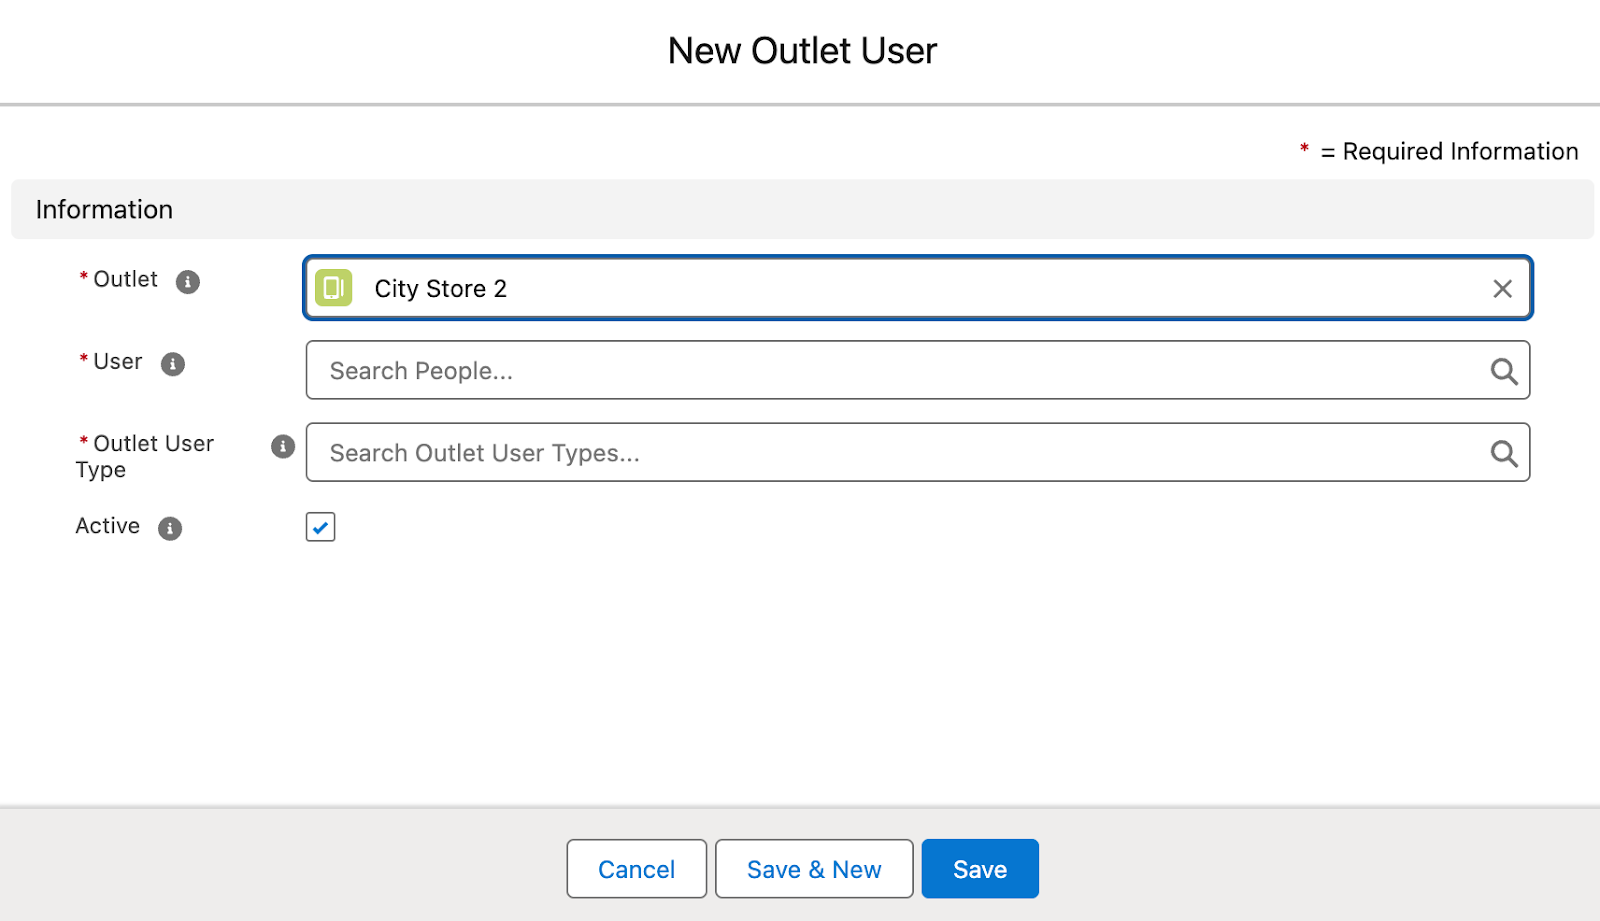
- Select the Outlet, or leave the pre-selected one.
- In the User field, begin typing the name of the employee. A list of existing users opens.
- Select the employee you want to make an Outlet User.
-
Select an Outlet User Type. If there are none to select, create one:
-
In the list, select + Outlet User Type. A new dialog opens.
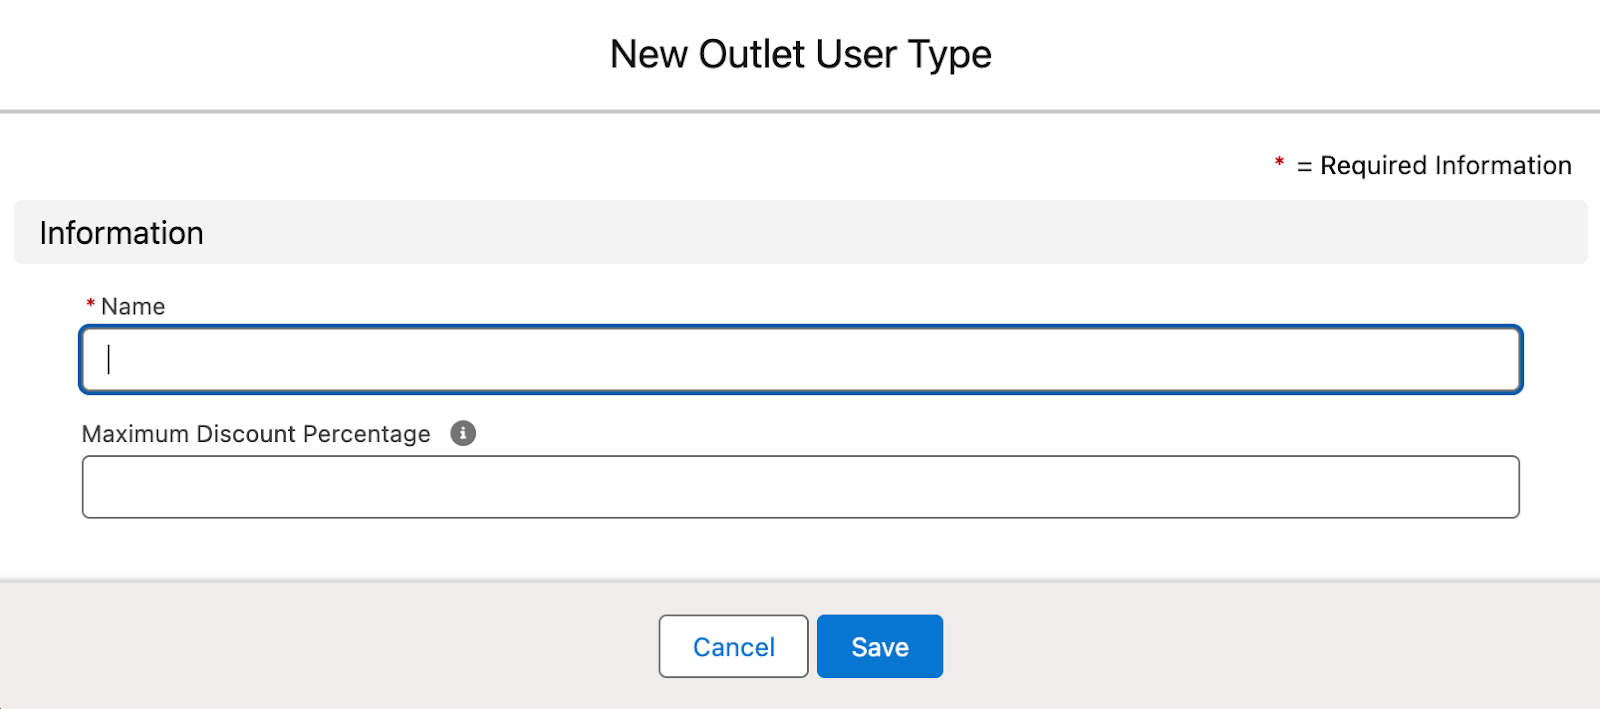
- Enter a Name that describes the user type, such as
Sales assistant. - Enter the Maximum Discount Percentage this user is authorized to apply at POS, from 0 to 100.
- Select Save.
-
- Select the Active option.
- Select Save, or Save and New to create another user.
The employee appears in the Outlet Users related list on the outlet. They cannot sign in to a register until you set a PIN for them.
Was this article helpful?
Thanks for your feedback! It helps us improve our docs.