

Set up your StoreConnect store
On this page
After installation, set up your store fully so you can start trading as soon as it is ready. Follow this guide.
:::note An AI agent can help you with some of these tasks. See set up your store with an AI agent. :::
Before you begin
- Install StoreConnect and complete the setup wizard.
- Have your payment provider credentials ready, and your shipping and tax decisions made. See set up accounts outside StoreConnect.
Work through the Setup Guide
-
Open the StoreConnect Console and go to Setup Guide.
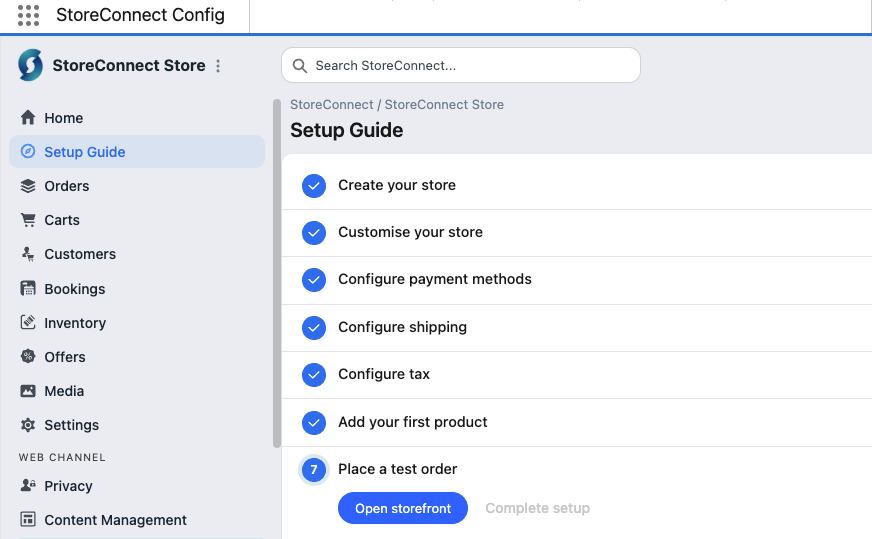
- At the theme step, choose a theme. The fastest start is a downloadable theme, loaded with the theme importer.
- At Configure payment methods, connect your payment provider with the API credentials from your provider account.
- At Configure shipping, set your own shipping rates or connect a shipping provider.
- At Configure tax, enter your tax rates or connect a tax provider. See tax.
- At Add your first product, create one product to test checkout with.
- At Place a test order, check test mode is on so no real payment is taken, then open your storefront and place an order.
- Confirm the Setup Guide shows every step complete, and the test order appears in the Salesforce Orders list.
Give your team access
- Give your team access and assign the permission sets that match each person’s job.
- Assign StoreConnect page layouts so your team sees StoreConnect fields on standard records such as Account, Product, and Order.
- Set up page layouts, profiles, and permission sets for anyone working with store data outside the StoreConnect app.
- Create Store Roles for anyone who edits the site in the Website Builder or connects an AI agent.
- (Optional) Create Lightning apps for your team that group the tabs each role works with, such as orders and customers for customer service staff.
Add your full product catalog
- Activate a price book and assign it to your store. Without one, products have no price on the storefront.
- Create product categories.
- Add your products. Use create multiple products for up to 500 at a time, or the CSV product uploader for larger catalogs. If you are migrating, see the catalog steps for a migration.
- Import your product images in bulk, or add them product by product.
- Add products to categories.
- If you sell subscriptions, migrate them from your current platform.
- Check each product meets the minimum requirements for product visibility. A product shows on the storefront only when it is active, belongs to a category in your store’s taxonomy, and has an available date in the past. It also needs an active price to appear in search and be purchased.
Bring existing customers across
If you are moving from another platform, or your customers are already in Salesforce, bring them across now. Installing StoreConnect does not sync existing Accounts and Contacts to your website. Follow the customer steps in migrate to StoreConnect from another platform. If you are starting a new business, skip this section.
Design your storefront
- Set up a test store so you can preview design changes before they reach your live store.
- Edit your site with the Website Builder to add pages and content. If you are migrating, follow the pages and search steps for a migration.
- Build your header and footer menus with the menu builder.
- (Optional) Customize the theme with CSS to match your brand more closely.
- Set up StoreConnect emails so order confirmations send from your own address.
- If customers sign in with an external login, configure authentication providers.
- If you are replacing an existing site, set up redirects from your old pages. To keep a migrated page’s old address as the address search engines see, use a canonical path override.
If you run more than one brand, region, or customer group, create multiple stores once your first store is working, and read about the default store.
Set up point of sale
If you sell in person, set up POS: the access URL, outlets, registers, payment methods, and users. Then set up products for POS. If you only sell online, skip this section.
Set up your store with an AI agent
An AI agent can take on most of Add your full catalog and Design your storefront: creating categories, products, pages, menus, and a theme from a description, or by recreating your existing website. Every change the agent makes is staged as a draft. Nothing reaches your store until someone with approval rights reviews and publishes it.
The agent connects through the MCP endpoint on your store, available in StoreConnect v22 or later. Before your store is installed, an agent with the StoreConnect AI skills can still help you plan the setup and answer setup questions, but cannot make changes in your store.
- Turn on agent access for each person who will use an agent, and give them a Store Role with the right access.
- Connect the agent to your store.
- Install the StoreConnect AI skills in the agent.
- Point the agent at your test store first, then ask it to follow the end-to-end store build sequence. For point of sale, see build POS with an AI agent.
For example, a migrating store might ask: “Recreate the categories, products, and home page from shop.example.com in my test store, then build a header menu that matches the look of that site.”
Do the Setup Guide steps for payments, shipping, and tax yourself or with your implementation partner, because they involve provider credentials. For what agents can do and the safeguards in place, see build on StoreConnect using AI agents.
When setup is done, your store at the default .storeconnect.app address shows your design and full catalog, and a test order placed with each payment and shipping option appears in the Salesforce Orders list. Next, launch your StoreConnect store.
Was this article helpful?
Thanks for your feedback! It helps us improve our docs.